Liquibase can help you easily manage work between different members of your team. In this article, I’ll show you how to prepare the changelogs for collaboration between two developers working on two different tasks. I’ll also take you through the execution of these tasks and easy deployment of scripts.
In the first part of the Liquibase tutorial, we went through several basic things, like the installation process, initial configuration, and connecting it to a new database. So I assume all these steps are already behind you – you have Liquibase installed and there are some objects in your repository. That was easy, right? Now, let’s go further, starting with some examples of real-life usage.
I’ve created a GitHub repository where you can find the files which I’m using in the examples below.
Note: the PL/SQL code used in this blog wasn’t tested and was only created as an example. It can be written better, but this tutorial is about Liquibase, not writing PL/SQL code.
Efficient GIT collaboration using Liquibase
In the examples below, I’m using:
- Fork (open source GIT client),
- Visual Studio Code,
- SQL Developer.
We have one development database, and one project (release 1.0), with two tasks to do.
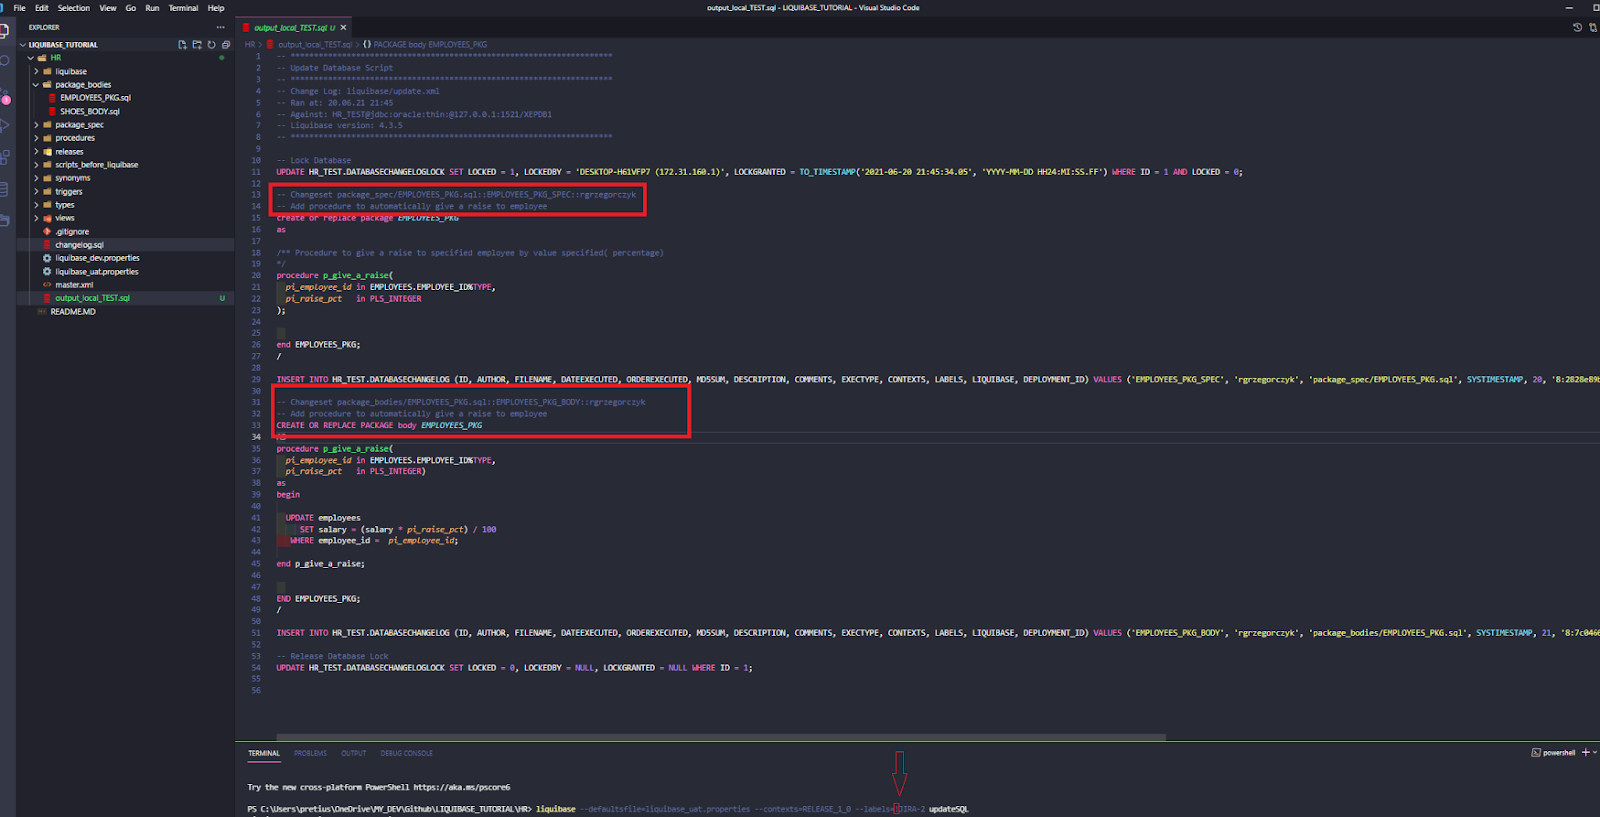
The first task JIRA-1 – “Automatic salary raise process” – is assigned to developer Rafal. Yep, that’s me (login RGRZEGORCZYK). I will write a process to automatically raise the salary of an employee by the specified percent value, for example by 50%.
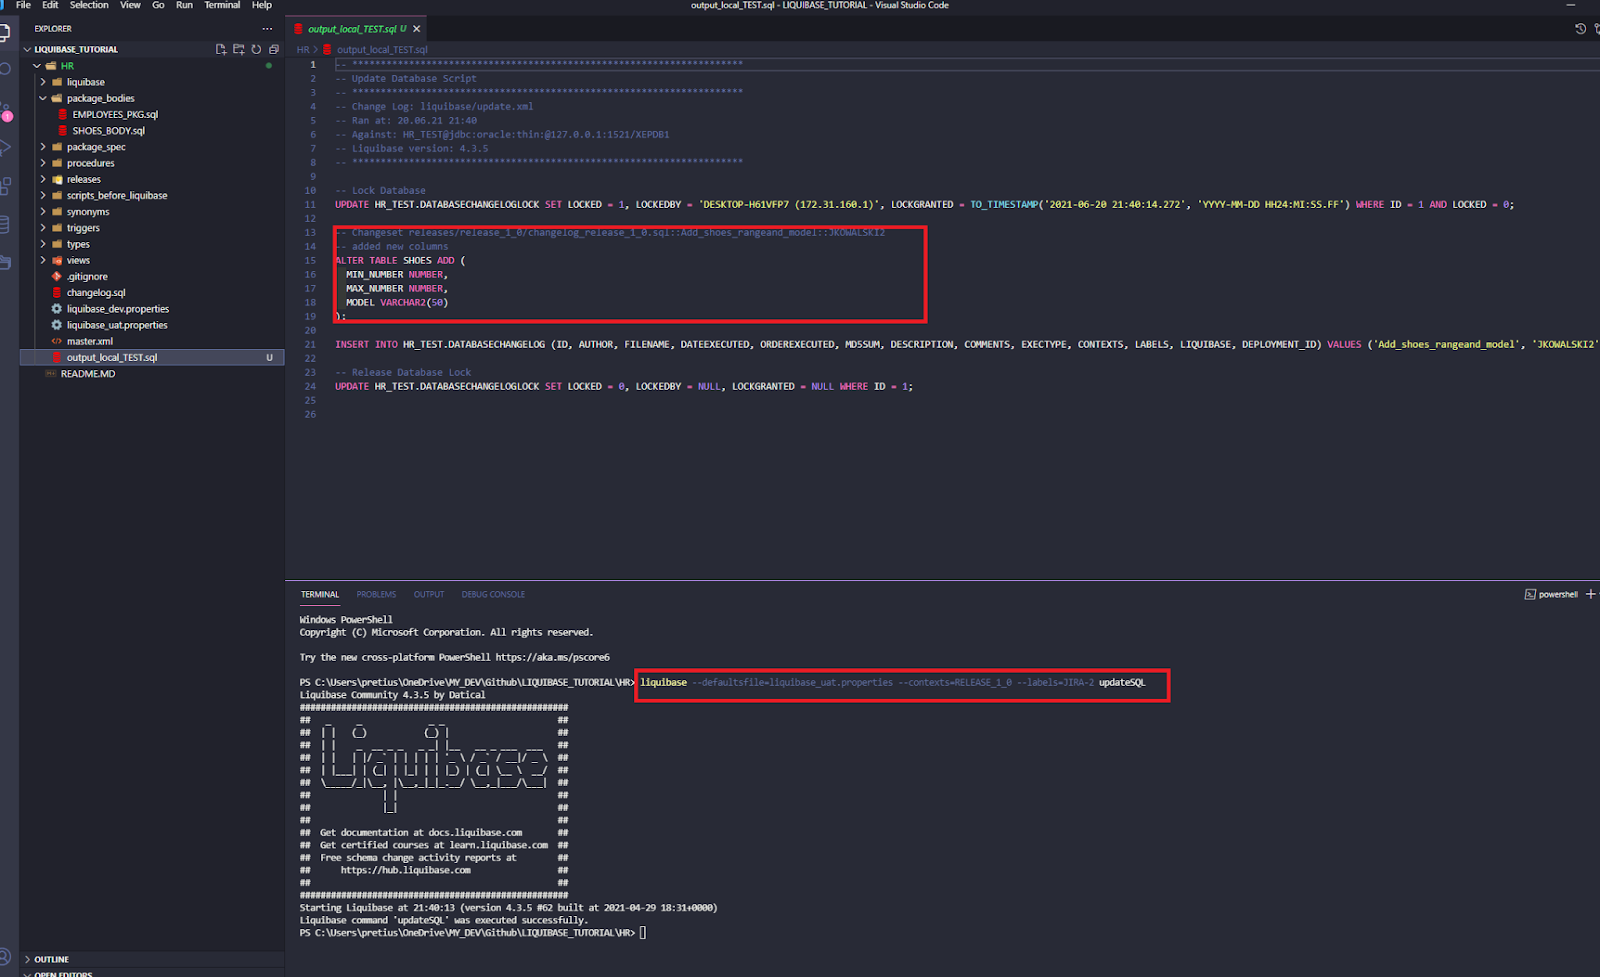
The second task JIRA-2 – “Add available shoe range” – is assigned to John (login JKOWALSKI2). He will add the option to insert the minimum and maximum available shoe number of a specified brand. A new column “model” also has to be added to the SHOES table.
Preparing changelogs for simultaneous work on several tasks
Ok, let’s suppose I’m a Team Leader (Rafal), so I will create a branch for development and create proper Liquibase changelogs files.
I switch to the MASTER branch in GIT and check if there are any changes that weren’t executed to the DEV database (“master” is the most up-to-date branch, as it has all the files from parts 1 and 2 of this tutorial).
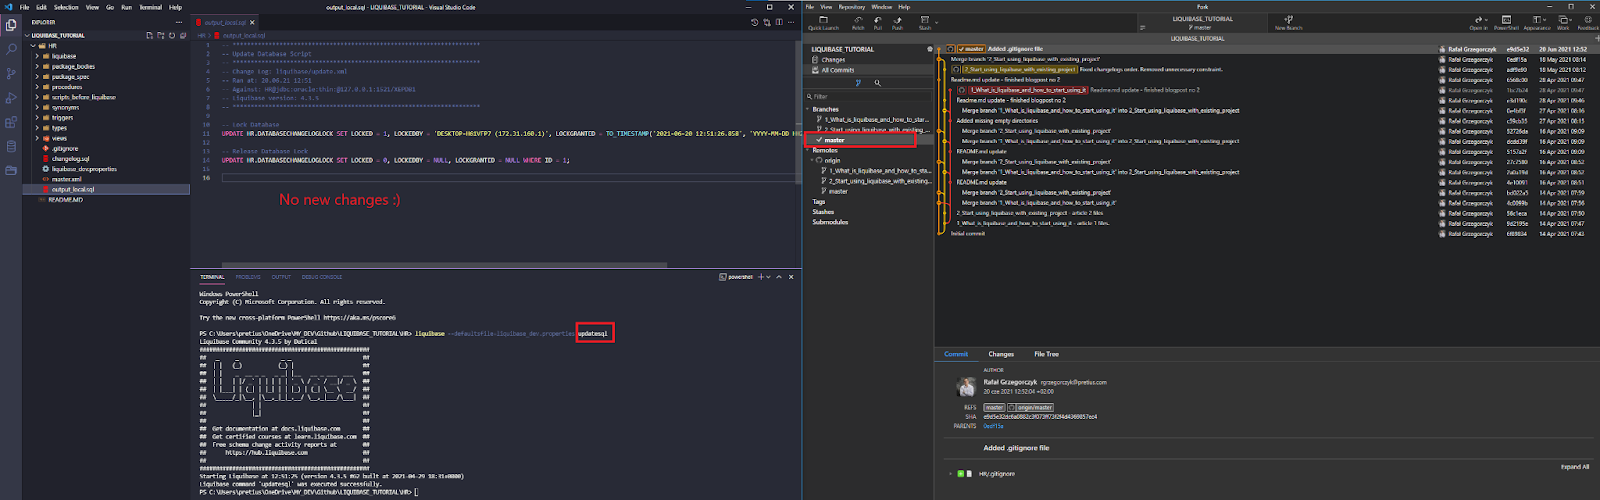
There are no changes that weren’t executed, so I create a new branch for our tasks JIRA-1 and JIRA-2. I name it “Release_1_0” and switch to it.

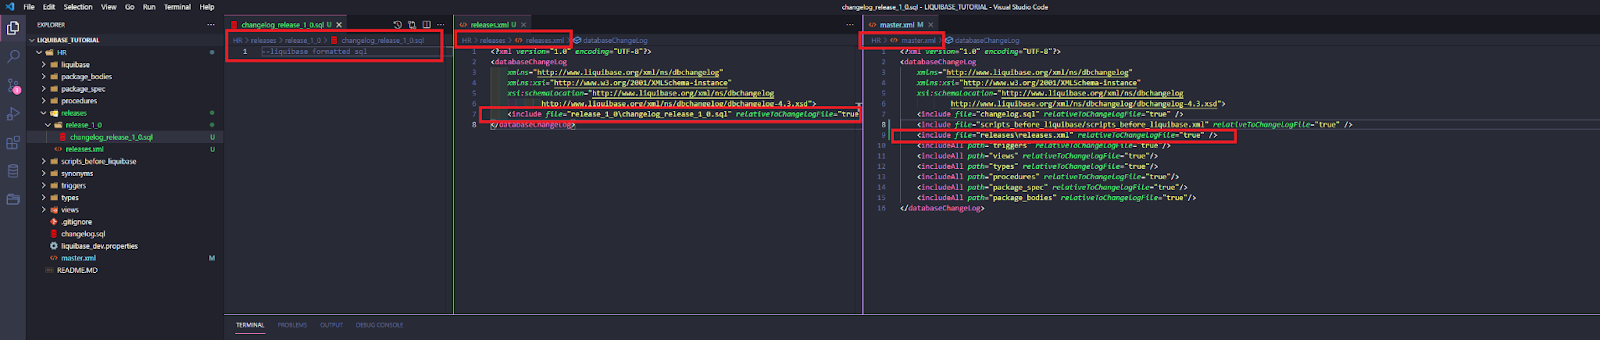
I create a new path HRreleasesrelease_1_0, and a new changelog inside of it -> changelog_release_1_0.sql.
In HRreleases I create a parent changelog releases.xml – it will store the information about changelogs of every current and future release.
I also add a path to releases.xml to my root changeset -> master.xml.
Note: in more complex projects you should consider organizing your changesets in a different way (more changelogs, more folders, etc.) – this tutorial is only a simple example so that it’s easier to understand.
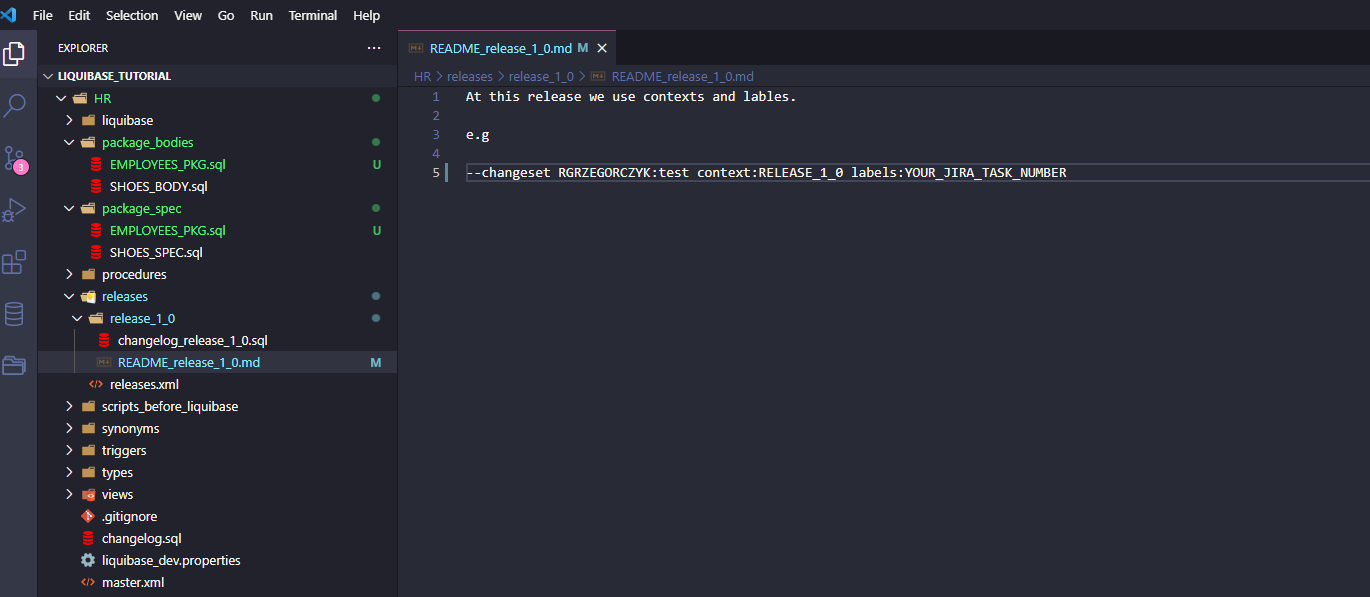
Besides the above files, I add a README_release_1_0.md to let other developers know what are the required Liquibase changesets naming conventions in these projects.
We will use the following context and labels:
- context -> RELEASE_1_0
- labels -> JIRA_TASK_NUMBER
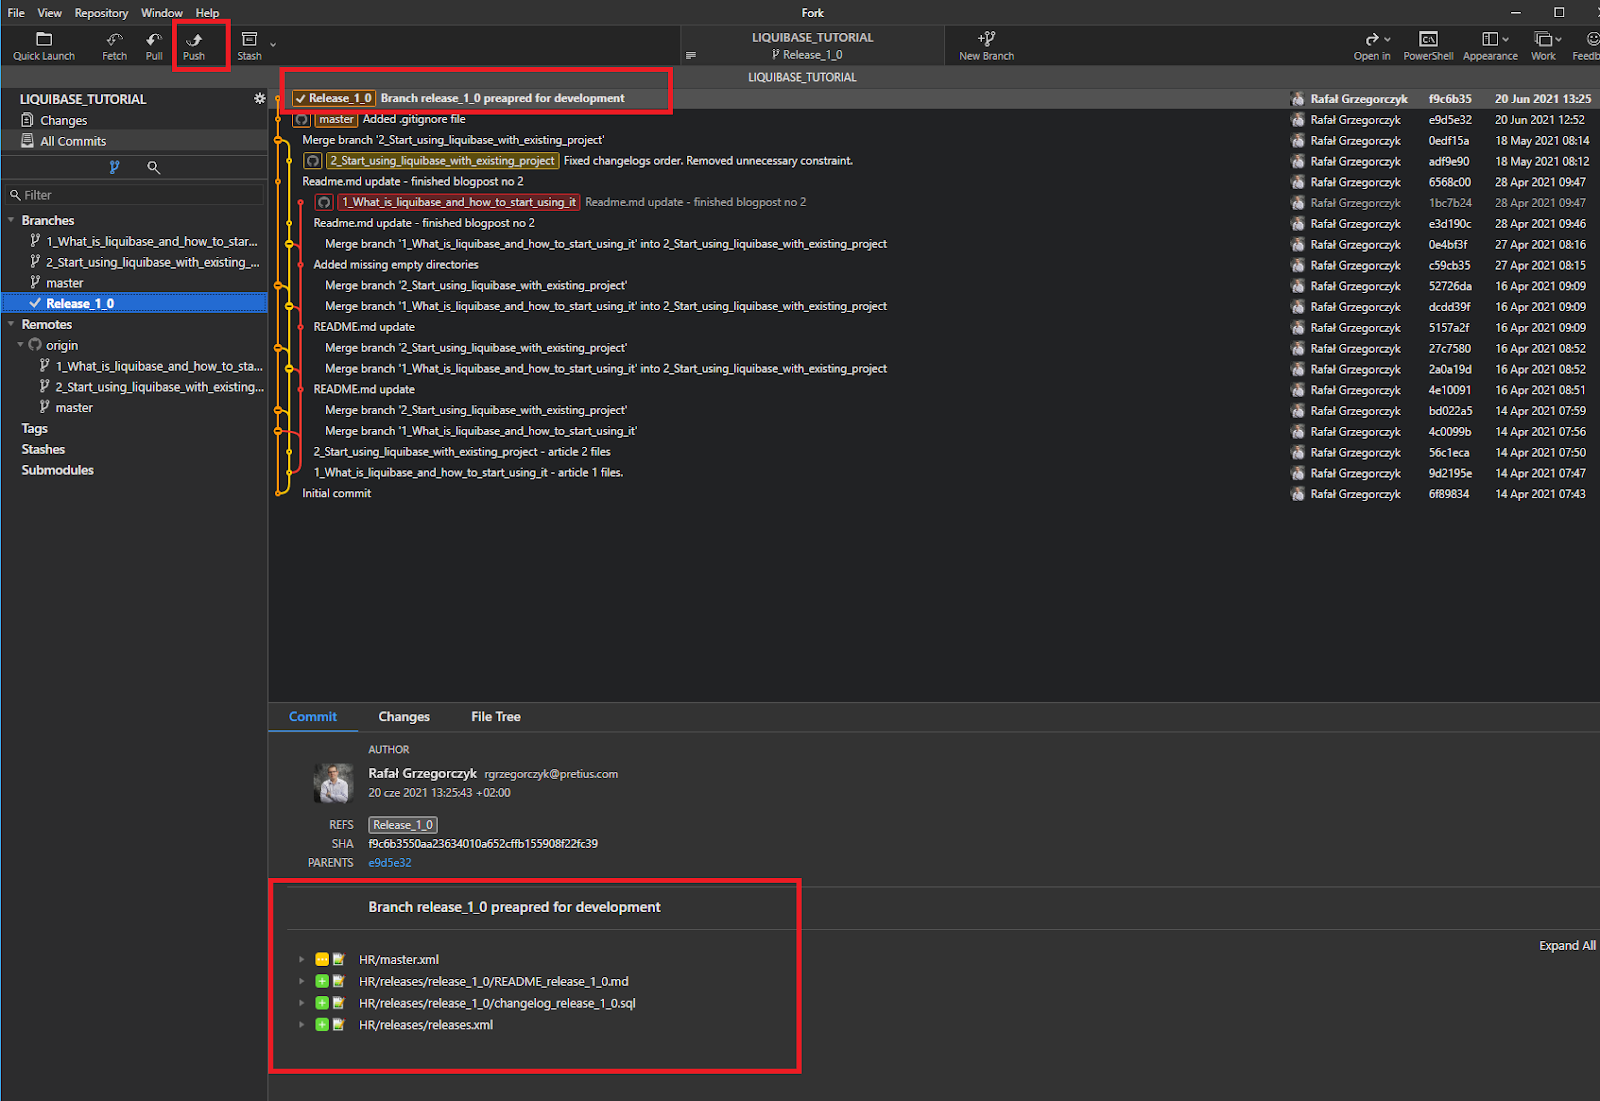
All is set, so I push my branch to remote so that my team member John (JKOWALSKI2) can use it.
Ok, before we move ahead, let’s take a quick look at our databasechangelog table:
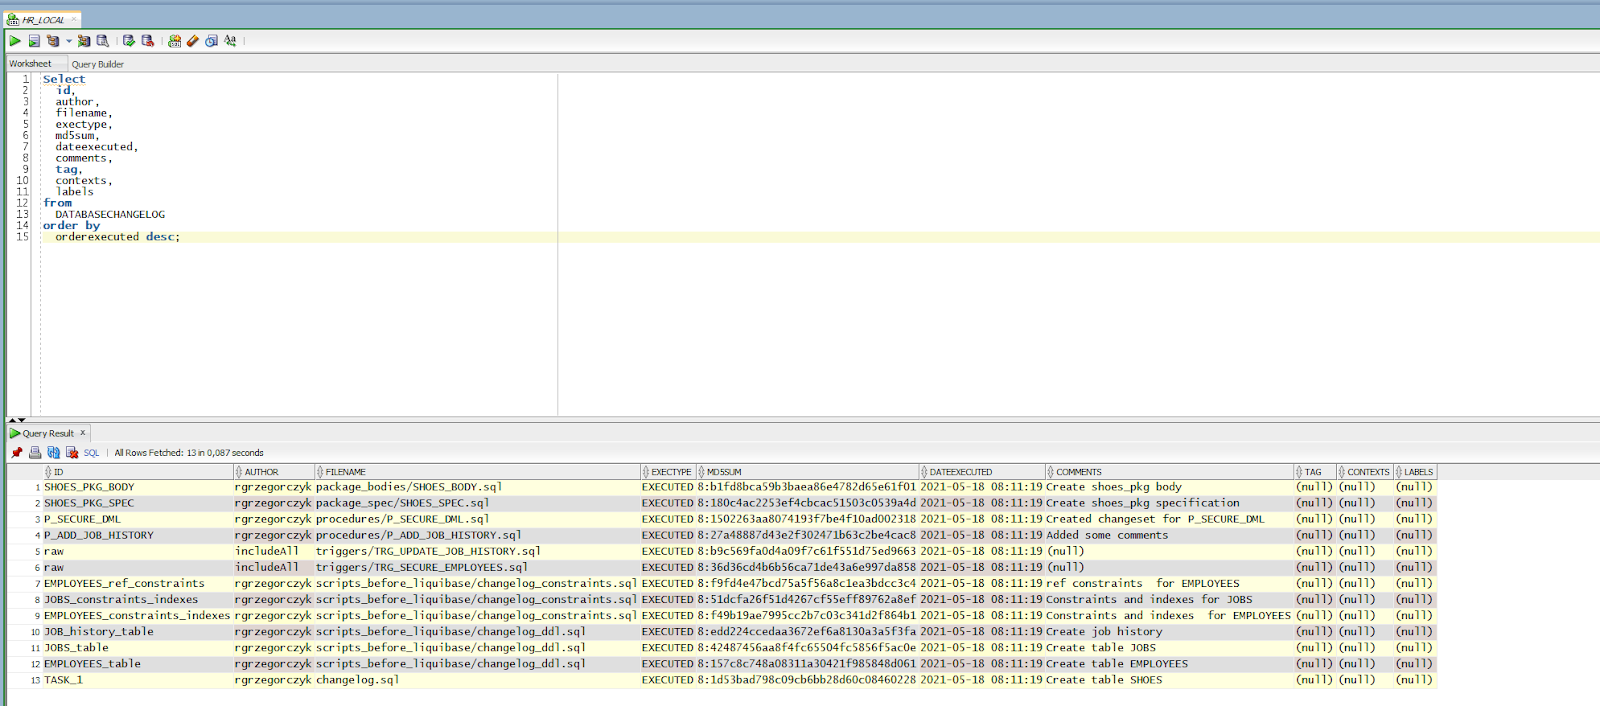
Rafal’s development – work on the JIRA-1 task
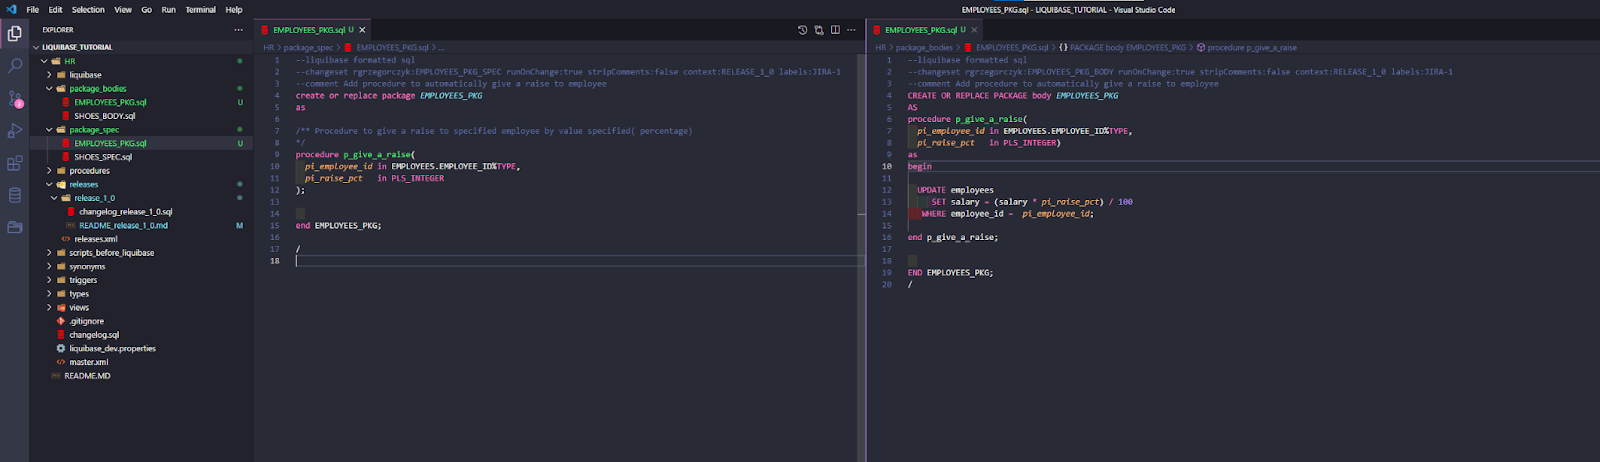
Ok, I work on my task JIRA-1. It’s simple, as I only created a new package EMPLOYEES_PKG, and a p_give_a_raise procedure inside of it.
I run updateSQL to review my code before executing it to the DB.

Looks fine, so I run the Liquibase update next.
I haven’t pushed my changes to GIT yet. Let’s switch to John’s view (JKOWALSKI2).
John’s development – work on the JIRA-2 task
John pulls up the branch “Release_1_0”, as Rafal asked.
Let’s look at it. Now, John has all changelogs prepared for the development.
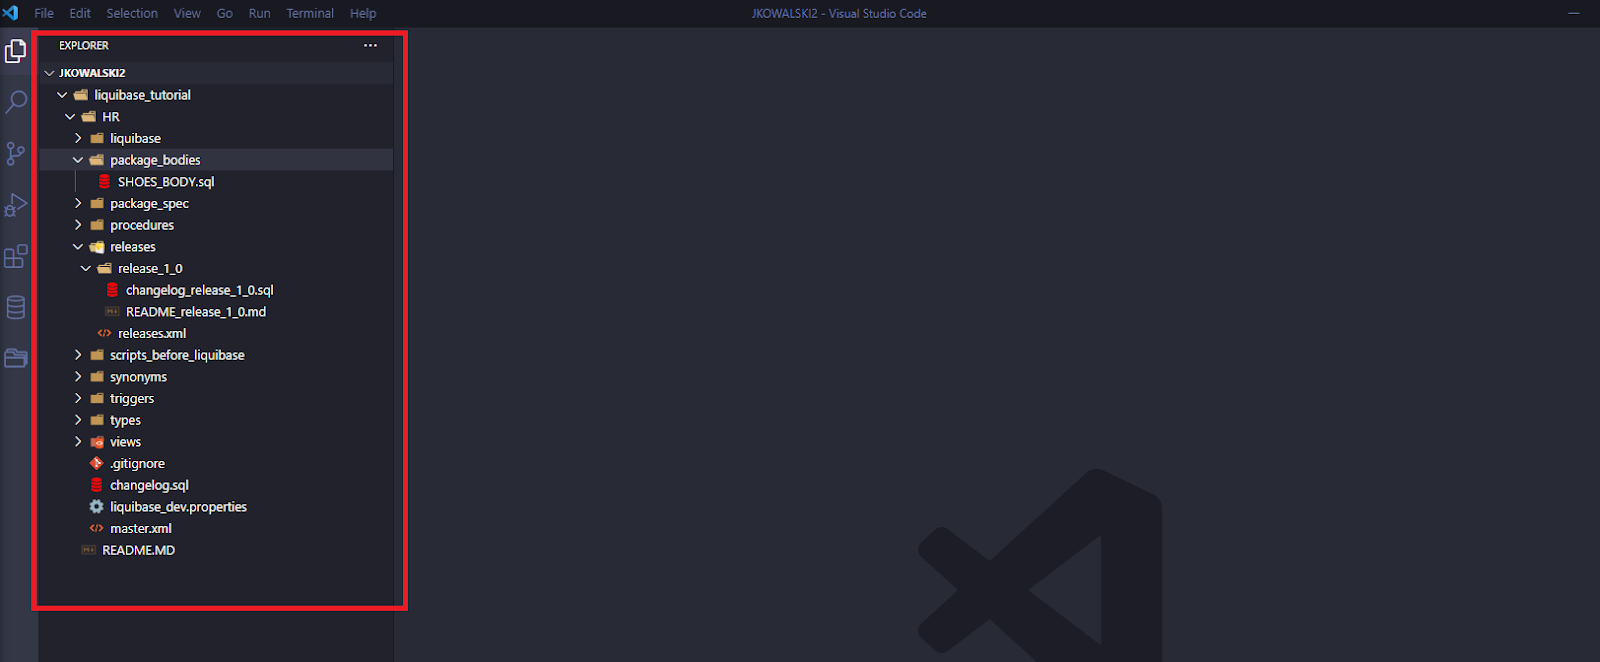
The new objects/changes made by Rafal are not visible in John’s repository. And that’s ok. Now, John makes his development according to the requirements from the JIRA-2 task. It’s only a DDL file, so John adds one changeset to the changelog previously prepared by Rafal:

John runs Liquibase UpdateSQL to preview the changes which he wants to execute to the dev database.
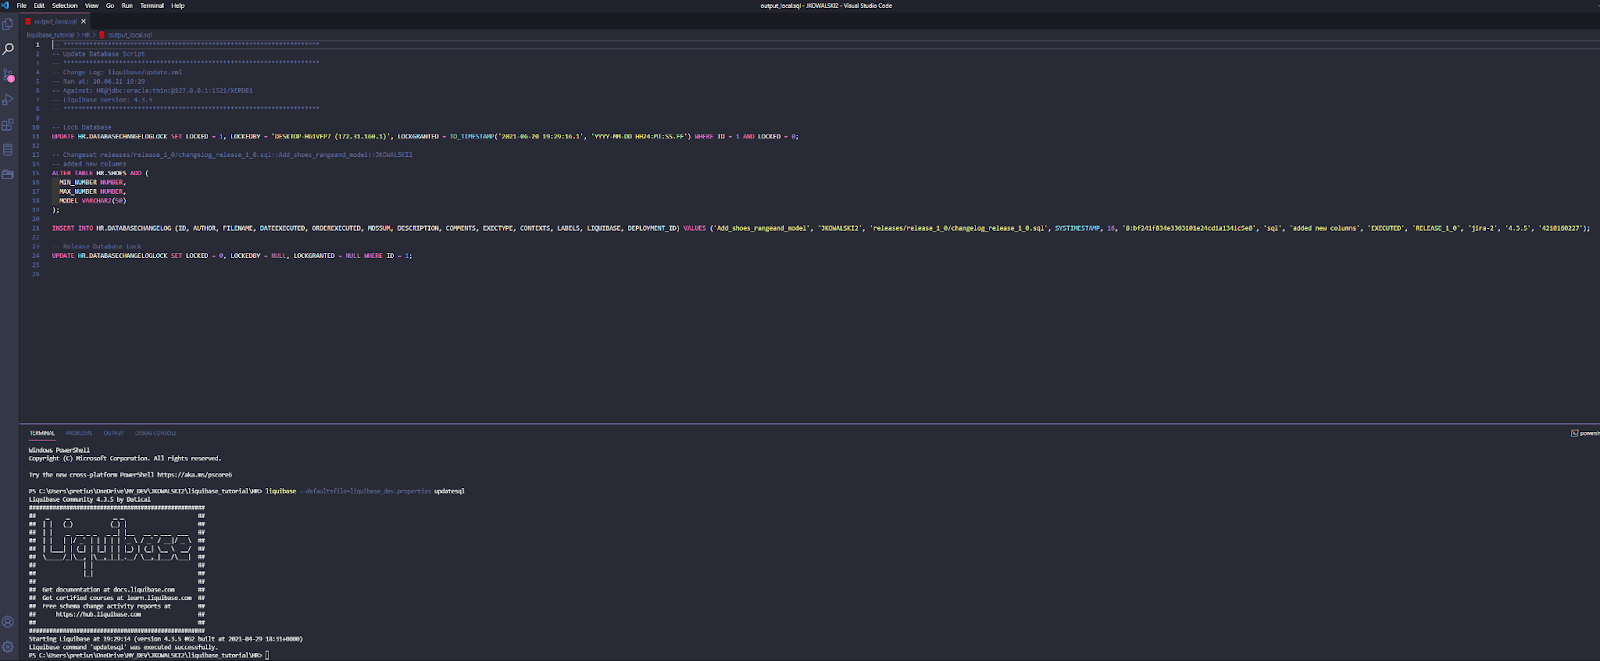
The script looks fine, so John runs the Liquibase Update command.

Release_1_0 – development complete
The development of Release_1_0 is completed. Rafal and John have finished their development tasks JIRA-1 and JIRA-2, so they committed their work and pushed it into the origin branch “Release_1_0”.
Note: If you need to develop more than 1 project (release) at once, just create more GIT branches and Liquibase contexts. For example GIT Branch “Release 2_0” and Liquibase context “Release_2_0”. Labels: JIRA_TASK_NUMBER.

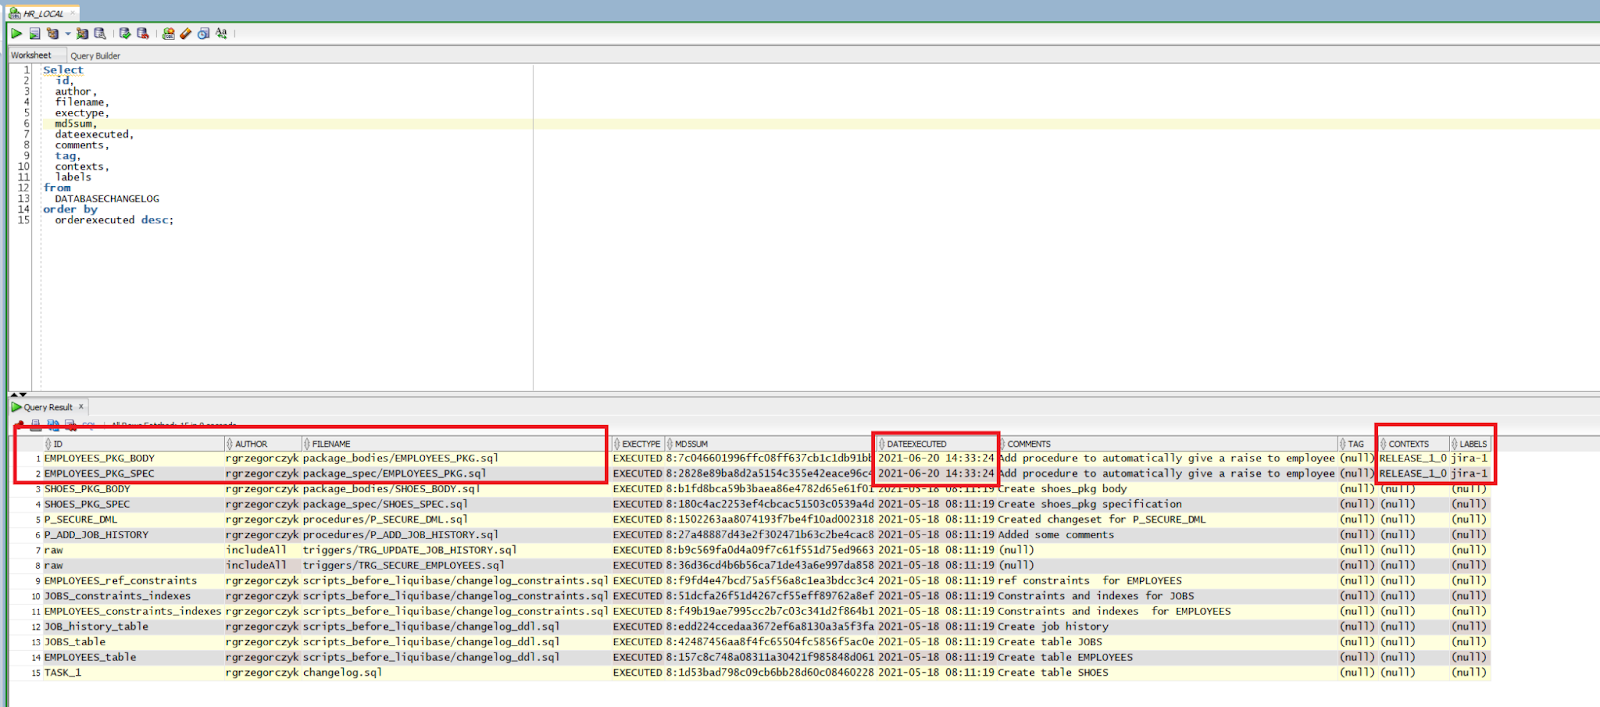
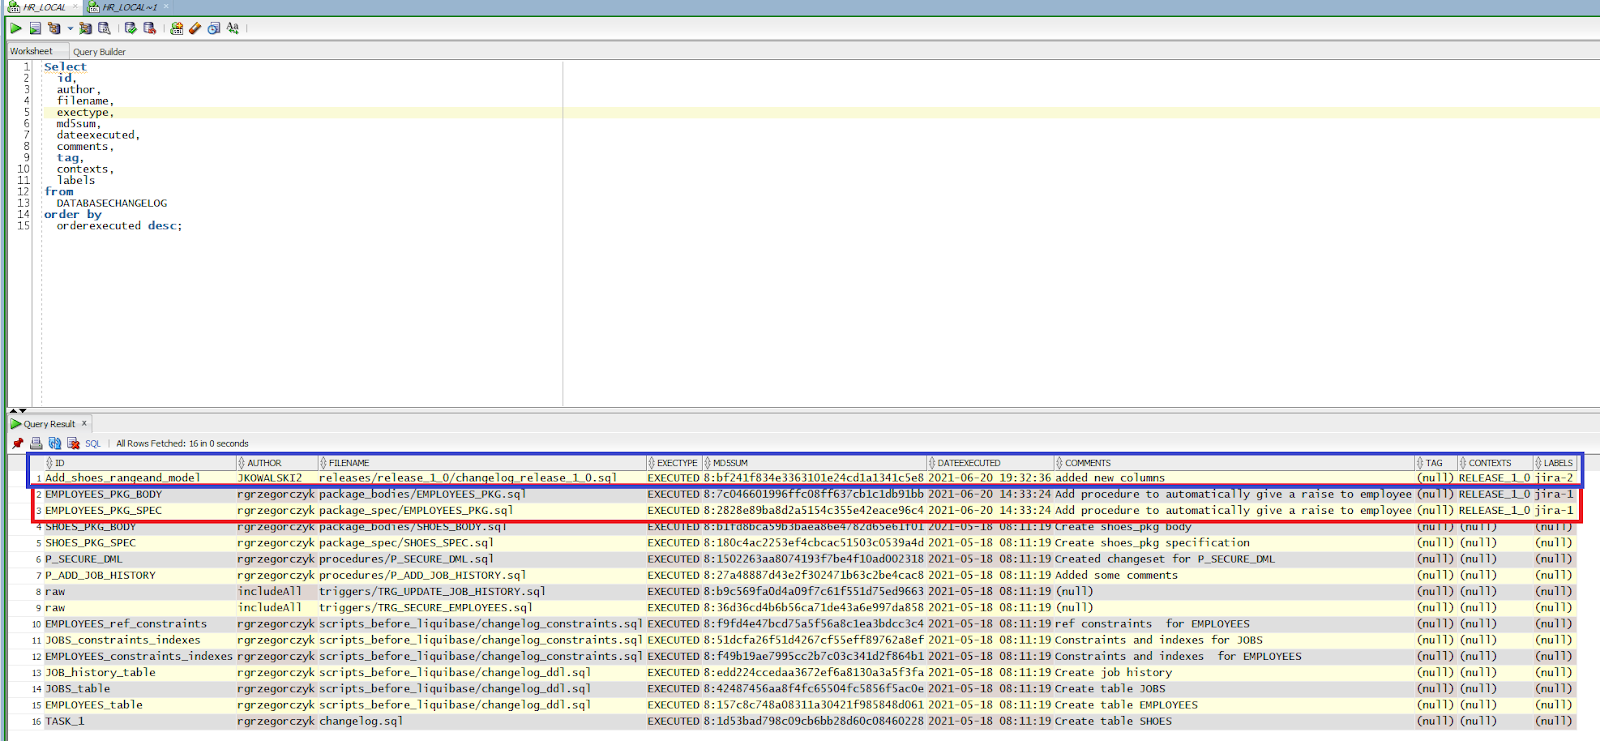
Let’s take a look at our table with Liquibase logs. As you can see, the DATABASECHANGELOG table shows detailed information about changes that were made to the database. We can see who made it, when, and why. There’s also the release, task number, and space where you can leave a comment.
Now, you’re probably thinking something along the lines of: “I can do almost the same thing with only GIT and Liquibase, I don’t really need those contexts and labels…”.
Are you sure about that? Read on.
Easy script deployments
Deployments would be easy If you had only one project at a time. You could just connect Liquibase to the TEST database and run UpdateSQL or Update commands. But what if, in the meantime, you managed to fix a production bug, and there is a changeset with it in the DEV database? Or maybe you have a few projects at the same time, with one DEV database, and different scheduled production deployment dates? How much time would you need to figure out which code you have to merge into one deployment script?
Example 1: deployment to the UAT database – the code developed during RELEASE_1_0
Note: We assume that my UAT DB has objects equal to the MASTER branch.
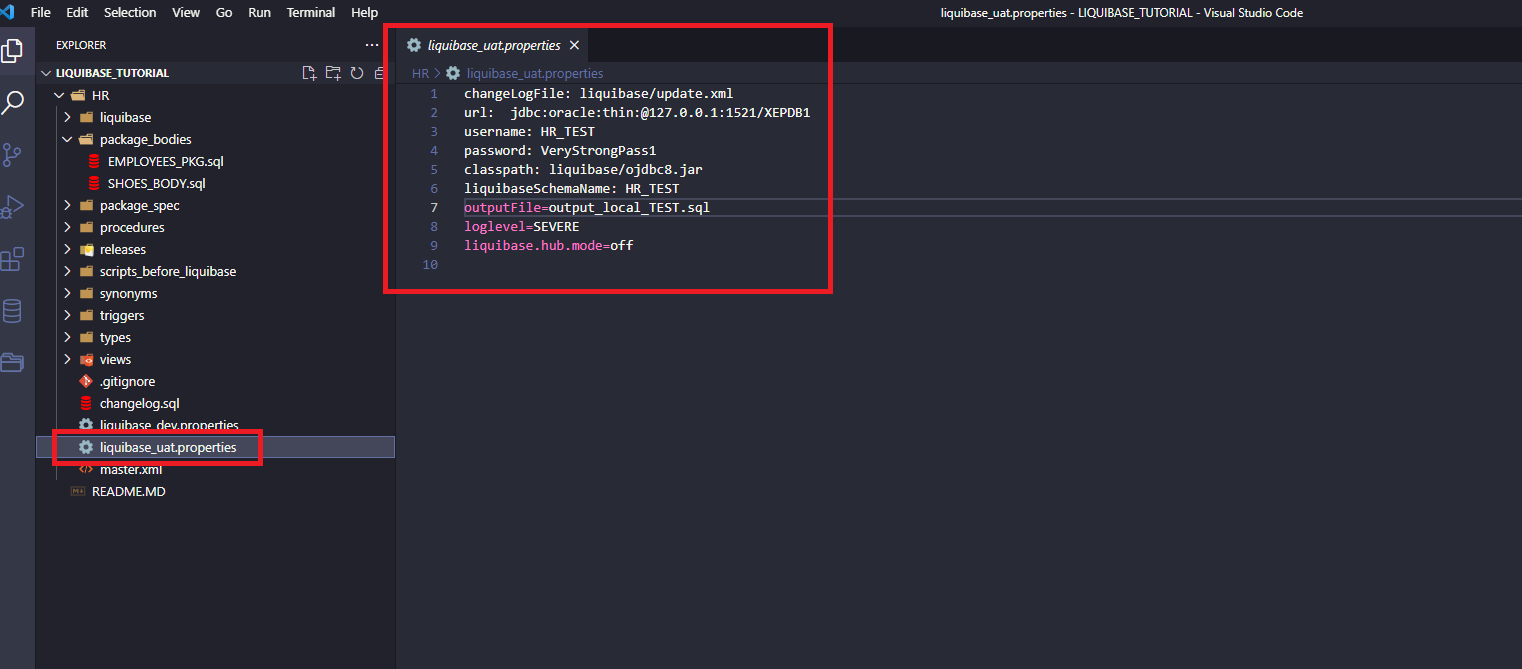
I create a new Liquibase connection to my second local database (let’s call it UAT) – the file is called liquibase_uat.properties.
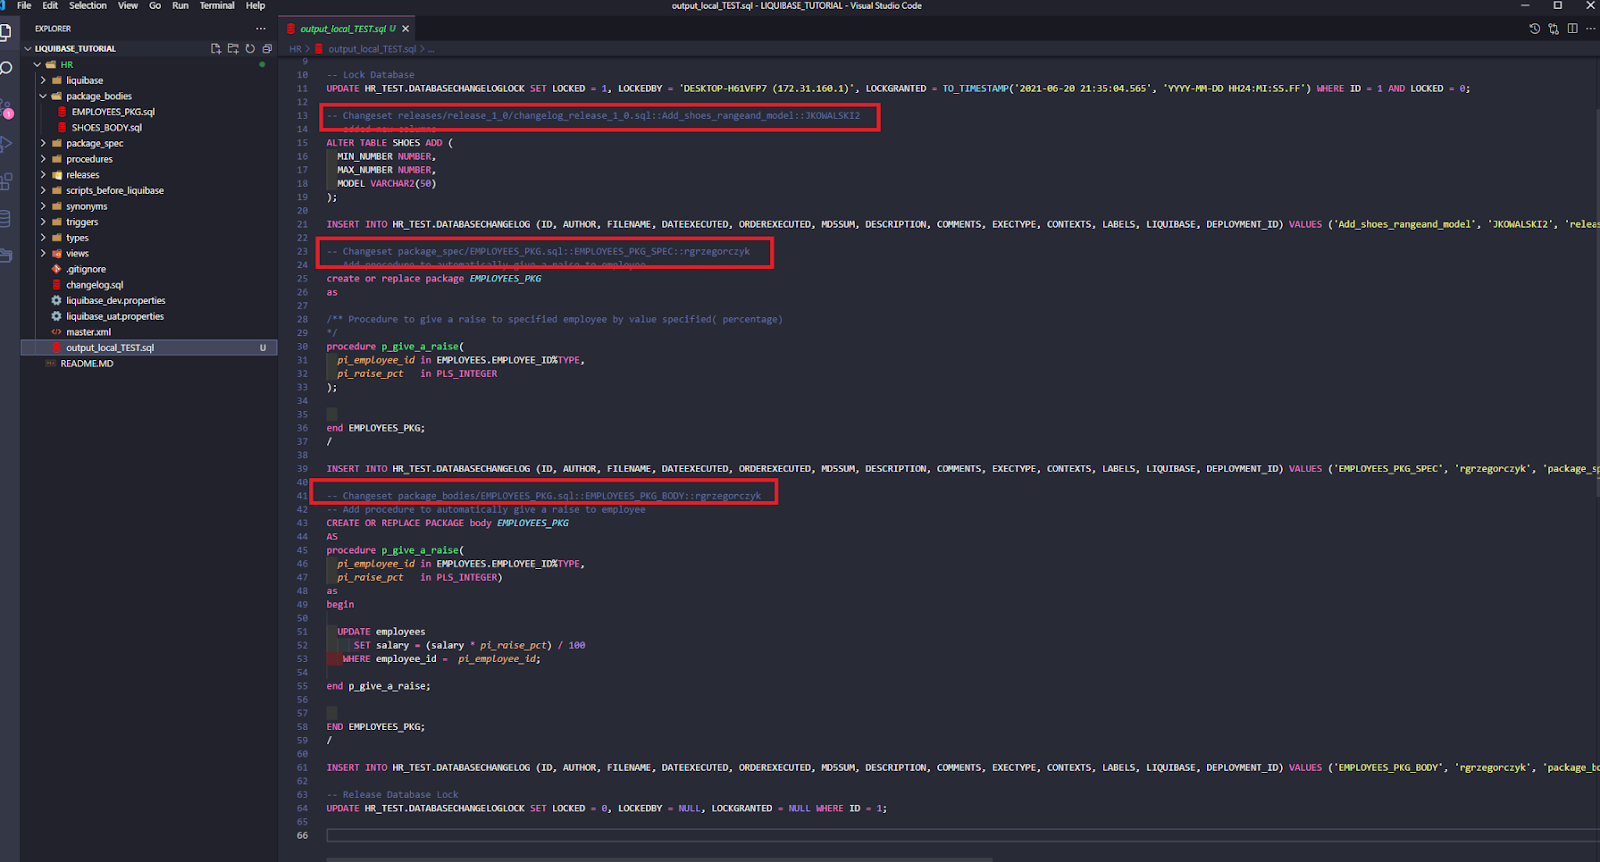
Now I create an SQL script by running:
liquibase –defaultsfile=liquibase_uat.properties –contexts=RELEASE_1_0 updateSQL
That was super fast and easy!
Now, look at the script. There are only 3 required changesets – two from Rafal (JIRA-1), and one from John (JIRA-2).
Example 2: deployment to the UAT database – the code developed during RELEASE_1_0 but only regarding the JIRA-2 task.
Simply run:
liquibase –defaultsfile=liquibase_uat.properties –contexts=RELEASE_1_0 –labels=JIRA-2 updateSQL
And voilà!
We have only one change from John and his task JIRA-2.
Example 3: deployment to the UAT database – the code developed during RELEASE_1_0 but excluding the task JIRA-2.
It’s also quite easy. Just run:
liquibase –defaultsfile=liquibase_uat.properties –contexts=RELEASE_1_0 –labels=!JIRA-2 updateSQL
There are two changes – both from Rafal, and none from John.
After reviewing the SQL scripts from the above examples, just run the Liquibase Update command.
Deployments without production access
Sometimes, for some reason (for example, you’re developing a project in the financial sector) you won’t have access to the production environments. So, how to generate scripts using Liquibase in such a situation?
You have 3 options.
Option #1 – a special production schema
If it’s possible, ask your DBA to:
- create a special schema on production (called LIQUIBASE, for example),
- get grants to this schema -> SELECT ON DATABASECHANGELOGLOCK and DATABASECHANGELOG tables.
Then create a liquibase_prod.properties file with the required connection details.
Run the UpdateSQL command to generate an SQL file – use context and labels to create a proper script.
Review the script and send it to the DBA for production execution.
Option #2 – an additional DEV database
Create an additional DEV database (you can call it PRE_DEPLOY, for example).
Run UpdateSQL to this database and send the generated script to the DBA ADMIN (for production execution).
Run Liquibase Update to PRE_DEPLOY, so that this DB is always equal to the client’s production database.
Option #3 – an insert script
If You can’t use option 1 or 2, there is also another one. It’s more complicated, but it works. Here are the steps:
- generate and save an insert script from DATABASECHANGELOG table, for example with all the rows having contexts=’RELEASE_1_0’;
- delete previously selected rows from the DATABASECHANGELOG table at DEV;
- run UpdateSQL to your DEV database – send this script to the client’s DBA;
- run the insert saved in step A to your DEV DB (instead of it you can just run Liquibase ChangelogSync, but it will change the order of the changelogs in your table – I prefer not to do that).
That’s how you can easily manage deployments in more complicated circumstances and projects, even when you don’t have access to the production environments. If you want to read more about Liquibase contexts and labels go to documentation:
- What is Liquibase and how to start using it? Automate your database scripts deployment with this Liquibase tutorial
- Boost the management of your Oracle Database version control changes with Liquibase
- Liquibase rollback – A smart way to do it with Jenkins
- Testcontainers + Liquibase: Make integration testing easier