
In this Blog, we are going to show you how to create two tables:
An APEX application will be built on the t_products table. We will create two FREE Oracle Cloud IAM Domains representing two Tenants (aka. Customer user sets). Each Tenant will be able to see a slice of the t_products data, i.e., 1 row for Tenant 1 and 3 rows for Tenant 2. Access to rows will be achieved via a VPD. Both authentication and authorization (demonstrated in this blog) will be achieved in Oracle IAM.
A Post Authentication PLSQL will map IAM roles to Custom APEX Roles & activate the VPD.
First, check if you have an IAM or the older IDCS in the Oracle Cloud; click Menu > Identity & Security.
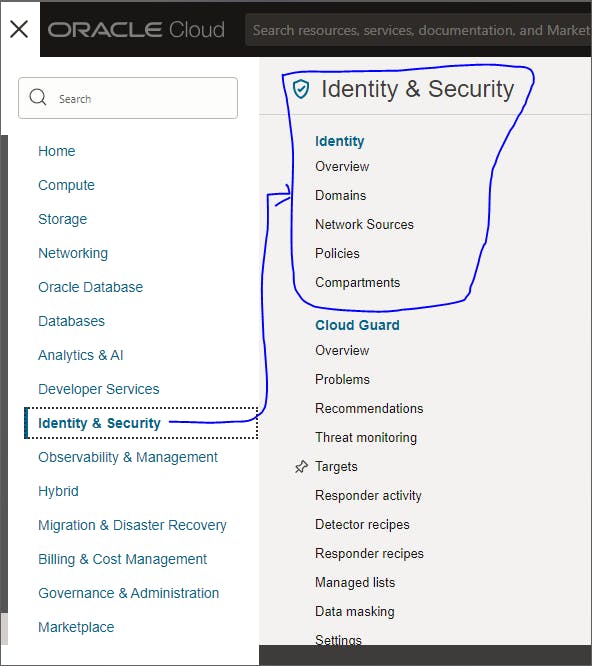
If you can see the word “Domains” then you have an IAM. If you can’t see the word “Domains”, then you are unable to continue this guide. I’ve been informed that in the future, your tenancy probably will update to IAM but I don’t have any information on timescales.
Next, check to ensure you are running Enterprise Edition of the database by typing the following:
select banner from v$version;
This will need to have EE or Enterprise Edition in the name. Next, check to see if you have execute on the dbms_rls package.
select 'PASS' from dual where exists ( select 1 from user_tab_privs where table_name = 'DBMS_RLS' and owner = 'SYS' and privilege = 'EXECUTE');
This will return a PASS if you have access. If it returns no rows, have your DBA run the following statement:
NOTE: This will not be possible to run on apex.oracle.com.
grant execute on sys.dbms_rls to YOUR_SCHEMA;
1. Run the following in your schema
-- create tables
 create table tenants ( id number generated by default on null as identity constraint tenants_id_pk primary key, name varchar2(32 char), domain varchar2(32 char) ) ;

 create table t_products ( id number generated by default on null as identity constraint t_products_id_pk primary key, tenant_id number constraint t_products_tenant_id_fk references tenants on delete cascade, name varchar2(50 char), description varchar2(4000 char), sku varchar2(30 char), unit number, unit_price number ) ;

 -- table index
 create index t_products_i1 on t_products (tenant_id);

 -- Add Tenant Default
 alter table T_PRODUCTS modify ("TENANT_ID" NUMBER default on null nvl(sys_context('APEX$SESSION', 'APP_TENANT_ID'), -1) );

 insert into tenants ( id, name, domain ) values ( 1, 'TENANT_1', 'DOMAIN_1' );

 insert into tenants ( id, name, domain ) values ( 2, 'TENANT_2', 'DOMAIN_2' );

 insert into tenants ( id, name, domain ) values ( 3, 'TENANT_3', 'DOMAIN_3' );

 commit;

 alter table tenants modify id generated by default on null as identity restart start with 3;

 insert into t_products ( id, tenant_id, name, description, sku, unit, unit_price ) values ( 1, 1, 'M-AABJ-35', 'Sn faucibus. Ut id nulla.', 'Fames Ac Ante', 38, 89 );

 insert into t_products ( id, tenant_id, name, description, sku, unit, unit_price ) values ( 2, 2, 'M-AADP-93', 'Is. Duis et commodo.', 'Ipsumprimis In Faucibus', 86, 63 );

 insert into t_products ( id, tenant_id, name, description, sku, unit, unit_price ) values ( 3, 2, 'M-AACX-75', 'Vulputate um a ligula.', 'Ante Ipsumprimis In', 65, 16 );

 insert into t_products ( id, tenant_id, name, description, sku, unit, unit_price ) values ( 4, 2, 'M-AAAX-23', 'Ex. Etesque. Proin.', 'Vestibulum Ante Ipsumprimis', 4, 78 );

 insert into t_products ( id, tenant_id, name, description, sku, unit, unit_price ) values ( 5, 3, 'M-AAAX-23', 'Domain 3 Lorem Ipsum.', 'Lorem Ipsum', 5, 7 );

 insert into t_products ( id, tenant_id, name, description, sku, unit, unit_price ) values ( 6, 3, 'M-AAAX-23', 'Domain 3 Latin Text.', 'Domain 3 Latin Text.', 6, 8 );

 alter table t_products modify id generated by default on null as identity restart start with 7;
2. Run the following Package Specification in SQL Workshop
create or replace PACKAGE apx_tenant
 IS
     function get_tenant_predicate(
             object_schema IN VARCHAR2,
             object_name VARCHAR2) return varchar2;

       PROCEDURE p_set_tenant_id( p_domain VARCHAR2);

 END apx_tenant;
 /
3. Then run the following Package Body in SQL Workshop
create or replace PACKAGE BODY apx_tenant
 IS
     function get_tenant_predicate(
             object_schema IN VARCHAR2,
             object_name VARCHAR2) return varchar2 as

             l_predicate varchar2(4000);

     begin
         -- Only apply VPD to specific APEX applications
         -- Change this "if condition" as appropriate but note that it should be VERY FAST
         if sys_context('APEX$SESSION', 'APP_ID') IS NOT NULL then
             -- this predicate is optimized for performance
             -- Note the use of sys_context. This allows the query to be parsed once.
             -- And sys_context values are in memory so it is very very fast.
             l_predicate:= q'! tenant_id = sys_context('APEX$SESSION', 'APP_TENANT_ID') !';
         end if;

         return l_predicate;
     end get_tenant_predicate;

     PROCEDURE p_set_tenant_id( p_domain VARCHAR2)
     IS
     BEGIN
     FOR x IN ( SELECT id FROM tenants WHERE domain = p_domain )
     LOOP
       APEX_SESSION.SET_TENANT_ID( p_tenant_id => x.id );
     END LOOP;
     END p_set_tenant_id;

 END apx_tenant;
 /
4. Create the VPD Policy for the T_PRODUCTS table
begin
     dbms_rls.add_policy(
       object_schema => 'MYSCHEMA', -- Change
       object_name => 'T_PRODUCTS',
       policy_name => 'MY_TABLE_VPD',
       function_schema =>'MYSCHEMA', -- Change
       policy_function => 'apx_tenant.get_tenant_predicate',
       statement_types => null,
       update_check  => true);

     commit;
 end;
5. Create an APEX Application; in SQL Workshop > Object Browser > Tables > T_PRODUCTS > More > Create App > Create Application
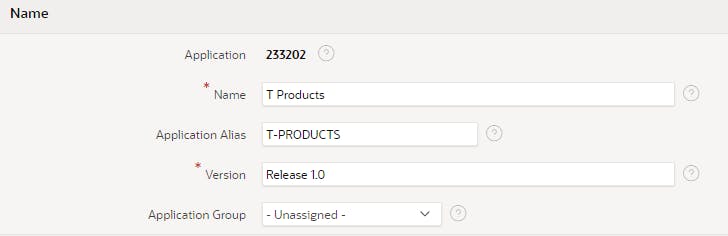
6. Click Edit Application Definition and make a note of the application alias e.g. T-PRODUCTS
7. Click Shared Components > Authorization Schems > Create > Next
Use the table below:
| Name | Value |
| Name | Supervisors |
| Scheme Type | Is In Role or Group |
| Type | Custom |
| Names | Supervisors |
8. Click Create Authorization Scheme
9. Click Create to create a new Authorization Scheme and click Next
Use the table below:
| Name | Value |
| Name | Empty |
| Scheme Type | Is In Role or Group |
| Type | Custom |
| Names | Empty |
10. Click Create Authorization Scheme
11. Click Shared Components > Security Attributes > Source for Role or Group Schemes and set it to Custom Code
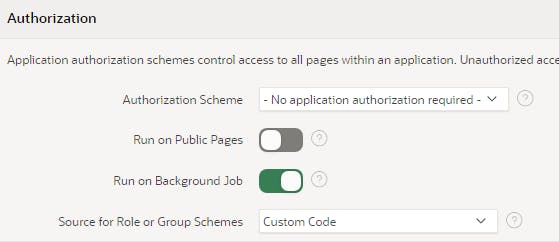
12. Click Apply Changes
13. Click Shared Components > Lists > Page Navigation
14. In the Interactive Grid Set Dashboard to Empty & T-Products Search to Supervisors
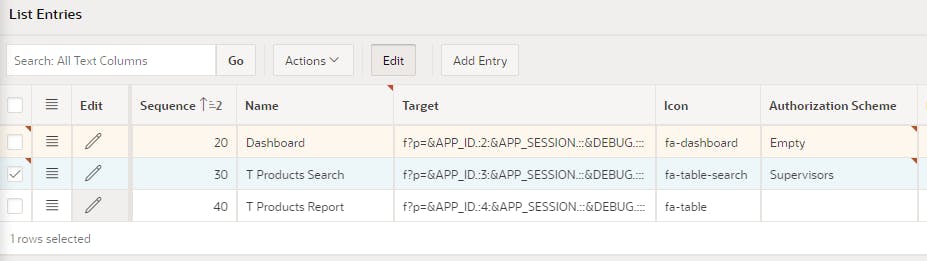
15. Click Apply Changes
16. Edit Page 1 and add an Interactive Report region using the following SQL. This will show you the Roles that the logged in User has access to
select WORKSPACE_ID,
       WORKSPACE_NAME,
       WORKSPACE_DISPLAY_NAME,
       APEX_SESSION_ID,
       USER_NAME,
       GROUP_NAME
  from APEX_WORKSPACE_SESSION_GROUPS
 where apex_session_id = :APP_SESSION
1. In Oracle Cloud click Menu > Identity & Security > Domains > Create Domain
Use the table below:
| Name | Value |
| Display Name | IAM.APEX.DOMAIN_1 |
| Description | IAM Identity for APEX : DOMAIN_1 |
| Domain Type | Free |
| Administrator’s first name | <your name> |
| Administrator’s last name | <your name> |
| Administrator’s username/email | <your valid email> |
2. Click Create Domain
This will take a few minutes to create (it seems this page doesn’t refresh by itself). In the meantime, check your inbox and activate your account by following the instructions to reset your password. Don’t bother clicking Continue to Sign In. Just close the browser tab.
3. Click on IAM.APEX.DOMAIN_1 > Overview > Domain URL > Show
e.g.
https://idcs-9948b68b.identity.oraclecloud.com:443
4. Copy this Discovery URL to Notepad and append the following to it
/.well-known/openid-configuration/
So that it looks like this:
https://idcs-9948b68b.identity.oraclecloud.com:443/.well-known/openid-configuration/
5. Click Groups > Create Group
6. In Name, type Supervisors and check the username that you’ve just created and click Create
7. Click IAM.APEX.DOMAIN_1 in the breadcrumb
8. Click Groups > Create Group
9. In Name, type Empty and click Create (without assigning any users)
10. Click IAM.APEX.DOMAIN_1 in the breadcrumb
11. Click Applications > Add Application > Confidential Application > Launch Workflow
Use the table below:
| Name | Value |
| Name | IAM Multi-Tenancy APEX Application |
| Enforce grants as authorization | Checked |
Click Next.
12. Click on the radio button from the picture below
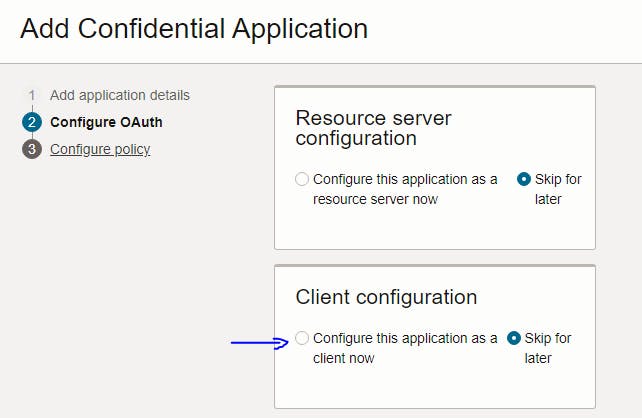
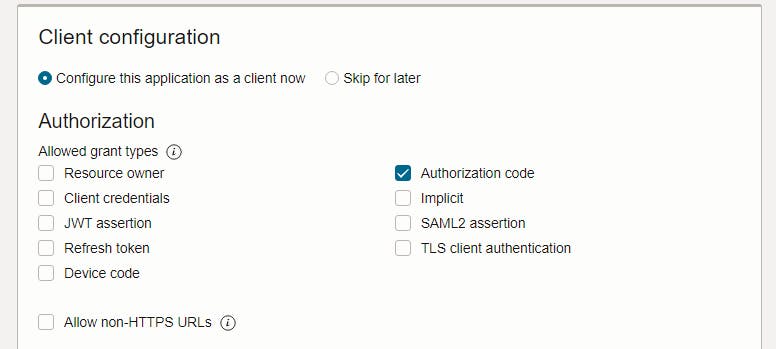
13. Click Authorization Code and then proceed to the next step
14. Run the following in your SQL Workshop
select APEX_AUTHENTICATION.GET_CALLBACK_URL () from dual;
When you get the results, copy everything up to the callback phrase, e.g:
https://apex.oracle.com/pls/apex/apex_authentication.callback
15. Paste the above into the Redirect URL
16. In the Post-logout redirect URL, type in the following
[BASE URL]f?p=[APPLICATION ALIAS]:1::APEX_AUTHENTICATION=DOMAIN1
For example:
https://apex.oracle.com/pls/apex/f?p=T-PRODUCTS:1::APEX_AUTHENTICATION=DOMAIN1
17. When it resembles the following… click Next

18. Click Finish (without configuring a policy)
19. Click Activate > Activate Application
20. Click Users > Assign Users
21. Check the User checkbox
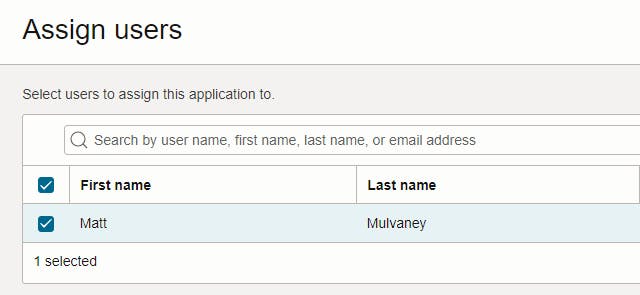
Click Assign.
22. Click OAuth Configuration & find the General Information

23. Copy the Client ID > Paste into Notepad
24. Click Client Secret > Show Secret > Copy > Paste into Notepad
25. In APEX click App Builder > Workspace Utilities > Web Credentials > Create
Use the following table
| Name | Value |
| Name | IAM.APEX.DOMAIN_1 |
| Client ID or Username | Paste in from Notepad |
| Client Secret or Password | Paste in from Notepad |
| Verify Client Secret or Password | Paste in from Notepad |
26. Click Create
27. Go back to your APEX Application > Authentication Schemes > Create
28. Click Next on Based on a pre-configured scheme from gallery
Use the following table
| Name | Value |
| Name | DOMAIN1 |
| Scheme Type | Social Sign-In |
| Credential Store | IAM.APEX.DOMAIN_1 |
| Discovery URL | Paste in the Discovery URL from Notepad i.e the one that ends with /.well-known/openid-configuration |
| Scope | profile,groups |
| Username | sub |
| Additional User Attributes | profile,groups |
29. Click Create Authentication Scheme
30. Click on Authentication Scheme DOMAIN1
Use the following table
| Name | Value |
| Source | Paste in Code Below |
| Post-Authentication Procedure Name | p_post_processing |
| Switch in Session | Enabled |
| Post-Logout URL | URL |
| URL | Your Post-logout redirect URL e.g apex.oracle.com/pls/apex/f?p=T-PRODUCTS:1::.. |
PROCEDURE p_post_processing
  IS
    l_group_names apex_t_varchar2;
  BEGIN

    apx_tenant.p_set_tenant_id( 'DOMAIN_1');
    --
    -- add all group names to l_group_names
    --
    for i in 1 .. apex_json.get_count('groups') loop
        apex_string.push (
          p_table => l_group_names,
          p_value => apex_json.get_varchar2 (
                        p_path => 'groups[%d].name',
                        p0     => i ));
    end loop;

    -- save group names in session

    apex_authorization.enable_dynamic_groups (
        p_group_names => l_group_names );

  END p_post_processing;
31. Click Apply Changes
32. Navigate to Page 1 in APEX
1. Click Run Page, and it’ll look like this
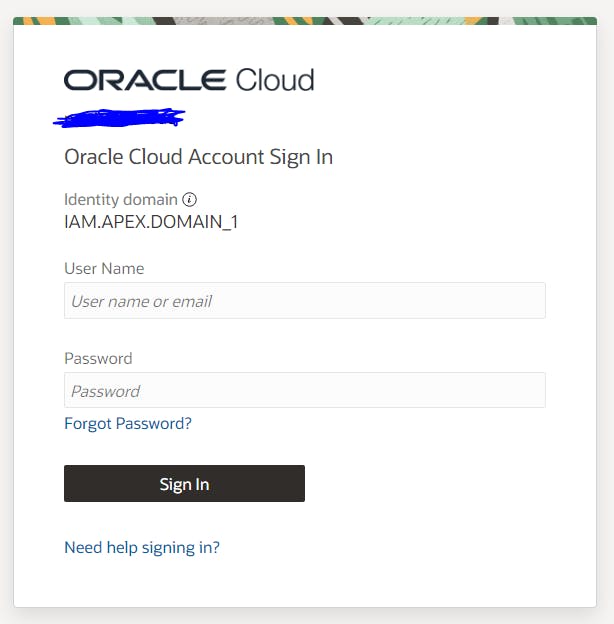
2. Sign in with your email and newly reset password
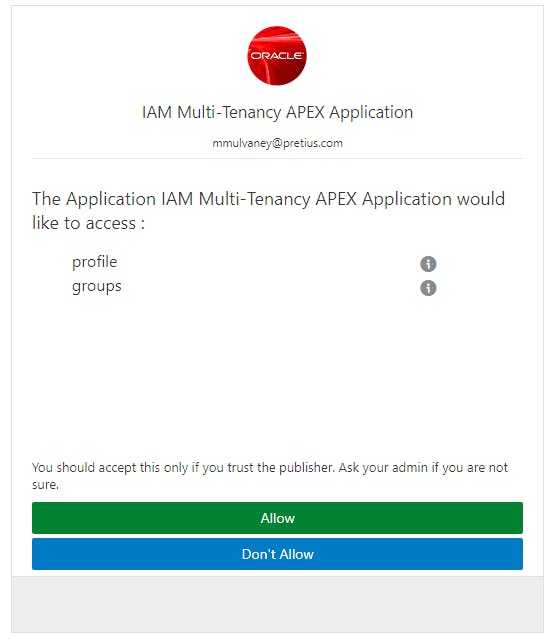
3. Allow access
4. Now you should have access to the application
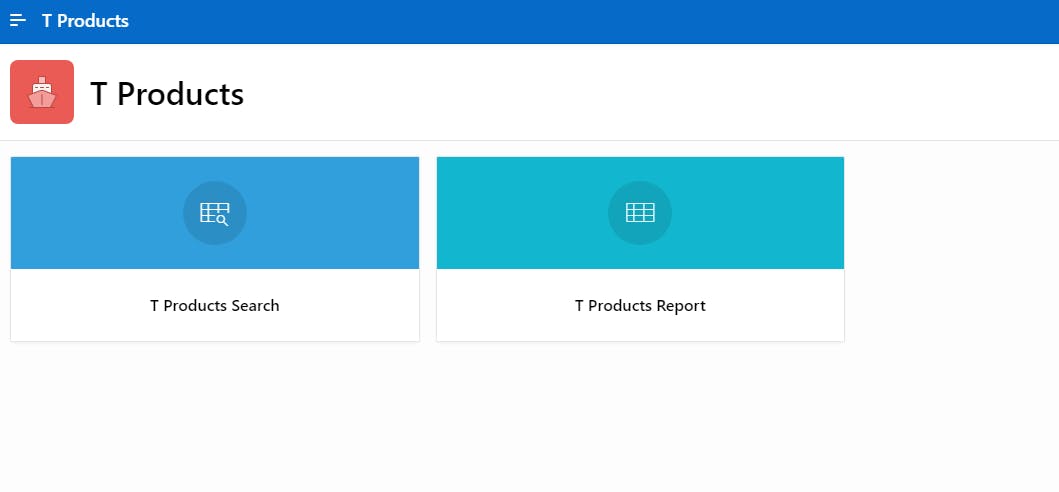
Notice that since the User has the Supervisors Role, they can see the T Products Search Card. However, since they don’t have the Empty Role, they can’t see the Dashboard.
5. Click on T Products Report
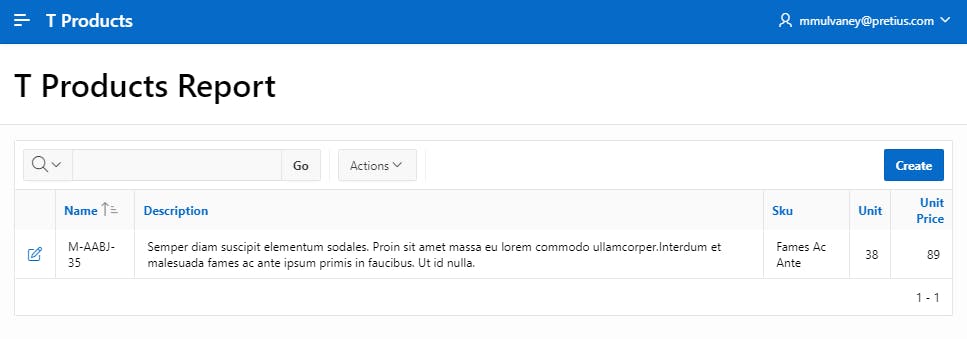
6. Notice the VPD has been applied, and only the first row is displayed for this Tenant
1. Perform the Domain & Authentication Configuration steps again, but use DOMAIN2 instead of DOMAIN1, so that you have two IAM Domains and two APEX Authentication Schemes.
NOTE: There will be several places where you need to change DOMAIN_1 to DOMAIN_2 and DOMAIN1 to DOMAIN2
2. Run/Test the application by using the Post-Logout URL i.e:
| Domain | URL |
| Domain 1 | apex.oracle.com/pls/apex/f?p=T-PRODUCTS:1::.. |
| Domain 2 | apex.oracle.com/pls/apex/f?p=T-PRODUCTS:1::.. |
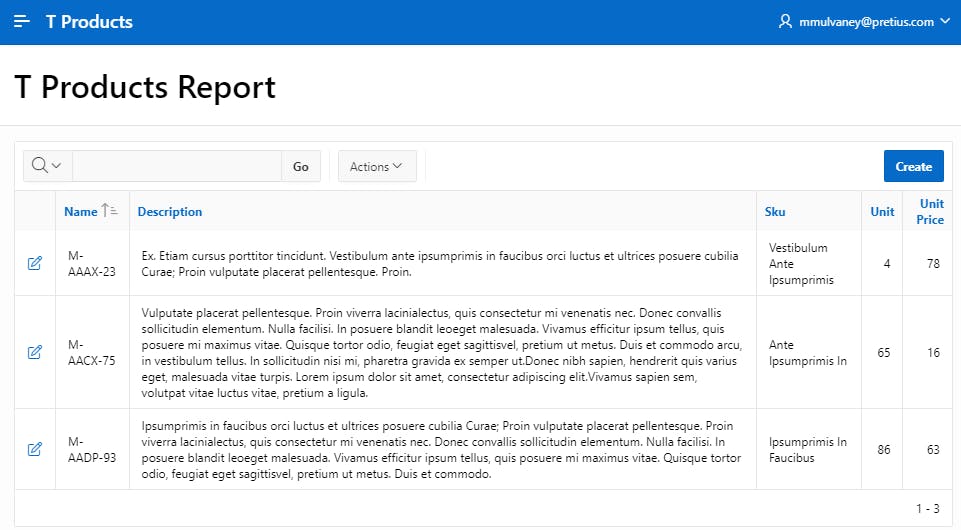
3. When clicking the DOMAIN2 link, and then viewing T Products Report, notice that the VPD has been applied, and now 3 rows are displayed for Tenant 2
And that’s about it. If you follow every step, you should have a working SaaS model for multi-tenant APEX Applications based on Oracle IAM domains. If you have any questions, you can always reach out to me at mmulvaney@pretius.com. Also, read the following sources I’ve used while writing this blog post:
Finally, be sure to check out my other articles on the Pretius blog. I broached various APEX-related subjects you may find interesting:


