
Disclaimer: This article was originally published in May 2023. However, in March 2024 it was updated with new content – an automated script that allows you to set everything up in one step. The updated information is at the very top, but if you prefer the manual method, you’ll find it in the latter part of the article.
This article includes several steps which are prone to manual error. Copying and pasting the required code can also be pretty time-consuming. Because of this, I’ve created an update that’ll let you do the exact same thing in just one single step. Just copy and paste the code below, come back after lunch, and you’ll have a ready-to-rock APEX environment.
You’ll need Podman, Docker or Docker-ce for Windows, Unix or Mac (Mac users read this first).
If you are running this on an OCI compute instance, you’ll need to open ports 8521, 8500, 8023, 9043 & 9922. Otherwise ignore this step.
Also, before you start: The 23c Docker image can be slow to start up on some OS’s and get the PDBs operational. This means a delay in successfully installing APEX. So remember about one of the steps from the guide below (the one about getting coffee) – it’ll come in handy!
I have never encountered any such issue on an Oracle Cloud Compute box. In this single step, the script doesn’t make itself (or yourself) a coffee. This would be a future improvement to the script.
So, here it is. Simply paste the code below into your Terminal/Command Prompt. The command should work in Windows, Unix & Mac (once again, Mac users should read this first). For clarity, I’m running this on Unix on an Oracle Cloud Compute with a free 50gb Block Volume.
docker create -it --name 23cfree -p 8521:1521 -p 8500:5500 -p 8023:8080 -p 9043:8443 -p 9922:22 -e ORACLE_PWD=E container-registry.oracle.com/database/free:latest
curl -o unattended_apex_install_23c.sh https://raw.githubusercontent.com/Pretius/pretius-23cfree-unattended-apex-installer/main/src/unattended_apex_install_23c.sh
curl -o 00_start_apex_ords_installer.sh https://raw.githubusercontent.com/Pretius/pretius-23cfree-unattended-apex-installer/main/src/00_start_apex_ords_installer.sh
docker cp unattended_apex_install_23c.sh 23cfree:/home/oracle
docker cp 00_start_apex_ords_installer.sh 23cfree:/opt/oracle/scripts/startup
docker start 23cfree
If on Unix, also run this to keep your container running after closing your connection:
loginctl enable-linger $UID
Now, wait around 20mins (and an additional 15mins if you haven’t previously fetched the docker image – it’ll download it automatically if you haven’t previously downloaded it). You can monitor the installation process using the following command (but perhaps wait 1 min before running it):
docker exec -it 23cfree /bin/bash
 tail -f /home/oracle/unattended_apex_install_23c.log
My run took 16m 40s (I had previously fetched the docker image), until it finally showed a ### APEX INSTALLED ### message.
When it’s done, you can use Ctrl+C to exit out of the log monitoring and go to http://localhost:8023/ords/apex to check it out.
If you ever restart the docker, APEX will back up and running in about 60 seconds. i.e It will not rerun the unattended install.
APEX Internal Workspace
Everything else, e.g. ORDS_PUBLIC_USER, APEX_PUBLIC_USER, SYS, etc.
And that’s about it – enjoy! Also, the configuration script is open source, feel free to fork it. You can find the repository here. If – for some reason – you’d like to go through the process manually, you’ll find the original steps below.
Firstly, these are the things you’ll need:
However, you don’t really need to download anything now – I’ll tell you how to do that quickly via the command line.
Also, if you already have Docker running, you can skip the first section about installation and get to the steps that follow (the Getting Docker to work section).
If you don’t have Docker installed, just get through the steps outlined below. Details will differ depending on your platform/OS of choice.
docker version
sudo yum install docker -y
Once you’ve downloaded Docker, you’ll need to unpack the data. Drop into the command line (i.e. terminal or windows+r, cmd) and type the following command. It’ll take about 15 mins to complete and unpack to 10.5GB on your HDD.
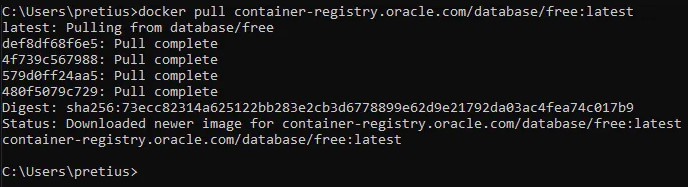
docker pull container-registry.oracle.com/database/free:latest
This is what it’ll look like once it completes:
Now, all that’s left is to run Docker. You can do this by using the following command. Please note, that I’ve changed ports to 8xxx to avoid conflicts with my other docker images.
docker run -d -it --name 23cfree -p 8521:1521 -p 8500:5500 -p 8023:8080 -p 9043:8443 -e ORACLE_PWD=E container-registry.oracle.com/database/free:latest
Now, here are the 25 steps you’ll need to follow to get everything working. The process is quite straightforward.
1. Enter bash
Just type the following command:
docker exec -it 23cfree /bin/bash
2. Get APEX
Use this command (it’ll take around 1 minute):
curl -o apex-latest.zip https://download.oracle.com/otn_software/apex/apex-latest.zip
3. Unpack and enter APEX
You can use these commands:
unzip apex-latest.zip
rm apex-latest.zip
cd apex
4. Let your database settle for at least a few minutes
It’s best to let things settle a bit before you continue, so give it a few minutes. You can grab a coffee while you wait!
5. Open SQL*Plus with sqlplus / as sysdba
The exact command looks like this:
bash-4.4$ sqlplus / as sysdba
SQL*Plus: Release 23.0.0.0.0 - Developer-Release on Wed Apr 5 13:27:32 2023 Version 23.2.0.0.0
Copyright (c) 1982, 2023, Oracle. All rights reserved.
Connected to: Oracle Database 23c Free, Release 23.0.0.0.0 - Developer-Release Version 23.2.0.0.0
6. Run the APEX installer
Use the following command:
ALTER SESSION SET CONTAINER = FREEPDB1;
@apexins.sql SYSAUX SYSAUX TEMP /i/
The installation will take around 10 minutes. If you get the PLS-00201: identifier ‘SYS.DBMS_DB_VERSION’ must be declared an error, just keep re-trying this step until it works. It’ll settle down after a while.
7. Unlock the public user account
Here’s the command:
ALTER USER APEX_PUBLIC_USER ACCOUNT UNLOCK;
ALTER USER APEX_PUBLIC_USER IDENTIFIED BY E;
8. Change the password
Run the following command and follow the outlined steps:
@apxchpwd.sql
It’s worth noting you must use a complex password for this purpose, so come up with something adequate.
9. Exit SQL*Plus
Simply type the following word:
exit
10. Create the following folders
To make things quick and simple, you can copy-paste the commands outlined below:
mkdir /home/oracle/software
mkdir /home/oracle/software/apex
mkdir /home/oracle/software/ords
mkdir /home/oracle/scripts
11. Copy the APEX images & change the folder
Simply type in the following:
cp -r /home/oracle/apex/images /home/oracle/software/apex
cd /home/oracle/
12. Install sudo
Use this command:
su
And then follow with these:
cat /dev/null > /etc/dnf/vars/ociregion
dnf update -y
dnf install sudo -y
13. Install nano
Type in the following:
dnf install nano -y
14. Edit the sudo list
Now, you’ll need to quickly edit the sudo list. First, type in this command:
nano /etc/sudoers
In the Defaults section, add the following:
Defaults !lecture
Now, at the very end of the file you also need to add this:
oracle ALL=(ALL) NOPASSWD: ALL
After that just click Ctrl+X and save the file.
15. Install Java
You can use this command:
dnf install java-17-openjdk -y
16. Setup ORDS folders & check JAVA
Here are the commands to use to set everything up quickly:
mkdir /etc/ords
mkdir /etc/ords/config
mkdir /home/oracle/logs
chmod -R 777 /etc/ords
java -version
If everything is as it should be, you will get the following result in return:
openjdk version "17.0.6" 2023-01-17 LTS
OpenJDK Runtime Environment (Red_Hat-17.0.6.0.10-3.el8_7) (build 17.0.6+10-LTS)
OpenJDK 64-Bit Server VM (Red_Hat-17.0.6.0.10-3.el8_7) (build 17.0.6+10-LTS, mixed mode, sharing)
17. Whilst still as su, install ORDS
Use the following commands:
yum-config-manager --add-repo=https://yum.oracle.com/repo/OracleLinux/OL8/oracle/software/x86_64
dnf install ords -y
18. Configure ORDS
Type in the following:
export _JAVA_OPTIONS="-Xms512M -Xmx512M"
ords --config /etc/ords/config install
It will give you the following seclection. Choose option 3.
Enter a number to select the TNS net service name to use or specify the database connection
   [1] EXTPROC_CONNECTION_DATA SID=PLSExtProc
   [2] FREE         SERVICE_NAME=FREE
   [3] FREEPDB1     SERVICE_NAME=FREEPDB1
   [S] Specify the database connection
 Choose [1]: 3
It will then ask for the database user name with administrator privileges. Choose user SYS and password E.
Provide database user name with administrator privileges.
  Enter the administrator username: SYS
Enter the database password for SYS AS SYSDBA: E
It will then display the following menu:
Retrieving information.
ORDS is not installed in the database. ORDS installation is required.

  Enter a number to update the value or select option A to Accept and Continue
    [1] Connection Type: TNS
    [2] TNS Connection: TNS_NAME=FREEPDB1 TNS_FOLDER=/opt/oracle/product/23c/dbhomeFree/network/admin
           Administrator User: SYS AS SYSDBA
    [3] Database password for ORDS runtime user (ORDS_PUBLIC_USER): <generate>
    [4] ORDS runtime user and schema tablespaces:  Default: SYSAUX Temporary TEMP
    [5] Additional Feature: Database Actions
    [6] Configure and start ORDS in Standalone Mode: Yes
    [7]    Protocol: HTTP
    [8]       HTTP Port: 8080
    [9]   APEX static resources location:
    [A] Accept and Continue - Create configuration and Install ORDS in the database
    [Q] Quit - Do not proceed. No changes
  Choose [A]:
Choose option 9 – APEX static resources location. When prompted, enter the following:
/home/oracle/software/apex/images
Type A to continue. ORDS will then configure. It’ll take 1-2 minutes and finally load and show the following message.
<code class="lang-plaintext">2024-04-15T15:30:27.922Z INFO        Oracle REST Data Services initialized
Oracle REST Data Services version : 24.1.0.r0960841
Oracle REST Data Services server info: jetty/10.0.20
Oracle REST Data Services java info: OpenJDK 64-Bit Server VM 17.0.10+7-LTS
19. Do a quick test and close ORDS
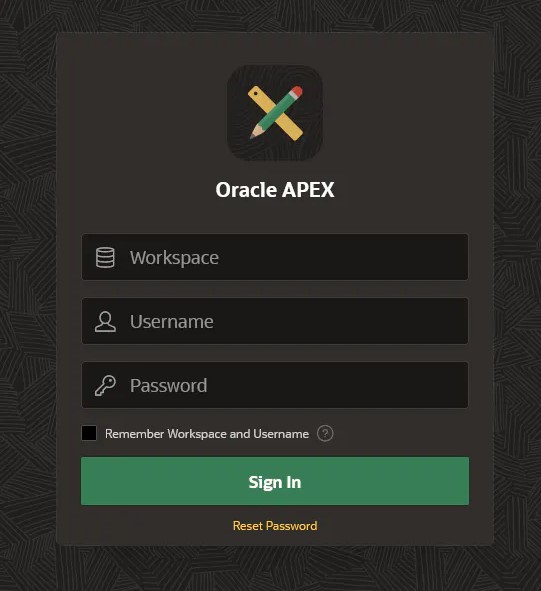
Run http://localhost:8023/ords/apex in a different browser tab – if everything was configured correctly you should see the APEX log-in visible on the screenshot below.
You can close the tab after that. You’ll also need to quit ORDS for now by using Ctrl+C.
FYI: Prior to ORDS 23.2 (read here), you just use the URL localhost:8023/ords.
20. Create a start_ords.sh file
Use the following command:
nano /home/oracle/scripts/start_ords.sh
And then paste in this:
export ORDS_HOME=/usr/local/bin/ords
export _JAVA_OPTIONS="-Xms512M -Xmx512M"
LOGFILE=/home/oracle/logs/ords-`date +"%Y""%m""%d"`.log
nohup ${ORDS_HOME} --config /etc/ords/config serve >> $LOGFILE 2>&1 & echo "View log file with : tail -f $LOGFILE"
21. Create a stop_ords.sh file
Start with this command:
nano /home/oracle/scripts/stop_ords.sh
And then type in the following:
kill `ps -ef | grep [o]rds.war | awk '{print $2}'`
If you ever need to use these scripts manually, you can run them via the following commands. However, don’t do this now!
sh /home/oracle/scripts/start_ords.sh
sh /home/oracle/scripts/stop_ords.sh
22. Create an ORDS startup script
Use the following command:
nano /opt/oracle/scripts/startup/01_auto_ords.sh
Then paste this in:
sudo sh /home/oracle/scripts/start_ords.sh
23. If you are using Docker on Unix, enable linger
This step isn’t required for Windows/Mac installations but you need it on Unix to prevent user processes from being killed once the session is completed. To do this, run:
loginctl enable-linger $UID
24. Stop your Docker container, and then start it again
You can simply use the graphical interface or run this command:
docker restart 23cfree
You do this to activate the ORDS auto-starter script you’ve created in one of the previous steps.
25. Wait a moment, and try logging in
Wait at least 60 seconds and try logging in at http://localhost:8023/ords/apex. Use the following data:
Workspace > INTERNAL
Username > ADMIN
Password > Your Complex Password
And that’s it! As you can see, the process was quite easy and not very time-consuming. It probably took you, what… around 30 minutes total? If everything was configured properly, you should be able to get into APEX without any issues. If you’ve got any questions, you can always reach me at mmulvaney@pretius.com. Also, if you’re interested in Oracle APEX, check out some of my other articles on this blog:


