Need to port an APEX navigation menu into another APEX application? In this article, I’ll show you what to do, and what not to do, to get optimal results.
Imagine you have two applications – one called Blue and another called Pink. Both are on the same workspace and together they are part of a group of “Mini Apps” (Note: this is a nod to Page 7 of the Oracle APEX Lifecycle Technical Paper).
To users, Blue and Pink appear as the same app, and navigation between them is seamless. However, to APEX developers, they are two separate applications.
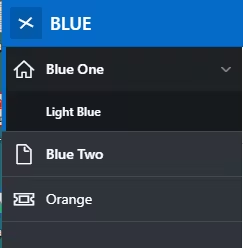
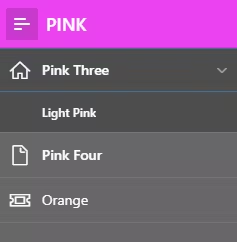
Blue and Pink, however, have two completely different Navigation Menu entries i.e., Blue has Blue-related entries and Pink has Pink-related entries.. easy right? Each click navigates around their own application’s pages.
Now, what is the use case for what I’m about to describe in this article? See that “Orange” menu entry above? Both Applications need to open Orange, giving the appearance of the entire Orange application being embedded in that calling application. This is because this is a SaaS app. The Orange module is only licensed by a certain tenant as a feature of Blue, and Pink uses the contexts of the calling app. However, I want the menu of the calling application to port across to Orange.
How not to do it?
First, let’s mention some things you shouldn’t do, even though they may initially seem like a good idea:
1. Duplicating the entire Orange code base between the two applications Blue and Pink. Technically, you can do that, but you’ll have to duplicate it again whenever Aquamarine (or any other color) comes along, too. And then, if anything changes, you’ll need to replicate it in 3 places. That’s a lot of work.
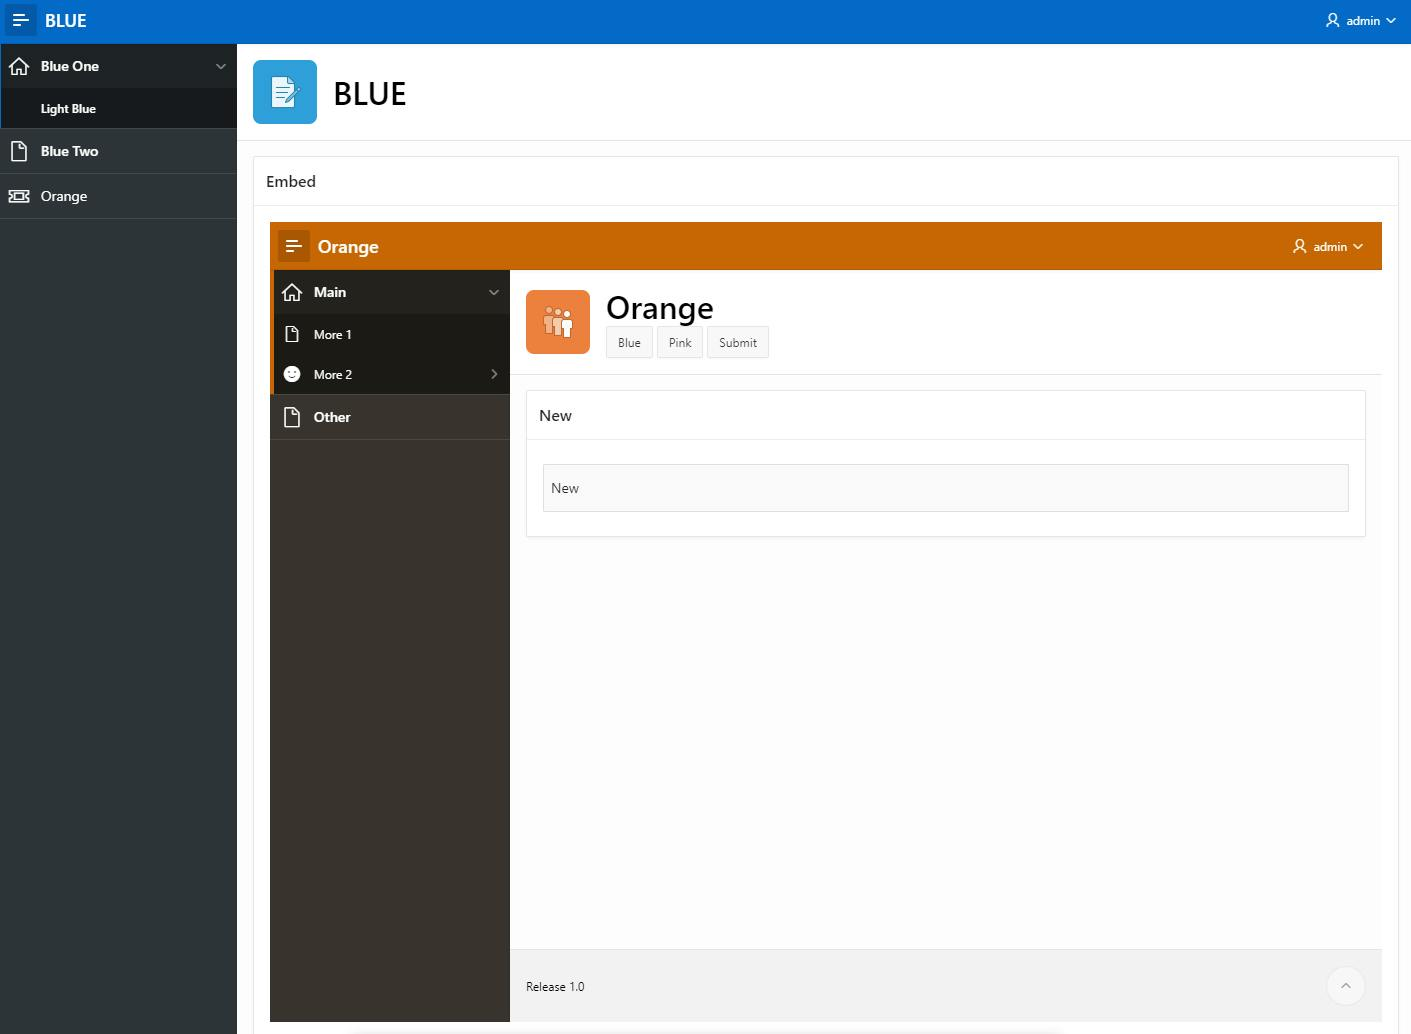
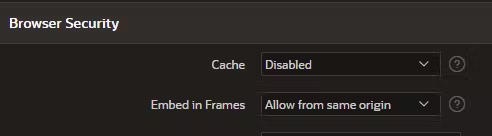
2. Using a URL Region (an IFRAME to you and me). Now, here is a picture of Orange embedded into Blue.
To achieve this, you must change the embed in Frames property in APEX.
You’ll also need to spend hours using a custom page template that deactivates the Navigation Bar + Menu. You’ll need to deactivate the style, breadcrumb (maybe), and play with the IFRAME settings to get it “just right.” And when you’ve got it exactly how you want it… let me know how that looks on mobile. Yeah, you can probably see why this approach isn’t such a good idea.
An easier way: Menu Porting
Menu Porting is an approach that I’ve found and works ridiculously well. It involves the following steps.
1. JavaScript on the Blue/Pink application rips the Navigation menu to JSON format and stores it in a page item. This is awesome as rather than trying to work out which menu entries should be displayed, we just get APEX to render it, and then we rip the menu to JSON. The correct event to use is when the treeView has been drawn and is called theme42ready.
2. We then replace the link on the Menu Entry for Orange with one that passed the JSON menu stored in a page item
3. When we click on Orange and open up the home page a JavaScript merges the Menu of the calling Application with Orange’s own menu
4. The result is a concatenated menu, that allows the user to seamlessly navigate back to Blue/Pink (with check-sums intact) or navigate around Orange’s own Navigation menu.
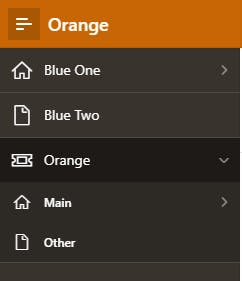
In the above picture we are seeing Orange’s Navigation menu which has been ported across from Blue. Orange’s own menu has been added as a “child” in the “🎫Orange” menu entry (which was ported across from the Blue menu – see early picture of the Blue menu).
Instructions – Blue/Pink Application
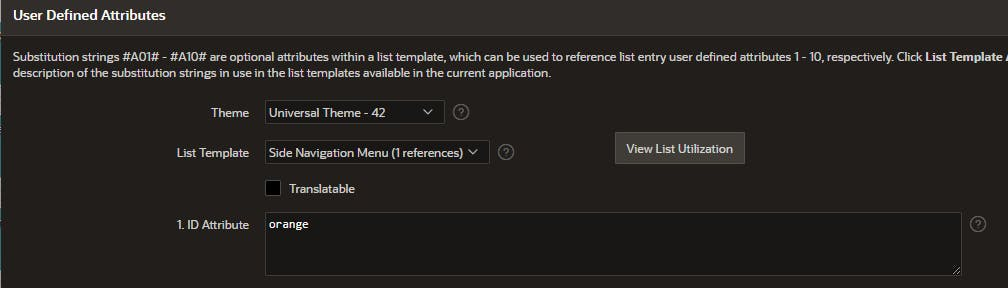
1. Edit the “🎫Orange” menu entry and give it an ID of orange. This will instruct the Orange application where to nest its own menu
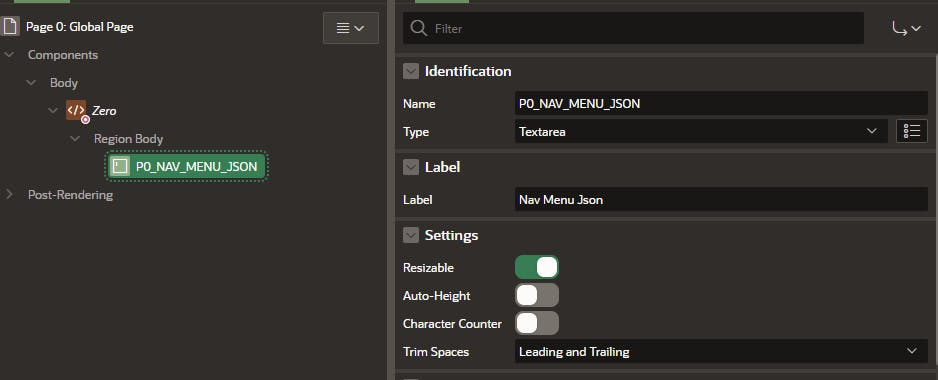
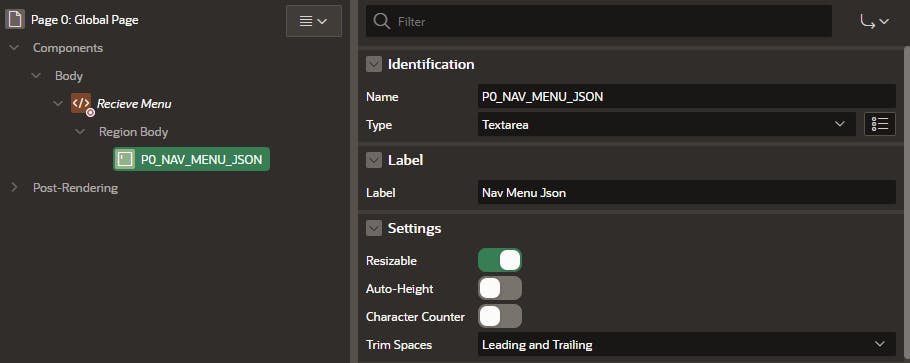
2. Edit Page 0
3. Add a P0_NAV_MENU_JSON page item (hidden or otherwise)
4. Add a Custom theme42ready Event with the following attributes
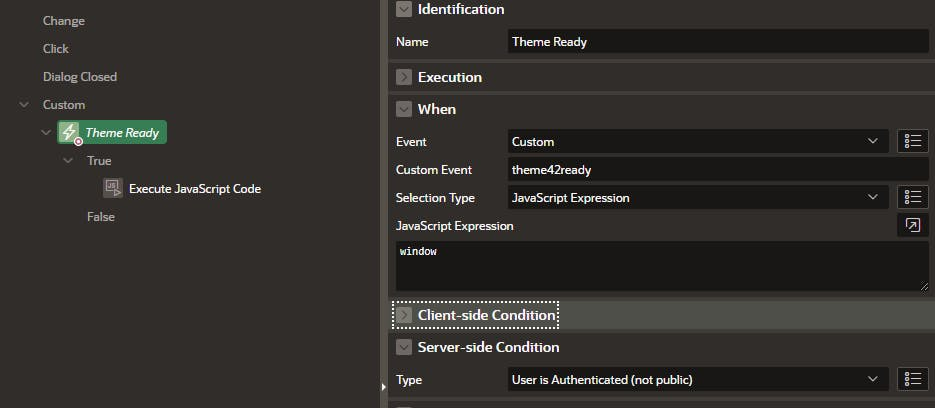
5. Create a Execute JavaScript Code True Action with the following code:
 const targetNodeId = 'orange';
 var tree$ = $( "#t_TreeNav" );
 var nodeAdapter = tree$.treeView('getNodeAdapter');
 var parent = nodeAdapter.root();
 navMenuNodes = nodeAdapter.data.children

 // Function to remove a specified attribute recursively
 function removeAttr(nodes, attributeName) {
     nodes.forEach(function (node) {
         delete node[attributeName];
         if (node.children) {
             removeAttr(node.children, attributeName);
         }
     });
 }

 // Remove parent references from original nodes to avoid circular error
 removeAttr(navMenuNodes, '_parent');

 encodedMenu = encodeURIComponent(JSON.stringify(navMenuNodes));
 apex.item('P0_NAV_MENU_JSON').setValue(encodedMenu);

 // Find the element with the ID  and update its link
 navMenuNodes.forEach(function(item) {
     if (item.id === targetNodeId) {
         item.link = item.link.replace('home?', 'home?p0_nav_menu_json=' + encodedMenu + '&');
     }
 });
Instructions – Orange application
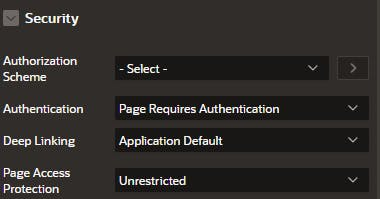
1. Page 1 should be set to Unrestricted Page Access
2. Edit Page 0
3. Add a P0_NAV_MENU_JSON page item (hidden or otherwise)
4. Add a Modify Navigation (theme42ready) Dynamic Action with the following attributes
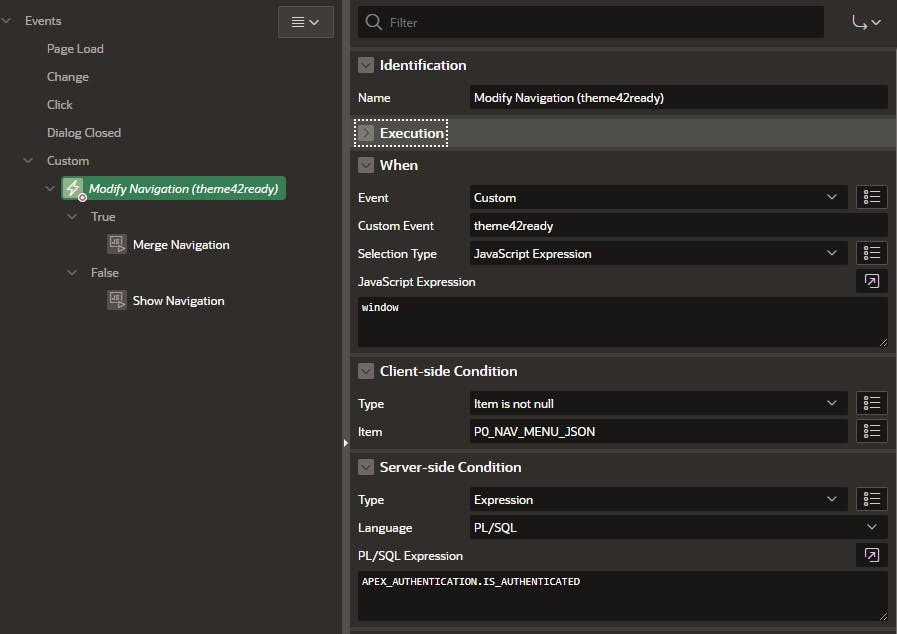
5. Create a Execute JavaScript Code True Action called Merge Navigation with the following code:
const receivedTargetNodeId = 'orange';
 const menUJsonPageItem = 'P0_NAV_MENU_JSON';

 // Function to build hierarchy recursively
 function buildHierarchy(node, data) {
     // Create a new node
     var newNode = {
         label: data.label,
         link: data.link,
         icon: data.icon || 'fa fa-file-o', // Default icon value if not provided
         current: data.current,
         children: []
     };
     node.children.push(newNode);

     // Recursively build children
     if (data.children) {
         data.children.forEach(child => {
             buildHierarchy(newNode, child);
         });
     }
 }

 // Get tree element and node adapter
 var tree$ = $("#t_TreeNav");
 var nodeAdapter = tree$.treeView('getNodeAdapter');
 var parent = nodeAdapter.root();

 // Function to remove a specified attribute recursively
 function removeAttr(nodes, attributeName) {
     nodes.forEach(function (node) {
         delete node[attributeName];
         if (node.children) {
             removeAttr(node.children, attributeName);
         }
     });
 }

 // Remove parent references from original nodes
 removeAttr(nodeAdapter.data.children, '_parent');

 // Parse and retrieve nodes to copy
 var recievedNodes = JSON.parse(apex.item(menUJsonPageItem).getValue()) || [];

 // Remove current from recieved nodes
 removeAttr(recievedNodes, 'current');

 // Find the node to append new children
 var transplantNode = recievedNodes.find(function (item) {

     return item.id === receivedTargetNodeId;
 });

 // Add new child nodes under the node
 if (transplantNode) {
     transplantNode.current = false;
     transplantNode.children = transplantNode.children || [];
     nodeAdapter.data.children.forEach(data => {
         buildHierarchy(transplantNode, data);
     });
 }

 // Replace the tree's children with the updated nodes
 nodeAdapter.data.children = recievedNodes;
 parent.children = parent.children || [];

 // Refresh and expand the tree
 tree$.treeView('refresh').treeView("expand");

 // If current item not visible, then expand a further level
 if (tree$.find('.a-TreeView-label.is-current').length == 0) {
     tree$.treeView("expandAll");
 }

 // Find the label element that is marked as current, then find its parent node and add classes to its row
 tree$.find('.a-TreeView-label.is-current')
     .closest('.a-TreeView-node')
     .find('.a-TreeView-row')
     .addClass('is-selected is-hover');

 // Default Page Focus
 $('body').focus();

 // Show Menu
$('div#t_Body_nav').css('content-visibility','inherit');
6. Create a Execute JavaScript Code False Action called Show Navigation with the following code:
// Show Menu
 $('div#t_Body_nav').css('content-visibility','inherit');
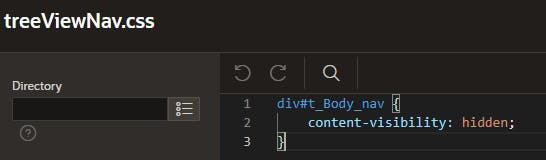
7. Create a Static Application File called treeViewNav.css with the following code:
div#t_Body_nav {
     content-visibility: hidden;
 }
8. In Shared Components > User Interface > CSS add the following File URL:
#APP_FILES#treeViewNav#MIN#.css
Conclusion
That final bit, containing the CSS, is a measure to prevent the Orange menu from being shown briefly before it is merged. To the users, this doesn’t look so nice, so the CSS is there to only show the menu when it’s been fully merged. Those is authenticated conditions are to stop things happening on the login page.
The conditions checking the P0 item is not null are there to allow users to log directly in to Orange, without navigating through Blue/Pink, and allow the exclusive use of the Orange menu – without any sort of merging.
You might wonder why Orange is Orange-themed? I did this to clearly illustrate it being a separate application for the purposes of this article. You may wish to port the theme style across too. This is also completely possible, but unfortunately not covered in this blog (I may cover this at a later date).
How do you like it? Let me know your comments. Also, If you’re interested in Oracle APEX, check out my other articles on the Pretius blog:
- Biscuits+ChatGPT: Using AI to generate Oracle APEX Theme Roller Styles
- Unlocking hidden colors in the Redwood Light APEX theme
- Oracle APEX new features – the low-code platform keeps evolving
- Using Auth0 Organizations with Oracle APEX: Create a single platform with access for multiple businesses
- Oracle APEX tutorial: Uncover Oracle’s best-kept low-code secret