
The goal for our APEX application is to create a single platform accessible to multiple businesses without any awareness of each other. Instead of creating individual cloned applications for specific customers, we aim to avoid these maintenance complexities.
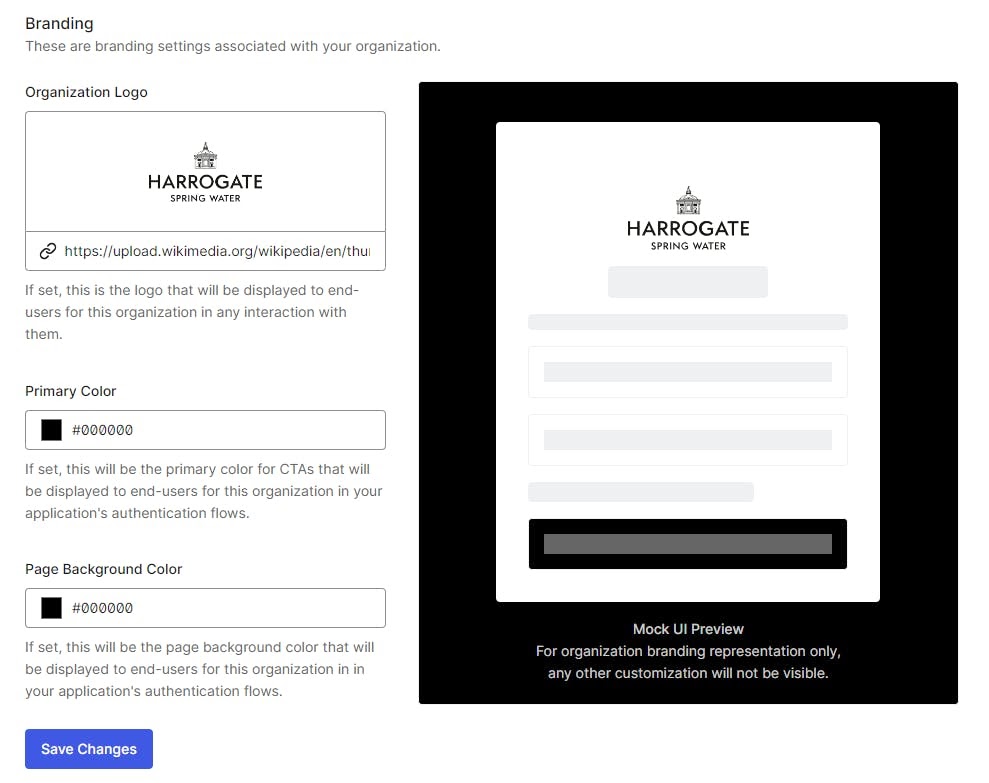
Additionally, we require different branded login screens, enabling each business to access its respective data. User roles will be consistently maintained across the system.
To meet these requirements, we plan to set up Users and Roles within the Identity Provider. Utilizing an API, all User management and Role assignments can be easily handled within APEX, eliminating the need for administrators to log in to the Identity Provider separately.
Advantages of using the Identity Provider:
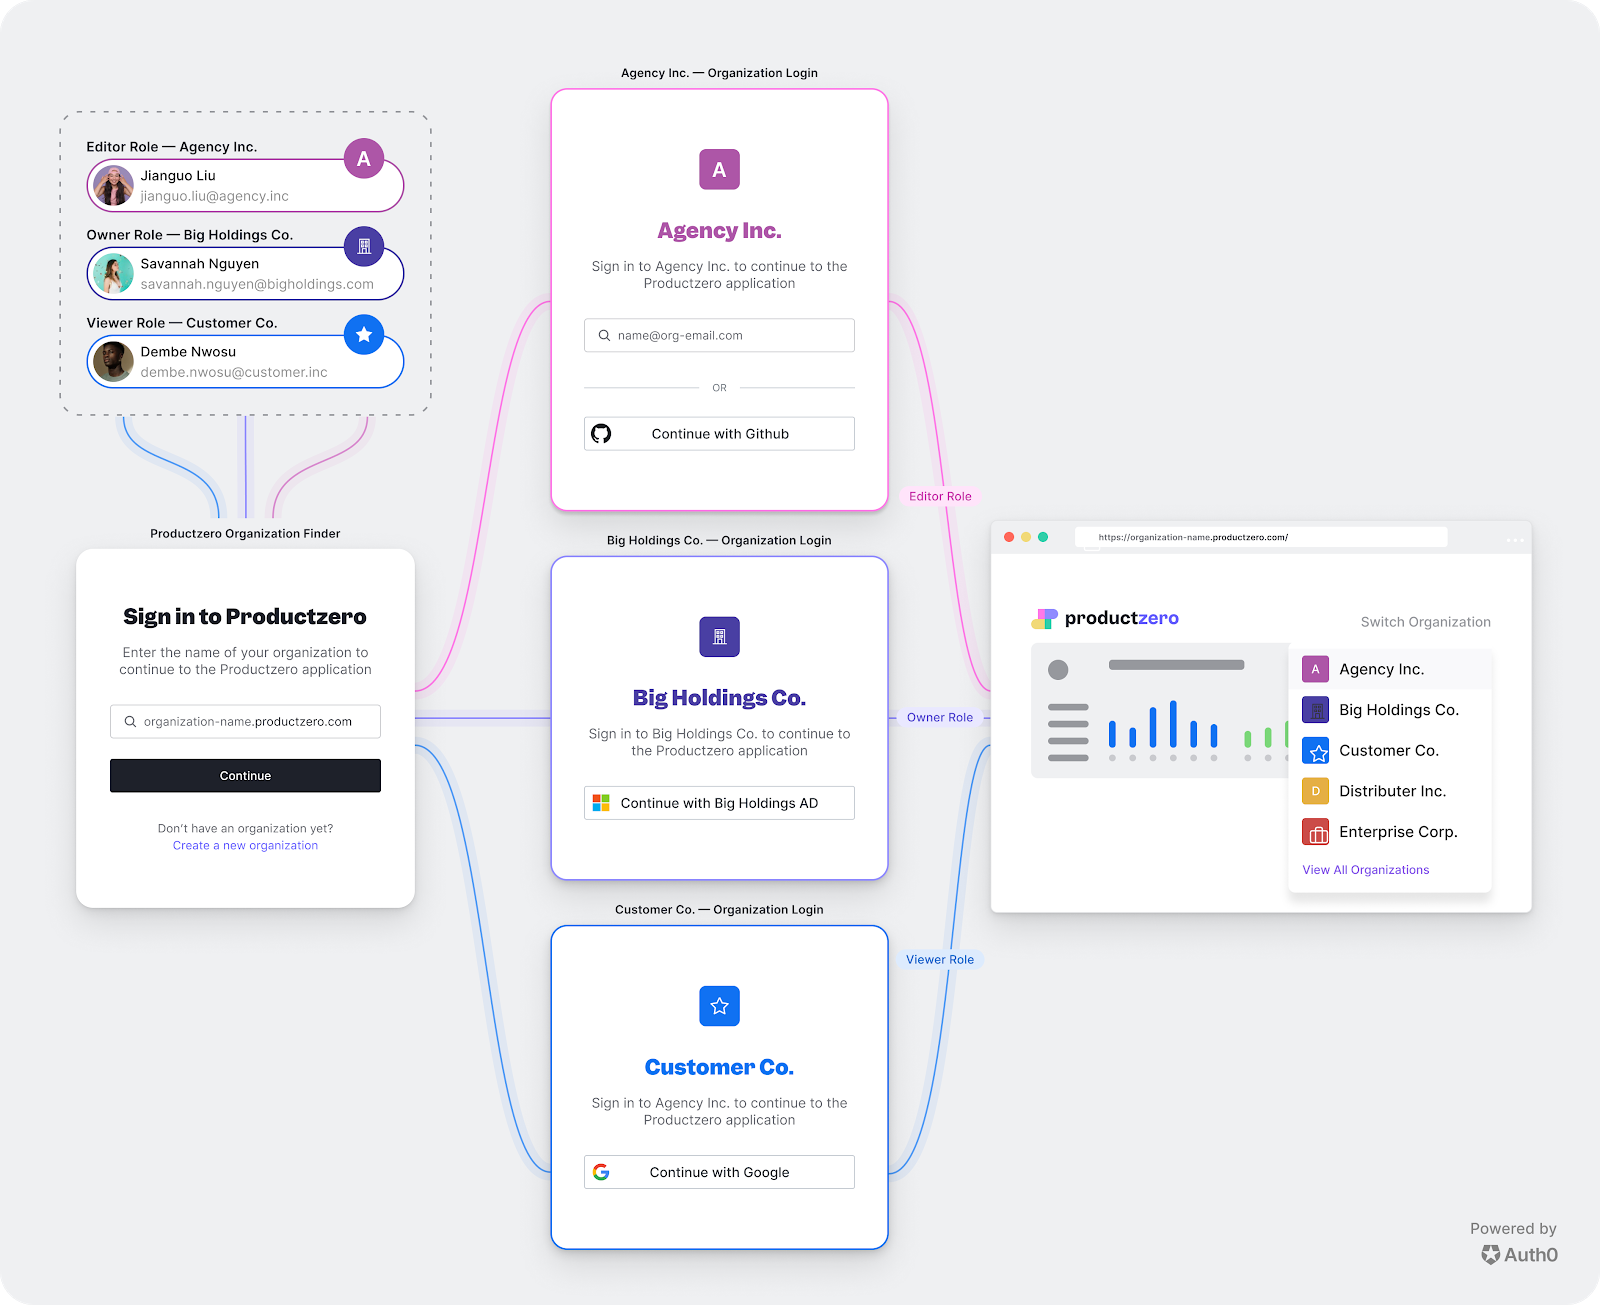
Auth0 provides a feature where organizations can be managed within the tenant. The diagram below shows an example flow. However, in our solution, we will bypass this first sign-in window and have APEX handle that side.
The following steps describe how to set this up.
1. Run the following in SQL Workshop:
select APEX_AUTHENTICATION.GET_CALLBACK_URL from dual;
From the results, just copy everything up to the callback phrase, e.g.:
https://g4cf7-lufatp.adb.eu-frankfurt-1.oraclecloudapps.com/ords/apex_authentication.callback
Paste this into Notepad as the Callback URL.
2. Obtain your APEX Home URL and paste it to Notepad as Home URL:
[BASE URL]/ords/r/[WORKSPACE]/[APP]/home?request=APEX_AUTHENTICATION%3DORGS
E.g.
https://g4cf7-lufatp.adb.eu-frankfurt-1.oraclecloudapps.com/ords/r/wksp_x/z-products/home?request=APEX_AUTHENTICATION%3DORGS
3. Now we need to Encode the Home URL to use it later, so go here, and paste in the Home URL. Find the section of the full URL below:
home?request=APEX_AUTHENTICATION%3DORGS
And replace it with:
home?request=APEX_AUTHENTICATION%3DORGS&x01=
4. Click ENCODE and copy the encoded URL to Notepad as Encoded Login URL.
5. Append the below phrase to the Encoded Home URL in Notepad:
&G_ORG_ID.
The end of the string should look like this:
APEX_AUTHENTICATION%253DORGS%26x01%3D&G_ORG_ID.
1. Sign up for Auth0 – see the plan details for more information. A trial account can access the Organization features, however, you’ll need to upgrade your Auth0 account to use it in production.
2. Once in the Dashboard, click on the top left and copy your AUTH0 Domain to Notepad as AUTH0 Domain. Mine is dev-ipga6 (obfuscated of course).

3. Take this Domain (e.g., dev-ipga6) and Country (e.g., UK), create a discovery URL and save it in Notepad as the Discovery URL, i.e.:
https://YOUR_AUTH0_DOMAIN.COUNTRY.auth0.com/.well-known/openid-configuration
It should look like this, for example:
https://dev-ipga6.uk.auth0.com/.well-known/openid-configuration
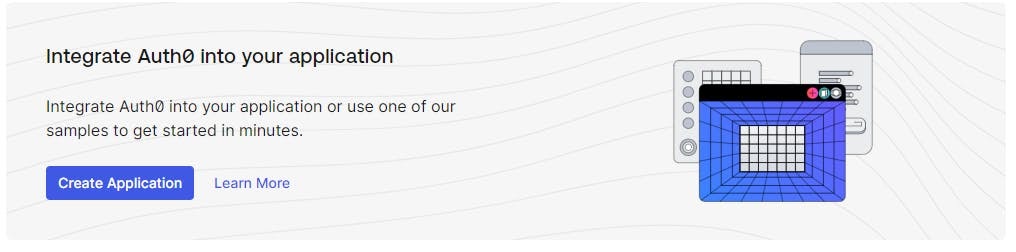
4. Once started, just follow the Create Application Wizard:
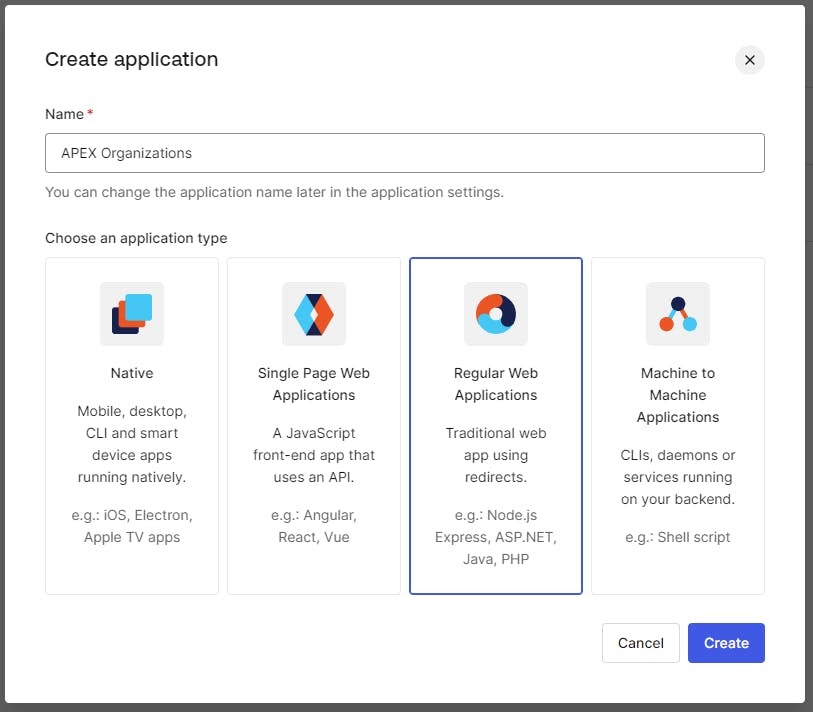
5. Specify Name as APEX Organizations, choose Regular Web Applications, and click Create:
6. When the Quickstart tab shows, immediately switch to the Organizations tab.
7. Click the Disable Grants Now button and Confirm.

8. Wait 30 seconds before continuing.
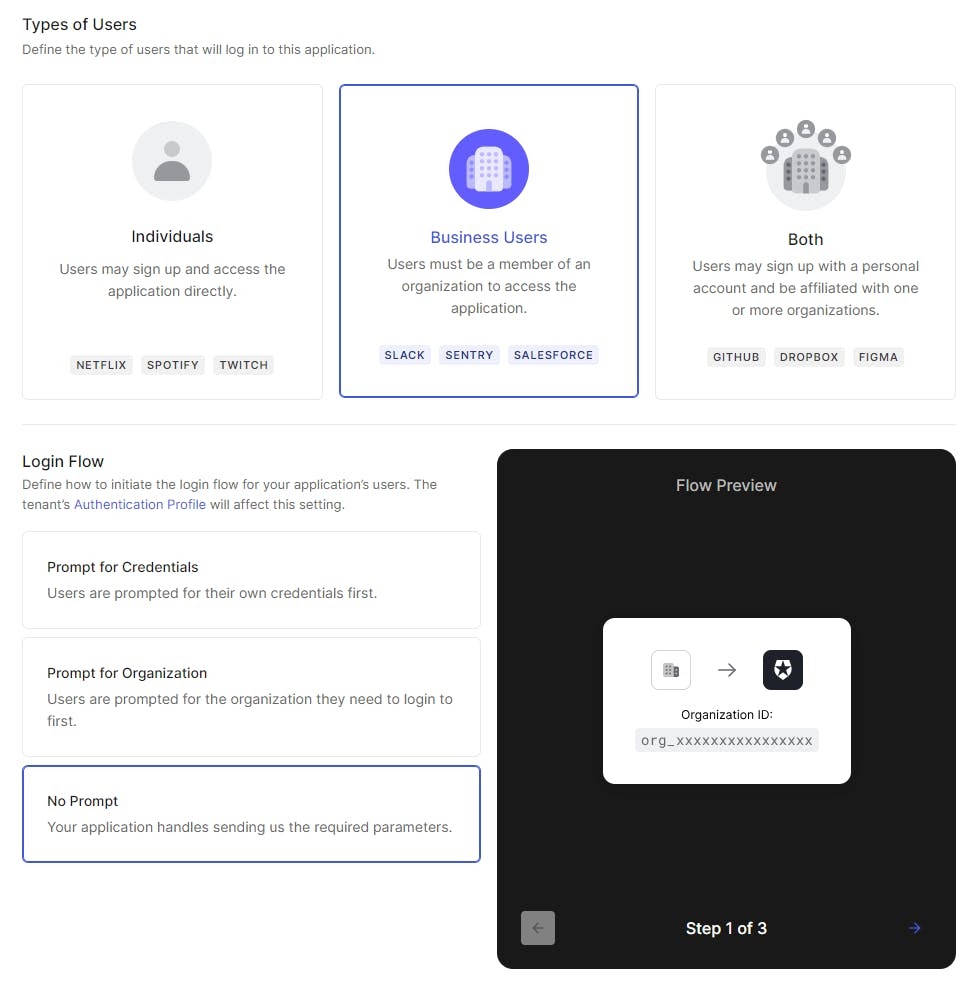
9. Ensure that Business Users & No Prompt are selected. You can choose others but this article is designed for this selection only.
10. Click Save Changes.
11. Wait 30 seconds before continuing.
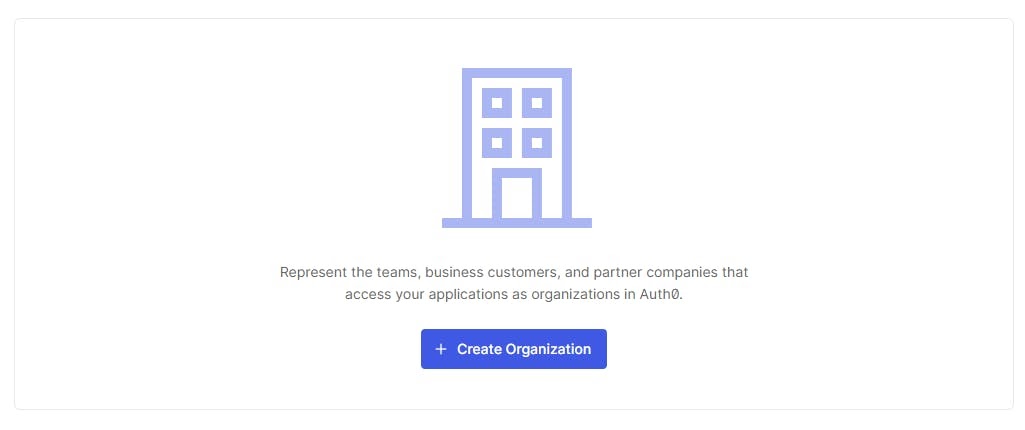
12. Click Organizations in the side menu.
13. Click Create Organization:
14. Enter a lowercase Organization Name and Description:
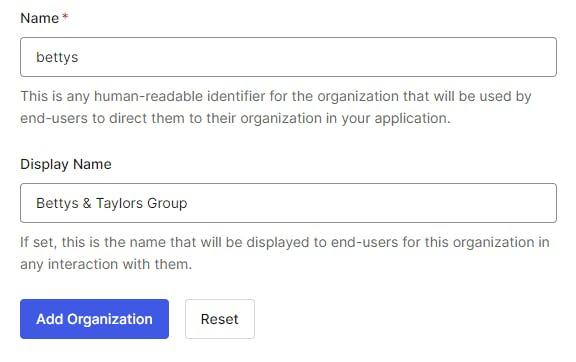
15. Click Add Organization.
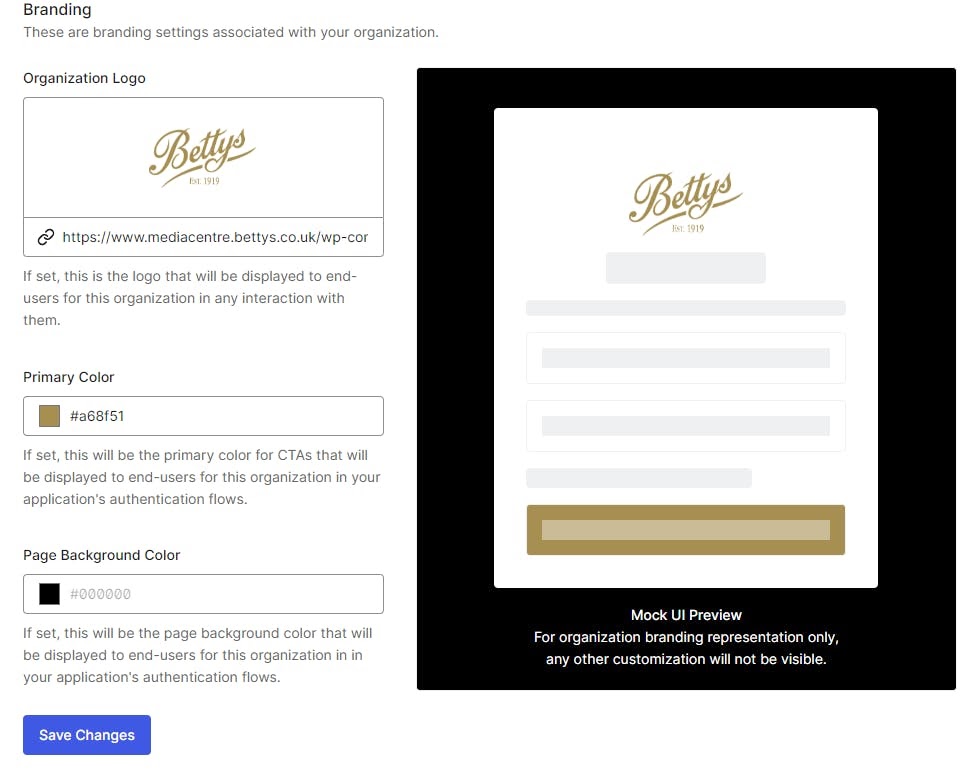
16. At the top, the Organization ID is displayed. Copy this to Notepad as Organization ID.

17. Click Save Changes:
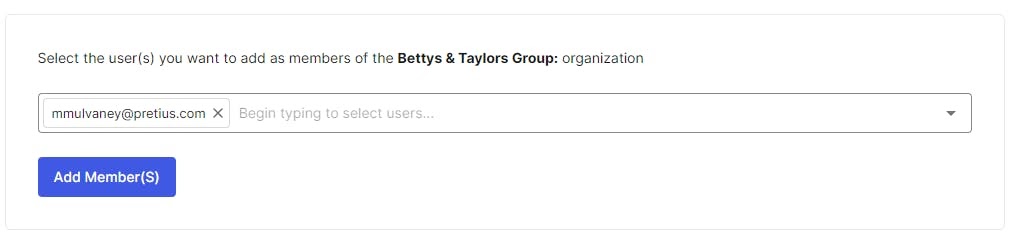
18. Whilst still in Organizations, click Members and Add Member(s) from your users to this Organization. Tip: Use email addresses.
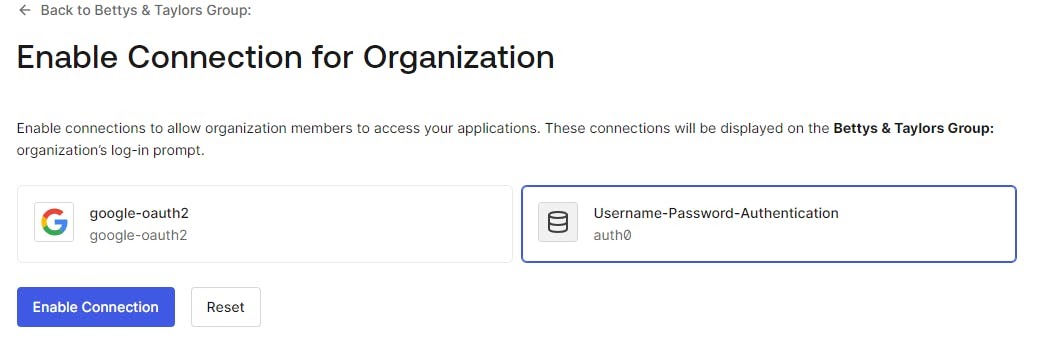
19. Click on Connections and click Enable Connections.
20. Select Username-Password-Authentication and click Enable Connection.
21. Keep Disable Auto-Membership selected.
22. Repeat the above steps for a second organization. For example, here is another one I created:
23. Return to Applications > Applications > APEX Organizations > Connections.
24. Click Enable Connections For Organizations.

25. Switch to the Settings tab.
26. Copy the Client ID and Client Secret to Notepad.
27. Copy the Home URL from Notepad (not the encoded one) to the Application Login URL, e.g.:
https://g4cf7-lufatp.adb.eu-frankfurt-1.oraclecloudapps.com/ords/r/wksp_x/z-products/home?request=APEX_AUTHENTICATION%3DORGS
28. Copy the Callback URL from Notepad to the Allowed Callback URLs, e.g.:
https://g4cf7-lufatp.adb.eu-frankfurt-1.oraclecloudapps.com/ords/apex_authentication.callback
29. In Allowed Logout URLs, paste in the Home URL without any parameters, meaning it ends with /home like this:
https://g4cf7-lufatp.adb.eu-frankfurt-1.oraclecloudapps.com/ords/r/wksp_x/z-products/home
30. Click Save Changes.
31. Click on Applications > APIs and copy the API Audience (next to Auth0 Management API) to the clipboard and then paste into Notepad as the API Audience.
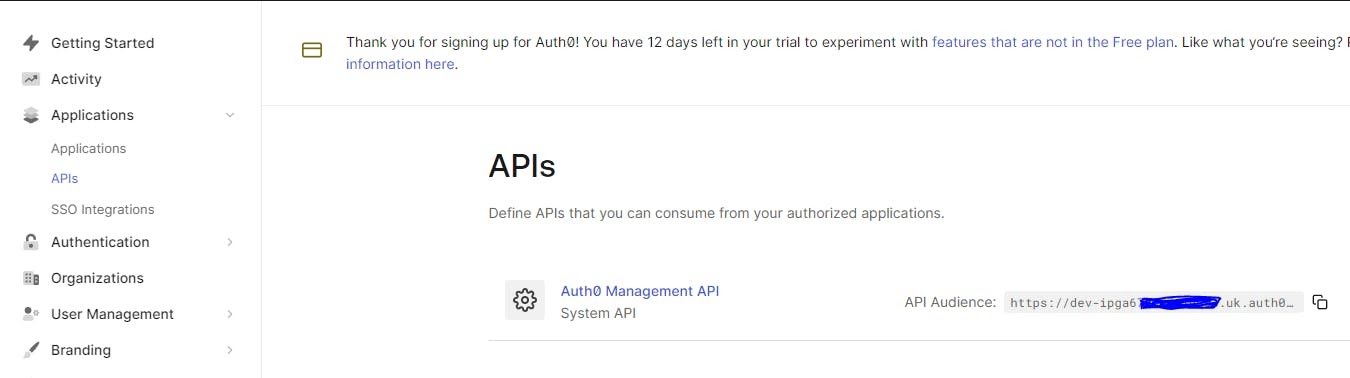
Note: The API Audience appears in my PL/SQL code below, however, the code assumes how it’s named. If you see any audience issues, please adjust the PL/SQL code accordingly.
32. Click on Auth0 Management API.
33. Click on Machine To Machine Applications and Authorize the APEX Organizations application.
34. On the Permissions (Under APEX Organizations application, just might have to click the Up chevron), select the following three permissions and click Update:
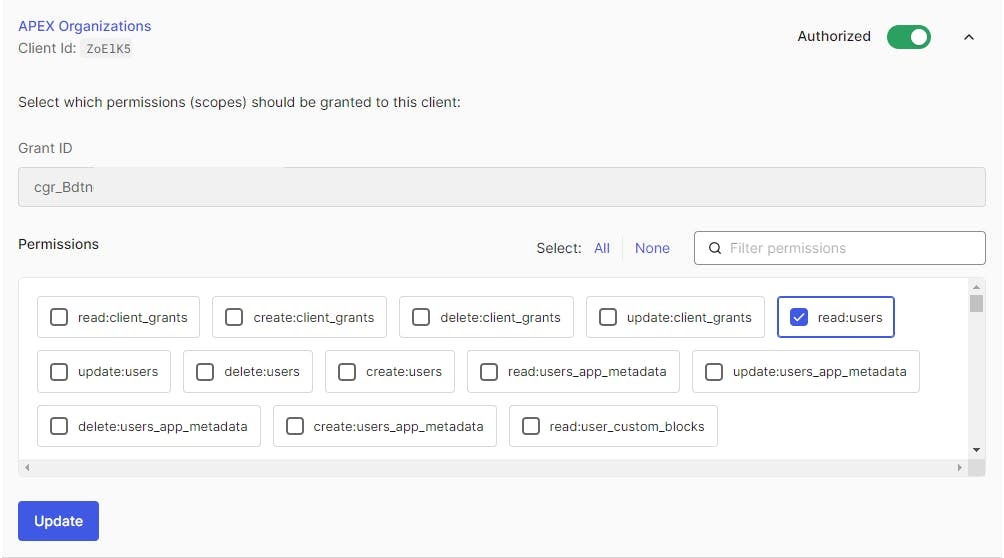
These permissions allow you to use the Management API to find the Roles the user is assigned to.
35. Click on User Management > Roles > Create Role.
36. Create three test roles (for demonstration, you can remove them later):
37. Click on User Management > Users.
38. Click the three dots/ellipses next to your Username and change your password (I don’t know why. I had to do this before the first login).
39. Click on your Username > Roles.
40. Assign all roles you just created to your username.
1. In APEX click App Builder > Workspace Utilities > Web Credentials > Create.
Use the following table:
| Name: | ORGS |
| Client ID or Username: | Paste Client ID from Notepad |
| Client Secret or Password: | Paste Client Secret from Notepad |
| Verify Client Secret or Password: | Paste Client Secret from Notepad |
2. Click Create.
3. Click Shared Components > Authorization Schemes > Create > Next.
4. Use the following details:
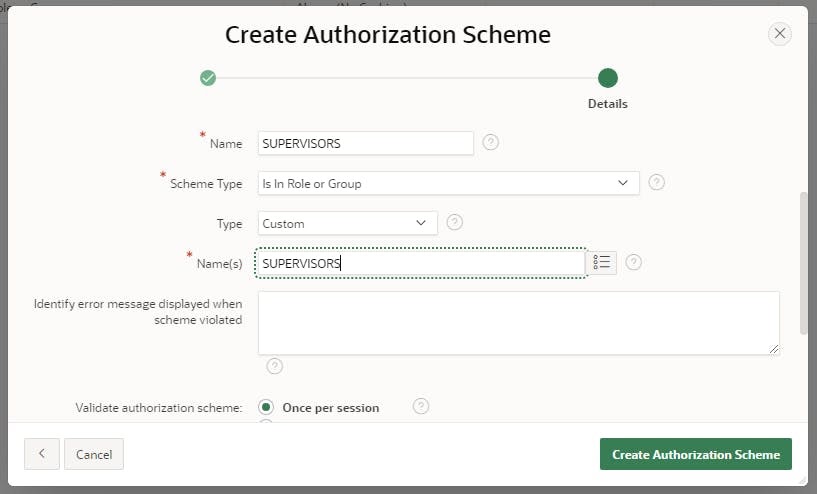
5. Click Create to create a new Authorization Scheme and click Next.
6. Repeat the above steps to create Authorization Schemes for MANAGERS and SUPERUSERS (as appropriate).
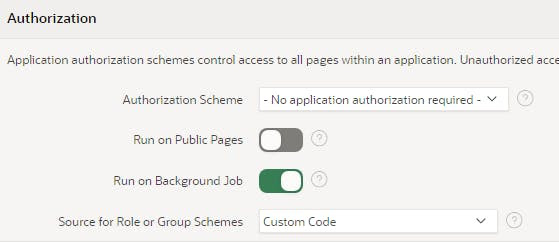
7. Click Shared Components > Security Attributes > Source for Role or Group Schemes and set it to Custom Code.
8. Click APEX Application > Shared Components > Application Items > Create.
9. In Name type G_SUB and click Create Application Item.
10. Click APEX Application > Shared Components > Application Items > Create.
11. In Name type G_ORG_ID and click Create Application Item.
12. Click APEX Application > Shared Components > Authentication Schemes > Create.
13. Click Next on Based on a pre-configured scheme from the gallery.
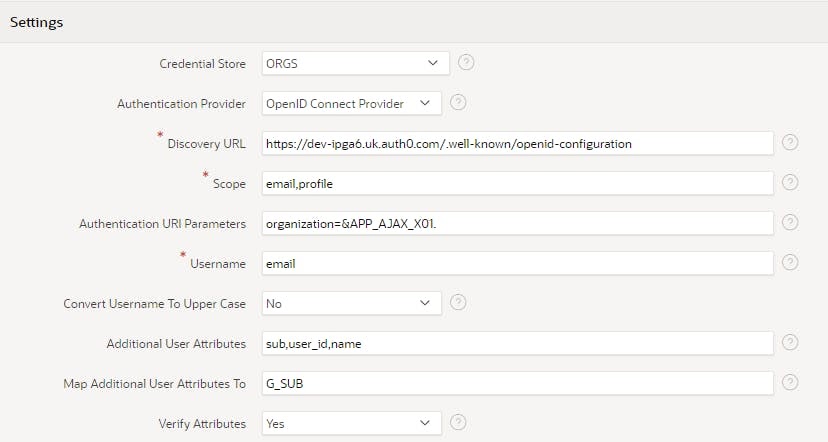
14. Use the following table:
| Name: | ORGS |
| Scheme Type: | Social Sign-In |
| Credential Store: | ORGS |
| Discovery URL: | Paste Discovery URL from Notepad |
| Scope: | email,profile |
| Authentication URI Parameters: | organization=&APP_AJAX_X01. |
| Username: | |
| Additional User Attributes: | sub,user_id,name |
| Map Additional User Attributes To: | G_SUB |
15. Click Create Authentication Scheme.
16. Click on ORGS Authentication Scheme.
17. Set Switch in Session to Enabled.
18. In the Post-Logout URL, set Go To to URL.
19. Set URL to this:
https://YOUR_AUTH0_DOMAIN.COUNTRY.auth0.com/v2/logout?returnTo=[ENCODED HOME URL]&client_id=[YOUR CLIENT ID]
E.g.:
https://dev-ipga6.uk.auth0.com/v2/logout?returnTo=https%3A%2F%2Fg4cf7-lufatp.adb.eu-frankfurt-1.oraclecloudapps.com%2Fords%2Fr%2Fwksp_x%2Fz-products%2Fhome%3Frequest%3DAPEX_AUTHENTICATION%253DORGS%26x01%3D&G_ORG_ID.&client_id=ZoElK
This should ensure that you can log out of APEX & AUTH0 and then return to the APEX Application’s AUTH0 login page under the same Organization.
20. In the Source > PL/SQL Code, paste the code below, replacing the three constant default values with your credentials:
PROCEDURE p_post_processing
IS
    l_token_clob     CLOB;
    l_clob          CLOB;
    j apex_json.t_values;
    l_domain CONSTANT VARCHAR2(32767) DEFAULT 'https://dev-ipga6.uk.auth0.com';
    l_client CONSTANT VARCHAR2(32767) DEFAULT 'nj7ERT';
    l_secret CONSTANT VARCHAR2(32767) DEFAULT 'd1VjYS';
    l_token  CLOB DEFAULT empty_clob;
    l_sub    VARCHAR2(32767) DEFAULT apex_util.url_encode(:G_SUB);
    l_group_names apex_t_varchar2;
BEGIN

    :G_ORG_ID := apex_json.get_varchar2('org_id');

    apex_web_service.set_request_headers(
        p_name_01        => 'Content-Type',
        p_value_01       => 'application/json' );

    l_token_clob := apex_web_service.make_rest_request(
        p_url => l_domain || '/oauth/token',
        p_http_method => 'POST',
        p_body => apex_string.format(
                  '{"client_id":"%0",
                    "client_secret":"%1",
                    "audience":"%2/api/v2/",
                    "grant_type":"client_credentials"}',
                    l_client,
                    l_secret,
                    l_domain ));

    apex_json.parse(j, l_token_clob);
    l_token := apex_json.get_clob(p_path=>'access_token',p_values=>j);

    apex_web_service.clear_request_headers;

    apex_web_service.set_request_headers(
        p_name_01        => 'Accept',
        p_value_01       => 'application/json',
        p_name_02        => 'Authorization',
        p_value_02       => 'Bearer ' || l_token );

    l_clob := apex_web_service.make_rest_request(
        p_url => l_domain || apex_string.format('/api/v2/users/%0/roles',l_sub),
        p_http_method => 'GET' );

    apex_json.parse(p_values => j, p_source => l_clob);

   FOR i IN 1 .. apex_json.get_count(p_path=> '.', p_values=> j)
   LOOP
        -- add all group names to l_group_names
         apex_string.push (
                  p_table => l_group_names,
                  p_value => apex_json.get_varchar2(p_path=>'[%d].name',p0=> i,p_values=>j) );

   END LOOP;

    -- save group names in session
    apex_authorization.enable_dynamic_groups (
        p_group_names => l_group_names );

END p_post_processing;
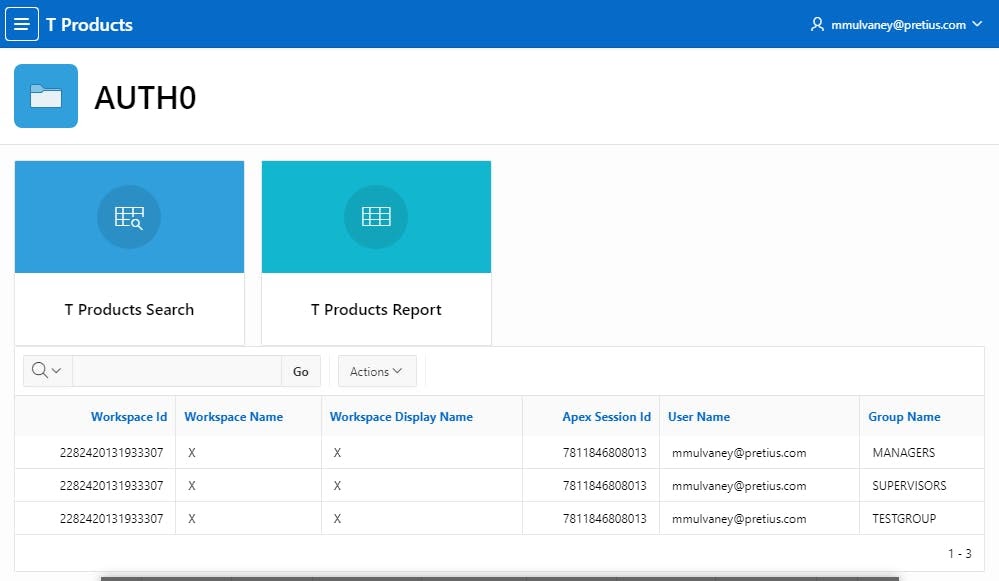
21. On Page 1, add an Interactive Report region using the following SQL statement:
select *
  from APEX_WORKSPACE_SESSION_GROUPS
 where apex_session_id = :APP_SESSION
22. This will show you the AUTH0 Roles that have been translated into Dynamic Groups.
Optionally, you can add a test. You can add the MANAGERS, SUPERVISORS or SUPERUSERS APEX Authorization Schemes to APEX Components, to test that the Authorization is working correctly.
1. Prepare your application URL like this:
[BASE URL]/ords/r/[WORKSPACE]/[APP]/home?x01=[ORGANIZATION ID]&request=APEX_AUTHENTICATION%3DORGS
E.g.:
https://g4cf7-lufatp.adb.eu-frankfurt-1.oraclecloudapps.com/ords/r/wksp_x/z-products/home?x01=org_Wahz&request=APEX_AUTHENTICATION%3DORGS
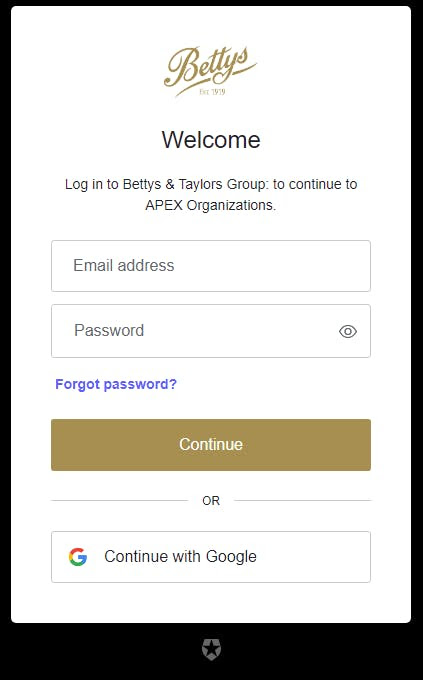
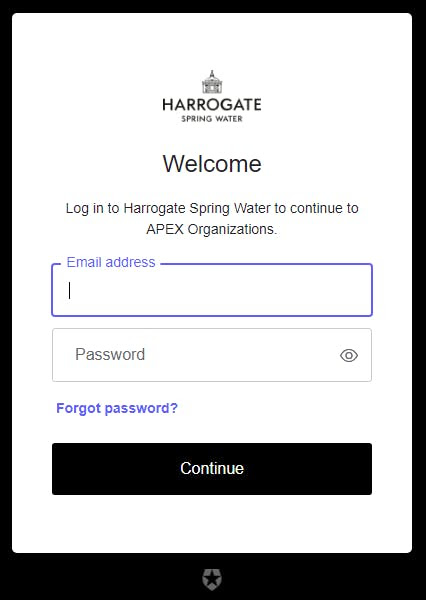
2. Paste your URL into a browser tab & you’ll see a Login Screen. Enter your AUTH0 User Credentials and click Continue:
3. Once in your APEX application, you should see the Auth0 Roles, mapped to APEX Authorizations and correctly observed by APEX. You should also see three entries in your Interactive Report:
4. Sign out of APEX, and you will see the Auth0 Login screen again, all set to log back into your APEX application.
5. Next, try signing in with a different organization:
6. Auth0 will also provide you with the org_id when you login:
In the code above, we grab the org_id and store it in G_ORG_ID. This is significant should you wish to implement a VPD (as explained in my other blog post on Achieving a SaaS Model for multi-tenant APEX Applications using Oracle IAM Domains). G_ORG_ID is also used within the signout URL, so on logout, it diverts the user back to their organization sign-in page.
And that’s about it. Thanks to Jon Dixon for pointing out the X01 method. If you’re wondering about possible next steps, you can distribute the URLs to your users or use a reverse proxy like Caddy to prettify your URLs. If you’re interested in that, see more on this in my Caddy article. You can also check out my other contributions on the Pretius blog:


