Nowadays, chatbots are becoming more and more popular, and allow for more significant interaction with users. But is it possible to combine Google Assistant with an Oracle database, and integrate it with APEX?
Imagine that you are a sales representative, just say to your phone: “OK Google, talk to hi APEX” and you can ask the chatbot about the next place on the list to visit today. Are you running out of reagents in a laboratory? The contract with an important customer is about to expire? Nothing easier! Just ask your Google Assistant for any information downloaded directly from the database, without distracting yourself from your activities.
This article provides general information on how to implement the Google Assistant chatbot in an APEX application. First, we will outline the assumptions made, the general architecture of the chatbot implementation, and the general workflow. Later on, we will include more technical information and samples of the final implementation.
If you’re interested in chatbots and assistants, check out our other articles:
Assumptions made regarding database and APEX
To start working with Google Assistant, you have to create an application that is open to the internet. The fastest way to achieve this is to create an APEX workspace at https://apex.oracle.com (go to ‘Sign In’) and create a new, blank application. This method has one flaw: you won’t have access to any of your databases through SQL Developer. If this is a must, we suggest that you create the same schema/workspace/application in the localhost, and after preparing your database, migrate it (via export/import) to your workspace at apex.oracle.com. Remember, that you must install the Oracle Rest Data Service (ORDS) on your (local) database in order for it to be accessible by Google Assistant. It is also possible to add Google Assistant to your existing application if you want to access your existing database.
A few words about Dialogflow and Actions on Google
Dialogflow is a tool provided by Google that allows you to architect conversations between end-users and Google Assistant. This tool offers many built-in conversation templates and also allows you to create special, unique questions that directly query the database. Imagine, for example, that you wanted to add your own welcome response to a user saying hi or good morning, say having Google Assistant respond with “good morning sunshine !” or “hi, I’ve been waiting for you forever :)” – in Dialogflow it’s simple!
Maybe you wanted specific information from a table in the database (e.g., EMPLOYEES), for example asking: “Could you tell me which department Steven King works in?” – you can also do this in Dialogflow! (check out the exact implementation in part 2).
Actions on Google is another tool created for developers to extend Google Assistant and release their own version. To use it, you must first fulfill a few mandatory conditions like entering the name of your bot and specifying a Privacy Policy. Instructions are given at every step and are clear and user-friendly. When you fulfill all the necessary conditions, your bot will be ready for deployment but must first be verified. You will have to send your prepared version for verification to Google, and after they verify it, they will contact you and give you information about whether your bot was approved or denied, and about any changes you need to make. This process can take anywhere from a few hours to a day. Should your bot be rejected, don’t worry! You will be told why it was rejected and what changes you should make before reapplying. Finally, once your Google Assistant is verified, you can deploy it to many devices (e.g., Google Home, Android, iOS)!
What do I have to do in APEX?
The APEX side of things is straightforward. Since you are provided with some HTML code by Dialogflow to setup an iframe for the assistant, you can simply paste the given code into your APEX web page and enjoy a friendly chat with your new bot.
An example of implementation:
Prepare APEX application
The following part contains technical information, problems I encountered during the creation of my personal Google Assistant and their solutions. Despite the vast amount of documentation freely available from Google, there isn’t a clear path on how to connect your bot with an Oracle database. This is not a manual for creating a bot, which is identical to the one in the movie at the end of the article (this is an example – my interpretation of using data from the Oracle database).
I have to remind you that you need to prepare the app, which should be visible across the internet. It should be port forwarded and have some form of static IP, be it via a Dynamic DNS service or an actual static IP address.
If you don’t want to develop your application at https://apex.oracle.com, or can’t get a static IP, there is a solution. You can use the free ngrok tool (https://ngrok.com/). After signing up to ngrok and downloading their command-line tool, write the following into the command prompt:
|
1
|
ngrok http 8080
|
Once you have ngrok running, it will forward any traffic bound for your localhost (127.0.0.1) at the specified port to a web address on ngrok.io. The web address looks like https://XXXXXXXX.ngrok.io, where XXXXXXXX is random letters and numbers. This web address will be used later during the bot creation process.
Step-by-step tutorial in APEX or database/SQL developer
Remember that you have to install Oracle Rest Data Service (ORDS) on the database. In Modules, you have to create a POST send method.
You can create the same method at apex.oracle.com (without SQL Developer).

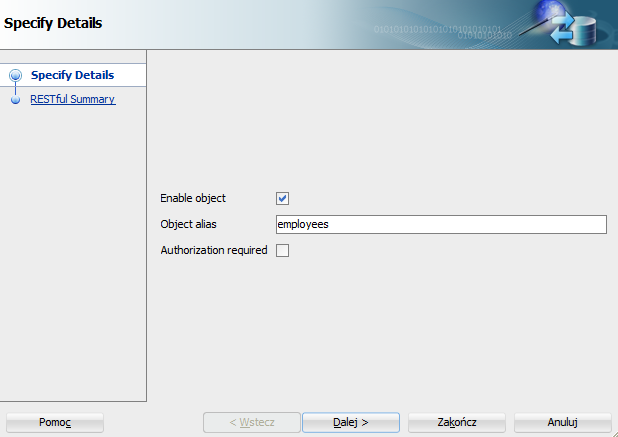
When you want to use a table or a view, you have to enable it in your REST Service. To do that, right-click (RMB) on an object, and select the following: Enable REST Service… > Enable object > Object alias, and alias the object. Make sure to disable the ‘Authorization required’ checkbox, and click Next and Finish.
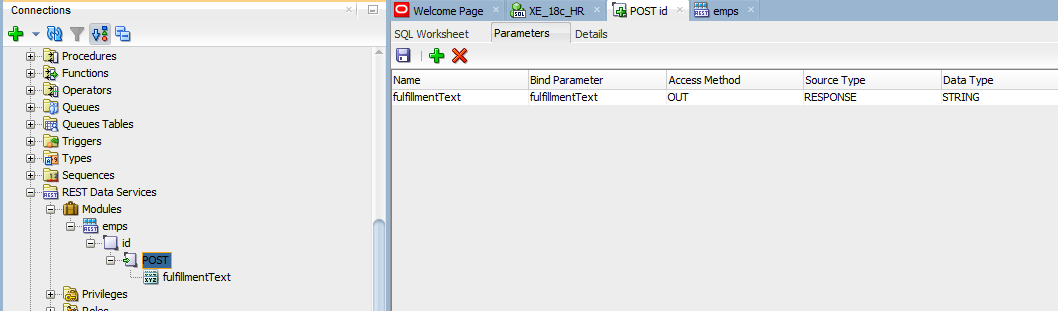
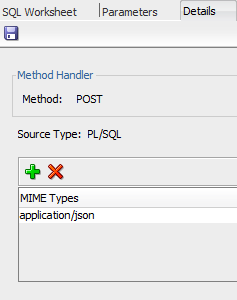
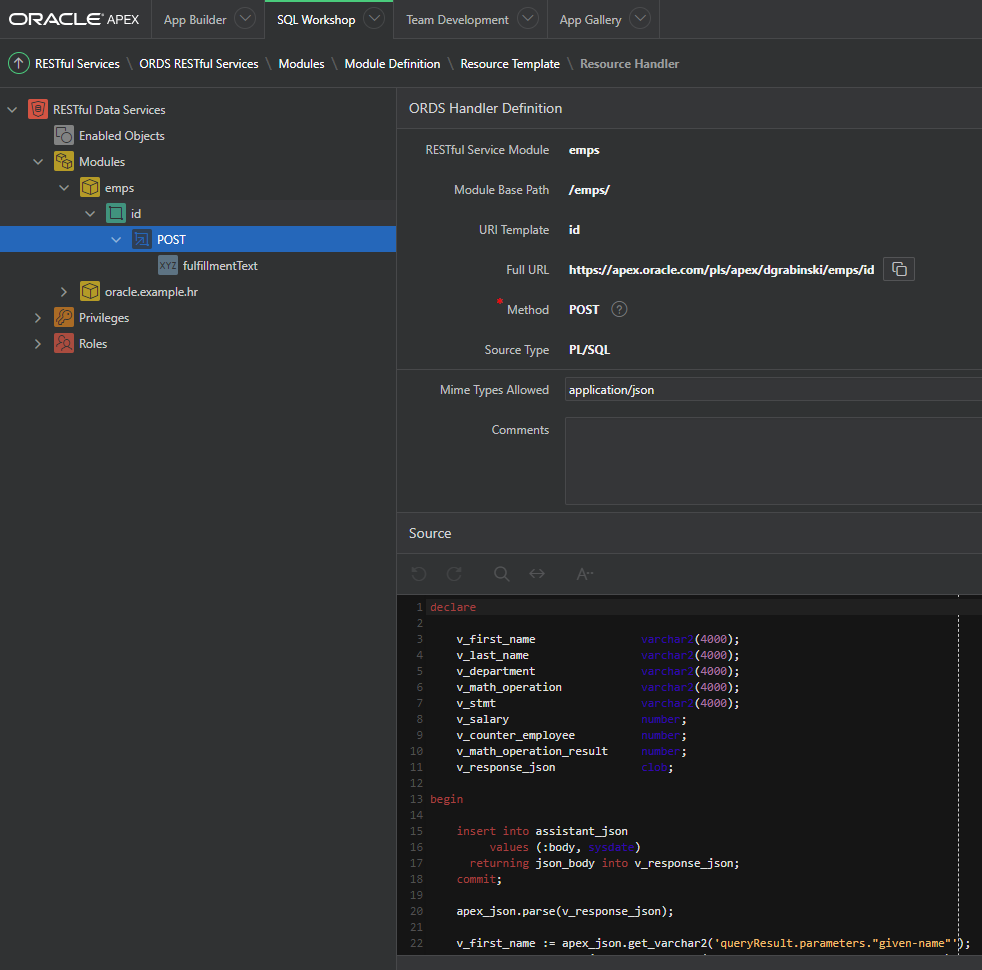
Right-click (RMB) on the POST method and click Edit… . Go to the Parameters and add a response parameter. Name it fulfillmentText, identically to what is shown on the screen below (this variable name is very important, because it’s a part of response JSON from Dialogflow).
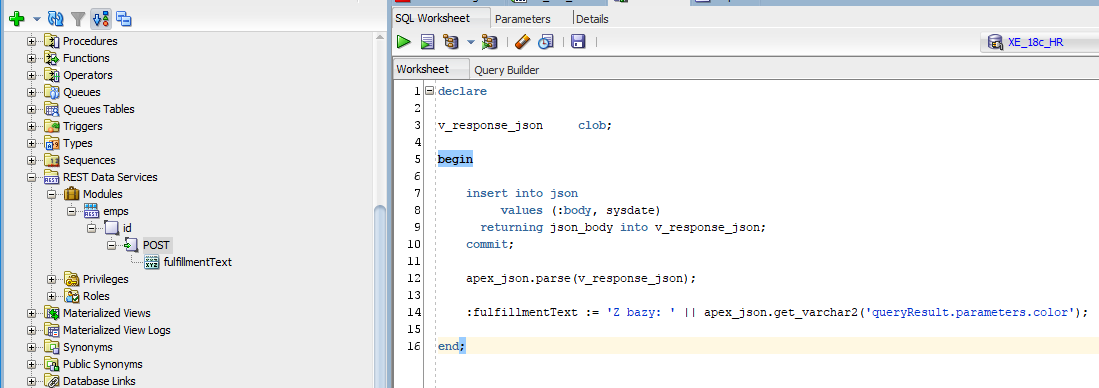
Go to the SQL Worksheet – here, you can add all the logic that you want. Remember that fulfillmentText is the variable that holds the response the assistant will use for your question.
Useful tip#1:
In SQL Worksheet, you also have the hidden variable :body. This is the response JSON from the assistant. Should you want to see what the assistant is returning, just create a new database table with the following structure: json_table (json_body CLOB, creation_date DATE), and write the following insert statement:
|
1
2
3
4
5
6
|
INSERT INTO json_table VALUES (
:body,
sysdate
) RETURNING json_body INTO v_response_json;
COMMIT;
|
Now you can see what’s inside the :body and have JSON in the v_response_json variable which you can then parse (using ‘apex_json.parse(v_response_json)’) and get useful information from it:
|
1
|
apex_json.get_varchar2(‘queryresult.parameters.color’);
|
Useful tip#2:
When you want to get the value of a parameter whose name contains a dash (‘-’), you have to put its name into quotation marks:
|
1
|
apex_json.get_varchar2(‘queryresult.parameters.”last – name”‘);
|
Useful tip#3:
You can add application/json as a MIME type to your POST method, as seen on screen:
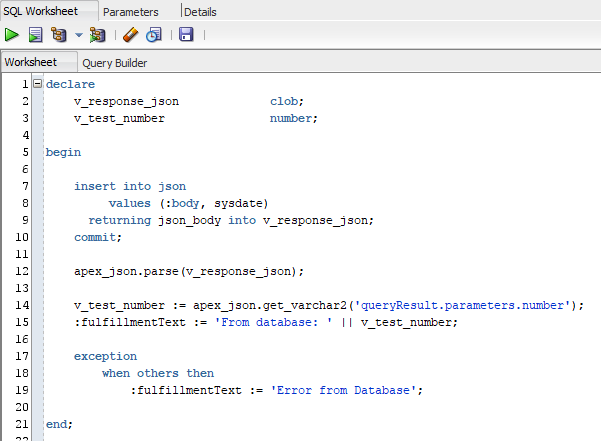
 Here is a snippet of code (from the SQL Worksheet) that will help you get your answer from the database:
|
1
2
3
4
5
6
7
8
9
10
11
12
13
14
15
16
|
DECLARE
v_response_json CLOB;
BEGIN
— check response JSON body from assistant
INSERT INTO json VALUES (
:body,
sysdate
) RETURNING json_body INTO v_response_json;
COMMIT;
— parse JSON
apex_json.parse(v_response_json);
— get from JSON value which is important for you, add phrase “From database” to check that everything works fine
:fulfillmenttext := ‘From database: ‘ || apex_json.get_varchar2(‘queryResult.parameters.number’);
END;
|
Now it’s time to prepare chat in Dialogflow and release in Actions on Google.
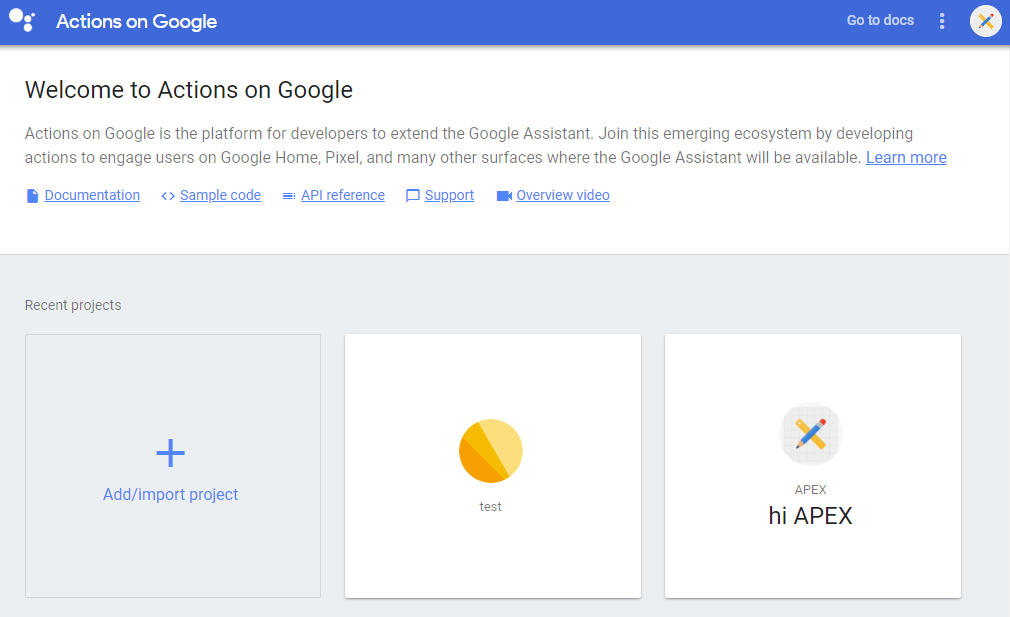
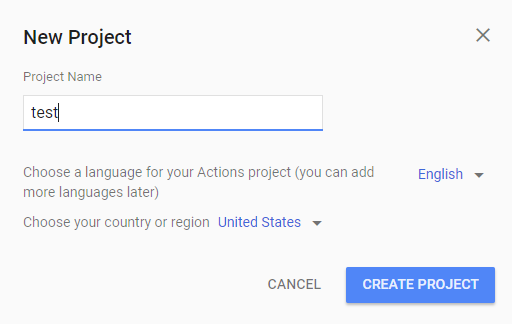
Go to https://console.actions.google.com, log in with your Google account, click Add/import project, enter a new project name, and click CREATE PROJECT:
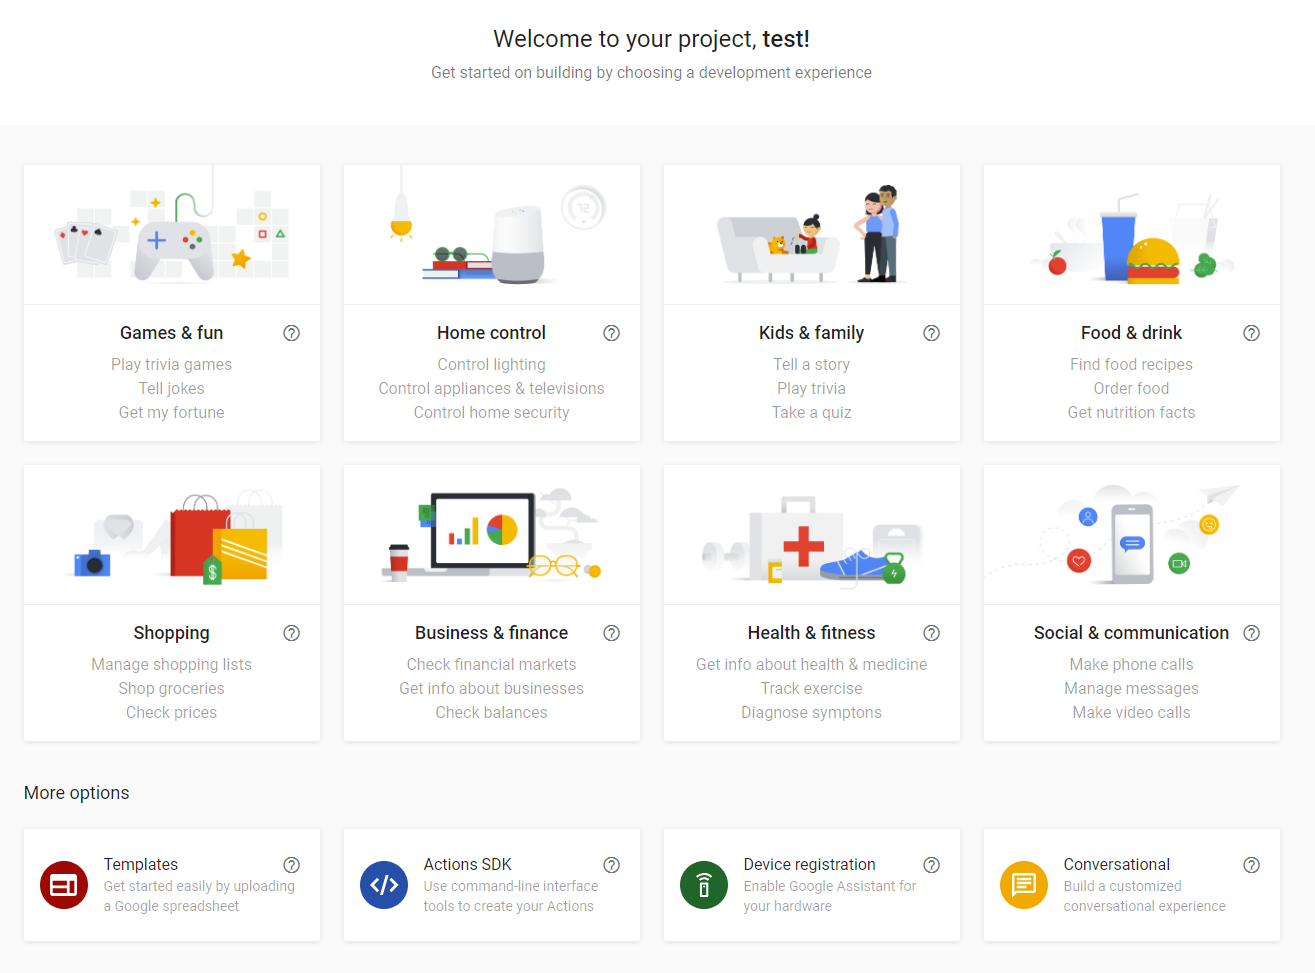
Choose the Conversational template (bottom right):
Useful tip#4:
Remember to create 2 projects (the second one could have any name and function), I had problems trying to test my chatbot with only one project.
Go to https://console.dialogflow.com and click CREATE AGENT:

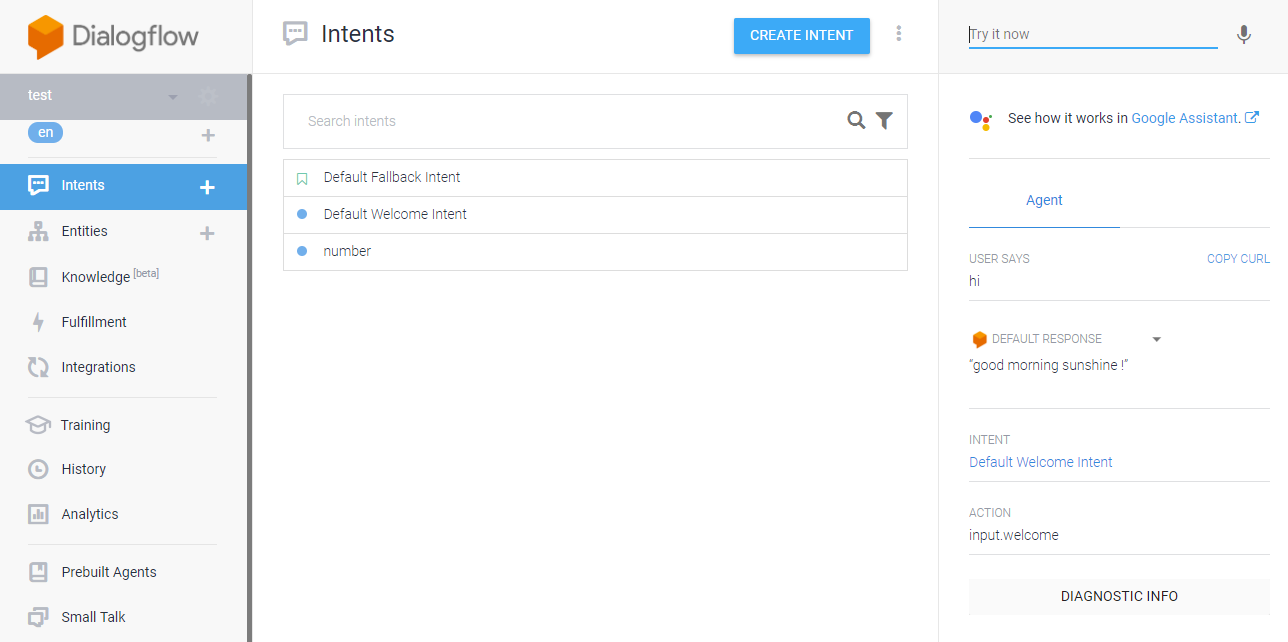
Enter a name, leave the default options, and click CREATE. You should be on this page:
![]()
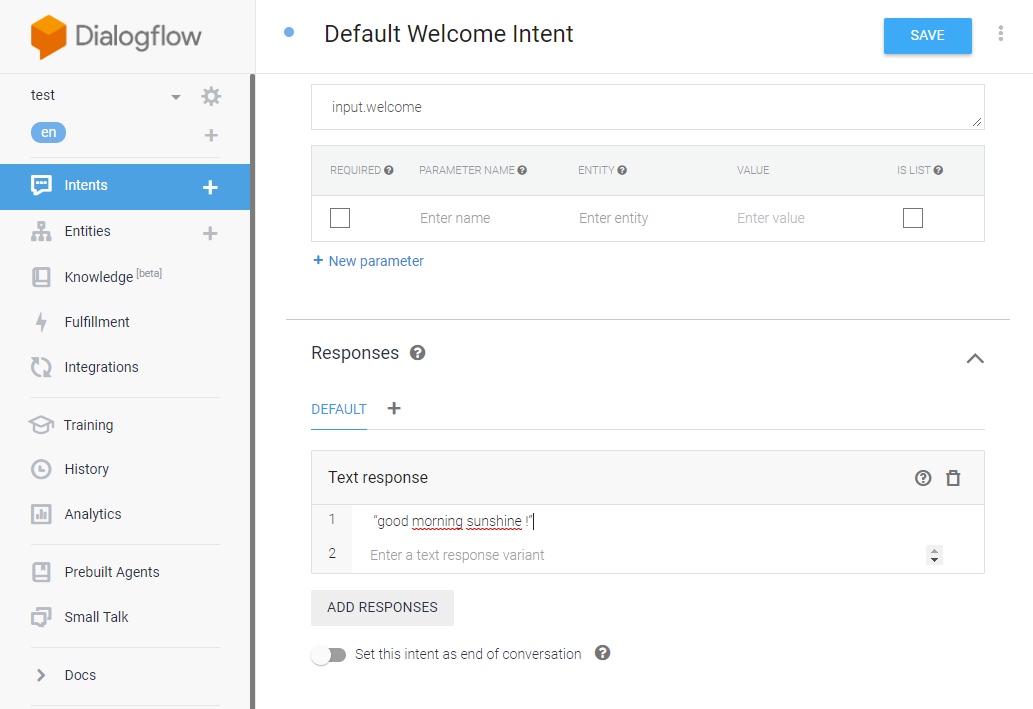
Click on the Intents (left menu) and go to Default Welcome Intent, click on Events and add Google Assistant Welcome (now your bot will answer on all devices with Google Assistant like Google Home, any devices with iOS 10.0+ and Android 6.0+).

Go to Responses, delete all default texts, and add something of yours like “Good morning sunshine !” (by testing the bot you will be sure that you are talking to that one which you prepared) and click SAVE.
Now it’s time to add your own intent. Go to Intents, click CREATE INTENT, and write in the Intent name placeholder, for example number, and press Training phrases:
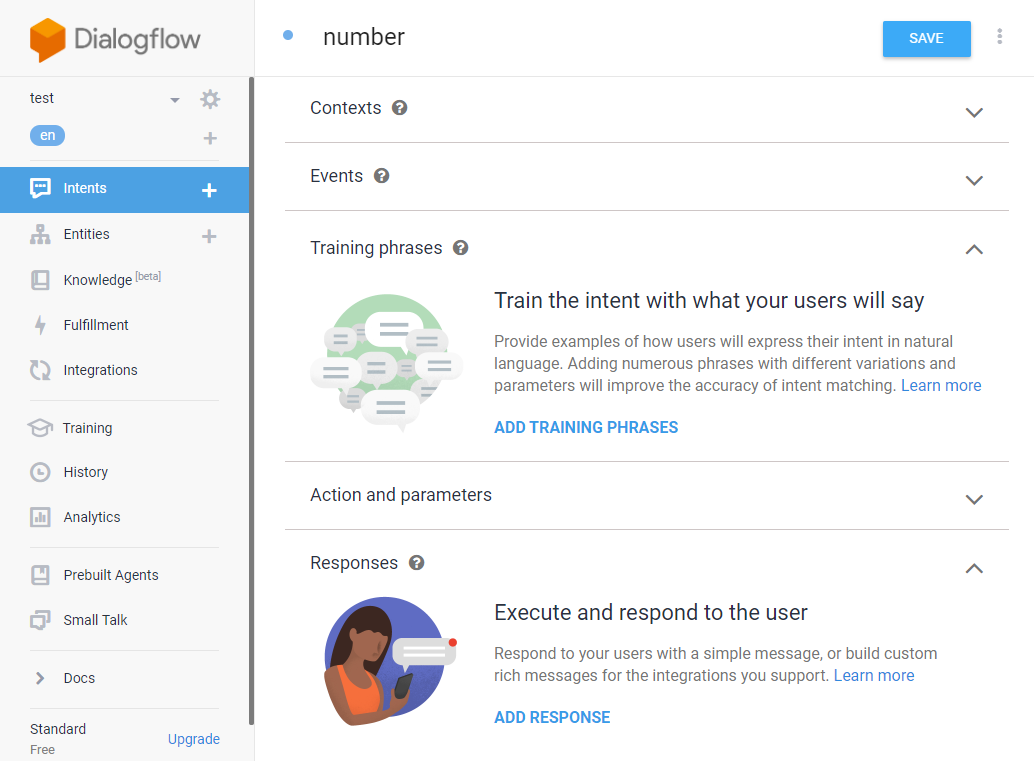
Give it a few of your own phrases, like ‘tell me 7’ or ‘give me three’ (the more expression you give it the better). As you can see, numbers are highlighted. That’s because Dialogflow detected a built-in Entity. Press MANAGE PARAMETERS AND ACTION:
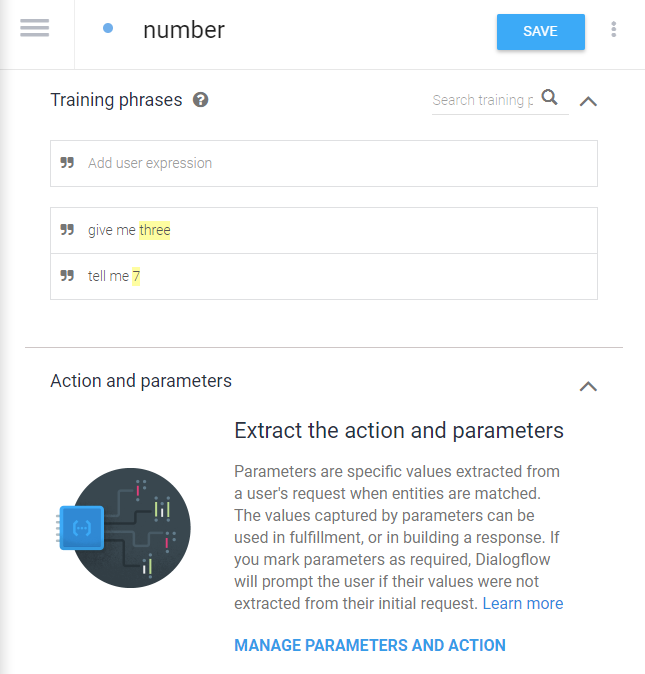
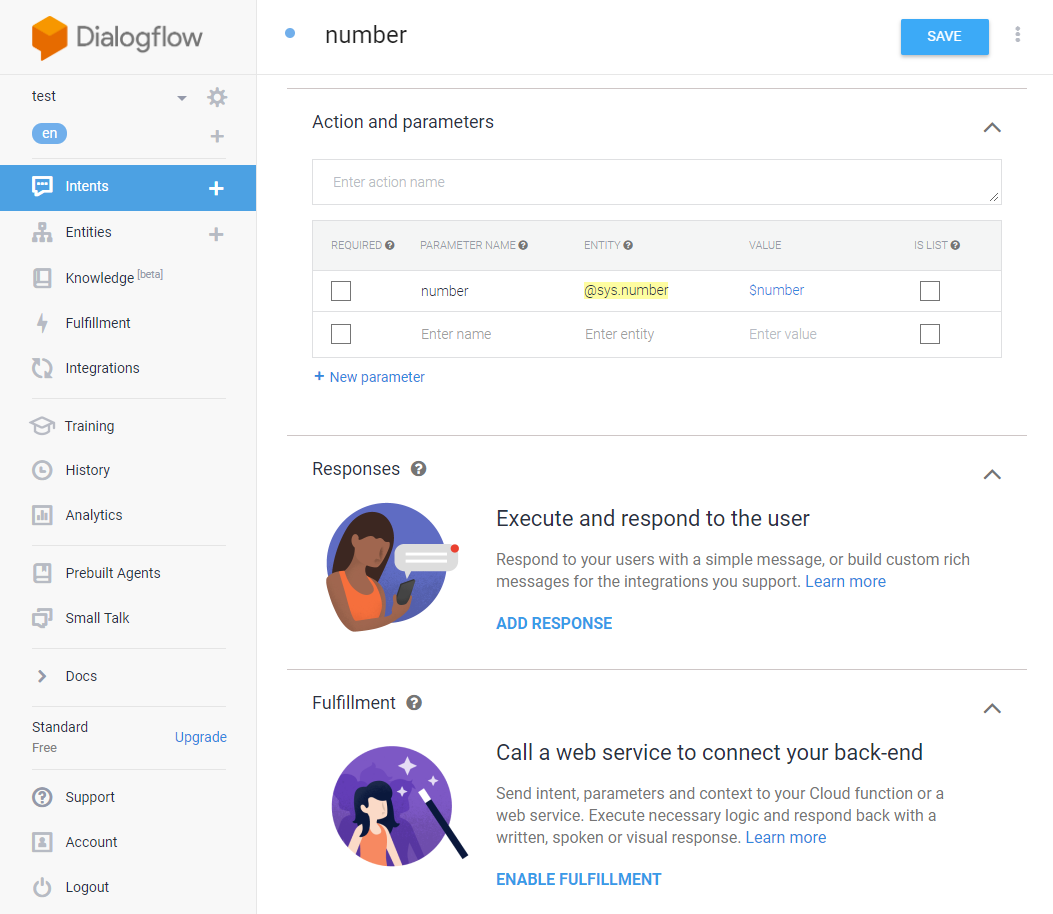
Now in the Action and parameters region, ‘@sys.number’ is highlighted at the same color (a reference to the entity). You can enable this parameter as REQUIRED and add PROMPT (a question that the assistant will ask when asking about this variable), leave REQUIRED as disabled, skip Responses and go to the Fulfillment region, and click ENABLE FULFILMENT:
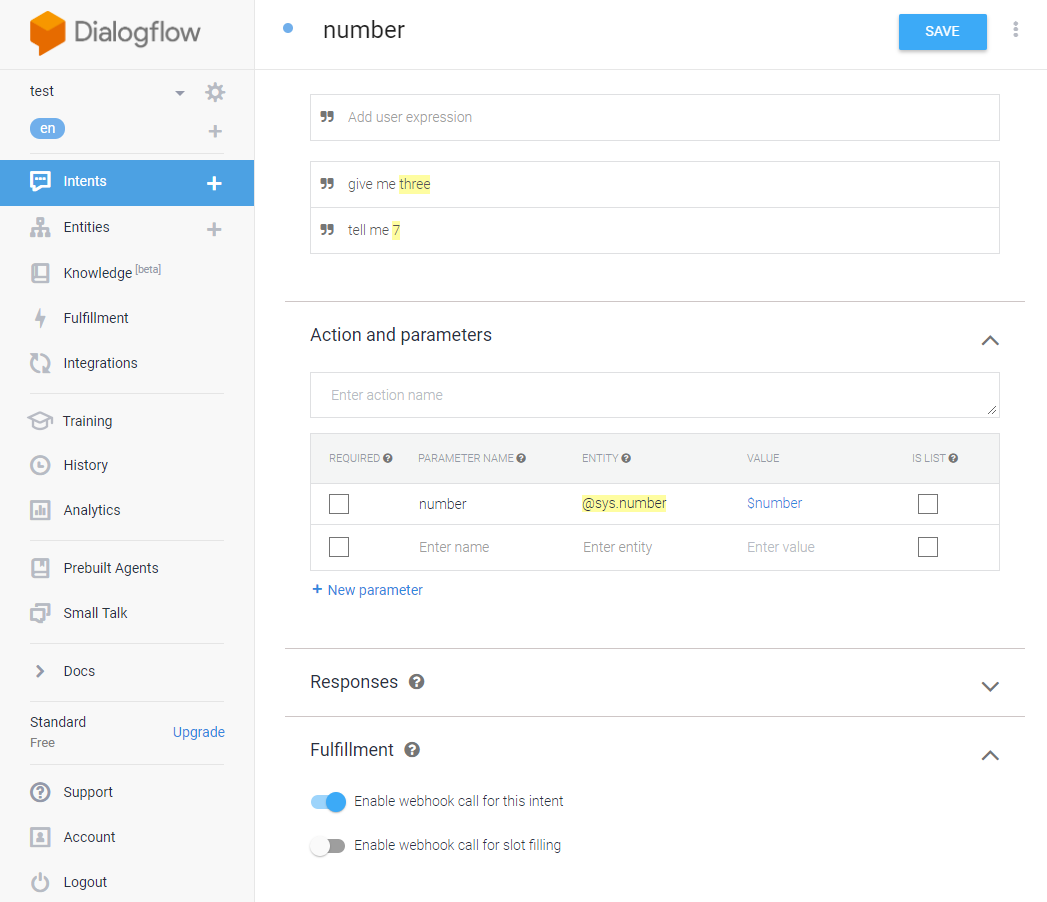
In Fulfillment, turn on the option Enable webhook call for this intent and click SAVE.
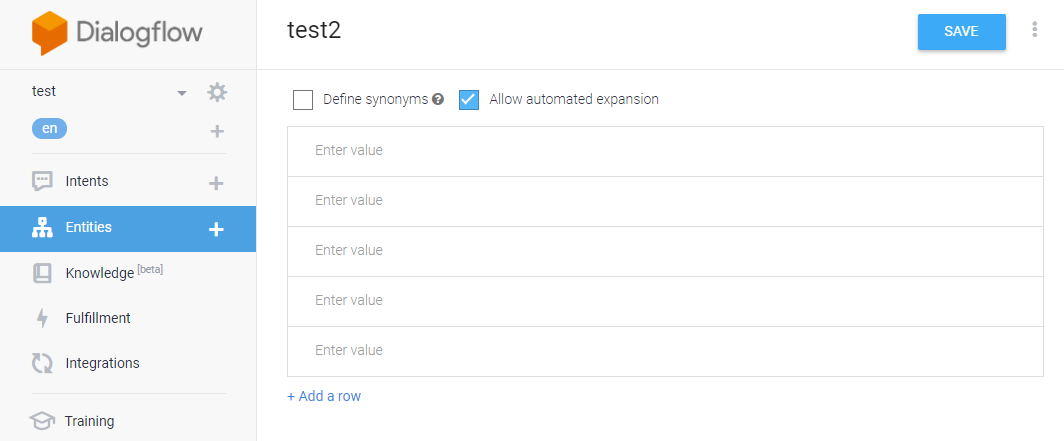
Entity is an object in Dialogflow which you can take action on. When you want to add a new entity with, for example, food, clothes sizes, or mathematical operations, you can go to Entities, click CREATE ENTITY, and add a few words with synonyms (enable/disable Define synonyms). You can also get (as a variable) every word in added Training phrases from Intents (in Entities enable/disable Allow automated expansion). In this tutorial, you don’t have to create a new entity:
It’s now time to connect your assistant with the database. You need an https:// (not http:// !) protocol to use with the POST method. You will get it from 2 sources:
- In SQL Developer, go to POST method, right-click (RMB) -> Edit… -> Details, and under Examples you have an address field:

Useful tip#5:
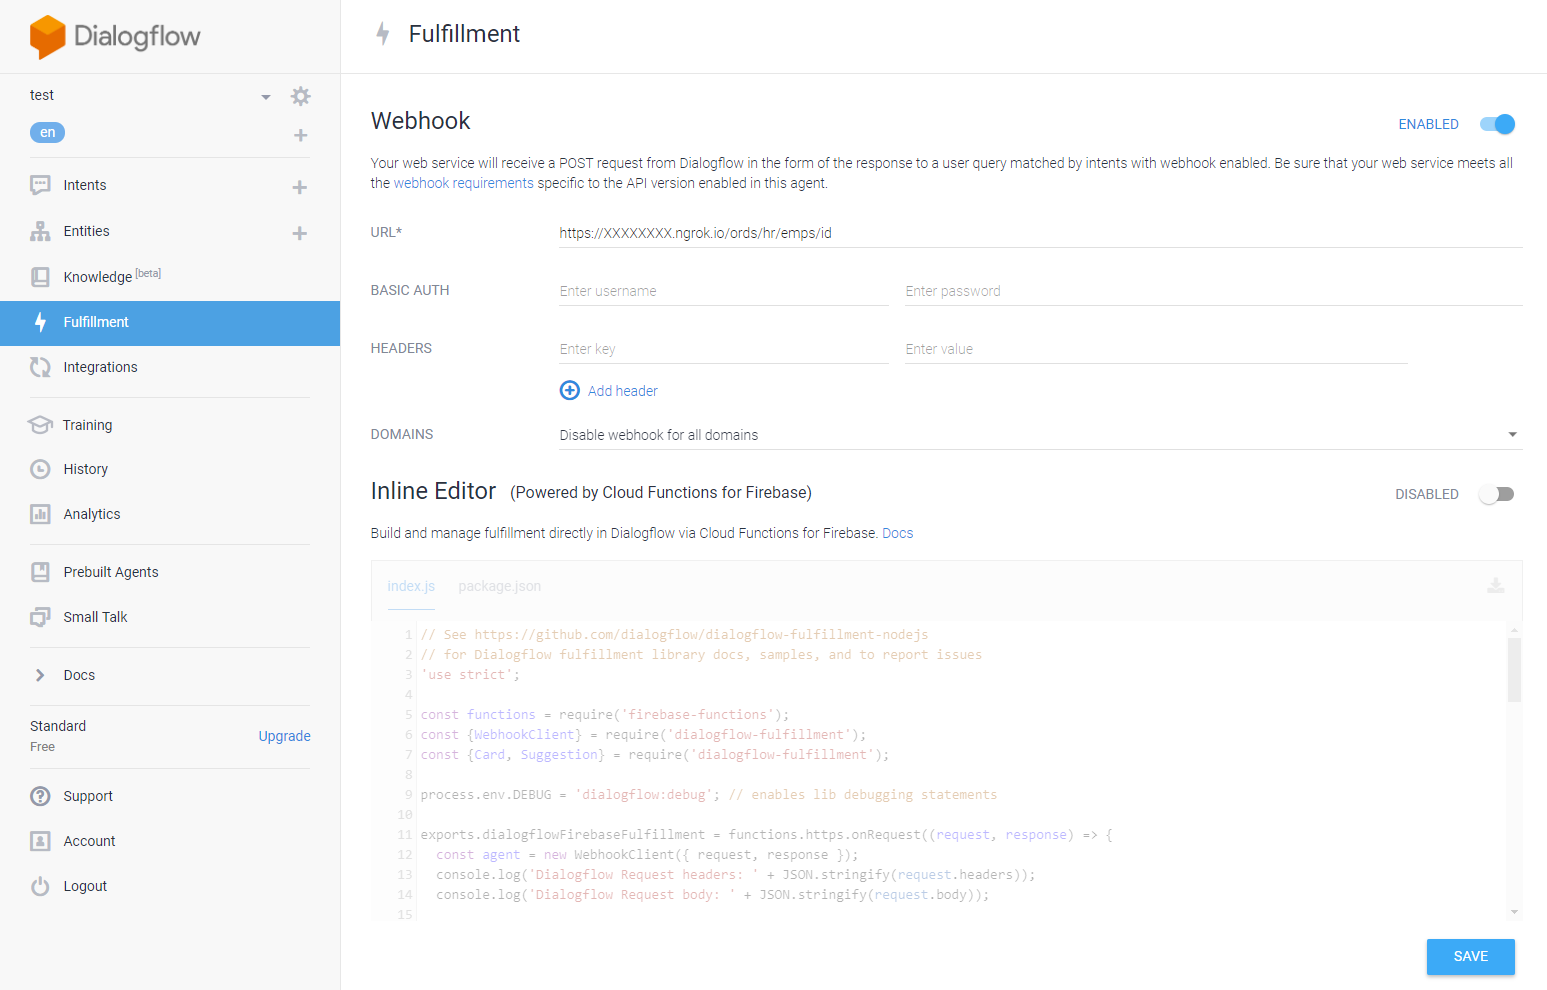
When you use the ngrok.exe from earlier (“Prepare APEX application”), you have to replace http://localhost:8080 to https://XXXXXXXX.ngrok.io, so whole URI pattern is: https://XXXXXXXX.ngrok.io/ords/hr/emps/id, and where the X’s are replaced by your personal ngrok ID.
- in APEX (apex.oracle.com) go to SQL Workshop > RESTful Services > find your POST method and copy the full URL:
When you get the full URL, go to Dialogflow and click Fulfillment > ENABLE Webhook option and paste the URL from earlier (https, NOT http) and click SAVE (bottom right).
Now all Intents with the Enable webhook call for this intent enabled and without a default response will answer with data from the connected database (included in ‘Steps in APEX or database/SQL Developer’).
At this moment you can test your bot in 2 ways:
- in Dialogflow (top right), you have a chat chart labeled with Try it now. Write ‘hi’, and if you get a response of ‘Good morning sunshine !’, then your bot responds correctly.
- If you want to test your bot further, navigate to the top right and click on the link:
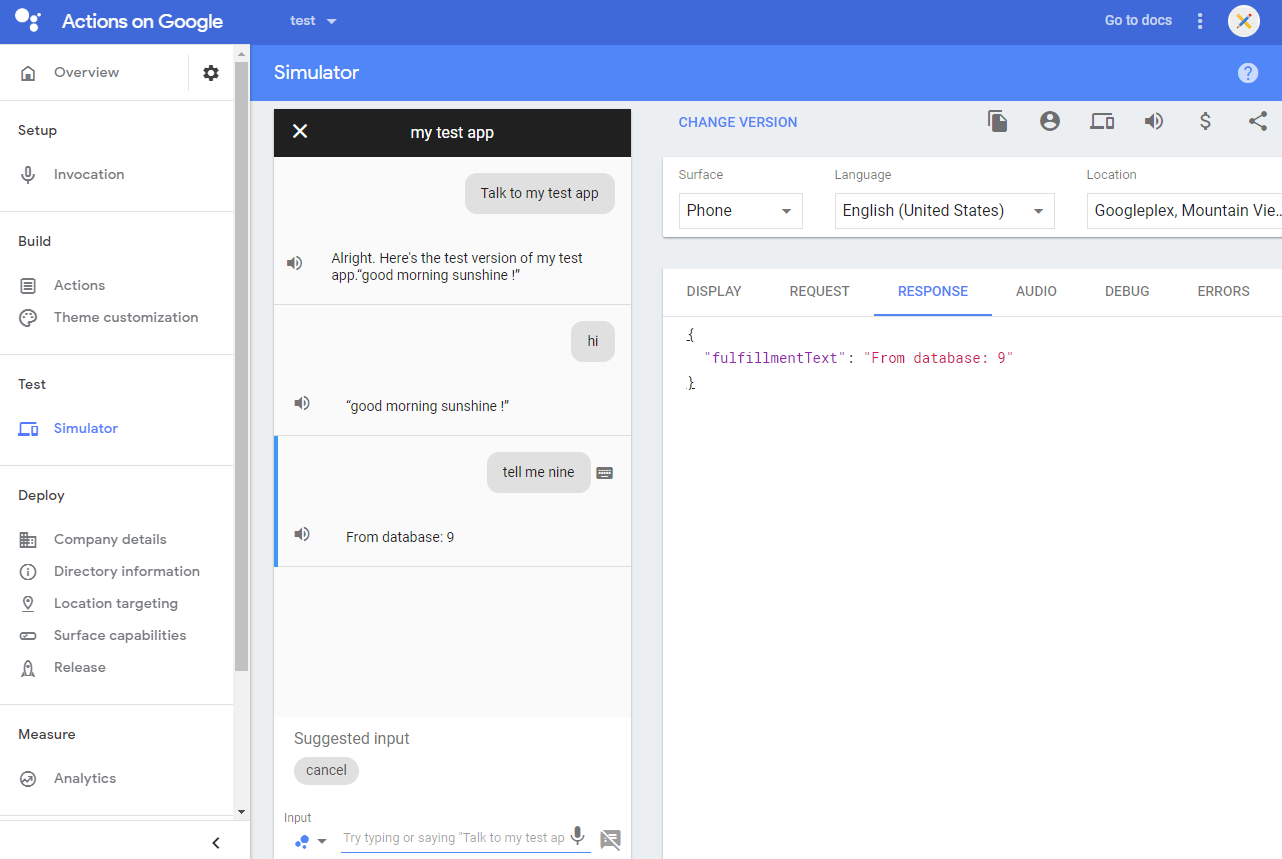
It will redirect you to Actions on Google, where you should navigate to the Test region (on the top toolbar), click Simulator, and press the grey button Talk to my test app. There, write ‘hi’, and see if you get ‘good morning sunshine !’ as the response. Next, write ‘tell me nine’, and if you get ‘From the database: 9’ as a response, everything works great!
Useful tip#6:
When you have a problem with the bot’s response, please check the full URL or SQL Worksheet (‘Steps in APEX or database/SQL Developer’).
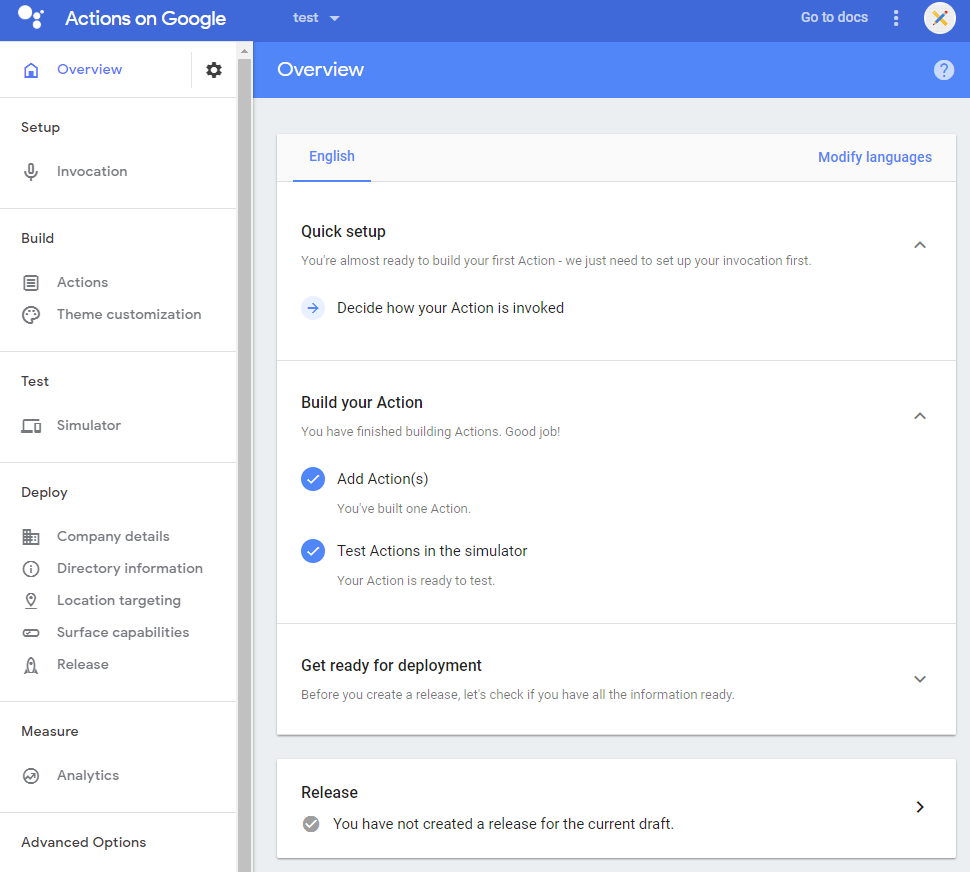
If you want to use your bot on any device that has a Google Assistant, you need to Release it. In Actions on Google, click on Overview and step-by-step complete all of the processes requirements (like the name of your bot or your Privacy Policy). There is no universal solution for this part, each bot is considered separately by google.
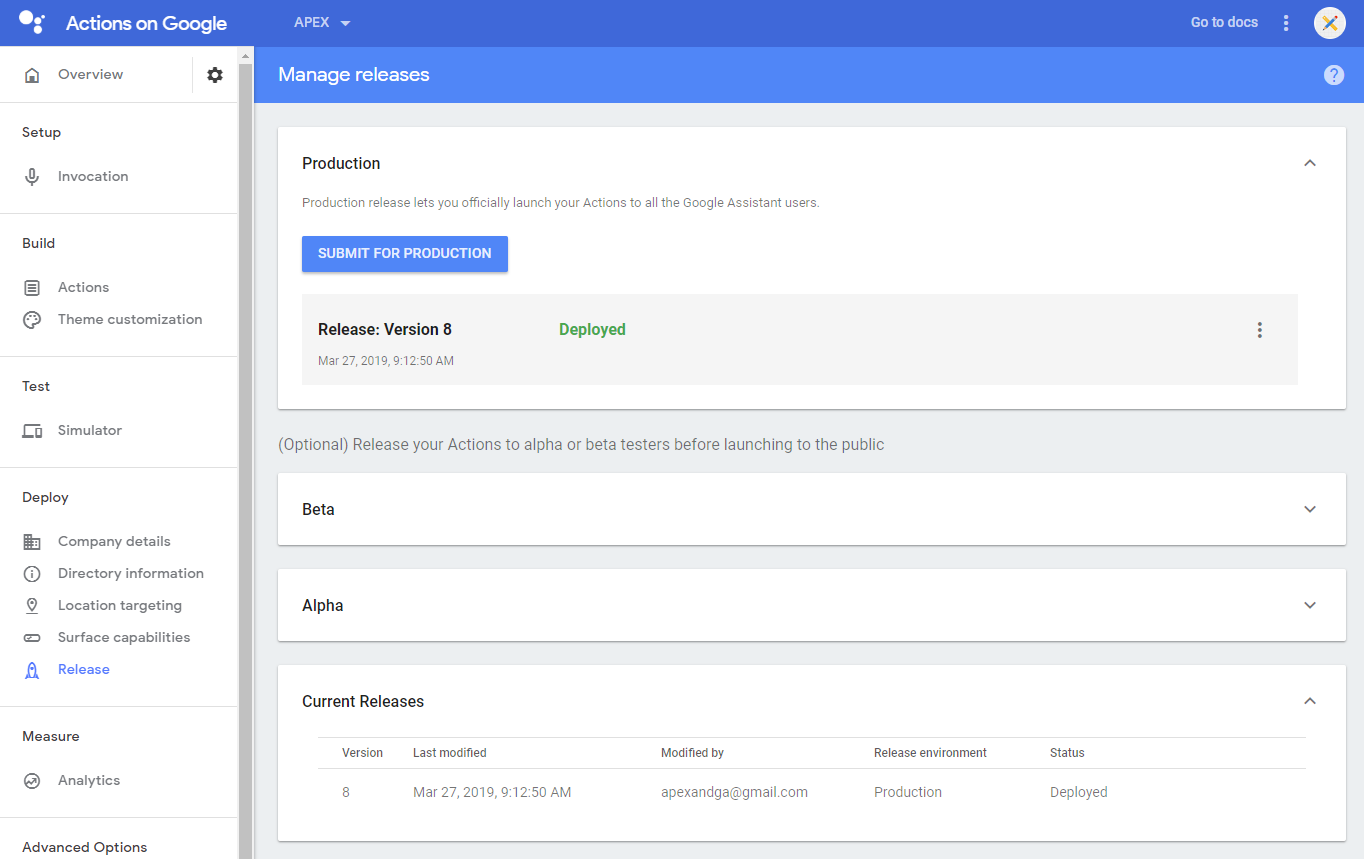
After approval, you will receive this information (by email and in Actions on Google):
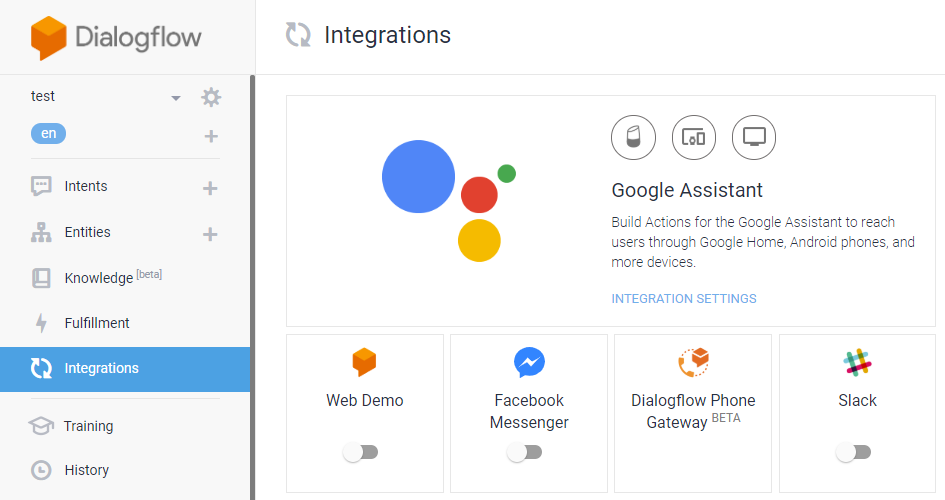
The last step is to paste your assistant to APEX. Go to Dialogflow, click on Integrations and enable Web Demo.
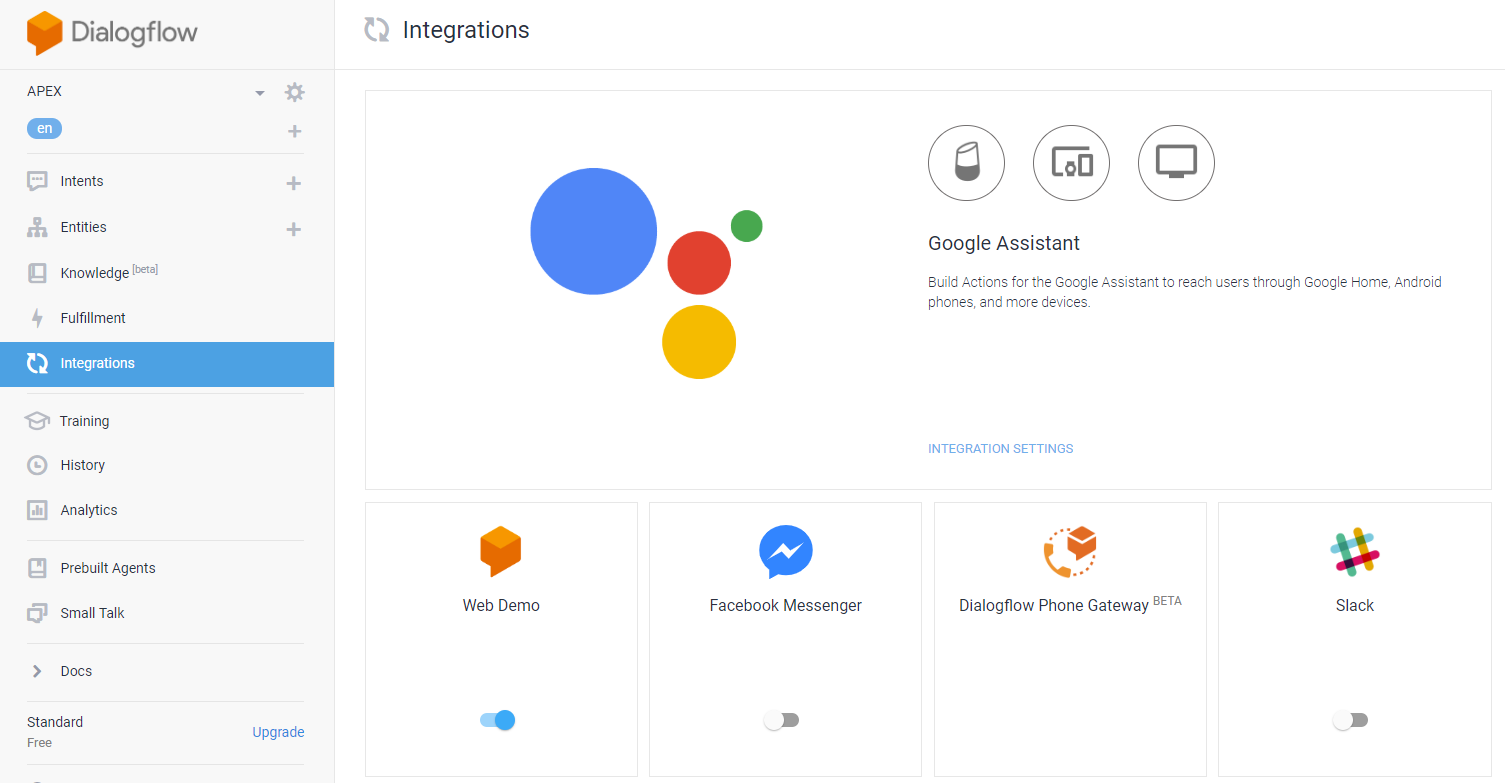
Click on Web Demo and copy the <iframe> code to a Static Content region in APEX:

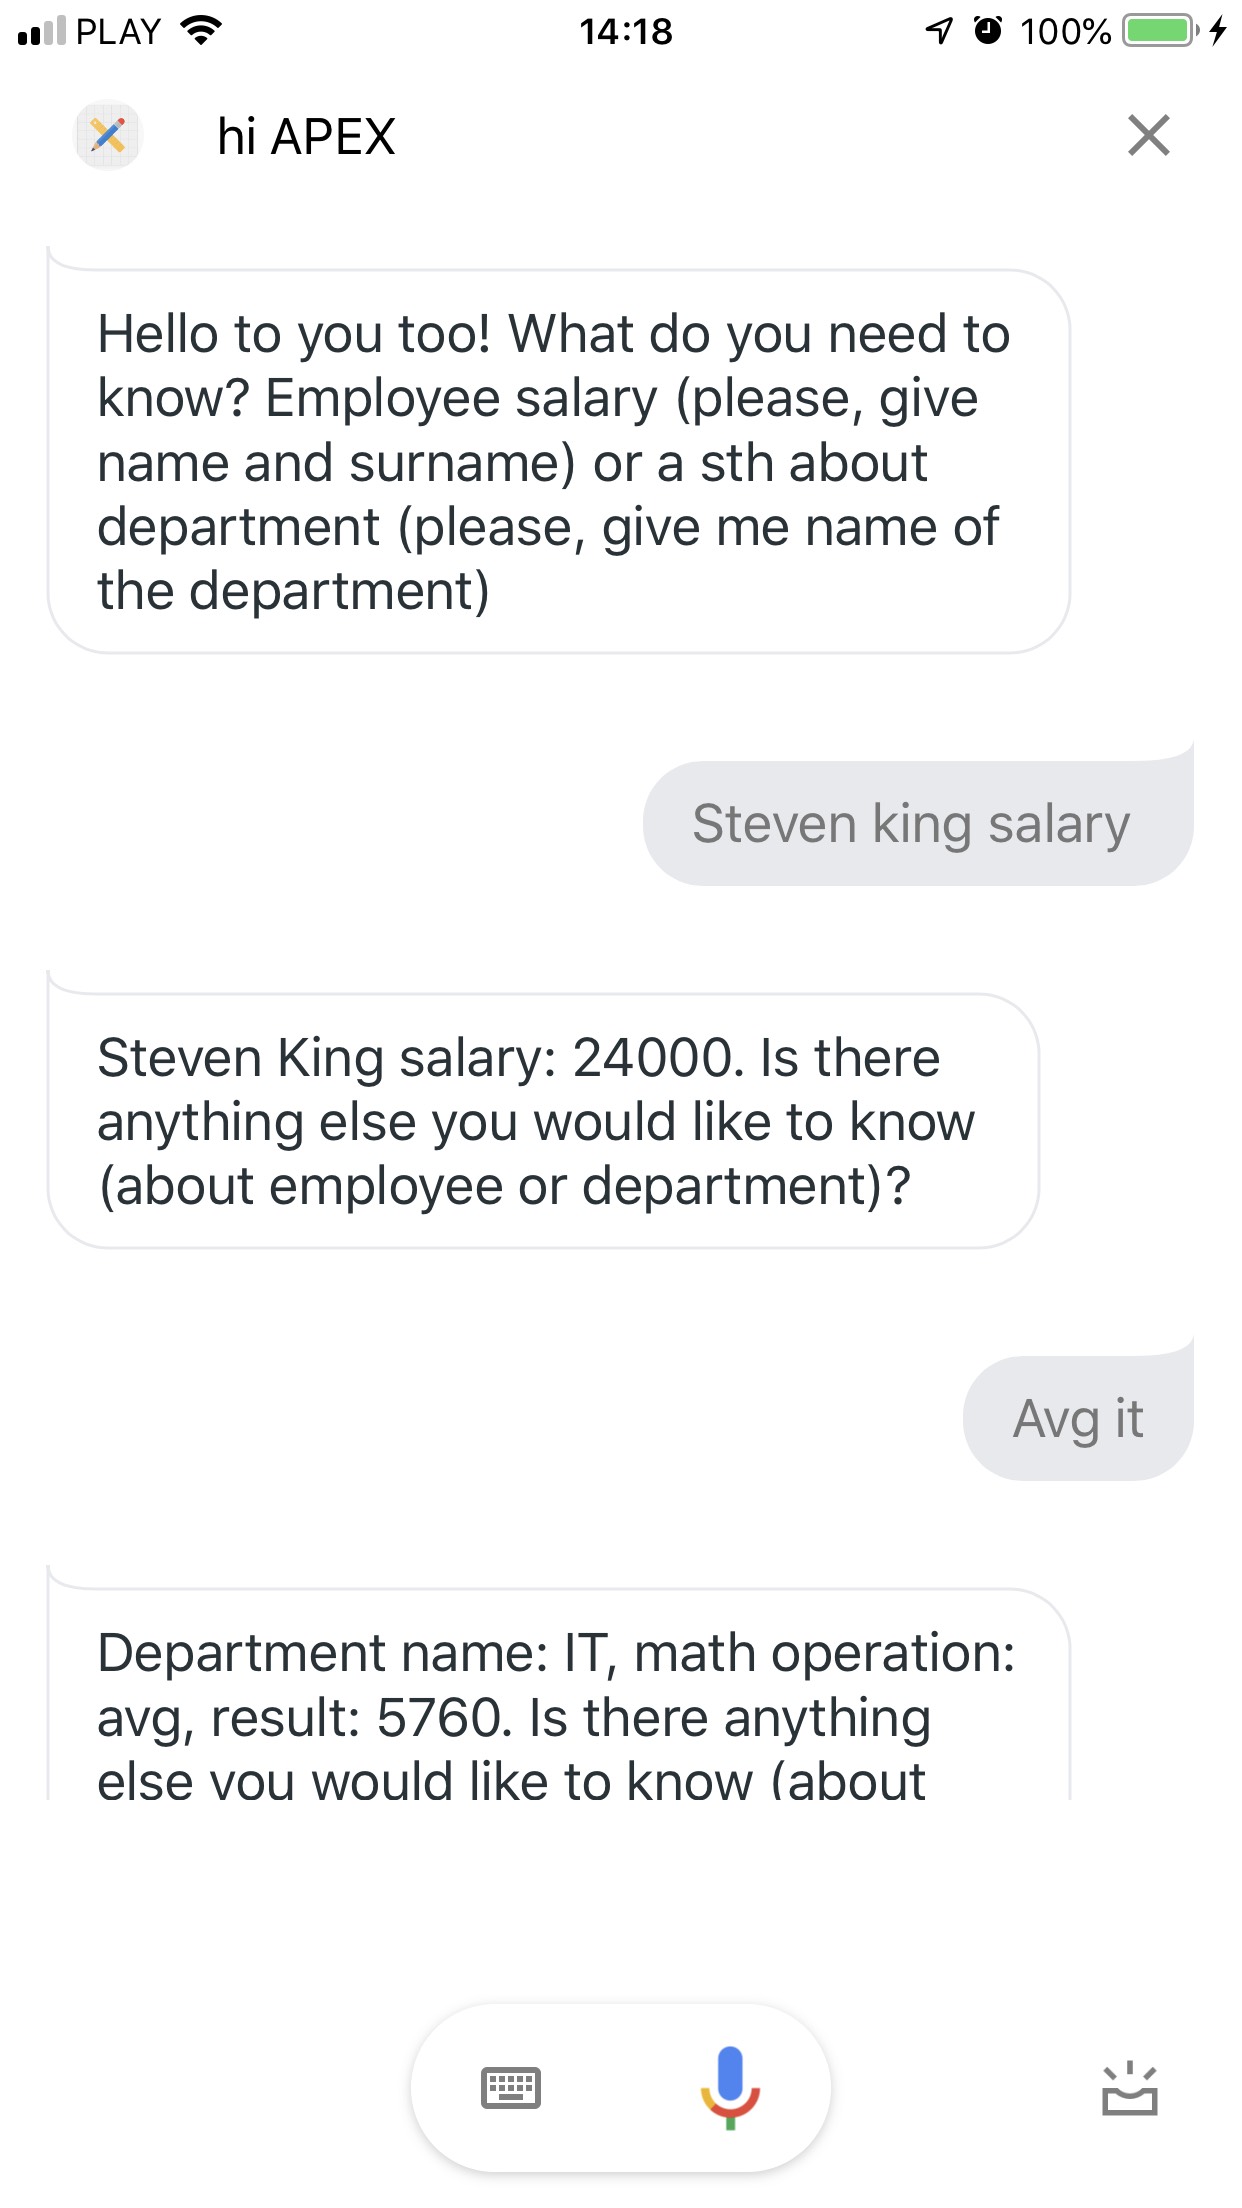
After a successful deploy, you can enjoy your own created Google Assistant, e.g. on mobile:
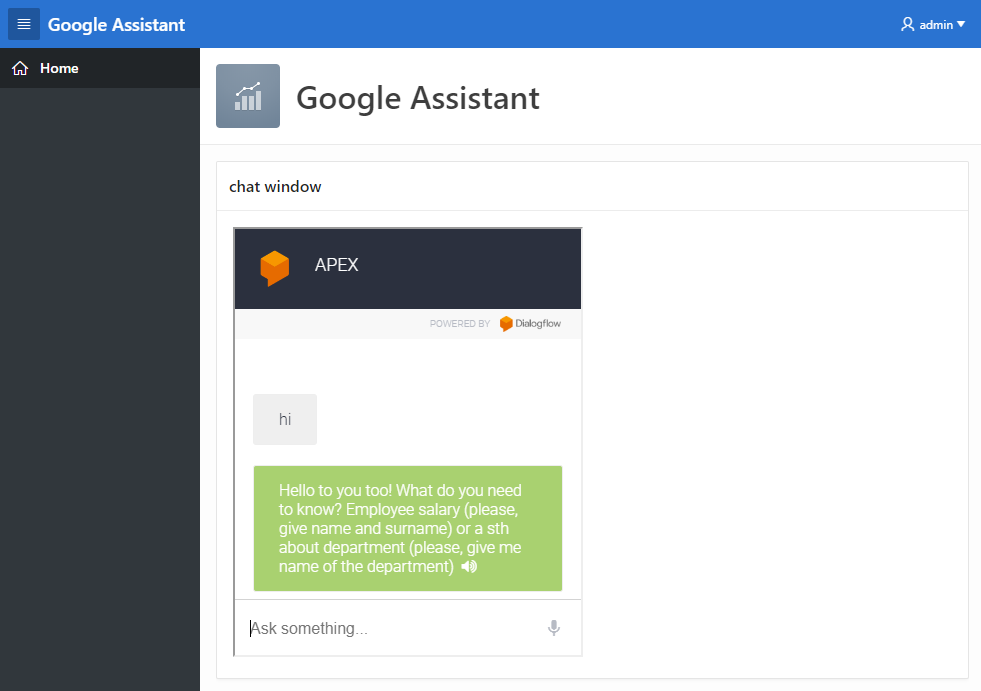
or in APEX application:
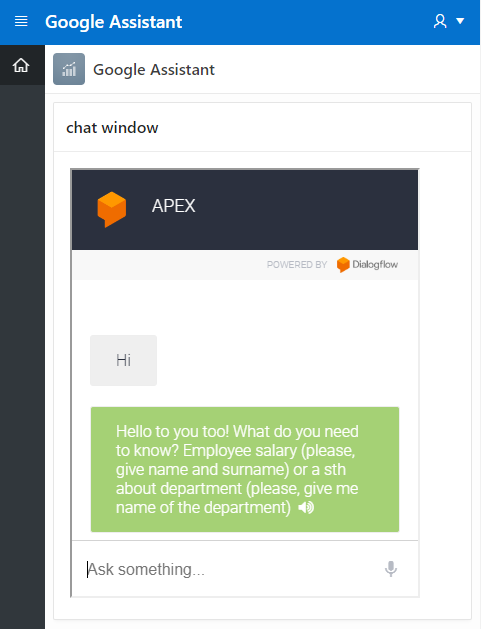
And this is an example conversation with a working Google Assistant connected to a database:
Summary
I hope that thanks to this description, you have managed to create a Google Assistant bot. This might have been your first, it might have been your 20th, but this one is unique because it is integrated with an Oracle database. Thank you for reading this article.