
The first part of my Google AppSheet tutorial offered a basic understanding of how to create a new app based on a data table using the Google AppSheet platform. You should know how data sources work, and be aware of the rules you need to follow to make the whole development process smooth. But it’s easy to see that when it comes to functionality and visuals, the application created in step one still has a long way to go. In this article, I’ll show you how to make it even more functional.
I’ll start with some basic theory. I’ll introduce you to the Data tab, and explain what you can do with the various sections you’ll find inside. Later on, I’ll show you how to put that knowledge to good use – I’ll present three examples of specific changes that can be made to your sample app to improve it in several areas. In short, you’ll learn how to use AppSheet to better effect.
Helpful information sources:
Downloadables:
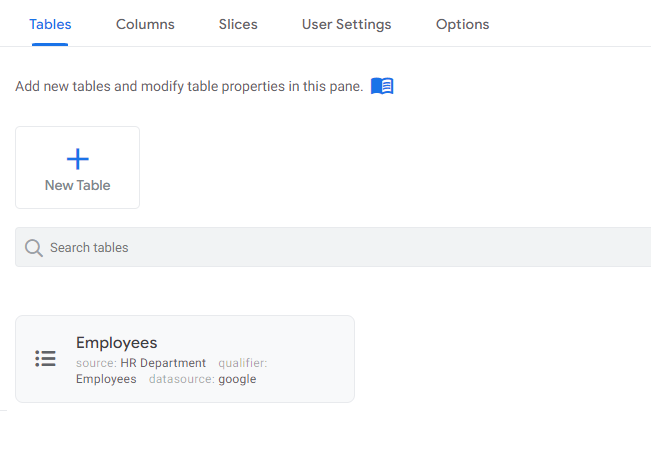
We will first examine the Tables section. As the short description indicates, here you can manage your data tables. This tutorial will be limited to data loaded from Google Sheet, but nothing prevents you from combining data of different origin in one application. In my sample application, one table was loaded when AppSheet was first launched, so one item is visibile on the list shown below.
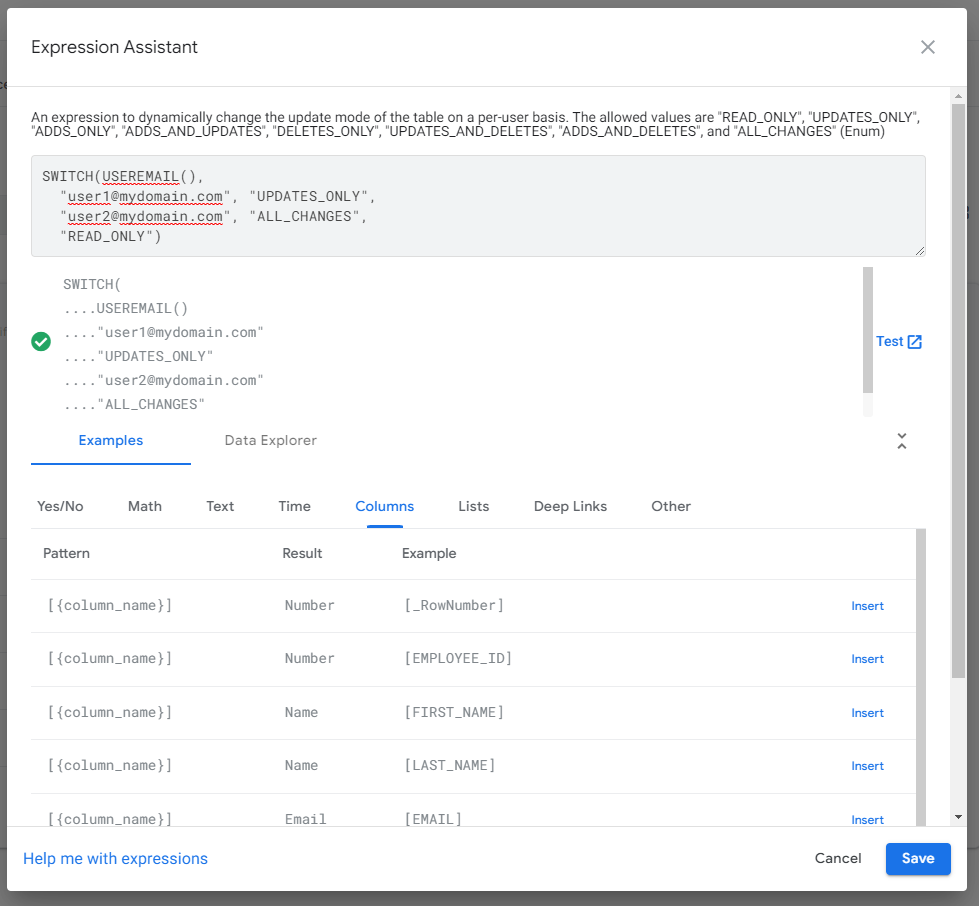
A glance at the Employees table summary reveals a number of available configuration options. You can indicate which Update/Add/Delete operations can be performed on the table. You can also leave the table in read-only mode, but that option will only be useful in some circumstances. Additionally, you can specify the business conditions, which, as shown in the example, determines the table operations depending on the application user’s email address. The whole operation is carried out using Expression Assistant. From this level, you can test the entire expression for syntactic correctness.
In the security section, you can control the visibility of the data. Some of these options will be available only on higher AppSheet subscription versions. In this menu you can set appropriate filters that will hide data that meets a specific condition. You can also control the visibility of data from the Slices section, which I will talk about later in this article.
Additionally, if you want to hide data that already exists, you also have this possibility. This can be used in survey type applications, where you collect data from anonymous users. The Filter out all existing rows? option was created with such applications in mind.

You also have more specialized options like managing storage and scaling your application due to dataset size.
Within the Columns section, you can view a list of columns that are part of the selected data table. You can customize each of them according to our expectations. You also have a lot of settings at your disposal. For the settings, AppSheet offers appropriate checkboxes and a formula wizard, in which you can create expressions that meet the given conditions.

Here are some of these conditions:
The last two items on the list above deal with what is referred to in AppSheet as App Formula and Initial Value, respectively. They are fundamentally different, although they refer to an aspect of the application related to the default value of the selected field. App Formula doesn’t allow you to interfere with the result of the expression you specify. Formulas of this type are recalculated after each change in the data. Initial Value works in exactly the opposite way – the value that was proposed initially can be changed by the user and there is no automatic recalculation each time.
These expressions can be used to create Virtual Columns. These are columns that do not appear in the source dataset. They are used to perform calculations on input data, and the values of the expressions contained therein are intended to extend the application logic. There are many examples of using Virtual Columns, but typical ones are logical expressions returning true or false or concatenation of text columns for the purpose of presenting data in a user-friendly way. If you want to present the result of a certain operation on data in a new column, you should use the Add Virtual Column option and provide a formula according to which the selected fields should be processed.

It’s worth noting that many useful settings here are usable right away. By comparison, in the case of Oracle Application Express low-code platform (Oracle APEX), analogous features require installing additional plug-ins.
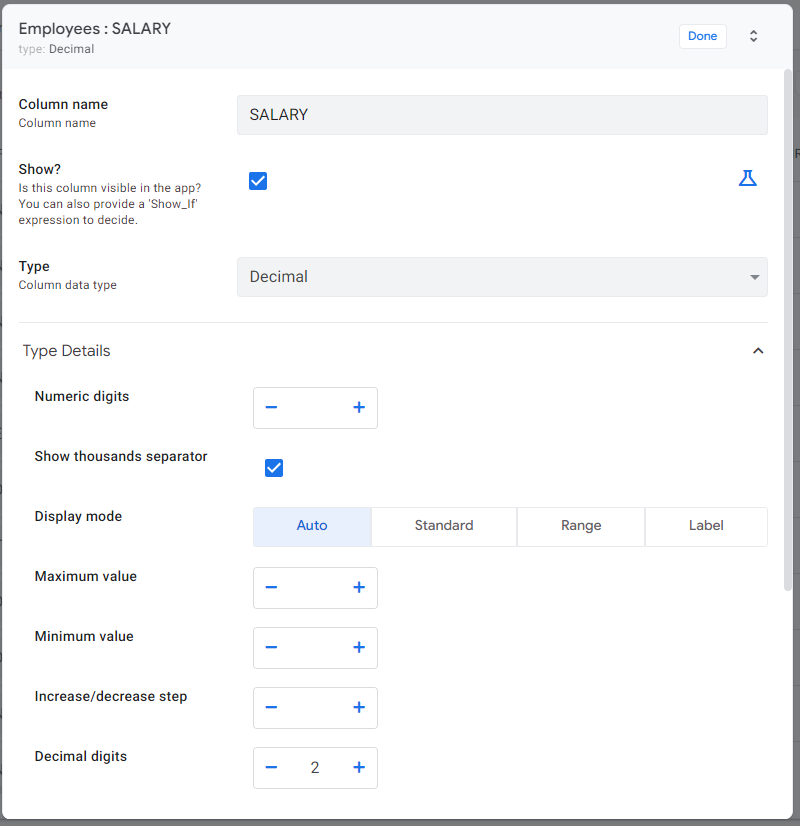
Each column has its own name, taken from the test Google Sheet. Moreover, based on the formatting of the data in the columns, AppSheet suggests the correct data type. The different data types have specific settings for each other. For example, the Decimal data type allows you to specify the precision for numbers, how they are displayed, and the form of presentation.
Let’s take a closer look at the data types. In addition to the standard ones, you can find more interesting options here that significantly affect the functionality of the application. Here are some examples:
In the case of my sample app and the table it contains, the best candidate for a key is a natural key that is directly related to the data stored in it. Such a key may consist of one or more columns.
A unique key can also be created dynamically by performing operations on selected data columns. You can use the formula wizard and the available functions that process the data to do it. It’s worth remembering that the formula should be defined and executed on the AppSheet side, as these operations can also be performed offline (I’ve explained it in more detail in my previous article). Moreover, if your formula assumes sequential determination of consecutive values, it’ll probably be impossible due to the mentioned offline mode and the option that allows multiple users of the application to work simultaneously.
Another option is to generate a unique key as a random combination of characters or numbers. The AppSheet documentation menthons two functions that can be used for this purpose.
If the search for a unique key fails, AppSheet will suggest using a key in the form of a row number. It’s worth noting, however, that this effect is accompanied by an error message indicating that basing the application on such a key is extremely risky.
If all of the solutions mentioned above fail, AppSheet comes to our aid by describing how to solve the problem of the lack of a unique data key, if the columns included in the key can be edited by the application user.
Up until now, my sample app was only based on a single Google Sheet. It was a convenient way to show you all the columns – I didn’t need to care about normalizing the data. However, in real-life circumstances, it’s very rare for application data to be stored in a single table. There are many possible reasons to use multiple source tables:
In such cirucumstances, it’s a good idea to normalize the data and store individual facts in separate tables. The effort put into proper preparation can bring many benefits, but when you decompose a complex table into smaller ones, you’ll usually want to preserve the original relationships and dependencies. AppSheet offers several possibilities in this regard.
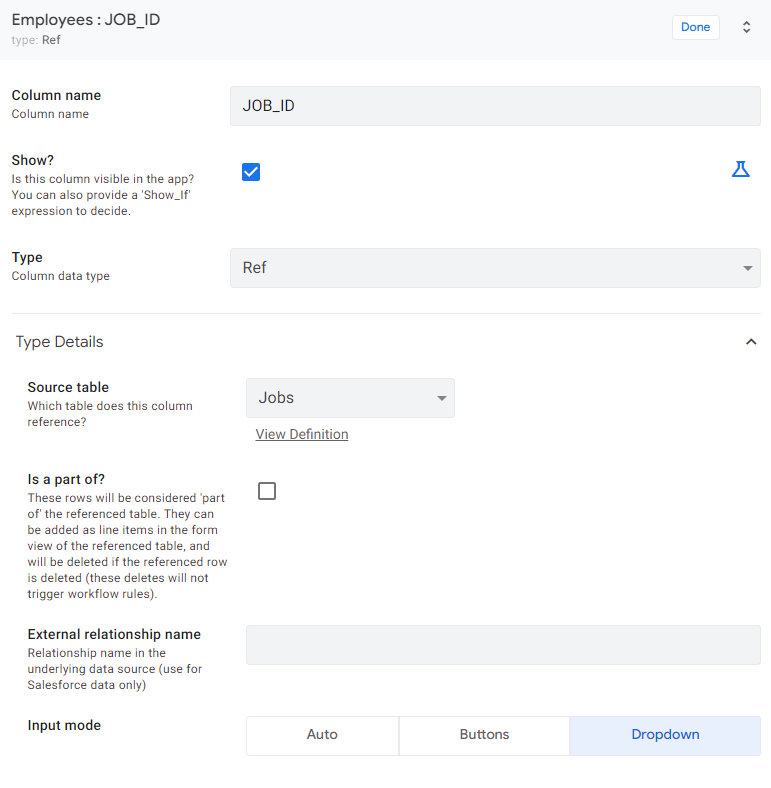
To create a reference, use the Ref data type. Then, indicate one of the available tables, which is to be included in the relationship. In addition, pay attention to the Input mode section, where you can specify the preferred way of entering data in this field.
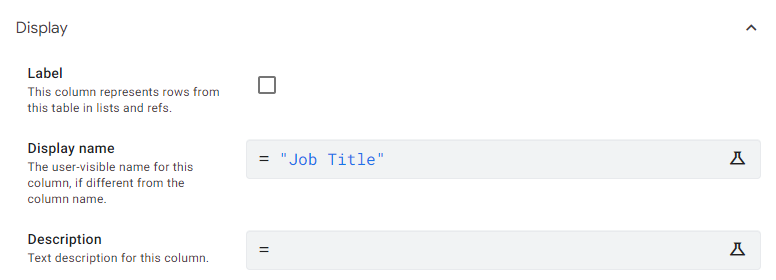
For the purposes of basic configuration, the Display tab is also worth checking out. You can use it to set the Display name parameter for a field that has been given the Ref type. This will make it easier for the application user to understand the meaning of this particular field.
Before you move forward with the linking, you should also take care of a few things related to the table you’re going to link with. Firstly, make sure that this table has a key on the correct column. This is important because AppSheet will infer relationships between tables based on keys. If you don’t want to display the key value and you have another column in the table responsible for the business description, check the Label? checkbox next to the correct column. Thanks to this, the application user will see the business descriptions, but the unique key values will be stored in the tables.
Another interesting observation is that AppSheet by default uses data sorting that has been established at the data sheet level. The same list of values can therefore have a different order in which the results are presented, depending on sorting or lack of it.
Slices are another way to present data in an AppSheet application. Imagine a source table with non-business columns or columns that don’t have to be shown to the user. As you know from the previous section, the visibility of columns can be controlled within the Columns section.
However, sometimes you need to do data filtering. In essence, you want to ensure data security, so that the user only sees what is absolutely necessary.
Here’s what a sample wizard for a new slice might look like. You give it a name and indicate which source table we want it to pull data from. This is one of the two mandatory items to provide. The other is the Update mode setting, where you can control the available data operations within this slice.

One of the main advantages of Slice is the ability to filter data. For this purpose, you can use the Property Row filter condition, in which you can create any valid expression. Expression Assistant will help you in this task. It’s worth noting that in AppSheet there is a function called USEREMAIL(), which returns the user’s email address. The AppSheet documentation suggests that if you want to filter the data depending on the logged-in user, it should be done with this function.
Another property is Slice Columns. Here you can compose the set of columns included in our Slice. You can select the columns that are to be presented to the user along with their order. Remember that among the selected columns must be those for which the value is required.
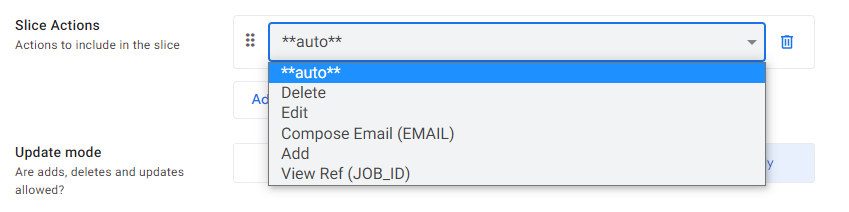
Within the Slice, you can also define Slice Actions. Depending on the types of data contained in the source table, you’ll have different options available here. You can add several actions depending on your needs. Here is a sample list of available actions for the Employees table.
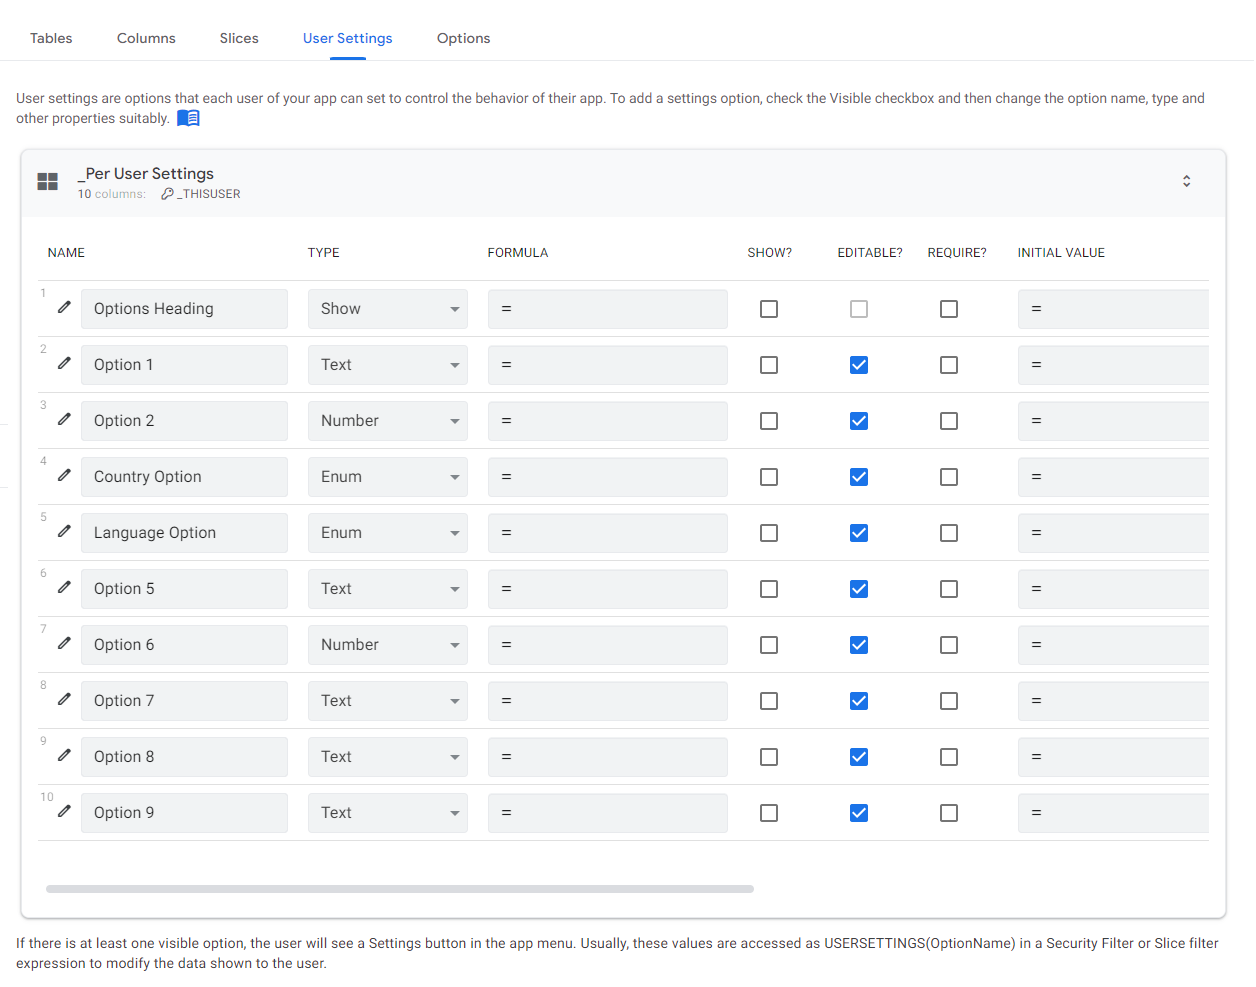
User Settings is a section dedicated to user preferences. Tne interface here is akin to what you saw in the Columns section. There are a few significant issues I want to talk about here.
Firstly, these settings are stored locally within the device. The app user only has access to their settings.
Secondly, using the built-in USERSETTINGS() function, you can get a value for the selected preference. This is useful mainly when filtering data or conditioning the visibility of selected application components.
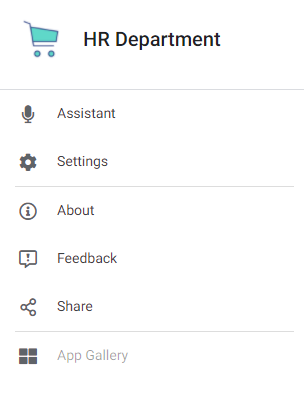
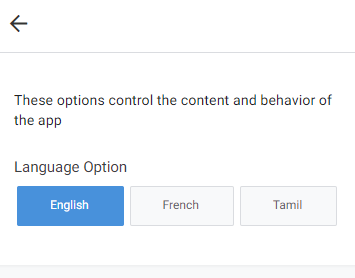
For example, a preference called Language Option causes a new settings option to appear on the menu level in the upper left corner of the application – it can used to choose a language version of the applicaiton, according to the specified settings.
It’s worth mentioning that the scope of User Settings is dependent on the AppSheet Subscription Plan.
You can also create preferences fully prepared by you. However, AppSheet’s documentation doesn’t recommend storing any sensitive data in these preferences – especially passwords or other types of access data.
I can also offer you one additional tip – one that’s displayed by AppSheet – which’ll conclude the information about User Settings.

Long story short, remember to sync online whenever you change user preferences. You can read more about this warning message here.
Theory is great, but it’s important to test the the things you learn in practice. If you follow these next few steps closely, your application will become more user-friendly – though it still won’t offer any visual fireworks. I have already mentioned some of these things while discussing the components of the Data section.
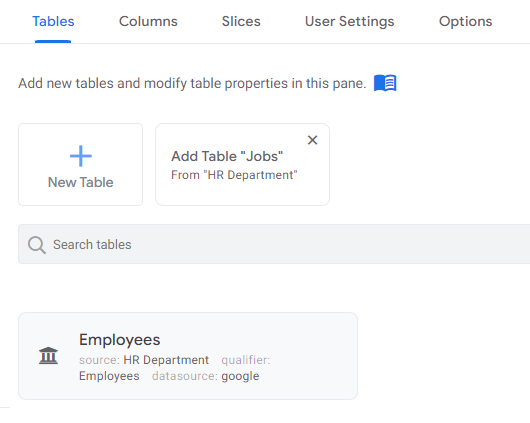
In this step, we’ll expand your sample dataset to include a dictionary, which contains a list of possible jobs in the organization being analyzed. In the Google Sheets file, I’ve added a new tab, which I called Jobs. The data contained in it has been prepared properly to be used in Google AppSheet. Note the visible connection between values from the Employees table, where the JOB_ID column collects the values corresponding to rows from the Jobs table.
Moving to AppSheet. At the level of the Tables tab, you can see a hint that suggests adding a new table based on a tab in Google Sheets, which at the moment isn’t used in the application. You can use this suggestion (click it) or click the New Table button and go through the whole process using the standard method.
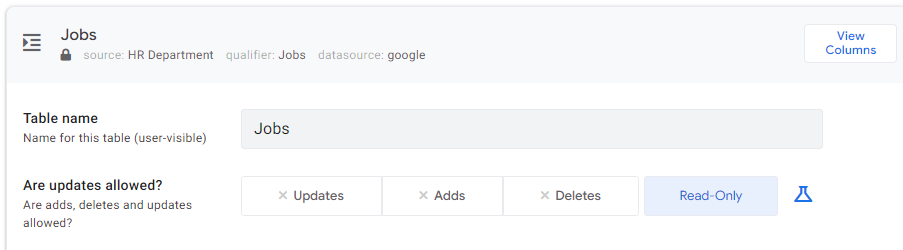
In the attached Jobs table, you have access to the typical settings that AppSheet offers within the tables. In the case of my sample app, this table plays the role of a dictionary. To recreate it in your project, select Read-Only for Are updates allowed?.
It’s time to perform the linking between the Employees and Jobs tables. As I’ve already mentioned, you can use the Ref data type for this purpose. I’ll now show you how to do that. The following description applies to both Tables and Slices.
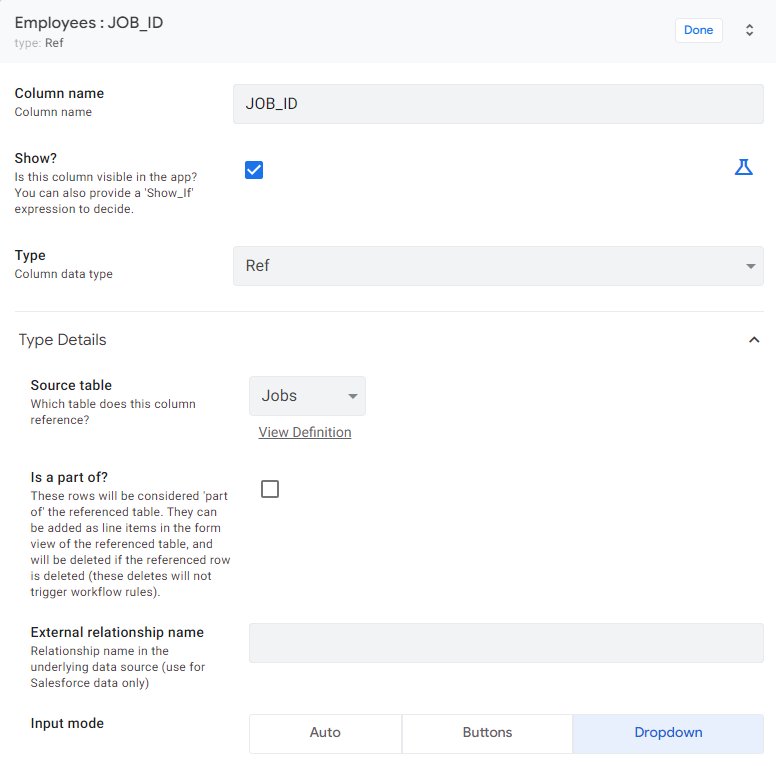
Go to the detail view of the JOB_ID column in the Employees table. From the selection list next to the Type field, select the Ref type. Point to the Source table as the Jobs table. The, choose Dropdown as the input mode.
You can also change the name displayed for the JOB_ID field. This option can be found in the Display section. Make the change and save the application.
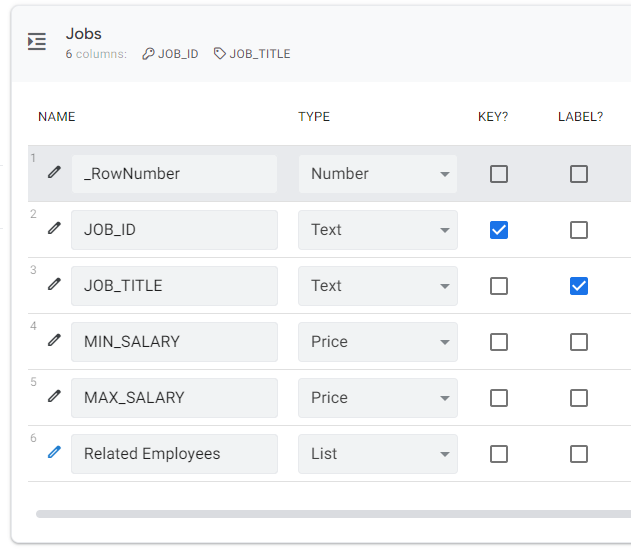
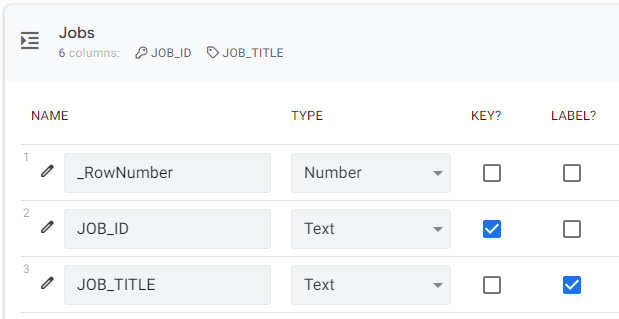
Note that in the Employees table job codes are stored, and these aren’t very clear. For the user of the application, this view can be cumbersome and incomprehensible. The problem will be especially apparent when someone will be promoted or demoted, since changing positions can be very difficult. Fortunately, in the Jobs table of my app, I have descriptions that are friendlier to the user, and so these should be presented in the application. Start editing the Jobs table, and check the Label? box next to the JOB_TITLE column. Also, uncheck the same option next to the JOB_ID column. Save the changes.
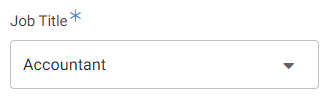
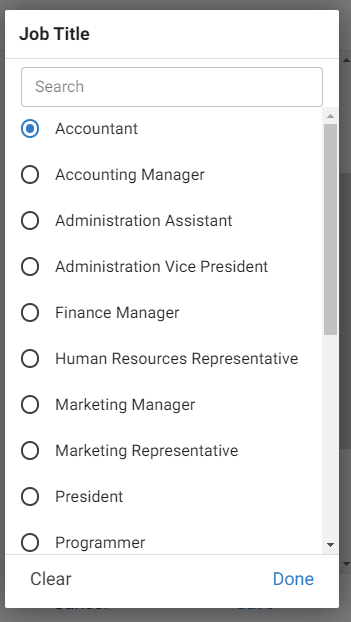
What did your app gain thanks to this operation? The screen used to edit the employee data now contains a friendlier label next to the field responsible for the selection of jobs. From now on it’s a list of choices presenting understandable names, according to what we have chosen at the stage of defining the connection between tables Employees and Jobs.
Now let’s do an experiment – change the selected employee’s position. This change will result in the row being updated with the job code value rather than the full name as seen by the user. The consistency of data will still be maintained.
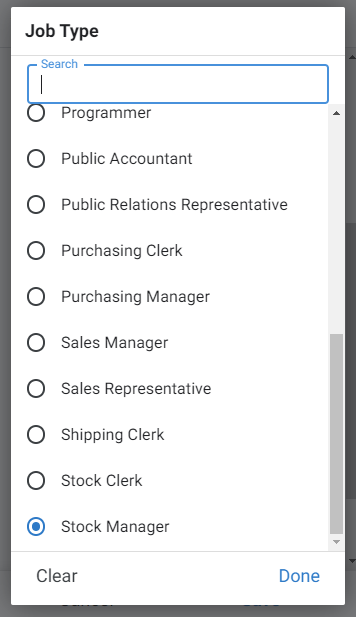
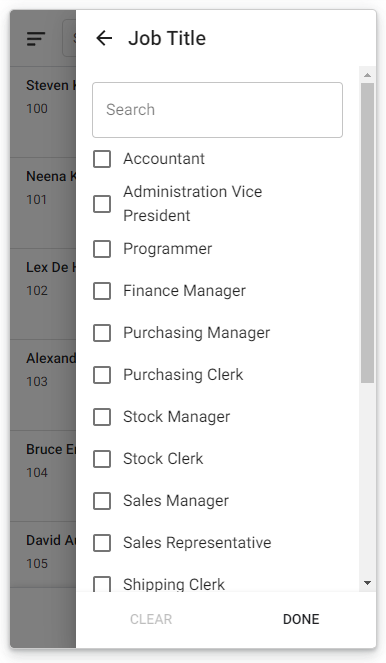
As you can see, the view of all employees has gained a new filter data option. From now on, instead of technical codes, you can filter employees by positions, which you will select from a list of checkboxes.
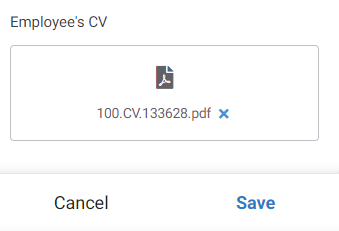
Let’s imagine a hypothetical situation in which the HR department, for the purpose of analyzing new applications, wants to have access to the CVs of people applying for a position. So, you need to extend the Employees table with an additional attribute that will store the file. How to do this?
From within the Google Sheets, add a new column – for the purposes of this experiment, I’ve named it CV. This column will not be visible in AppSheet until you run the Regenete Structure option at the Employees table level. This is a necessary action whenever you make a change to the table structure.
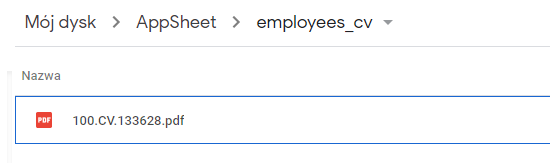
Go to the settings for the new column and indicate File as the data type. Under Type Details settings, enter a sample file path to see how AppSheet manages directories. Save the changes.
Let’s check what new features have been added to our application:


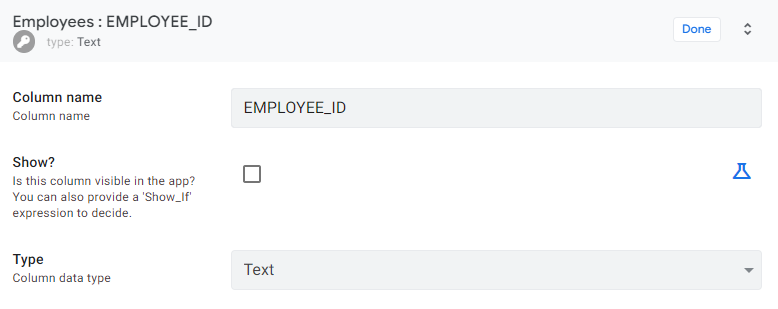
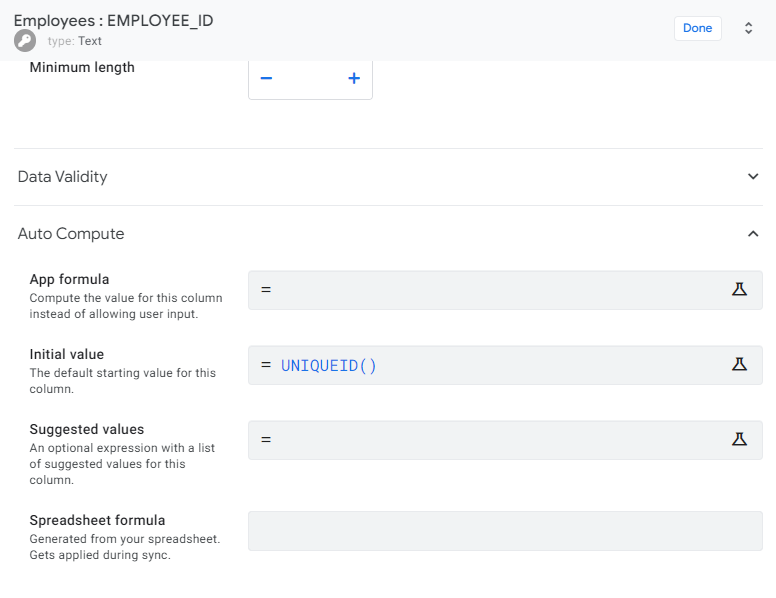
Since the theoretical part of working with the unique key is behind us, it’s time to take a look at our Employee table. For now, we use an artificial key on the EMPLOYEE_ID column, which stores numbers, usually incremented by 1 for the next row of data.
If you want the key values to be generated automatically, you need to remember a few things:
Navigate to the Date tab and select the EMPLOYEE_ID column from the Employees table. Enter the detailed view and make the following settings:
A quick glance at the newly introduced data row will show you how the new functionality works.
![]()
Finally, I’ll make one observation and offer a clue in the context of the unique key. The method presented above made it possible to generate a key which is essentially an artificial key. There is no correlation between the generated value and the data in the other columns of the table.
However, whenever you can, you should rely on the natural key. It can consist of one or more columns, which together allow for unequivocal identification of a given row. Working with a dummy key contained in one column makes much more sense when many tables are related to each other and you want to avoid redundancy. Things will also work this way when you connect AppSheet with a database, where such procedures as data model normalization are the order of the day.
The Data section in Google AppSheet is really diverse – it’s all about the range of possibilities it offers. Despite the fact that AppSheet is “just” a no-code platform, it still allows you to solve a suprising number of both typical and more complex problems, mainly due to an extensive list of data types. Everyone can find something for themselves here, which completely refutes the argument about the theoretical limitations of the platform – it can be used for far more than just creating simple apps.
This article should leave you with all the basic skills you’ll needed to work with data. Problems such as tuning data types and the use of multiple tables will no longer be a challenge, opening up many more possibilities than you had when you finished reading the previous part of this tutorial. Also, a well-prepared data model will pay off in the future, because you won’t need to consult the data model often – the less variable it is, the better.
In the next episode of the series, I will show you how to improve the visual layer of the application. You’ll learn what graphic components AppSheet offers and how much the user interface can be expanded.


