
This article will uncover Keycloak’s wide range of possibilities and detail the key elements of advanced server configuration, enabling the implementation of the most complex business requirements. For consistency and ease of understanding, the concepts presented here will be based on the application created and described in the previous article. We’ll start by discussing the new Keycloak configuration items and then test them working in an Angular application.
Before you do anything else, log in to the Keycloak server configured in the previous article and go to the Master Realm you created back then.
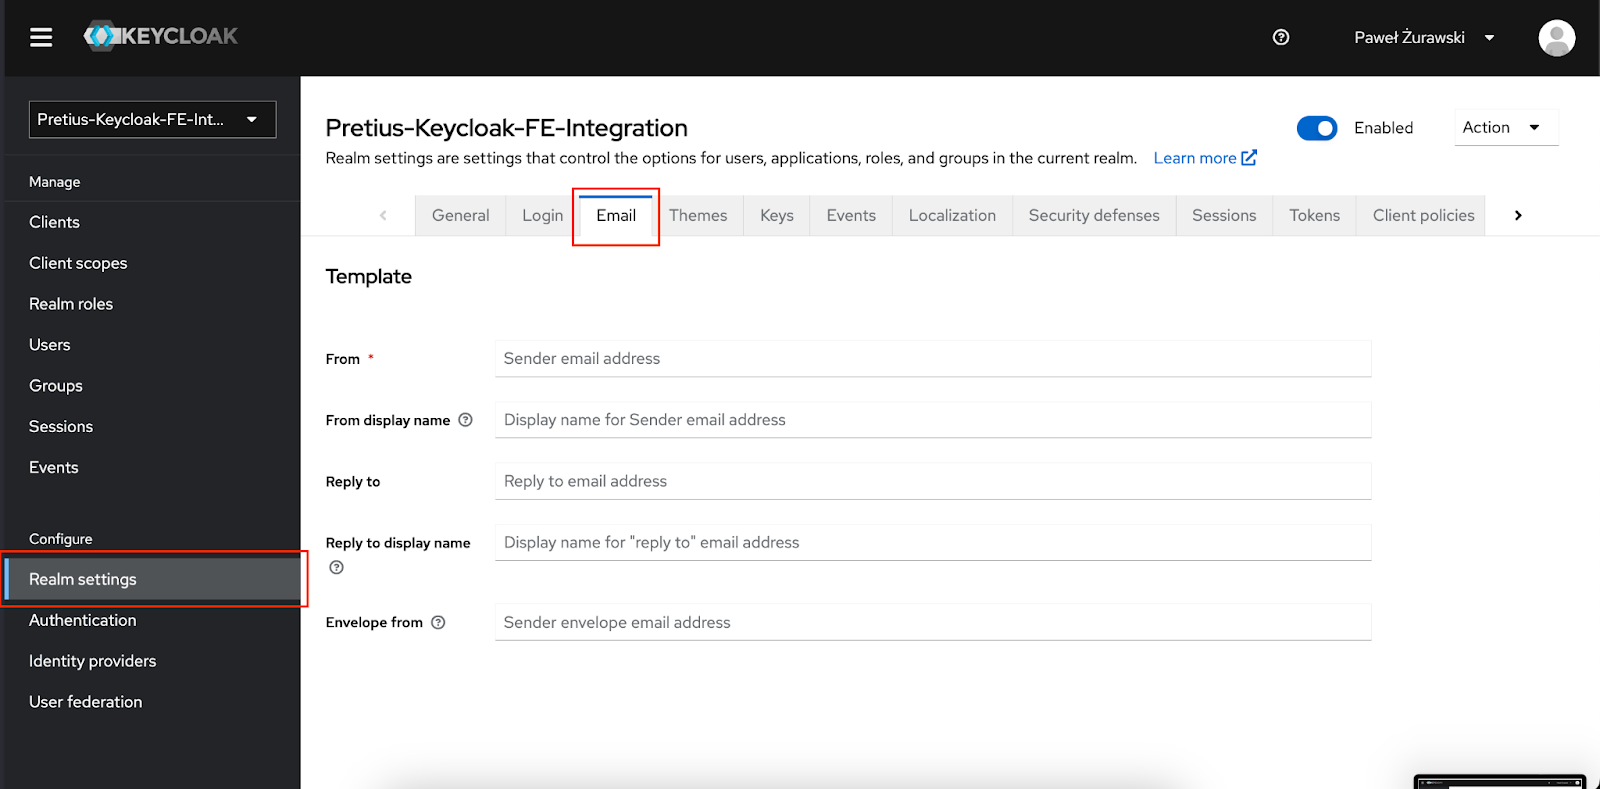
The first step in the advanced Keycloak configuration tutorial is to enable the ability to send email messages through the Keycloak server. In our case, we will use a free SMTP server from Google, which allows us to send up to 500 messages a day – sufficient for the purposes of this guide. To configure the SMTP server, go to the Realm Settings tab in the Keycloak side panel and then open the Email tab.
Then, fill out the available fields (those required to create a valid configuration in Keycloak are marked with a red asterisk). These fields are also accompanied by icons with a question mark, displaying a popover with an explanation (in case you’re unsure about their purpose). Complete the configuration on this page as presented below:
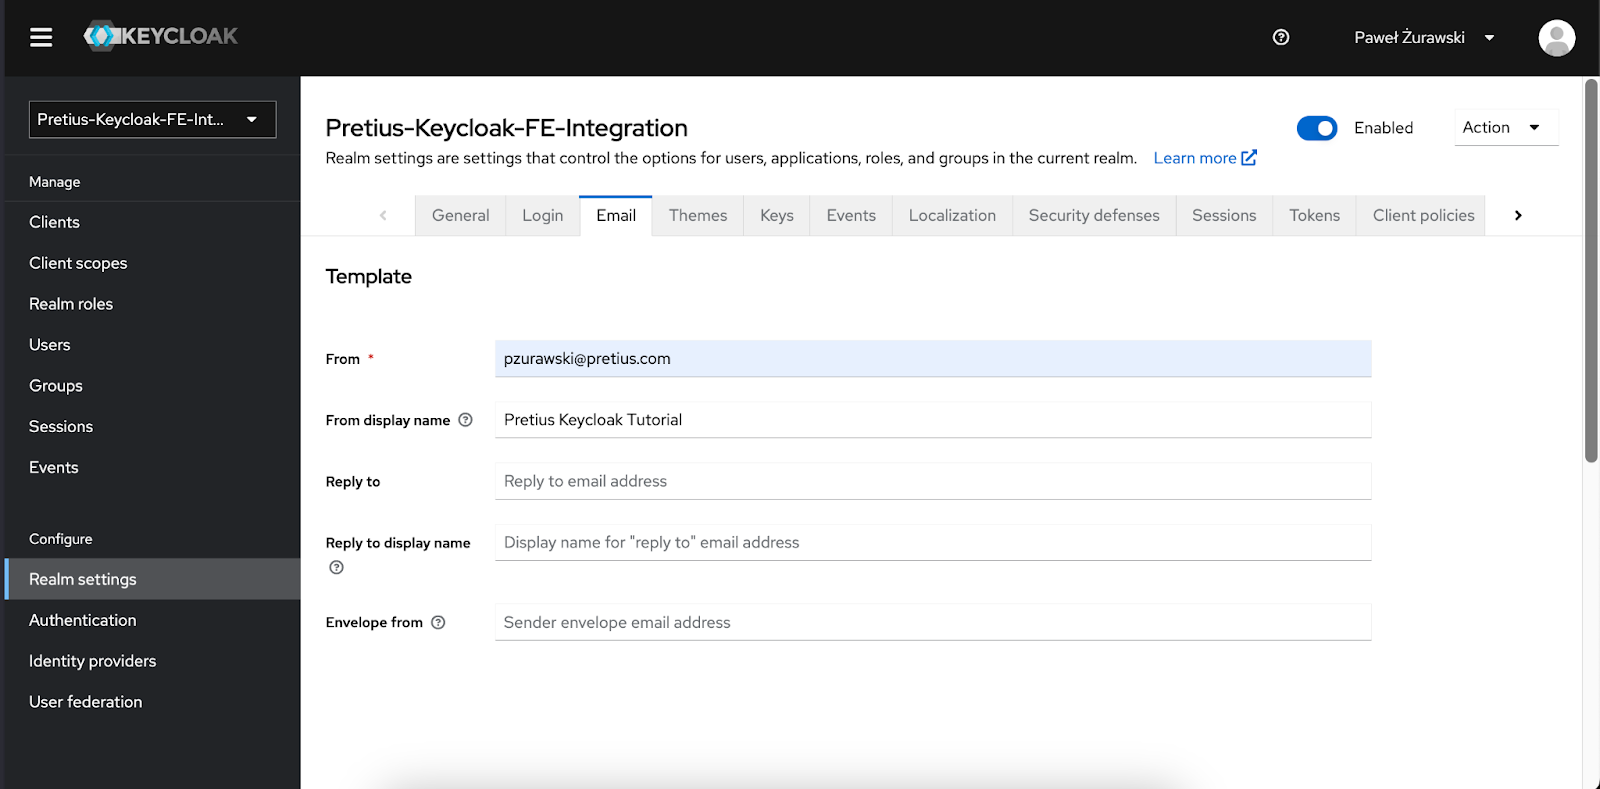
The configuration above sets the following elements in Keycloak:
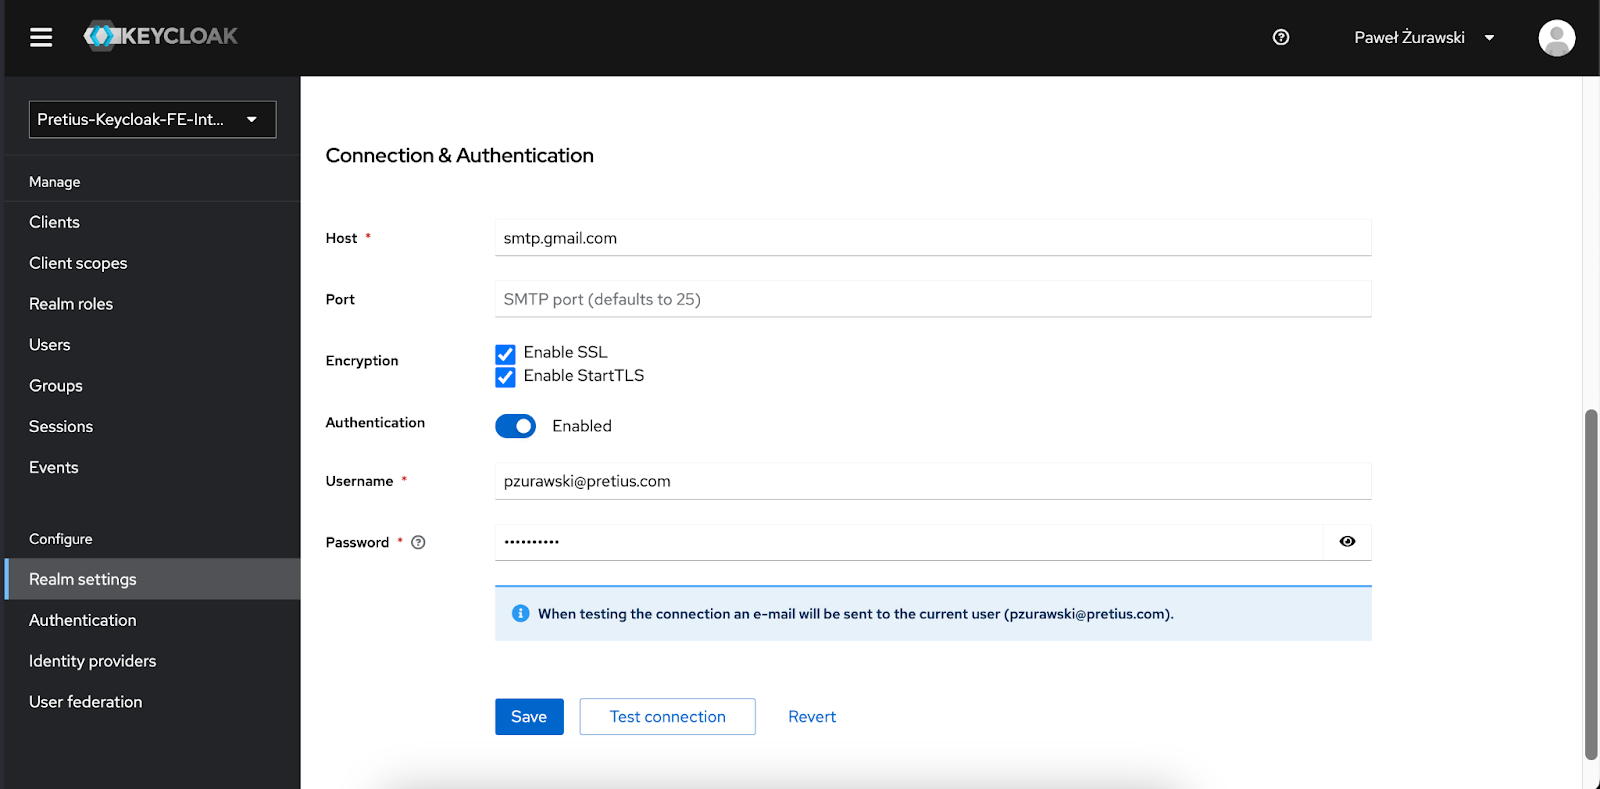
The next step is to provide the appropriate credentials for your SMTP server. This tutorial assumes you use Google for this purpose (it’s what we used in our sample app’s case), so you must provide the username or email address you want to use to send messages and the password for your application.
The password mentioned above is not the password for your Google account but one generated specifically for your application. To generate it, perform the following steps:
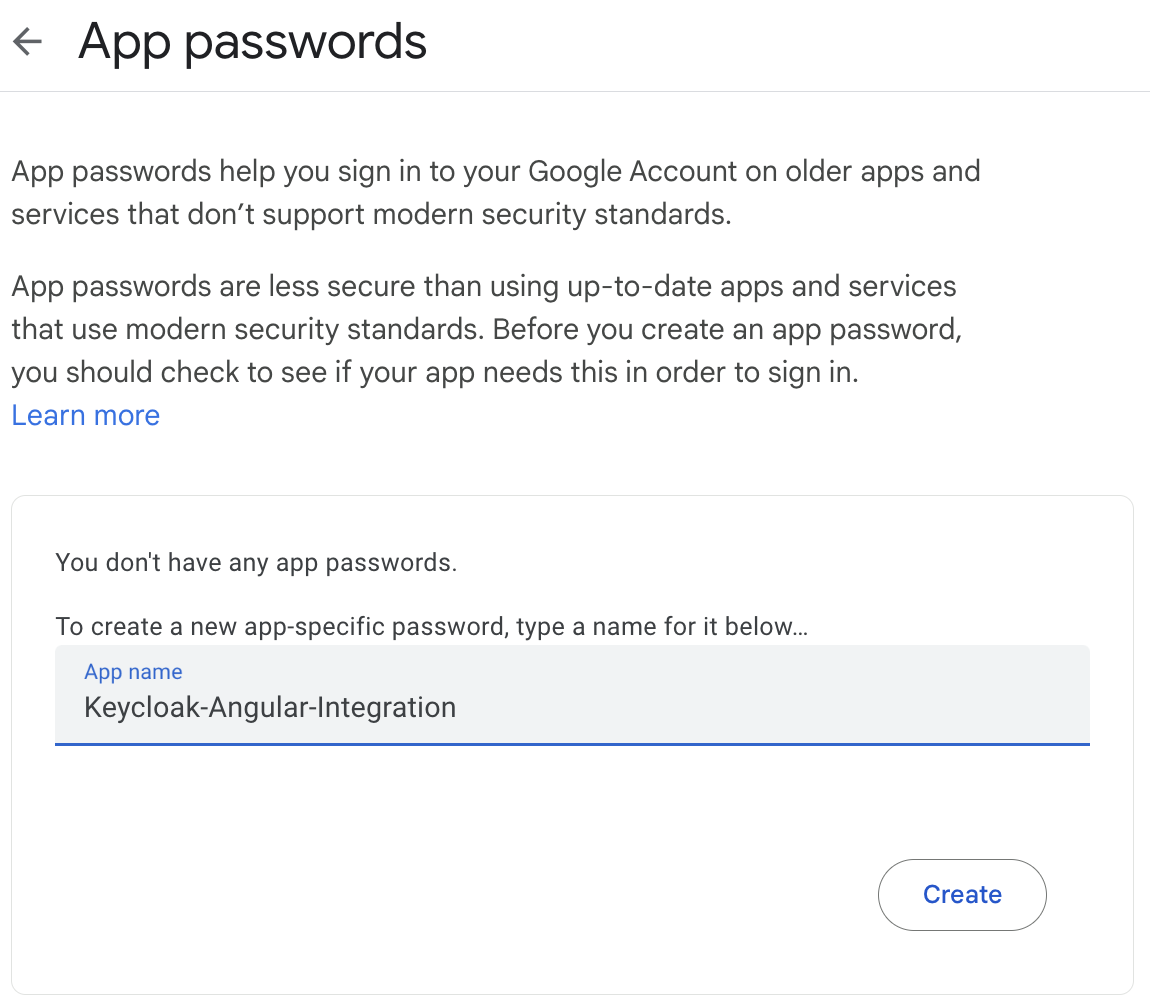
Your new application password will be located where the Xs are in the screenshot above. You just need to copy and paste it into the “password” field required for authentication.
You can also encounter a situation where the Test connection button is grayed out, and the following information appears below it:

To fix this, go to the provided link and add your email address to your user profile. Once you have done this, the button should be available, and the yellow message should change to the following:

If the following error appears after pressing the Test connection button:

Try one of the following solutions:
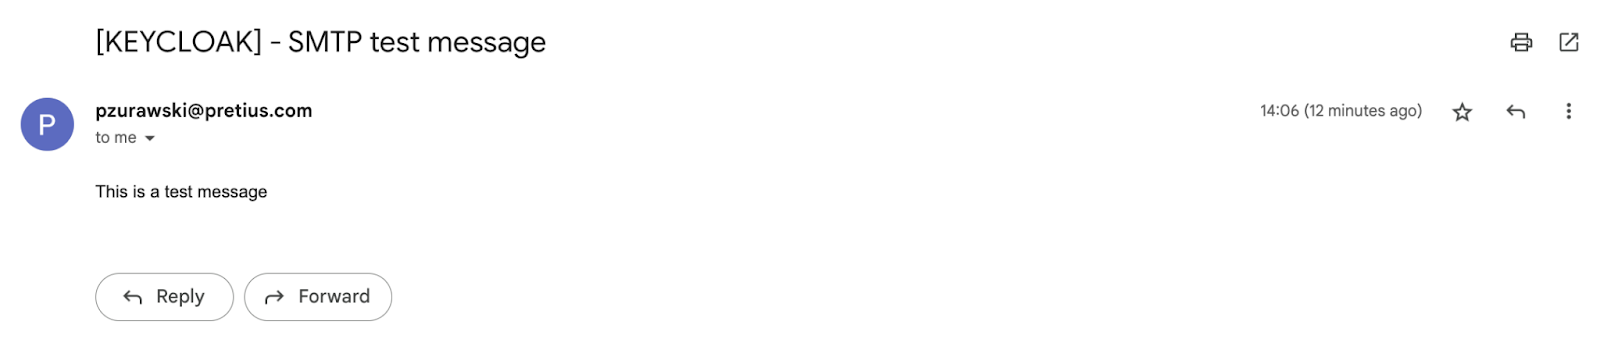
If you managed to configure everything correctly, you should find the following email in your mailbox:
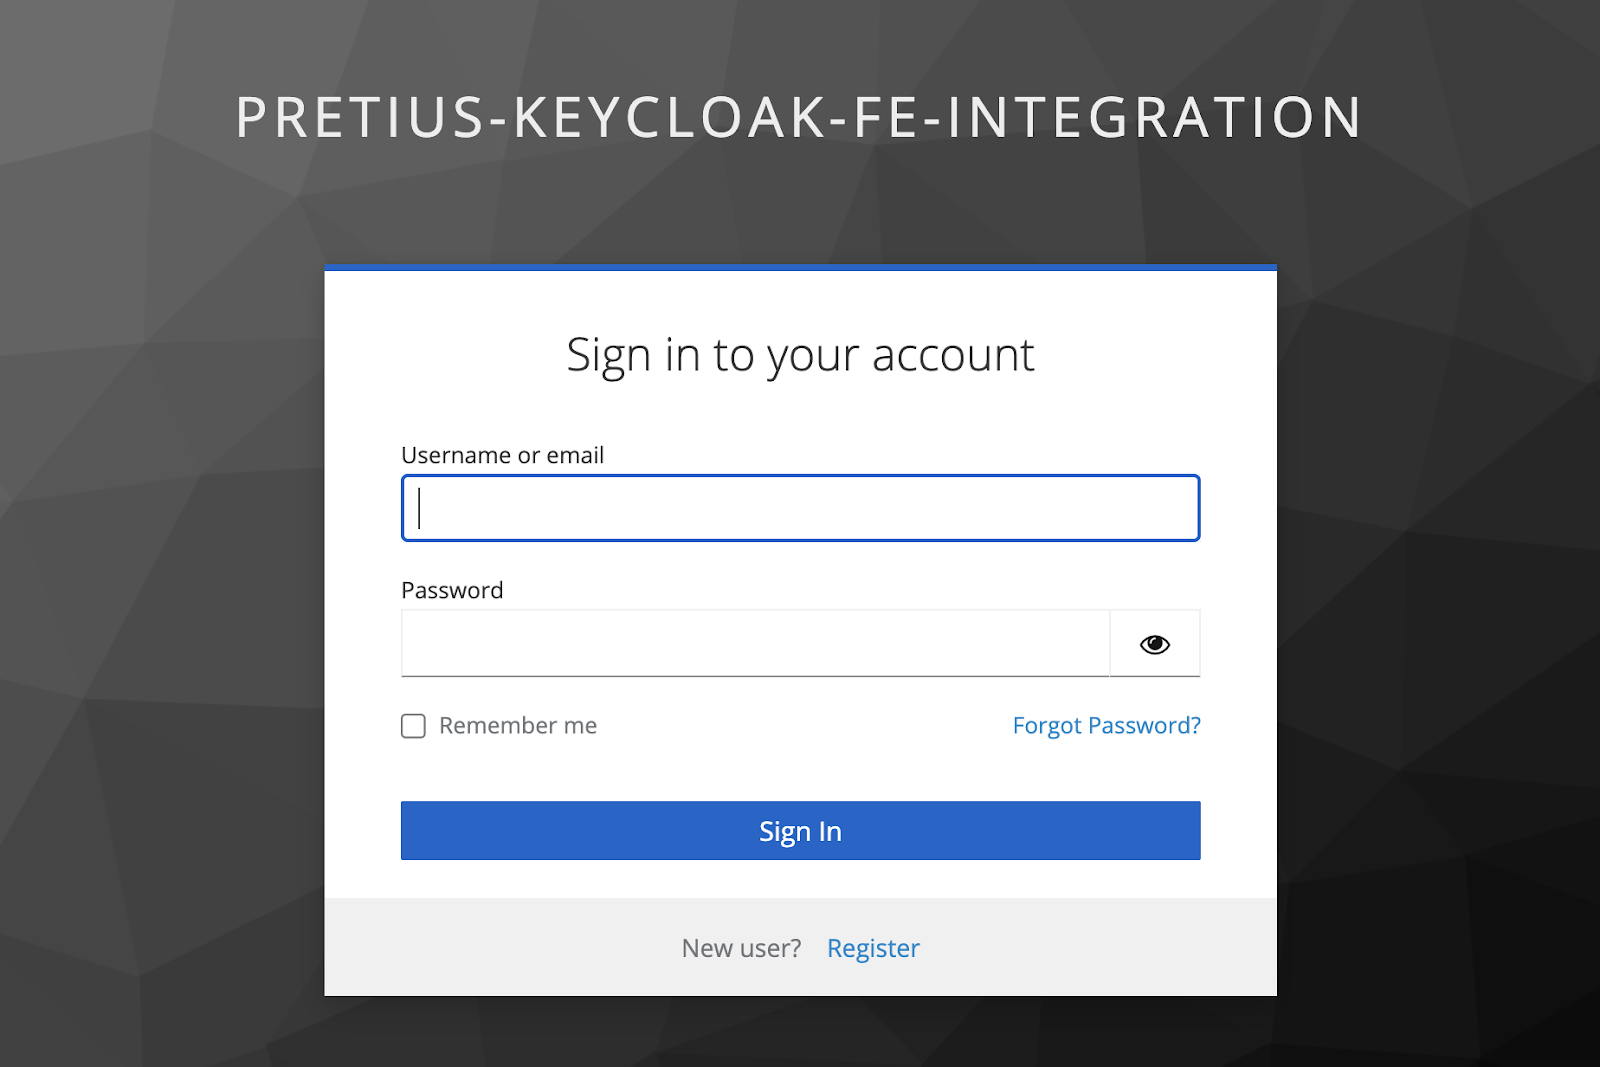
Now that you have successfully configured e-mail communication, you can start using it, e.g., to enable user registration after confirming the correctness of the entered email address. We’ll demonstrate it using our sample Angular application, so start it and press the login button. You should see the following view:
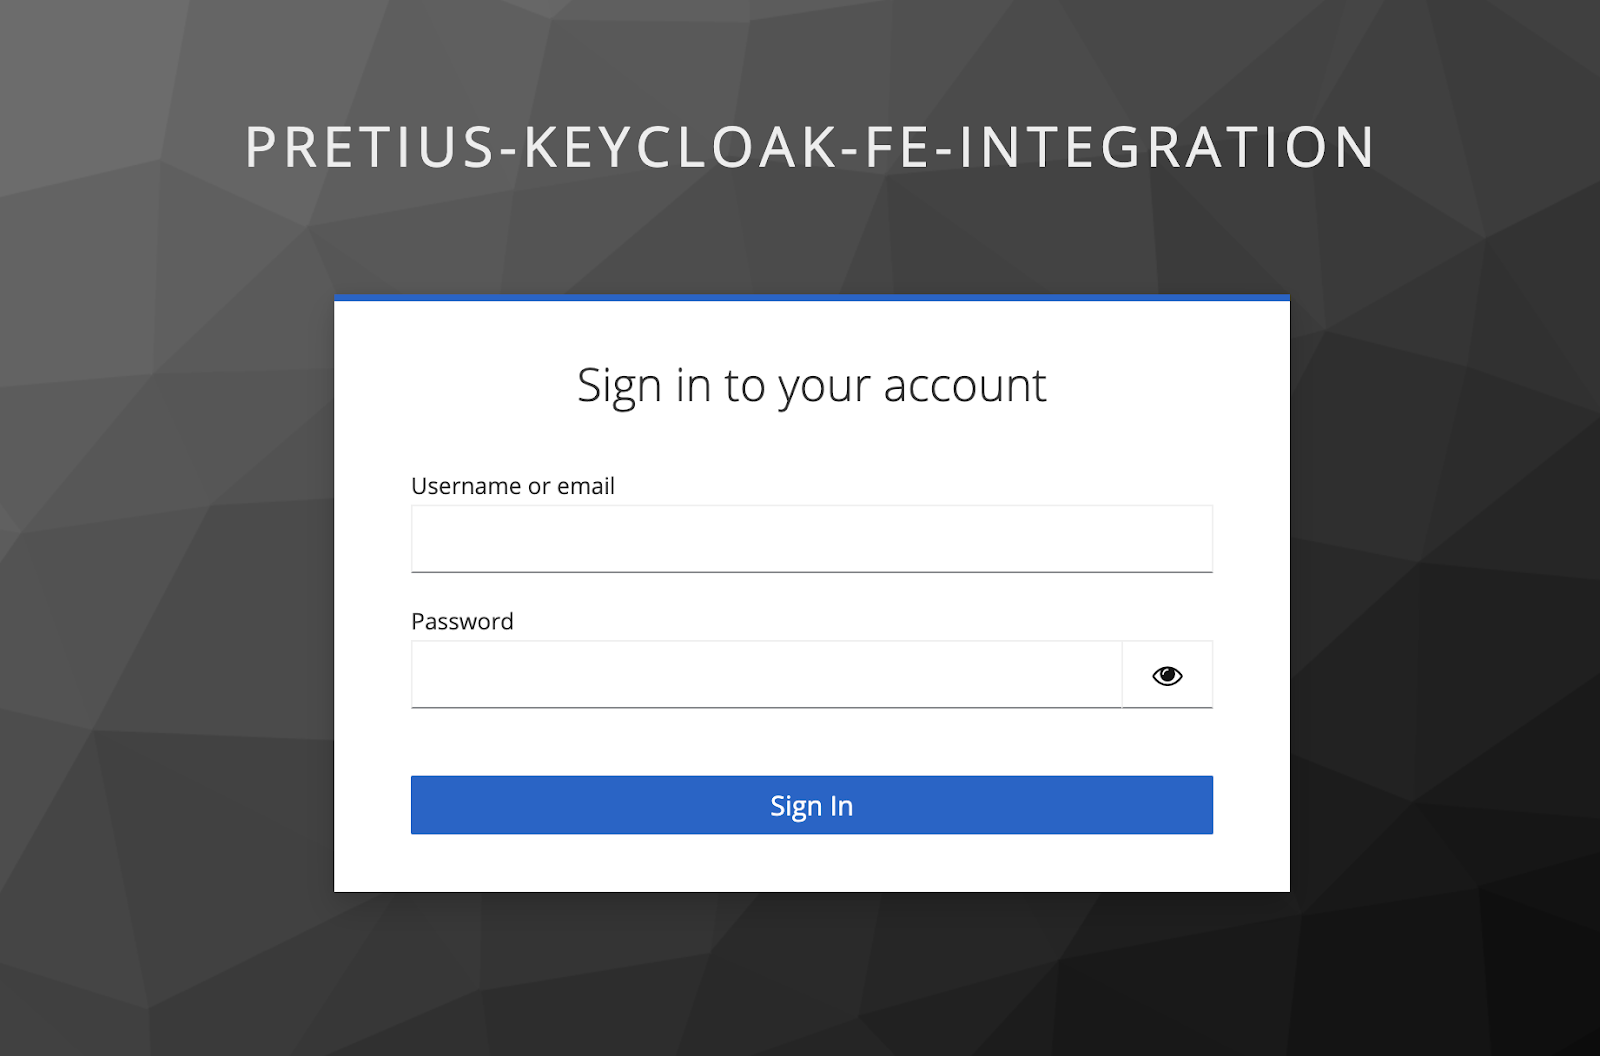
This is the application login screen prepared in the first article. Let’s examine how you can extend it to perform the basic actions expected of modern applications. For that, you need to configure your Keycloak server with additional properties. Return to the Keycloak configuration panel and open the Login tab in Realm settings.
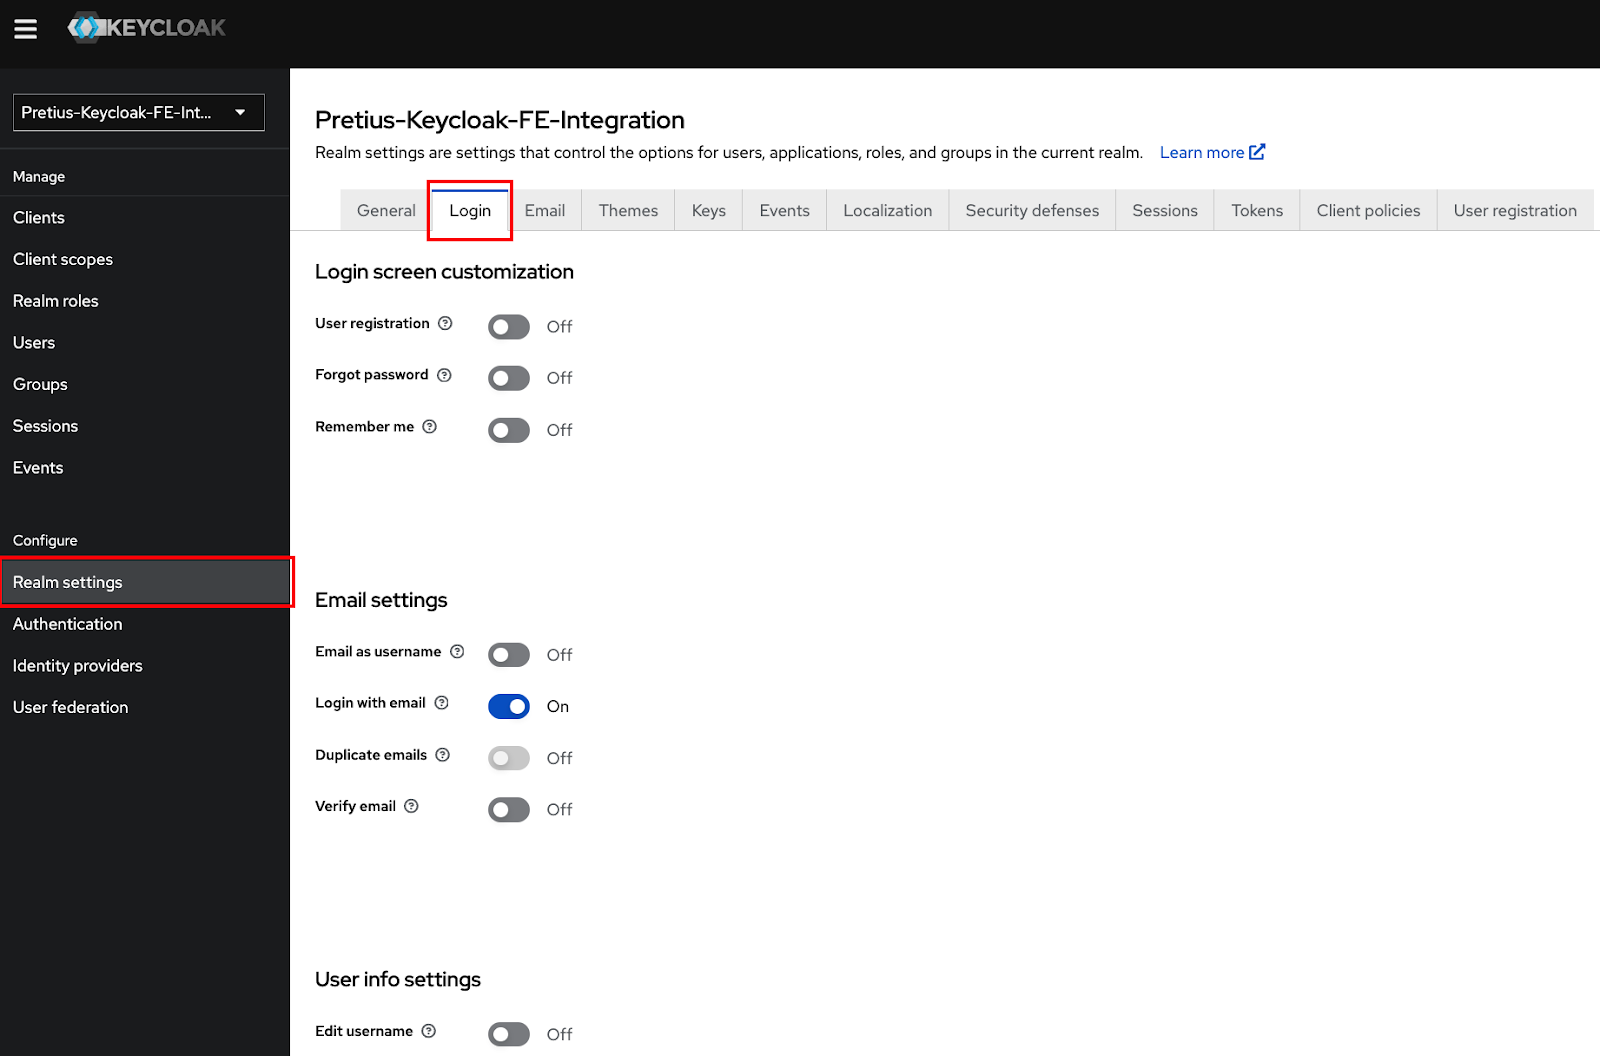
As you have probably already noticed, these options allow you to easily expand the functionalities available to the user when logging in to the application. Each option also contains a question mark icon that, when pressed, provides a short explanation of what exactly it applies to. Expand your configuration with the following options:
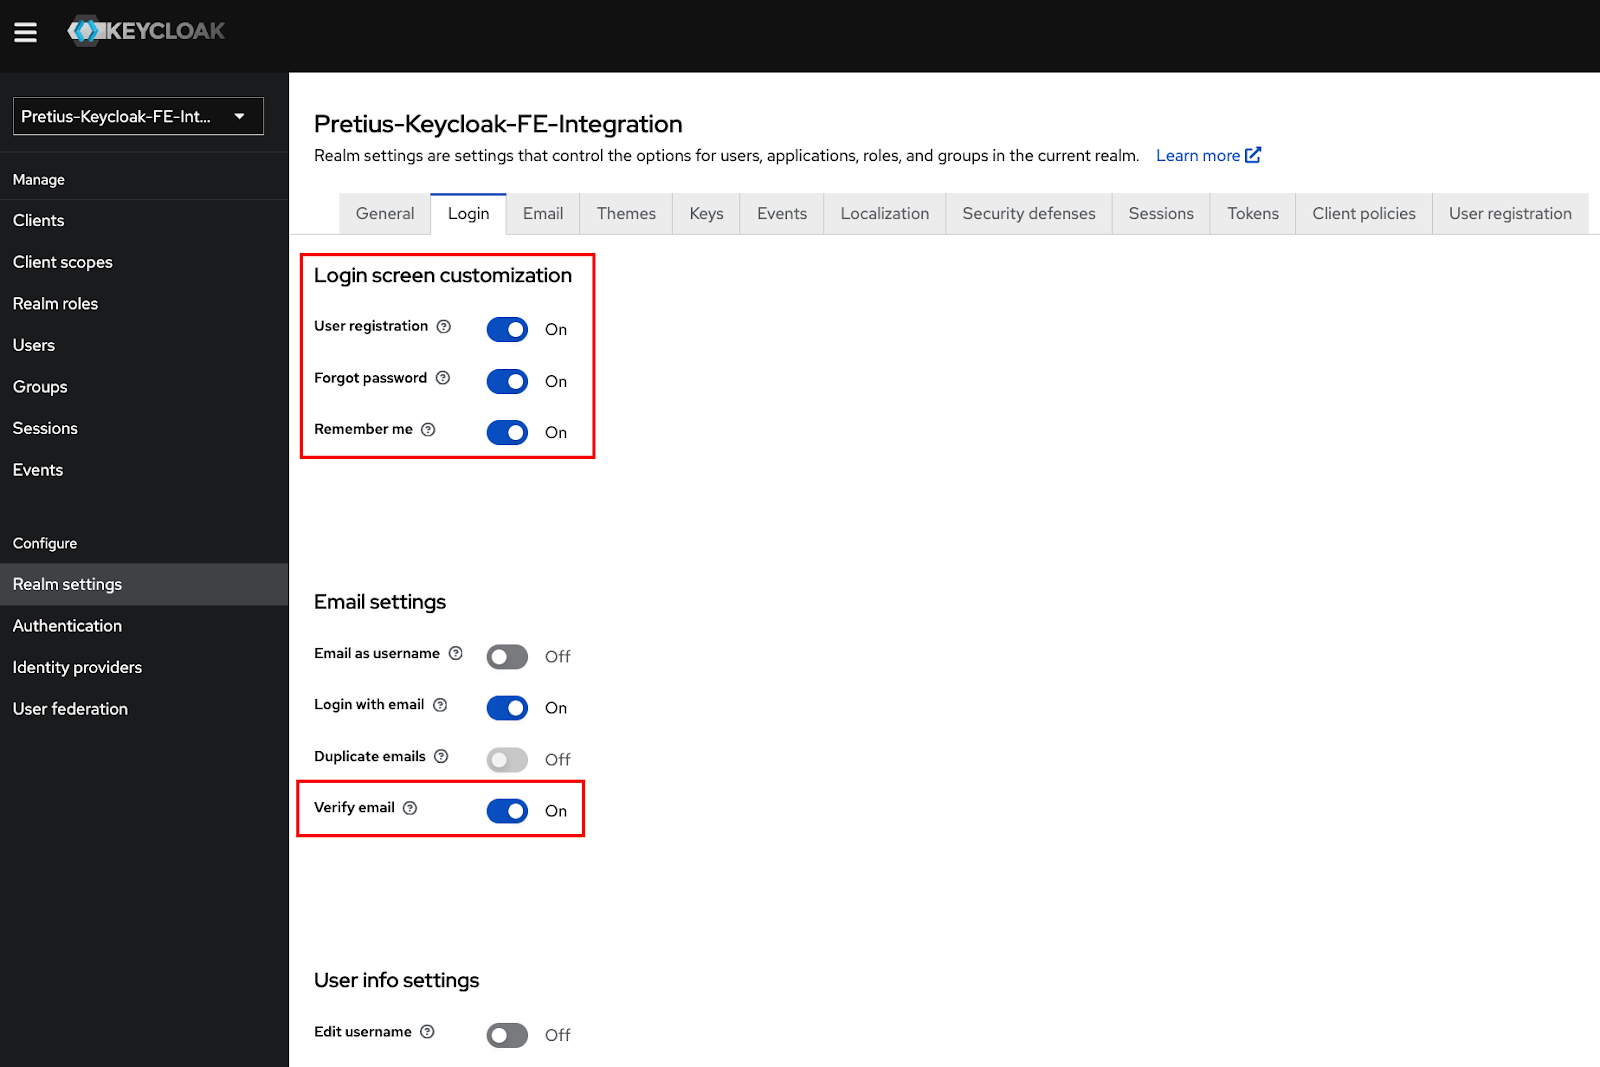
After checking the indicated boxes and refreshing the login screen in the application, the modified appearance of the login screen should appear:
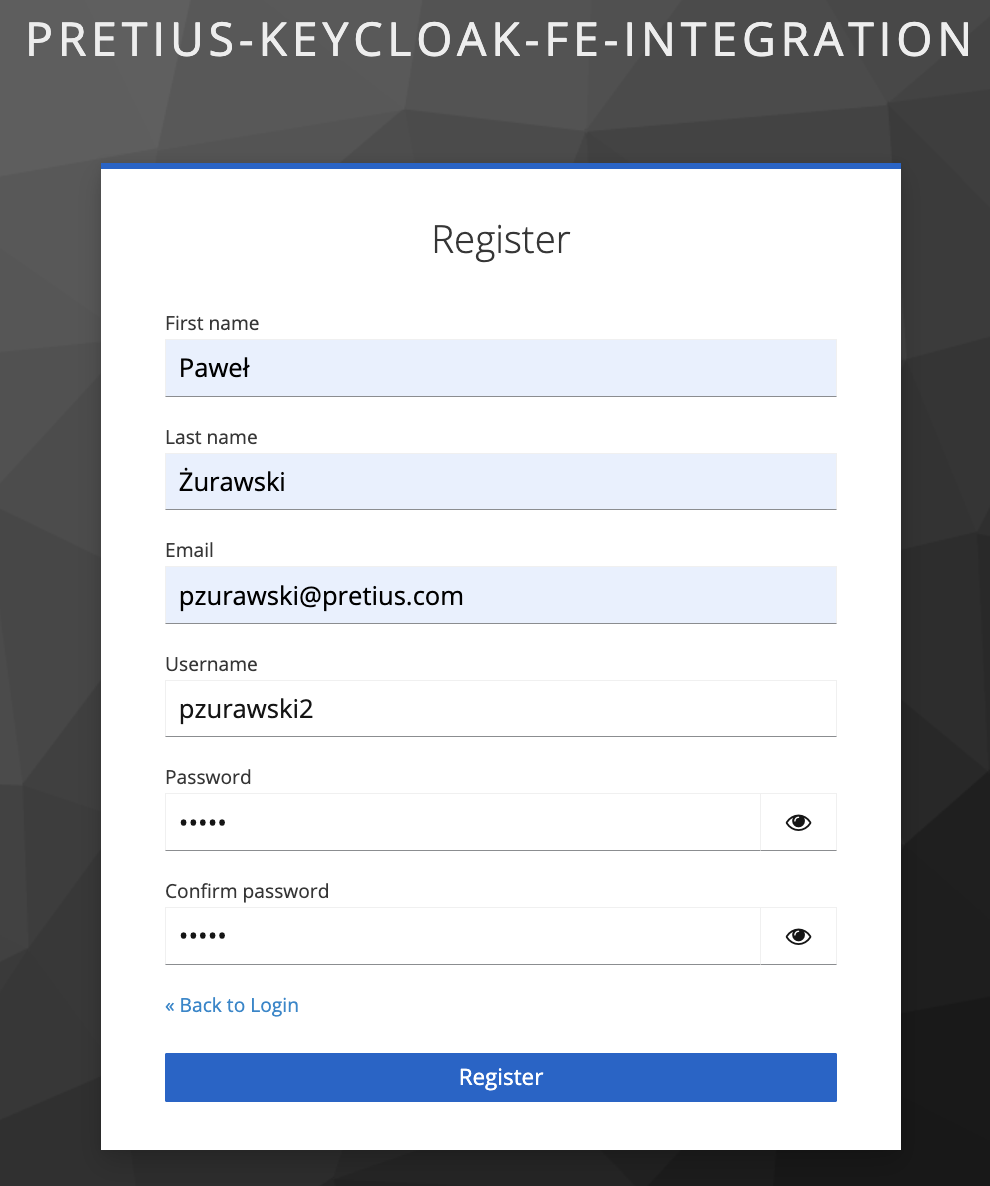
You can now try out how Keycloak handles the app registration process. After pressing the Register button at the bottom of the screen, you will be taken to a short new user registration form. Complete it by providing the target email address to which the registration confirmation should be sent and pressing the Register button.
If everything has been completed correctly, you should receive a notification about the need to verify the email address, as shown in the screenshot below:
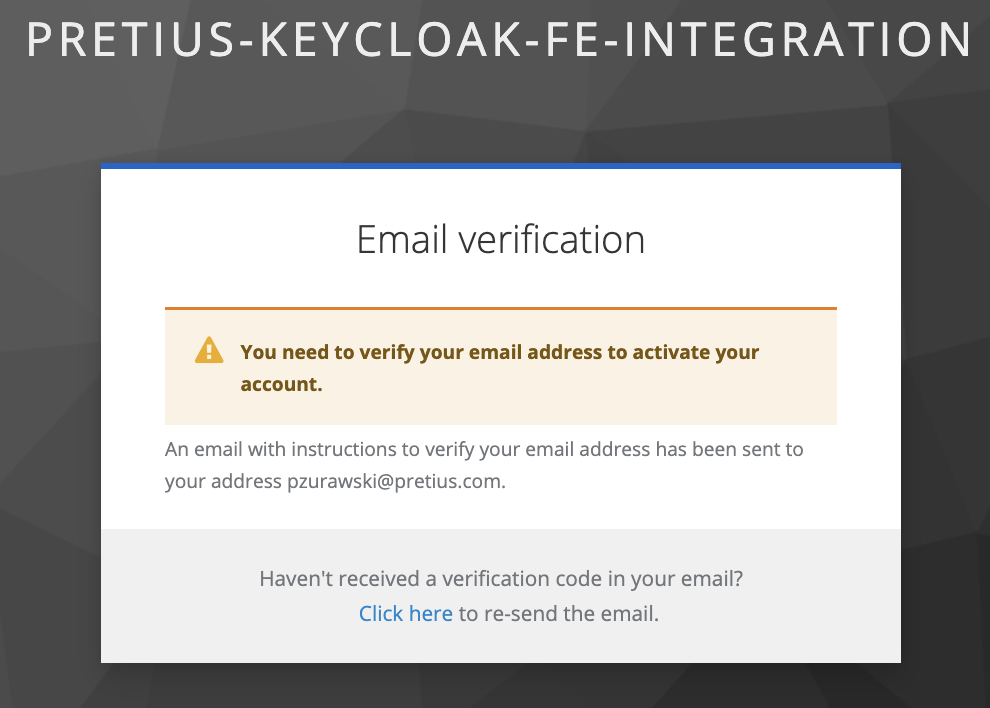
Go to the chosen mailbox, where you should find an email with a link to confirm the correctness of the entered address. Open the link you received and click the Click here to proceed button to complete the process.
After completing these steps and returning to the application, you should receive a notification that you have successfully logged in to the newly created account.
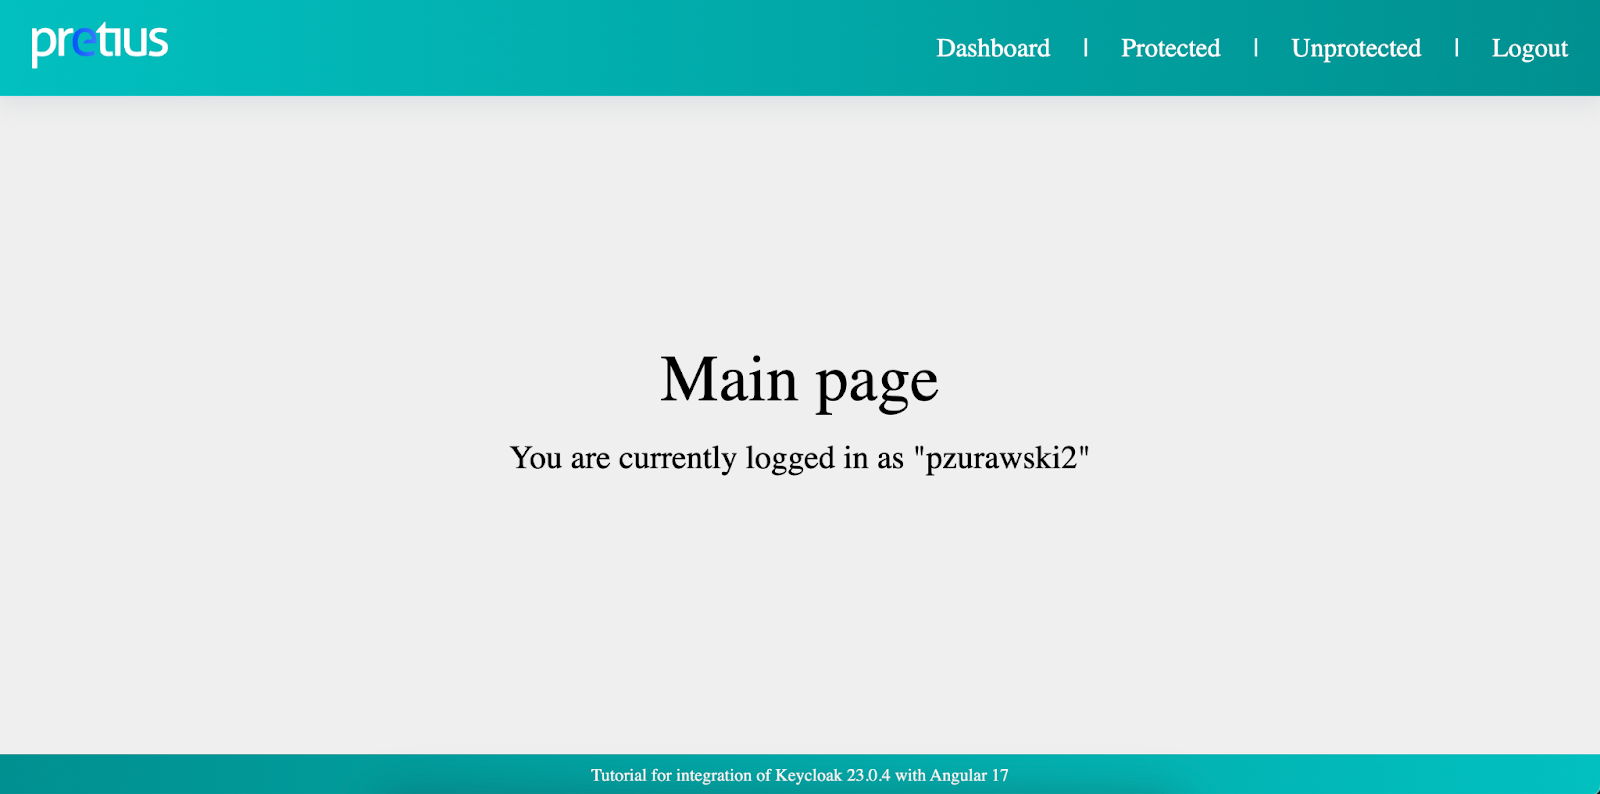
If you see this screen, you have successfully added a new user without creating any custom logic – everything was done using Keycloak features.
You have successfully registered and transferred information about a new user to the application. So, let’s take a look at how Keycloak passes data about the logged-in user to the client app. When you open the console in your browser of choice and go to the Network tab, you will see a query called token, which returns information from the Keycloak client in the form of a JSON object containing, among other things, several JWT tokens.
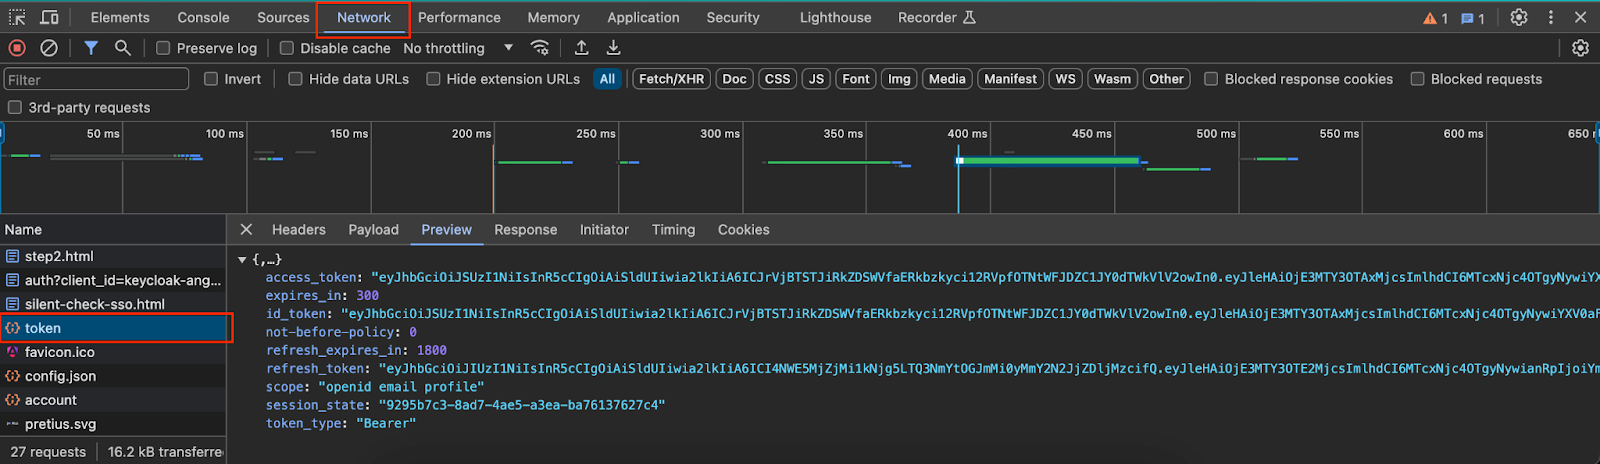
Let’s take a look at what each token is responsible for:
Tokens operate within the OAuth 2.0 and OpenID Connect protocols, which Keycloak supports. The idea is simple: the user logs in and receives an access token, an ID token and a refresh token. The JWT access token is used to access protected resources, while the ID token provides the client with information about the logged-in user. After the access token expires, the client uses the refresh token to obtain a new access token and ID token.
The information in tokens is stored in an encoded form, so we are unable to read it directly. However, if you want to read the information in such a token, just use this website. Then, you only need to complete the required fields and select the encoding algorithm (RS256 by default), and you will see the decoded form of the token containing all the information.
However, decoding tokens in this way is impractical if you want to use the information they contain in your application. Fortunately, there are many ways to obtain them. One of the most popular solutions is the jwt-decode library, which allows you to extract information from JWT tokens using the jwtDecode() function.
However, in the new versions of the keycloak-angular library, there is an even simpler way to obtain the information passed in the access token and ID token. You just need to use the provided tokenParsed and idTokenParsed variables. To access them, we’ll need to make a few changes to our Angular application. The first step is to add a function in AuthenticationService that returns both tokens:
import { KeycloakTokenParsed } from 'keycloak-js';
...

getAccessToken(): KeycloakTokenParsed | undefined {
  return this.keycloakService.getKeycloakInstance().tokenParsed;
}

getIdToken(): KeycloakTokenParsed | undefined {
  return this.keycloakService.getKeycloakInstance().idTokenParsed;
}
This code allows you to directly obtain the decoded form of both tokens without performing any additional actions, as would be the case if you used the jwt-decode library for this purpose. You can use the values obtained in this way anywhere in the application. So let’s add a new component that will display the tokens received from Keycloak.
Start by generating a new component in the application. We called it TokenPageComponent because its only task will be to display the decoded ID Token and access token side by side. The logic of this component will only consist of adding the functions added above in the website constructor:
import { CommonModule } from '@angular/common';
import { Component } from '@angular/core';
import { AuthenticationService } from '../../services/authentication.service';

@Component({
  selector: 'app-token-page',
  standalone: true,
  imports: [CommonModule],
  templateUrl: './token-page.component.html',
  styleUrl: './token-page.component.scss',
})
export class TokenPageComponent {
  constructor(readonly authenticationService: AuthenticationService) {}
}
The HTML code will contain a way to display the mentioned information:
<div class="content-wrapper">
    <div class="token-content">
        <strong>Access Token</strong>
        <pre class="token-object">{{authenticationService.getAccessToken() | json}}</pre>
    </div>
    <div class="token-content">
        <strong>ID Token</strong>
        <pre class="token-object">{{authenticationService.getIdToken() | json}}</pre>
    </div>
</div>
You can also add a bit of CSS to make the presentation of both tokens clearer:
.content-wrapper {
  display: flex;
  gap: 2rem;
}

.token-content {
  display: flex;
  flex-direction: column;
}

.token-object {
  font-size: 0.5rem;
}
In addition, as in the previous article, you need to add the path to your new component in the app.routes.ts file:
export const routes: Routes = [
...
{
  path: AppRoutes.Token,
  canActivate: [AuthGuard],
  component: TokenPageComponent,
},
...
And finally, you will need to add a link that will allow going to a new page in navigation-bar.component.html:
<div class="nav-links">
...
    <a class="link-text" *ngIf="isLoggedIn" routerLink="token">Tokens</a>
    <p class="link-text" *ngIf="isLoggedIn">|</p>
...
</div>
Thanks to these changes, after starting the application and logging in to your user profile in Keycloak, you should be able to go to the following address: http://localhost:4200/token. If you followed all the steps, the page should contain the currently logged-in user’s decoded access token and ID token. If no user is logged in to the application, AuthGuard will not allow access to this path. As a result, you should see a view similar to mine:
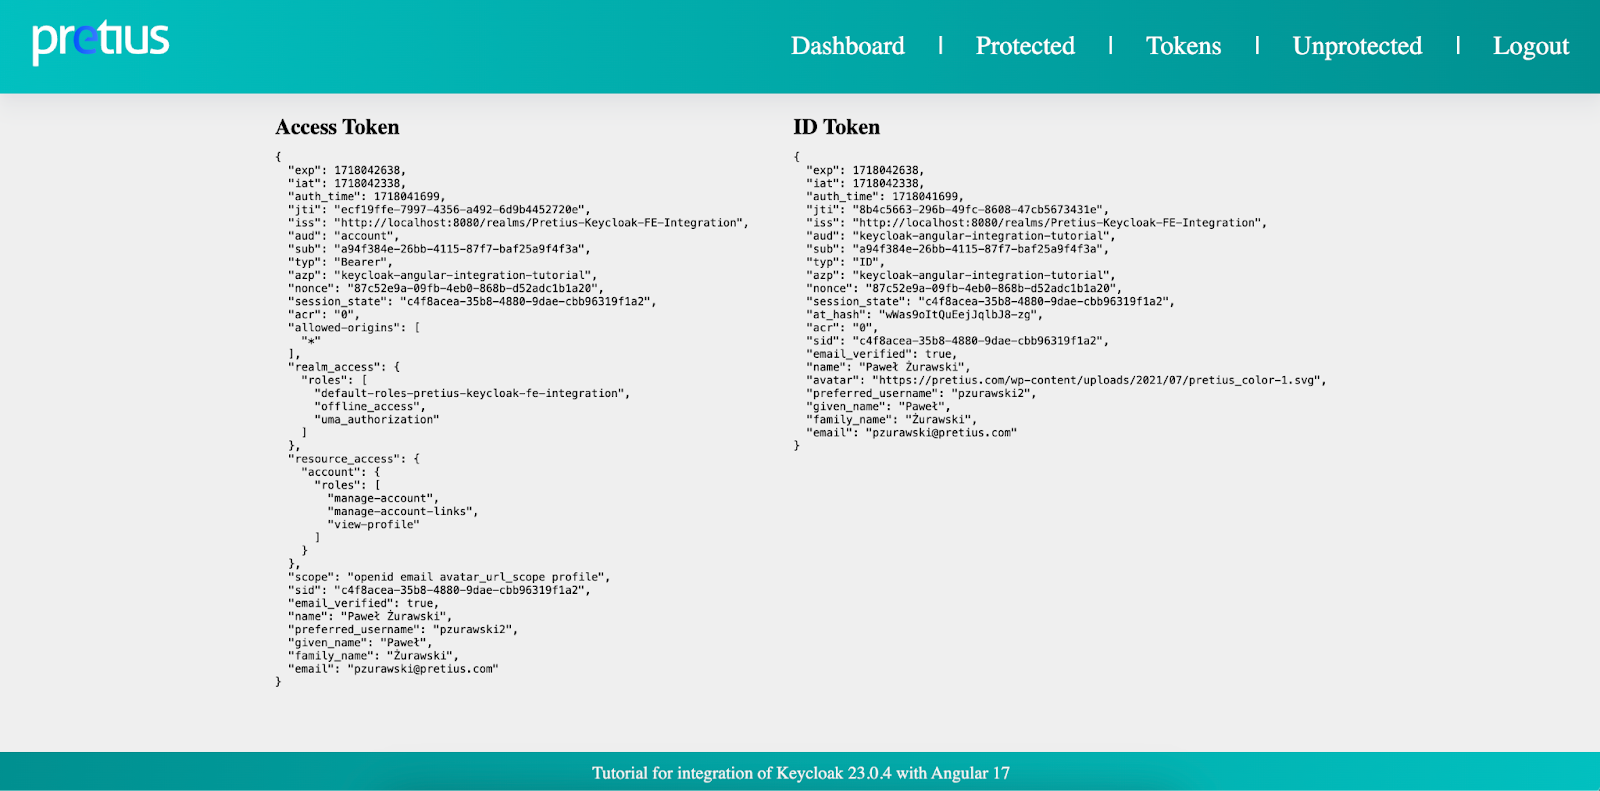
You correctly decoded and displayed the data in the tokens transferred from Keycloak to the client. They contain numerous information regarding, among others: data of the currently logged-in user, their permissions, current session, and the tokens themselves. You can use the obtained information as needed in your application, e.g., to examine user permissions. Now, let’s look at expanding this data to include additional information. We’ll show you how to add an attribute that stores the address to the logged-in user’s avatar.
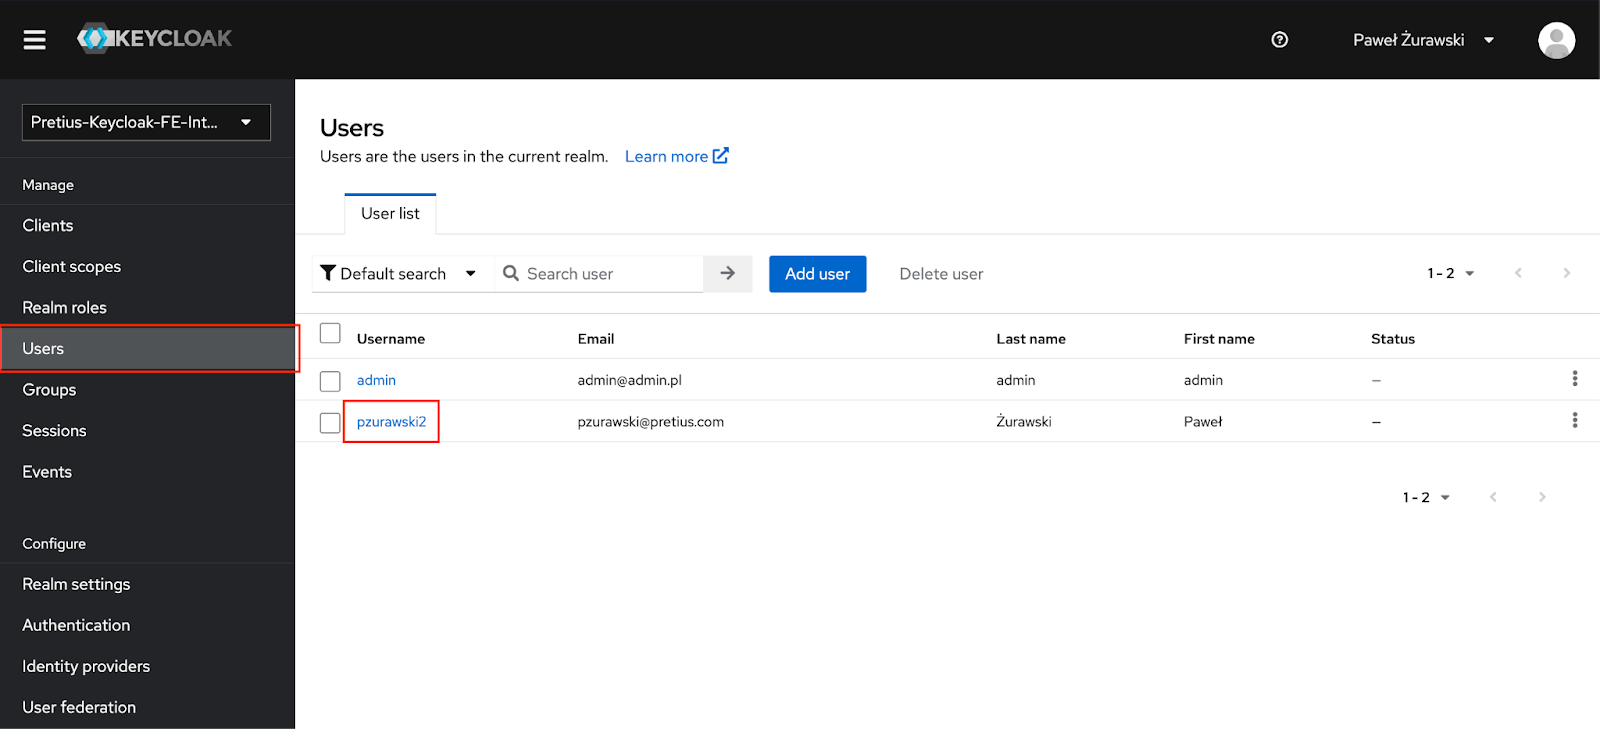
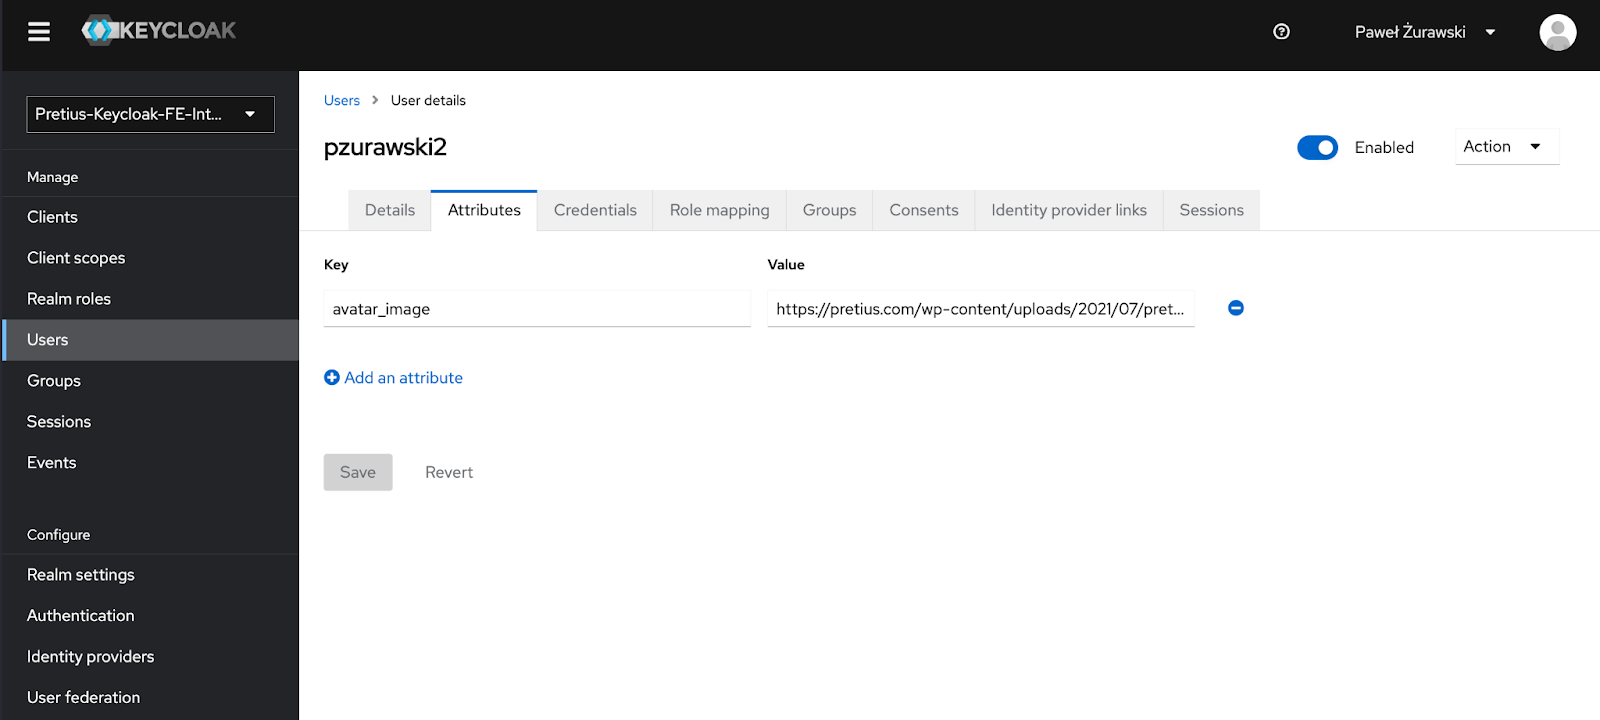
To do this, return to the administration console inside Keycloak and go to the Users tab. Select the user you want to modify. In my case, it’s the previously created pzurawski2.
Then you need to go to the Attributes tab and press the Add an attribute button.
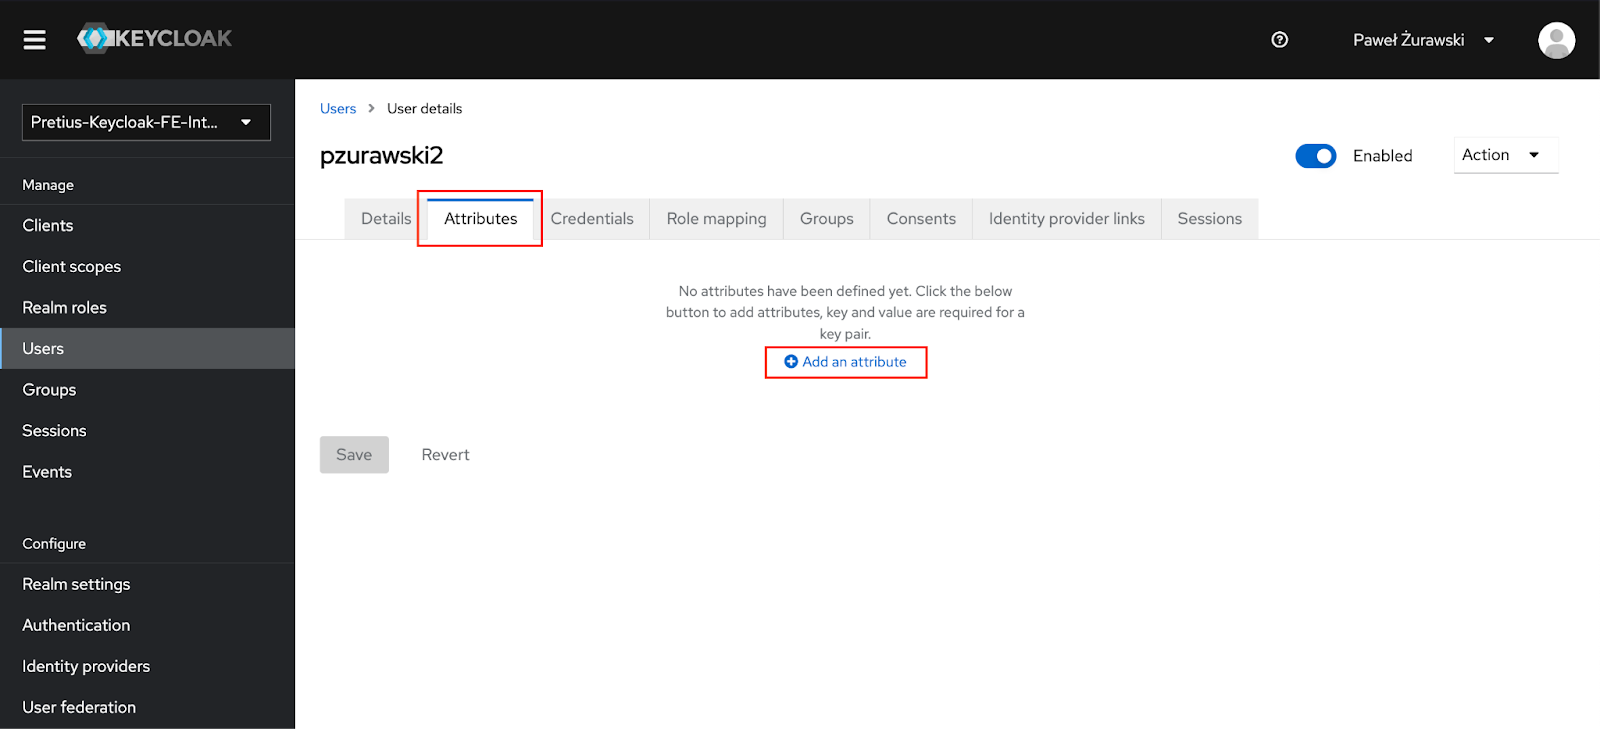
The last step is to add the new attribute’s name and value. Once you have completed these steps, simply press the Save button.
However, despite adding a new attribute, you won’t notice any change when you return to your application and examine the data returned from Keycloak. Unfortunately, this is not the end of the configuration. At this moment, Keycloak contains information about the value of the attribute you set, but the client is still unaware of its existence. So, let’s look at how you can pass attributes from Keycloak to your Angular application.
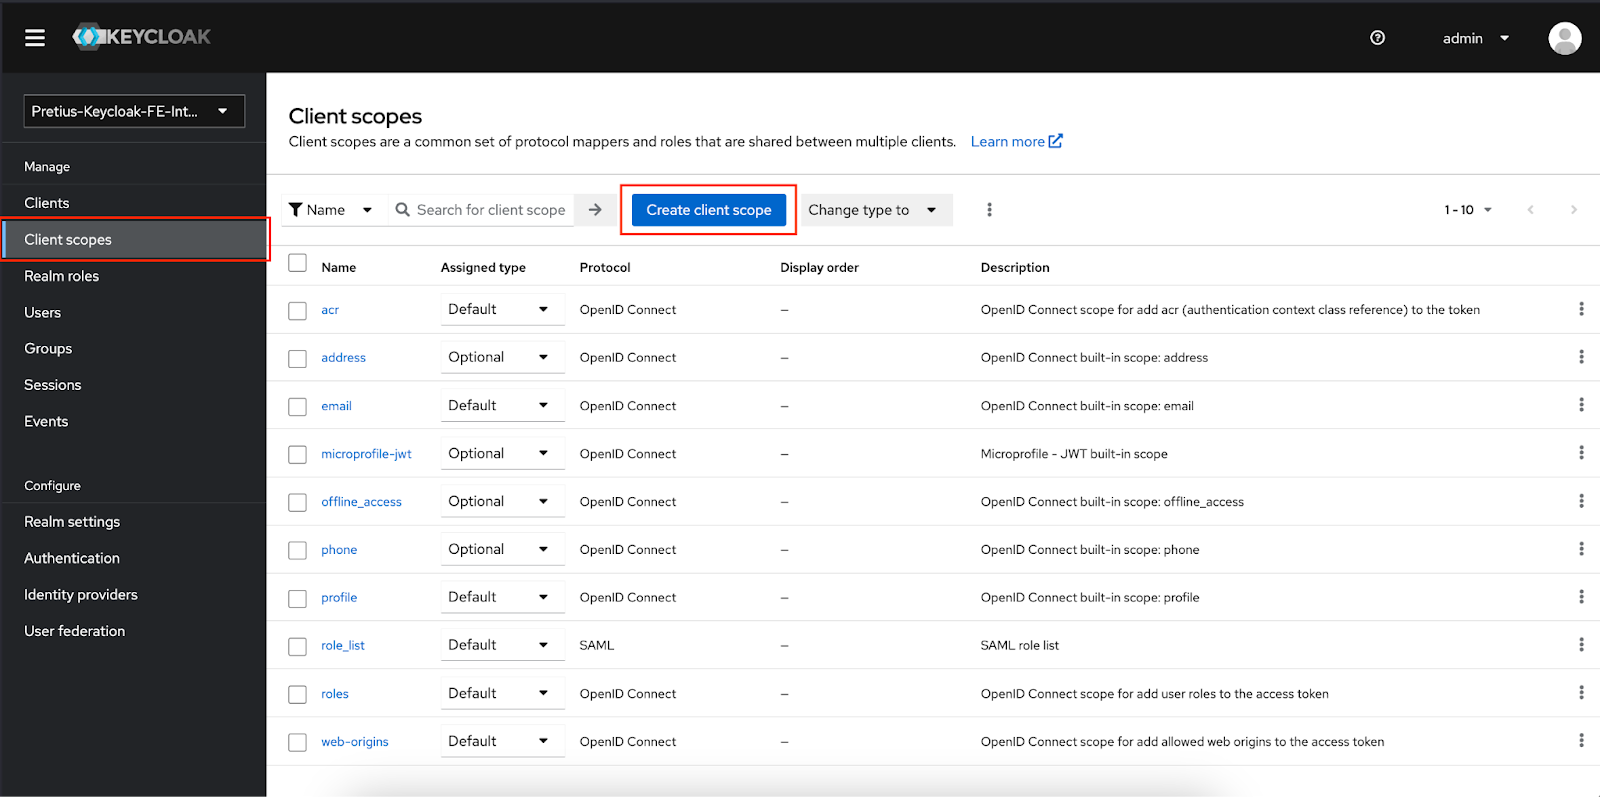
To do this, go to the Client Scope tab, which allows you to create elements that enable central management of common protocol configurations and role mappings for many clients within one domain (realm). This makes administration easier and maintains consistency of configuration and permissions. Additionally, client scopes allow clients to dynamically request specific claims or roles for users based on parameters passed in the OAuth 2.0 protocol. This allows you to assign permissions precisely, depending on the context of the request, which increases the security and flexibility of applications that use Keycloak.
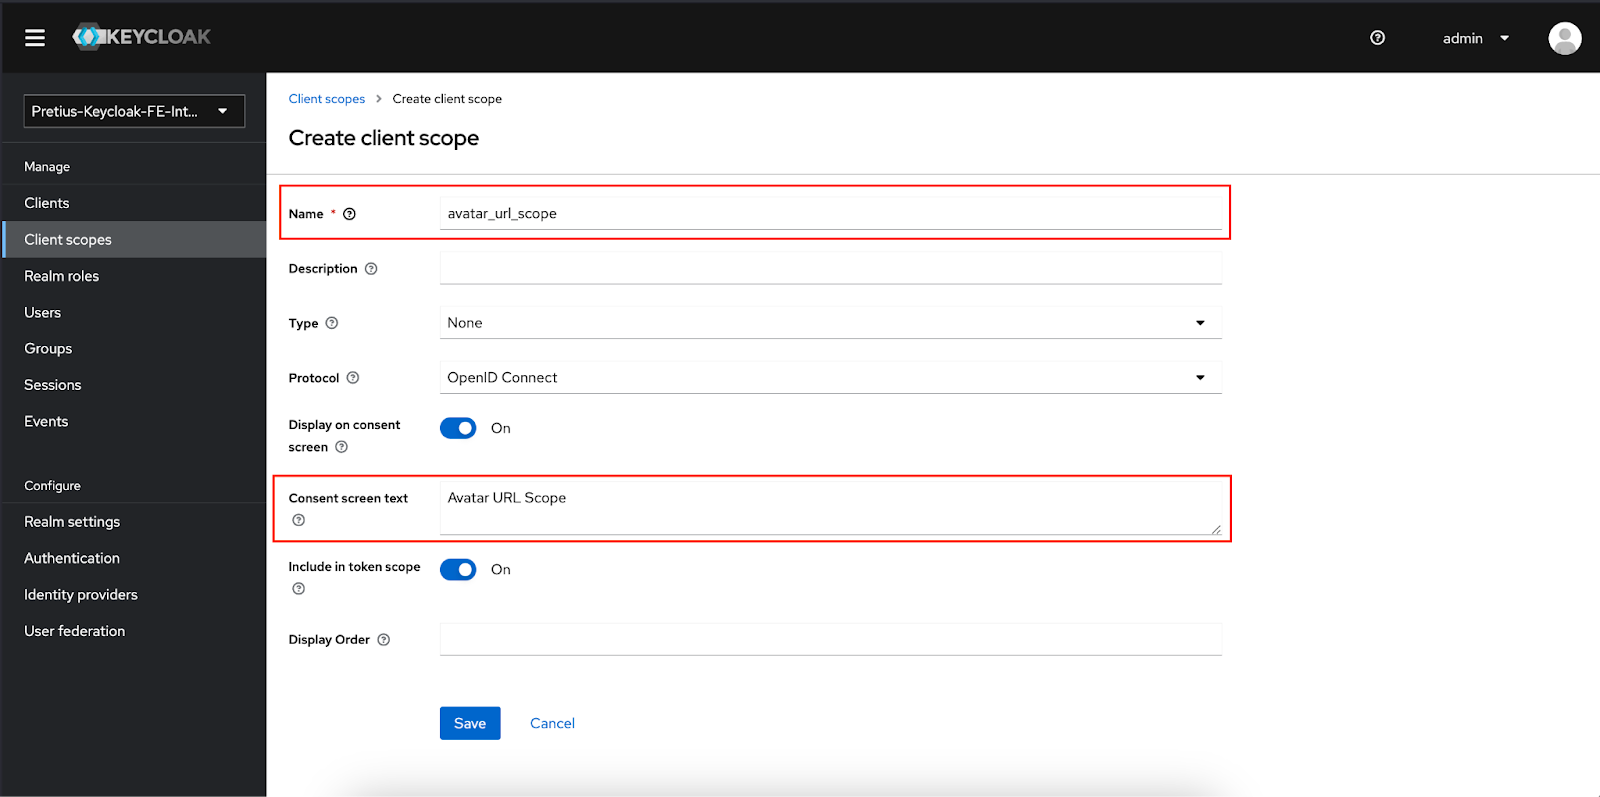
Create a new client scope that will allow you to map the value of your attribute. To do this, press the Create client scope button and then specify its name (the name of each scope should be unique and not contain spaces).
Additionally, fill out the Consent screen text field with a more user-friendly name because it will be displayed as the name of your new client scope.
The next step is to assign a new mapper to your client scope, allowing you to pass the value of the created attribute. Go to the Mappers tab and select the Configure a new mapper option.
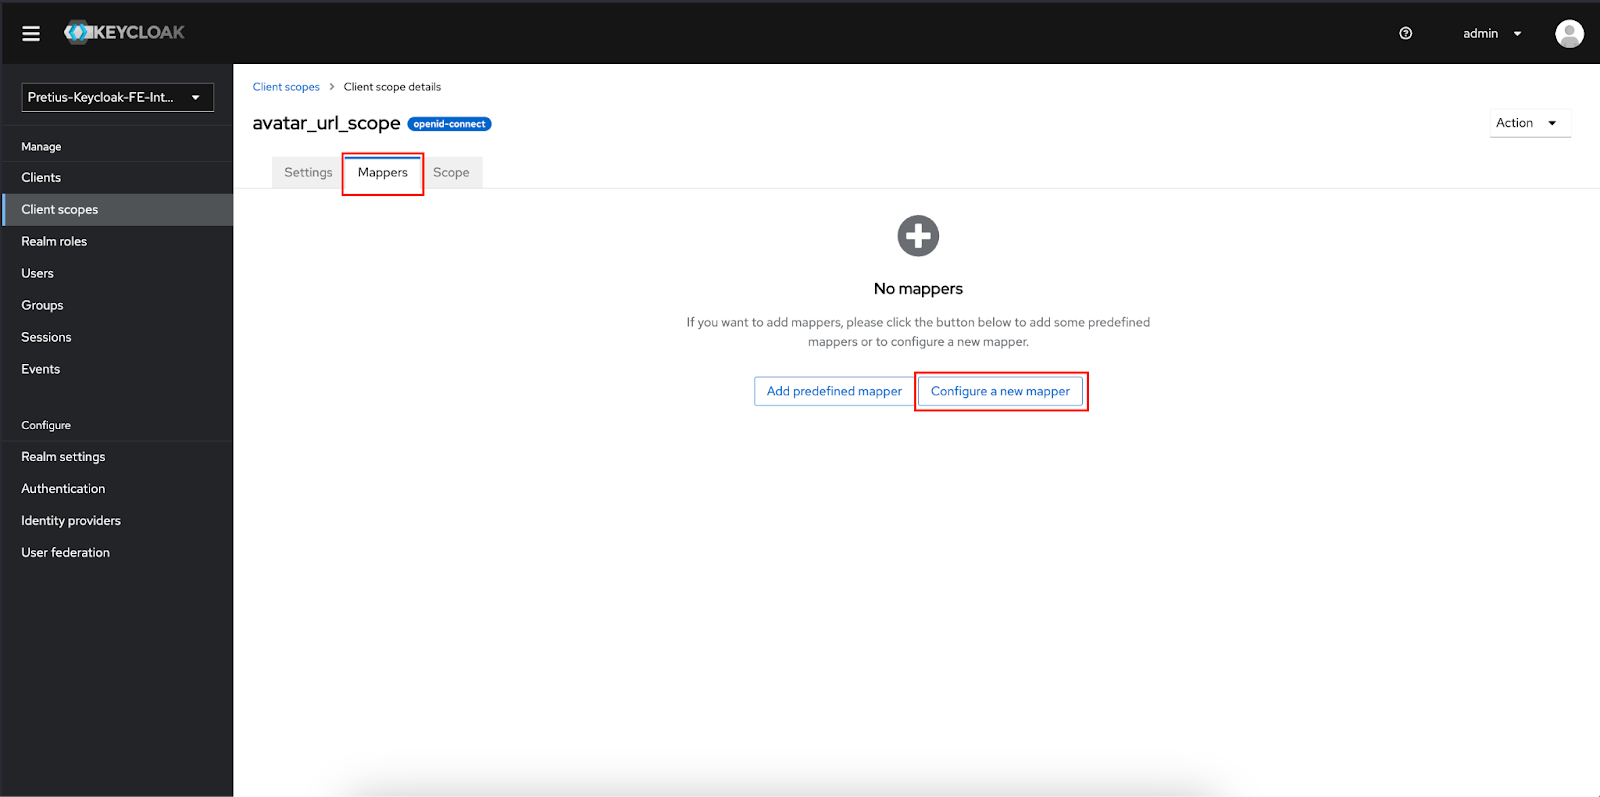
You should see the new mapper configuration modal:
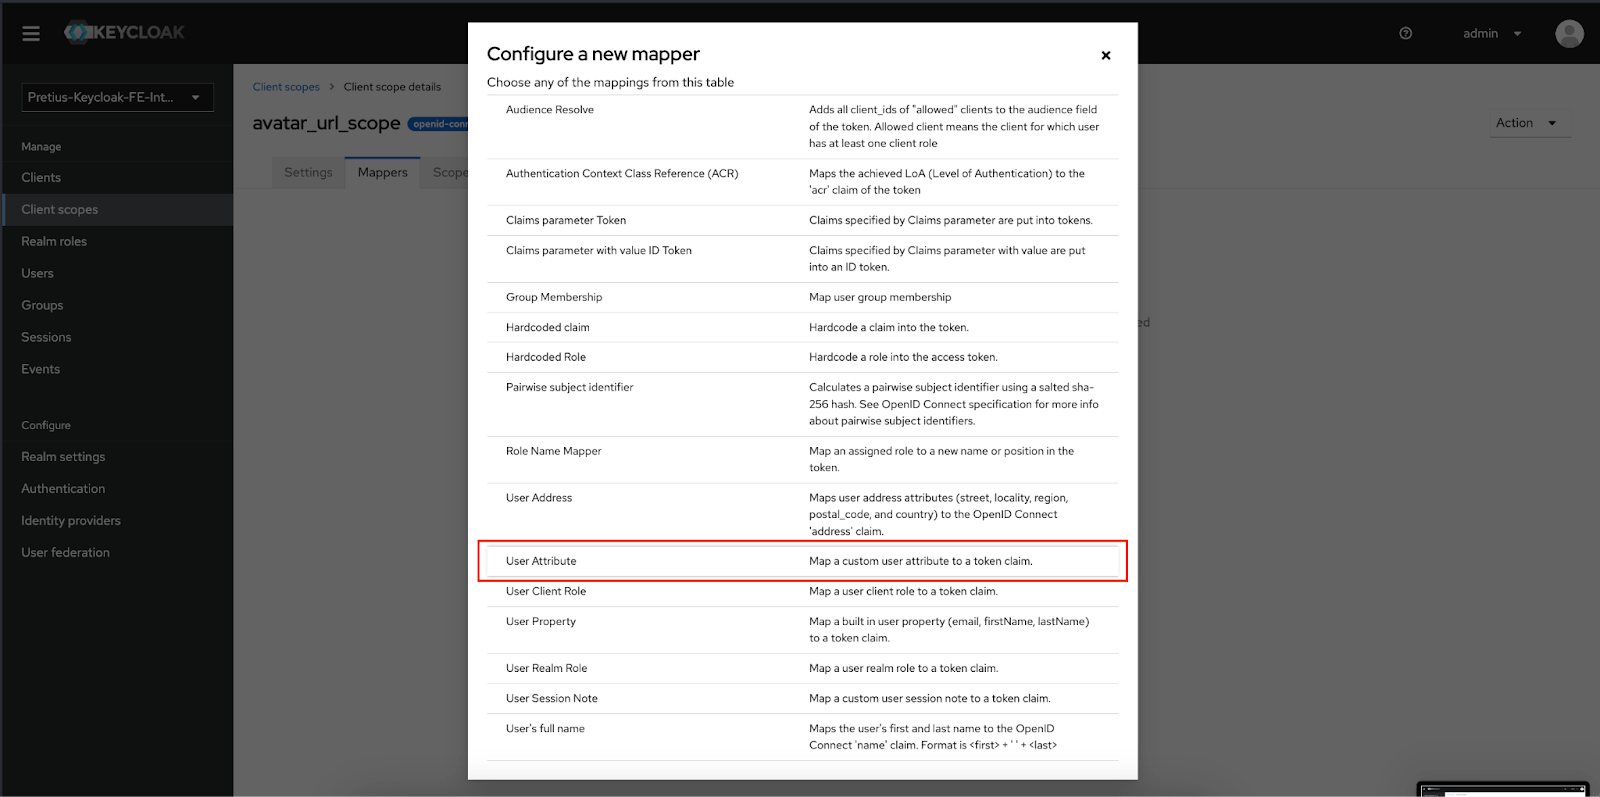
As you probably noticed, it allows you to easily and quickly add information to tokens returned from Keycloak to clients. One such piece of information could be the User Address mapper, which maps attributes related to user address data stored in Keycloak to the OpenID Connect address claim. However, the option you should be interested in is the User Attribute mapper. With its help, you can pass custom attributes in the returned token. So, select this option and go to the configuration window of this mapper.
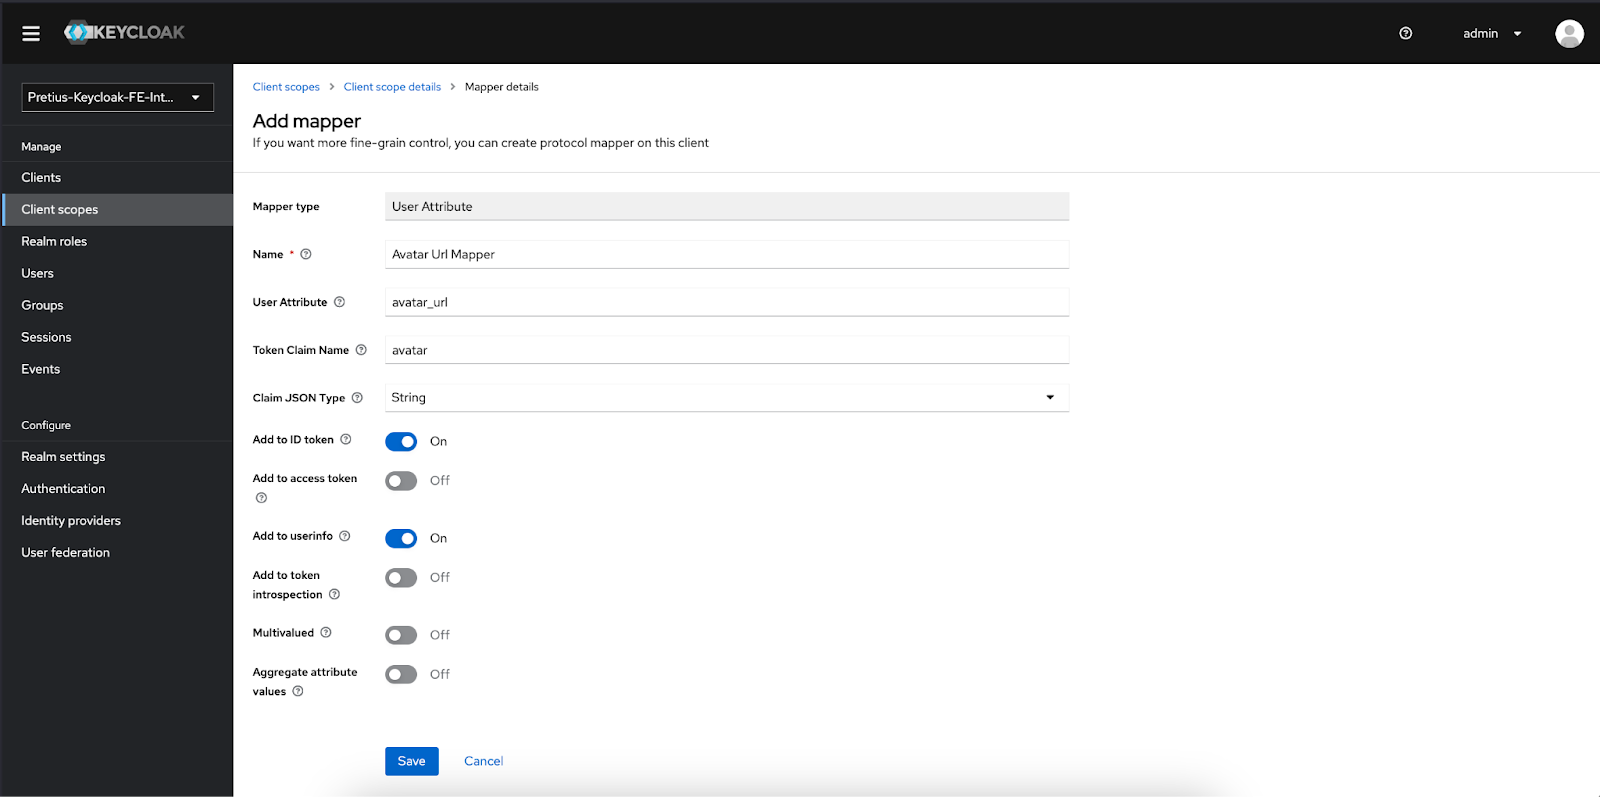
To pass the avatar_url attribute, you must set Name for your mapper and indicate the name of the attribute you want to pass from Keycloak – in this case avatar_url – in the User Attribute field. You also need to provide a name under which it will be possible to find the passed value in the token, which you do by completing the Token Claim Name field.
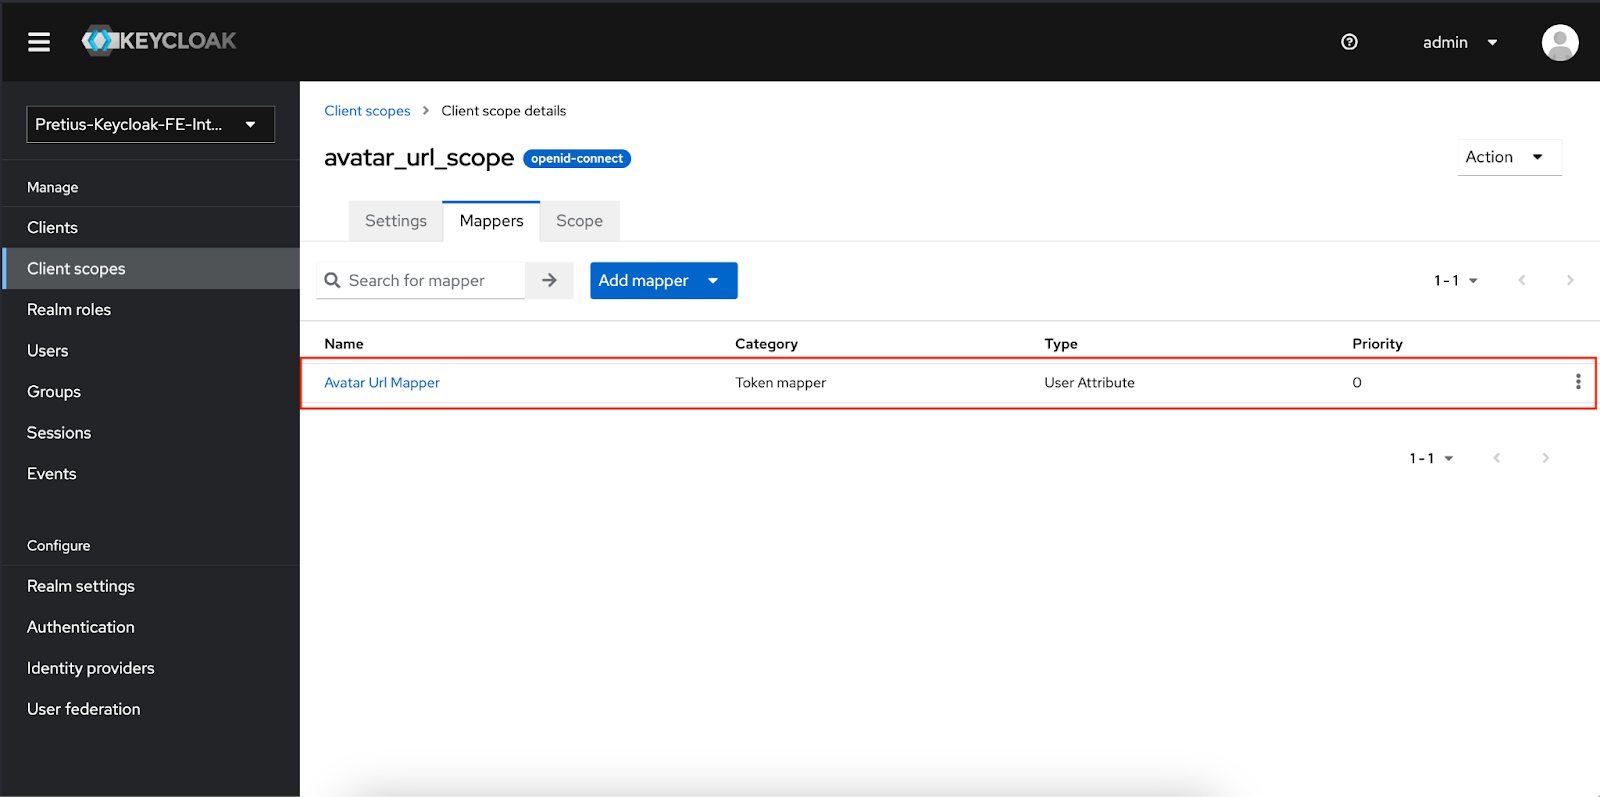
The process is quite simple, especially since individual fields offer information explaining their meaning under the question mark icons. Since you know that the values passed using this parameter will be text values, leave the default String value in the Claim JSON Type field. You also want the information about your attribute to be included only in the ID token, so uncheck the toggle in the Add to access token field. Save by pressing the Save button. You should now have a new row, like in the graphic below.
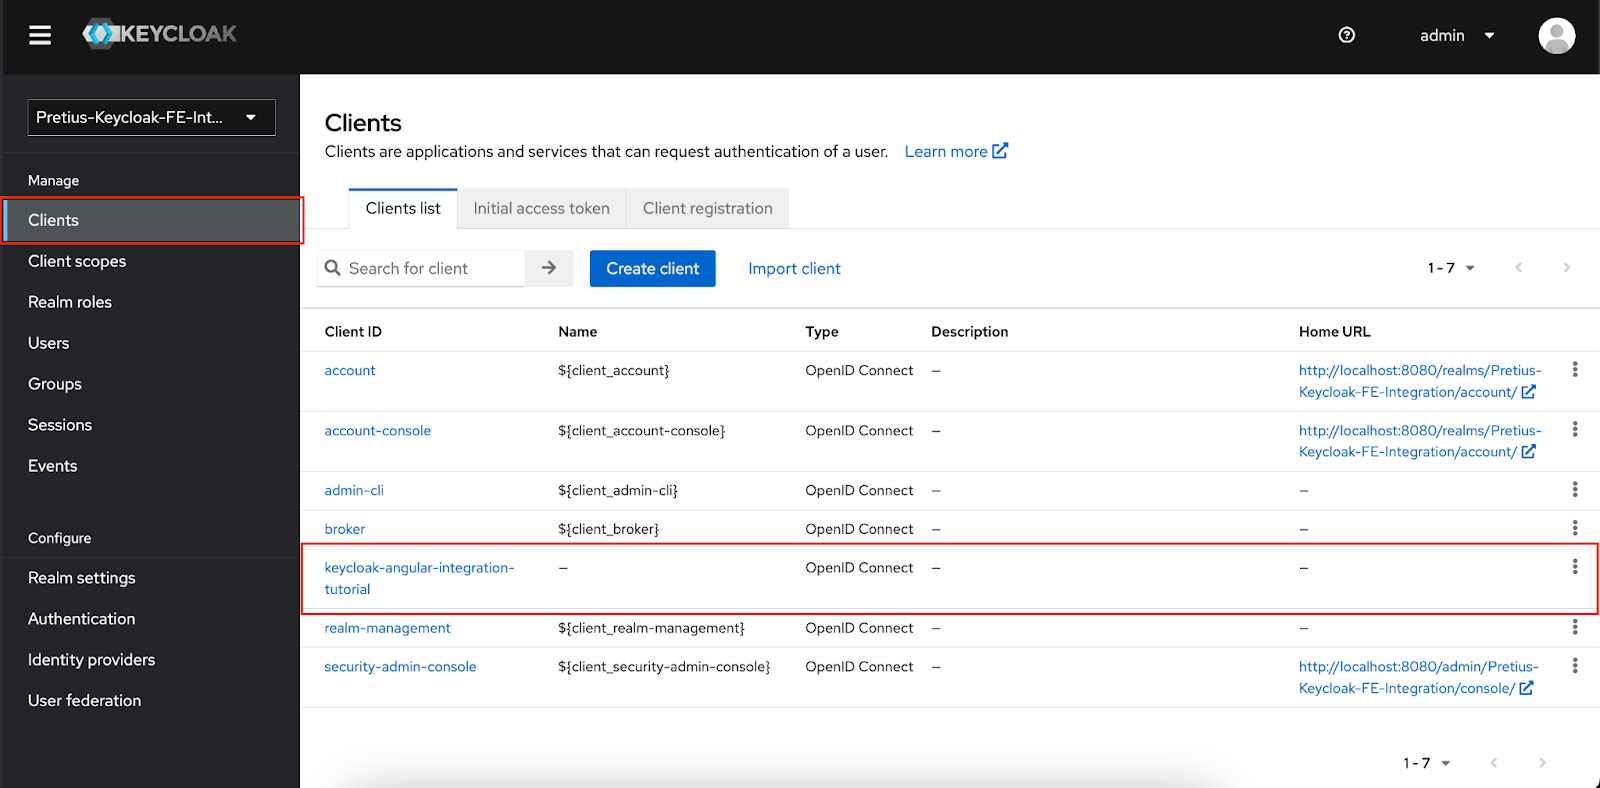
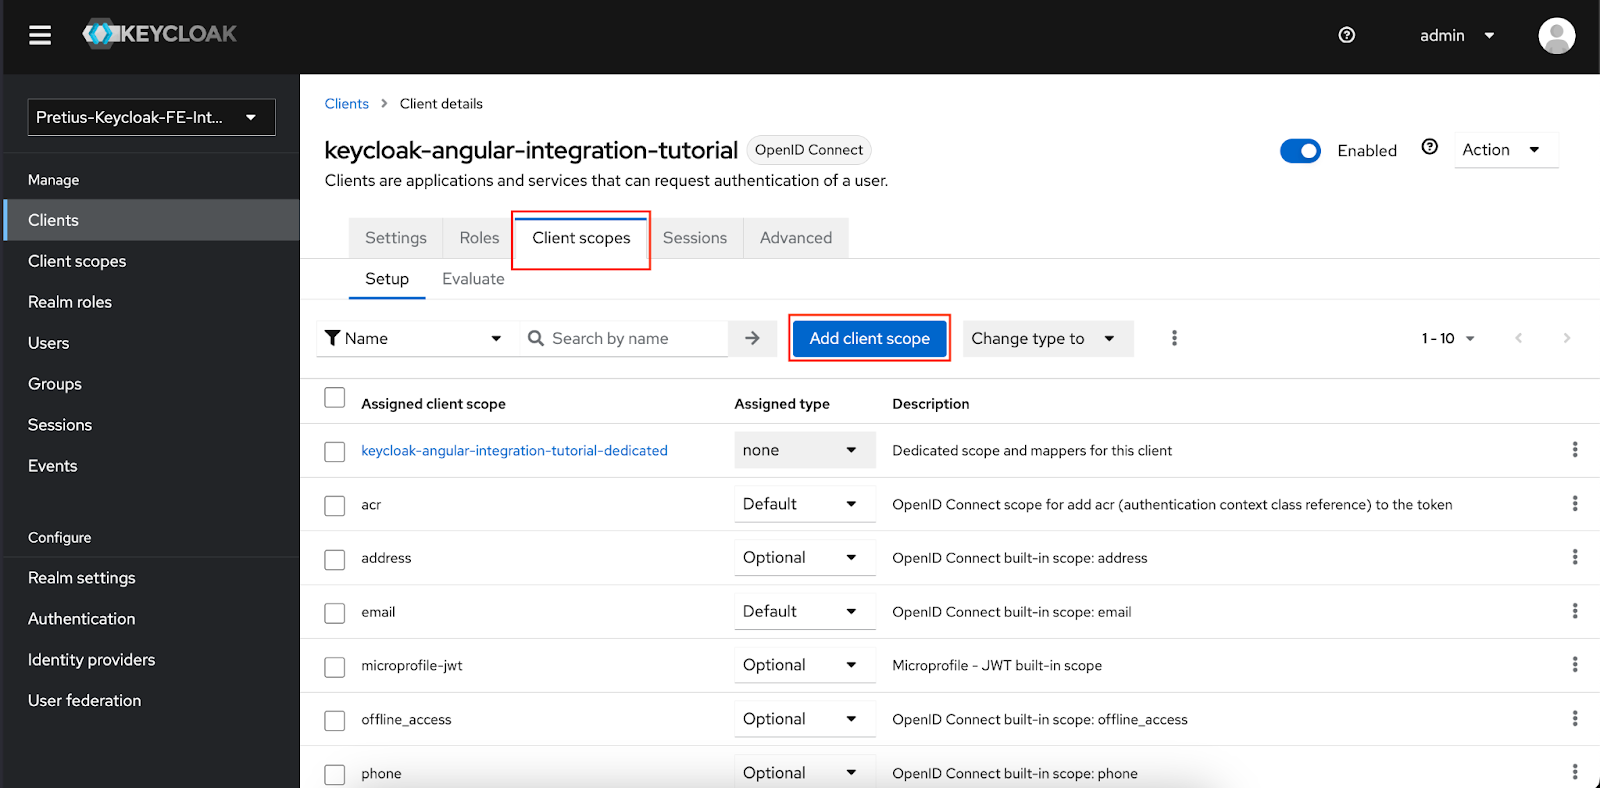
After creating a new client scope, assign it to your client configuration in Keycloak. Return to the Clients tab and select your Angular application.
Go to the Client scopes tab and add a new scope to your client:
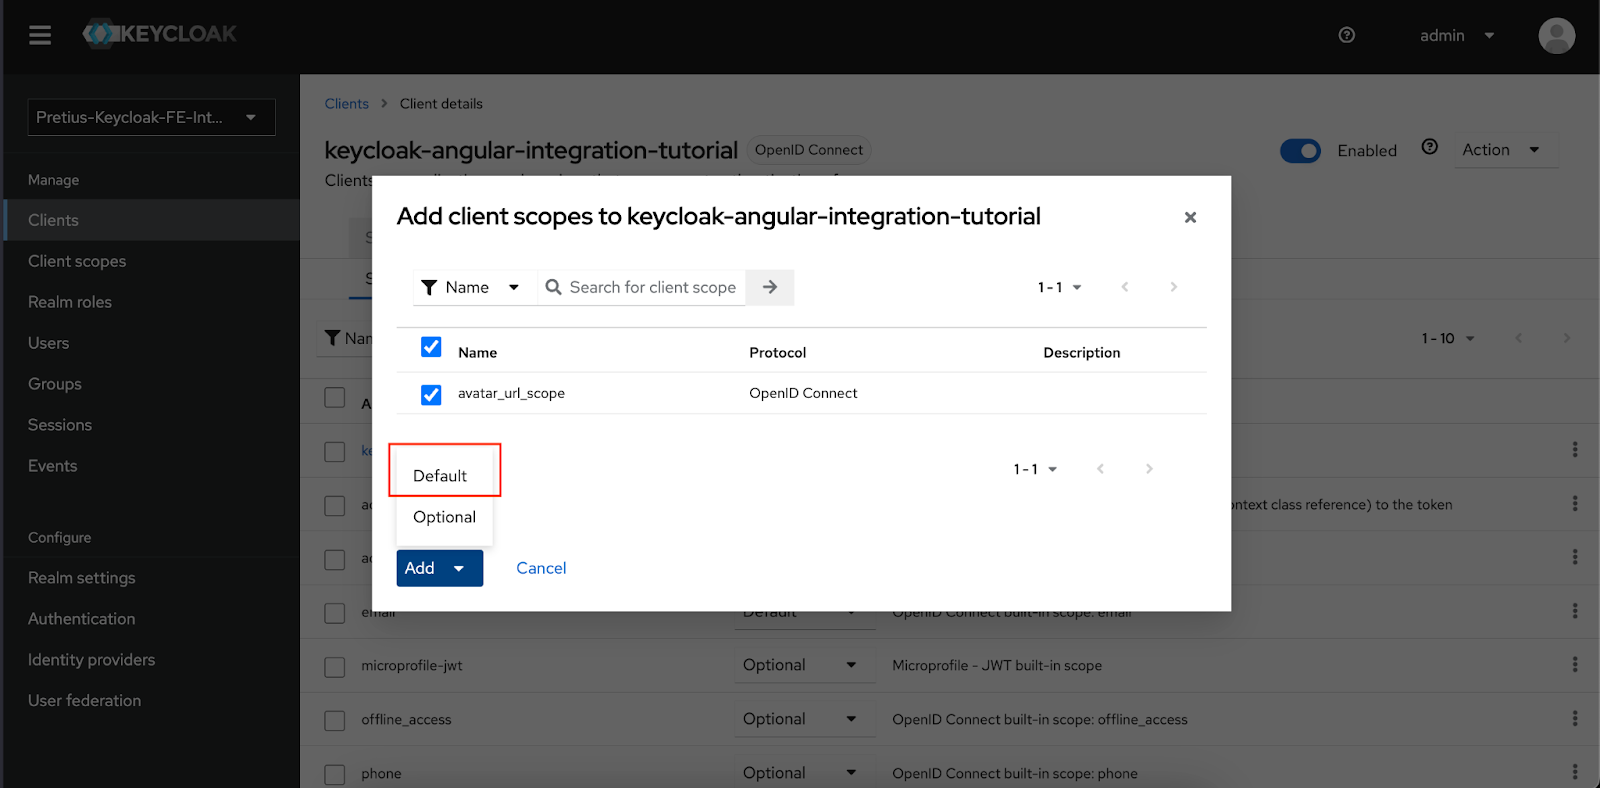
After pressing the Add client scope button, you should see a modal with the option to select the previously created avatar_url_scope. Select it and press the button below to add it as the default return value. The difference between default and optional is that the default client scope is always included in the token, and in the case of optional client scope, it must be explicitly requested by the client. Only then are the roles and permissions associated with the optional scope included in the access token.
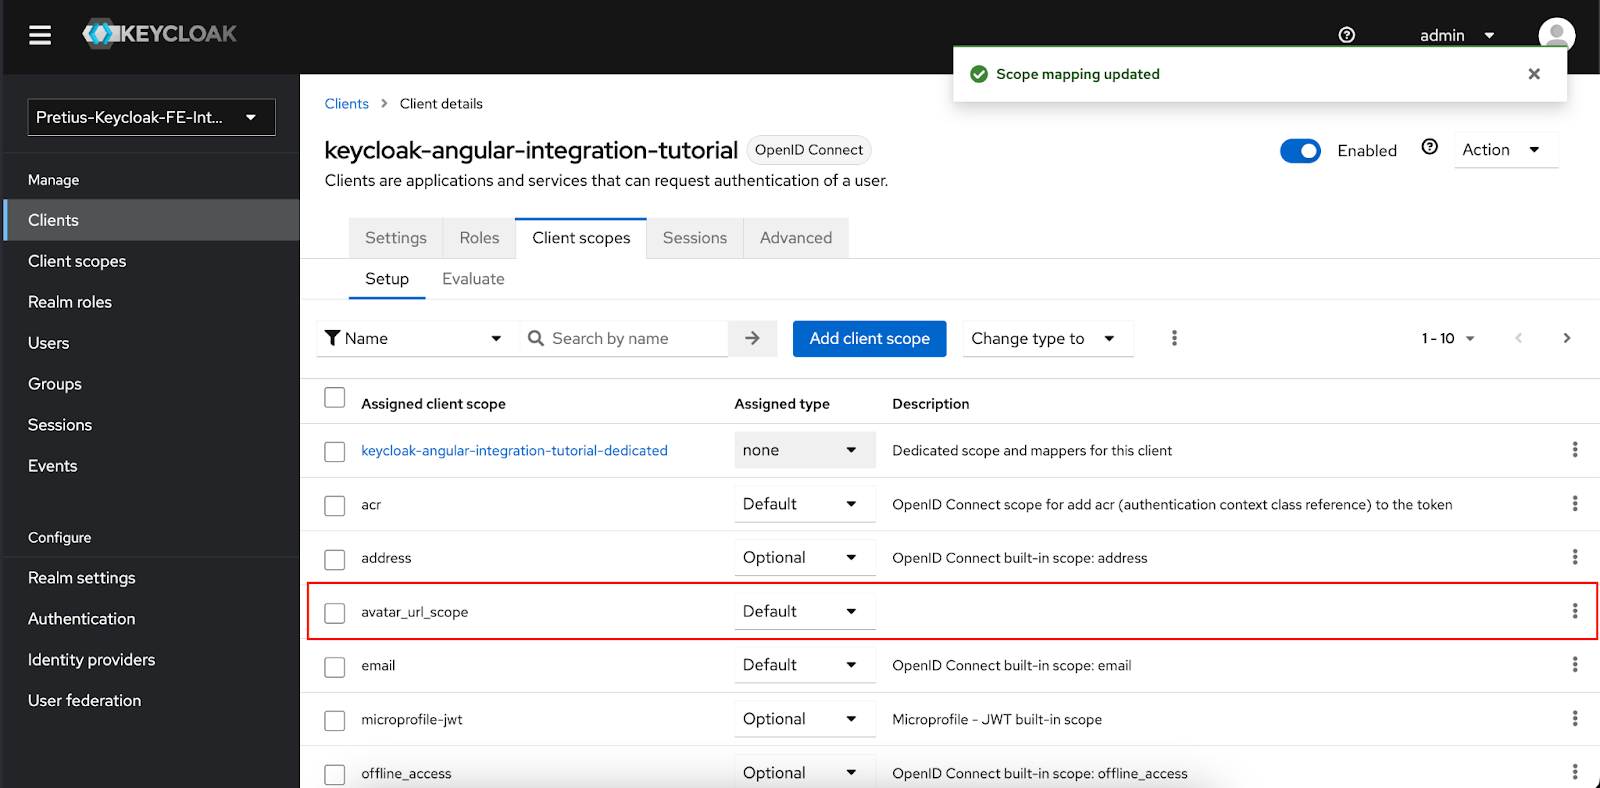
If you have followed all the steps above, you should now see your scope in the list:
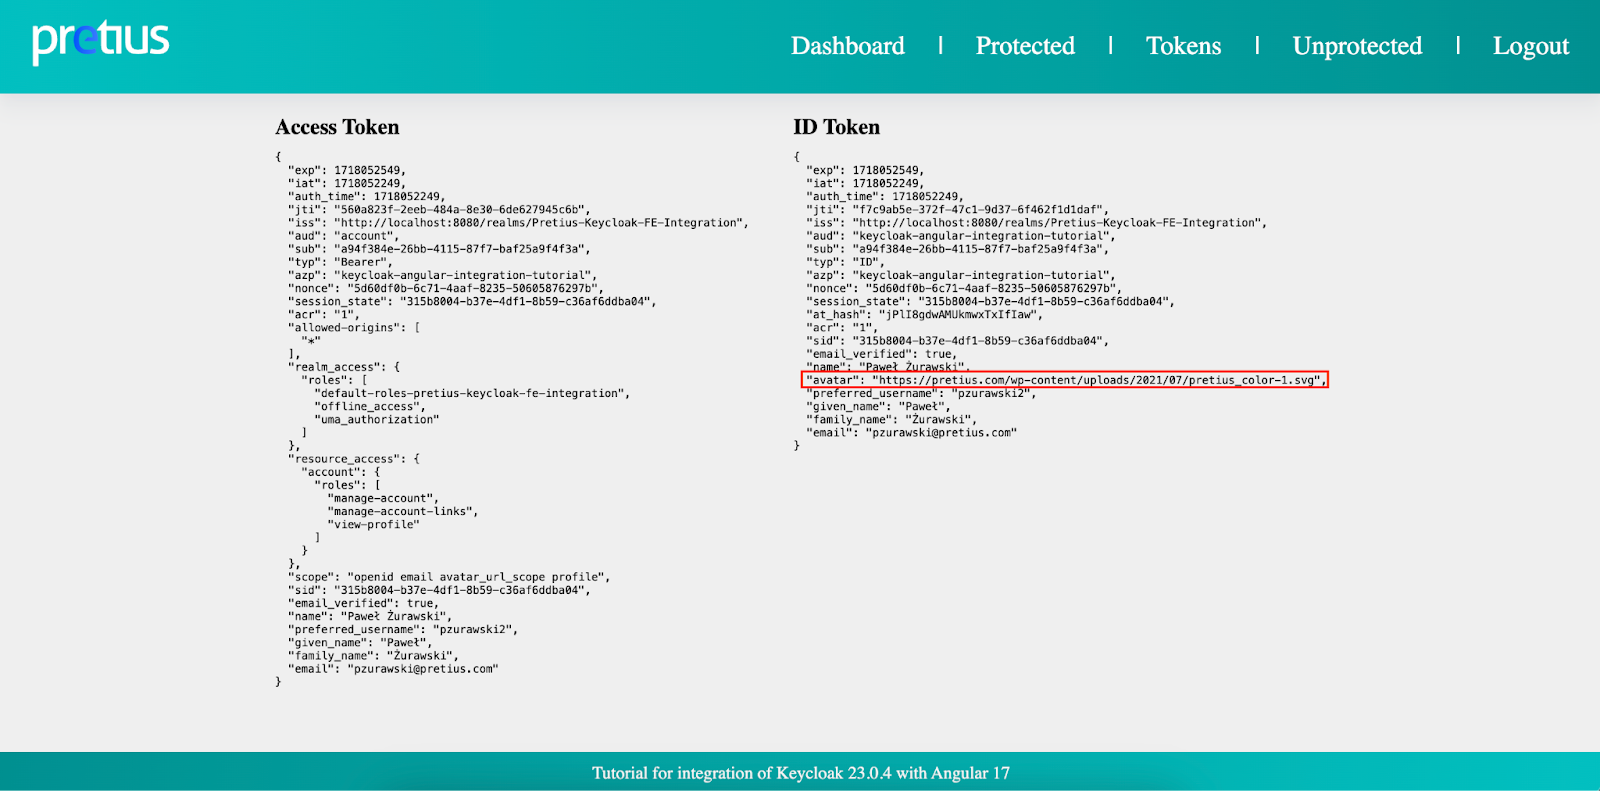
With this, you managed to properly configure adding a new attribute, mapping it to the client scope and transferring it from Keycloak to the Client (e.g., your Angular application). When you go to your application, the passed ID token includes the avatar variable, storing a link to the user’s avatar. Since you chose to place this information only in the ID token during configuration, you can immediately confirm that such information doesn’t appear in the access token. Look at the information contained in the tokens presented below, and you’ll notice that everything is displayed correctly.
Of course, in the case of a real application, you wouldn’t fill out the information stored in the attributes from the admin panel. There are many alternative ways to allow users to configure custom attributes. For example, you can extend the login screen with a new field allowing you to enter a value for this attribute, create a mapper that will download the data you need (e.g., from Google), or add the ability to configure the attribute to the Keycloak Account Management Console, where users can modify the values of selected attributes themselves at any time. You can find the console at the following link: http://localhost:8080/realms/NAME_OF_YOUR_REALM/account/#/
Additionally, Keycloak can inform the user when a client application needs to store information about them in Keycloak. In such a case, to access the application, the user must confirm that they agree to share the items listed on this screen. To configure this, go to the Clients tab, and in the Settings section, go to Login settings as presented below:
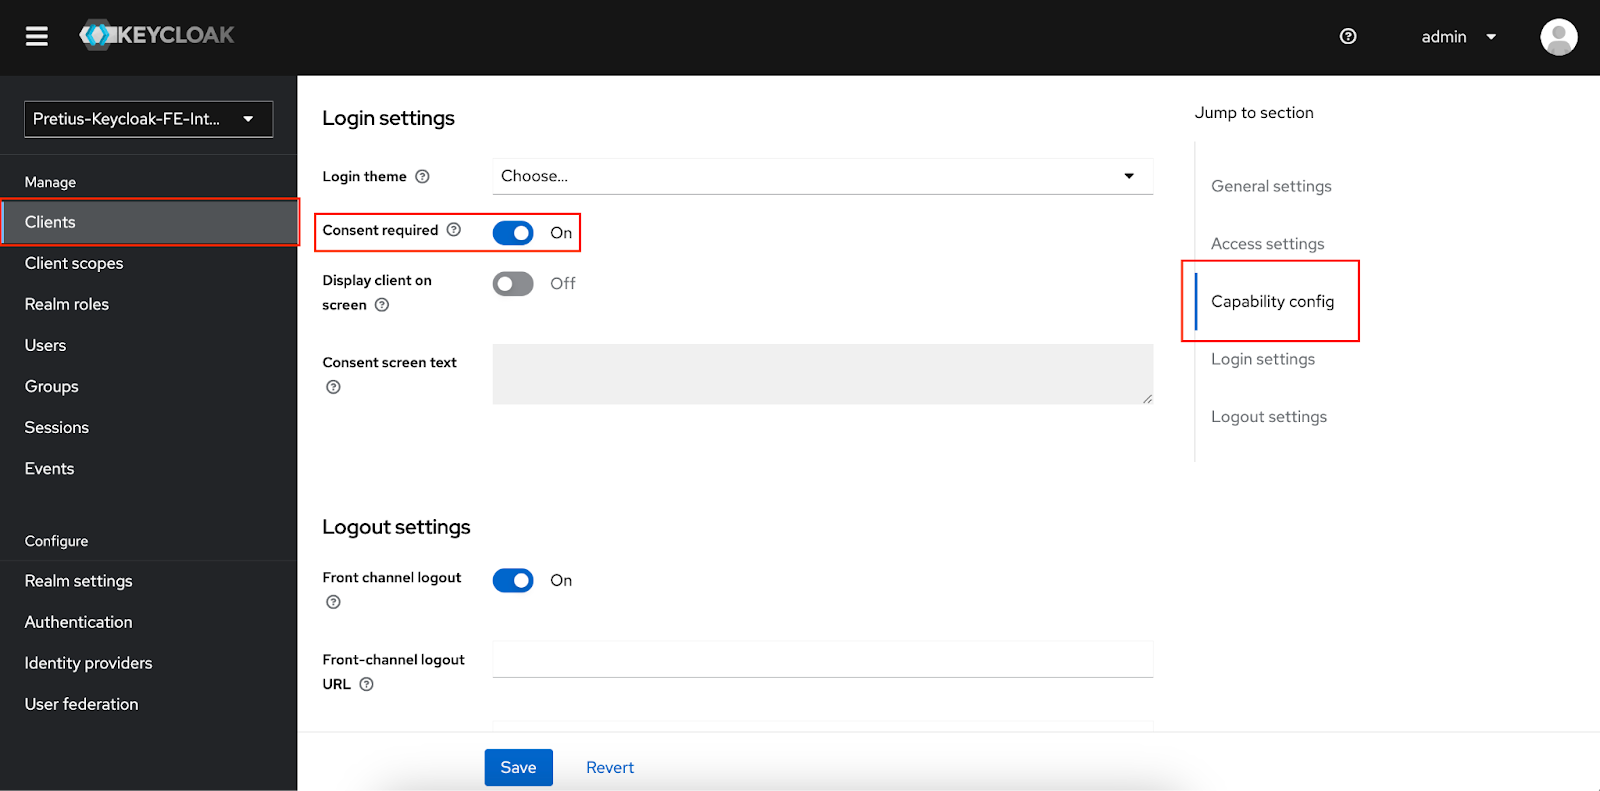
All that’s left is to select the Consent required option. The next time you try to log in to your Angular application, you should see the following view:
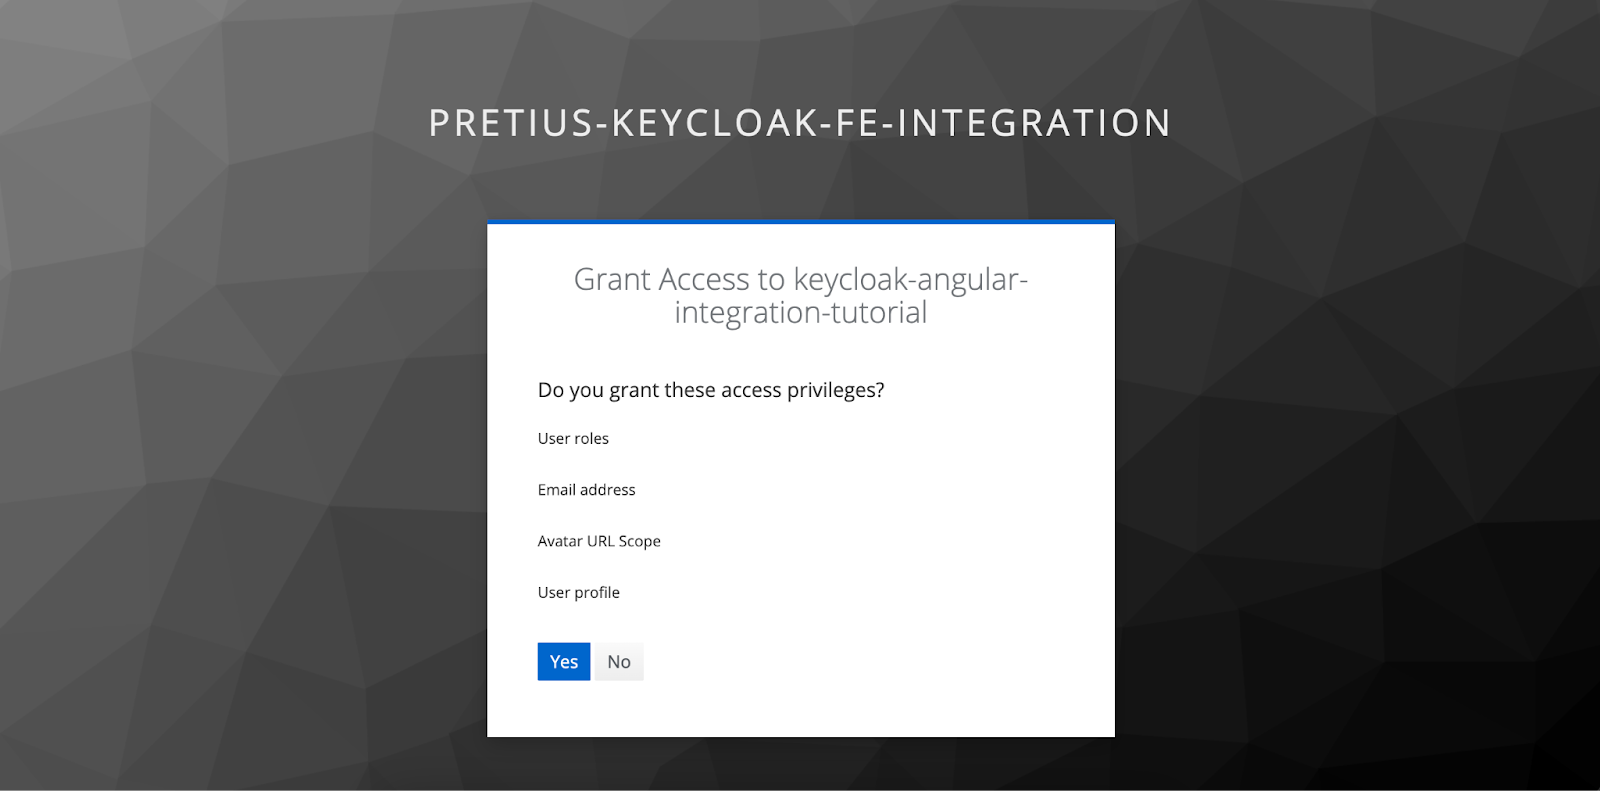
As you can see, there is plenty of information about the user and the URL Scope Avatar you created. After accepting the consent, you’ll be redirected to your application.
If you don’t like the default appearance of the application login screen, you can modify it in a few simple steps. You may have noticed the Login theme field among the available Client settings in one of the previous images. This checkbox stores the names of all the themes on the server with your Keycloak instance. Therefore, to modify the appearance of the login website, you must build your own theme.
First, create the appropriate directory structure. In the themes directory where Keycloak is installed, create a new directory for the theme, such as mytheme. Within this directory, create subdirectories for the types of themes you want to customize. Keycloak allows you to easily modify the appearance of many aspects such as login, account, admin or email by simply creating a subfolder with one of these names and placing the appropriate files inside. Each subdirectory should contain a theme.properties file, which defines the basic settings for the theme. Here’s an example of the content of such a file:
parent=base
import=common/keycloak
styles=css/styles.css
scripts=js/script.js
locales=en,pl
Within a theme (i.e., inside a subdirectory), you can place various resources used to determine its appearance and behavior. Let’s take a look at what type of files these are and where they should be located:
The easiest way to create themes is to use existing options and expand them with new elements. The base theme was created precisely for this purpose – it contains only the minimum amount of logic required to handle individual functionalities, such as logging in without imposing styling. The newly created theme should then be copied to the themes directory in your Keycloak installation. There are two ways to do this.
docker ps
You should receive a response similar to the following:

Once you know the instance ID, i.e., CONTAINER ID, use the docker cp command, which allows you to transfer the content from your computer directly to the indicated container. The exact command used in our example is below:
docker cp path_to_your_theme_folder/mytheme your_keycloak_container_id:/opt/keycloak/themes/mytheme
IMPORTANT: You may receive this error when running this command:
Error response from daemon: Could not find the file /opt/keycloak/themes in container 00ccde070a54
It means that in your case, the folder containing themes is in a different place. You must find the path to the themes folder in your instance. You can do this via the following command:
docker exec -t -i your_keycloak_container_name /bin/bash
Below is an example of how the location of this folder was found in our case:

If you have done everything correctly, your theme should be successfully uploaded (you may have to restart the server first).
The second way to achieve this effect is to create a Dockerfile and place it in the code responsible for copying your theme when starting the Keycloak instance.
This way, you can specify how exactly you want to build the instance before launch and indicate not only where the themes you want to use are to be downloaded from but also, for example, set environment variables indicating where the SSL certificate for your application is located. If you want to delve deeper into this knowledge, we encourage you to review the official documentation. You’ll learn how to run Keycloak in a container and configure its instance using Dockerfile. We won’t cover this topic in this article, but we’re planning another one that will focus on this issue, among others.
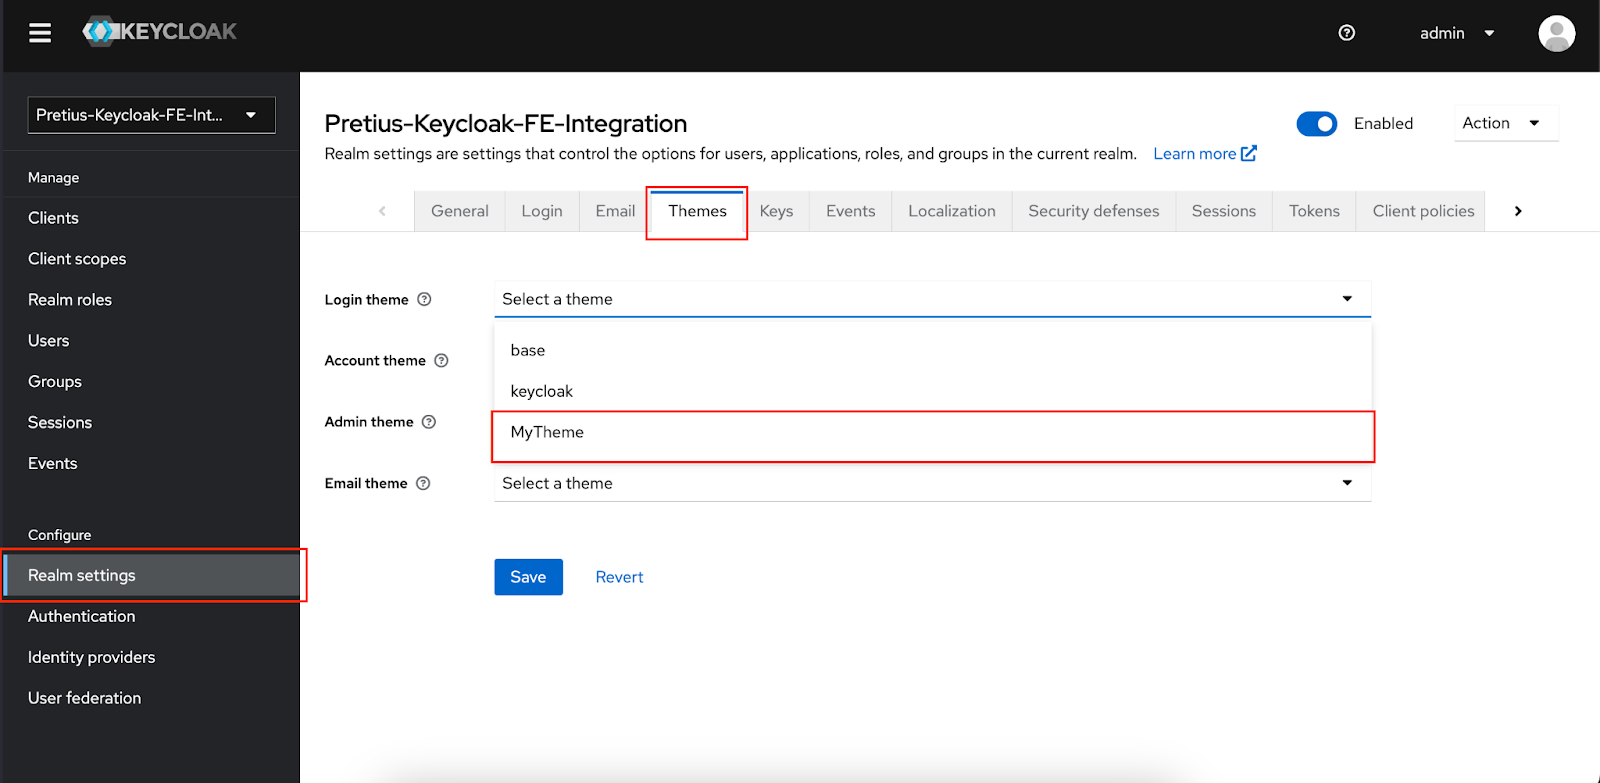
When your theme is copied, log in to the Keycloak admin console, select the appropriate realm from the drop-down menu in the upper left corner, go to the Realm settings section and click on the Themes tab. There, you can select a new theme for different types (e.g., Login Theme, Account Theme) as presented in the graphic below:
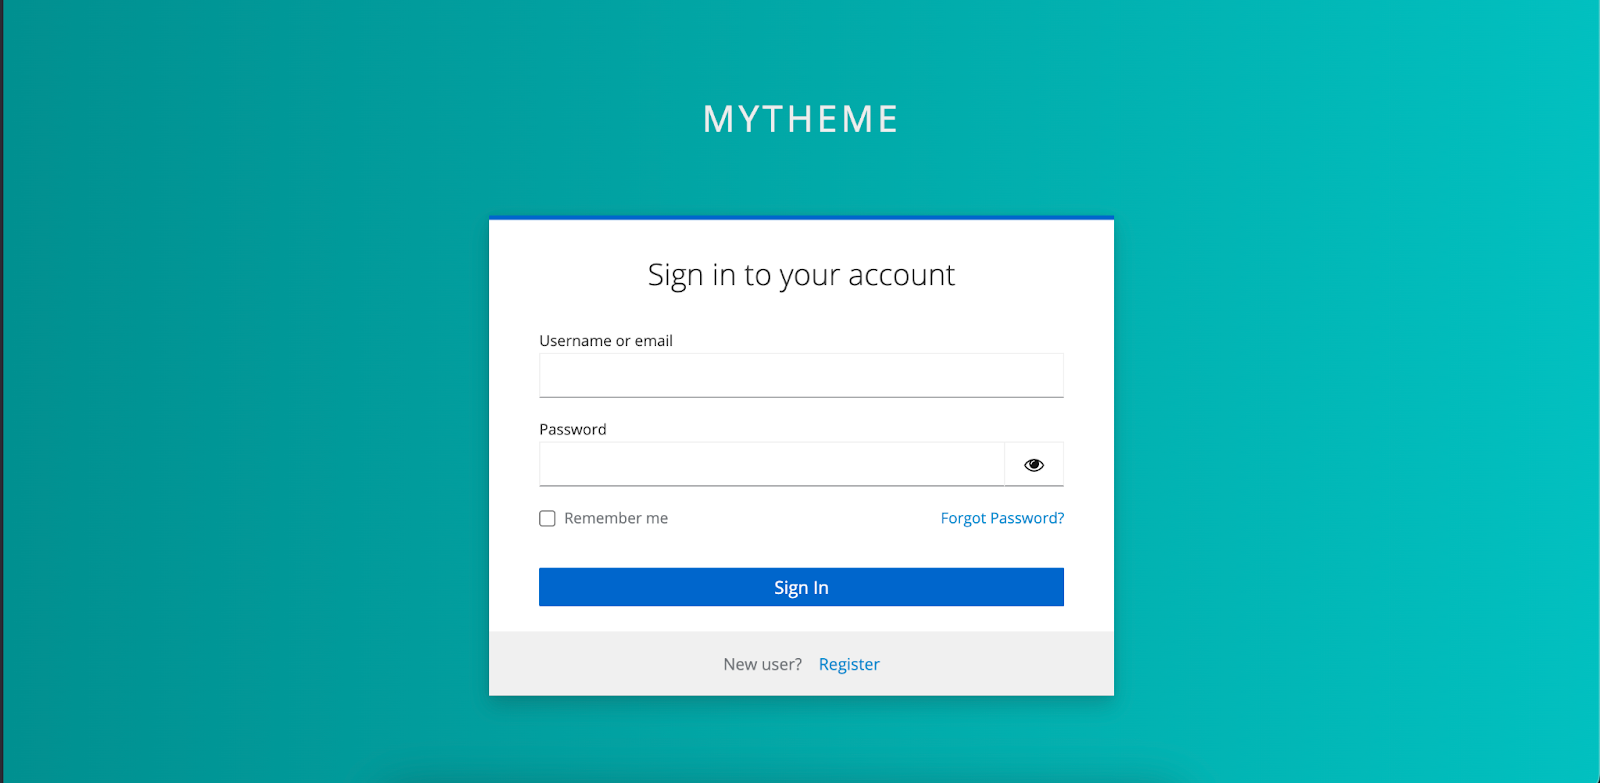
Once you have configured your new theme, go to the login page of the appropriate realm to verify your changes. If the theme didn’t load correctly, check whether you placed the theme files in the correct folders. If everything was done correctly, you should see the modified login page look like this:
Enabling effective identity and access management is crucial in the case of complex systems. We hope this article helped you understand how information is passed between Keycloak and client applications (such as our application written in Angular) and how to influence and modify the information transmitted in this way.
The Keycloak features discussed in the article are only some of this platform’s capabilities, but they are this tool’s critical elements. They make Keycloak is a flexible environment that can be adapted to specific project requirements. By using this Identity Provider, you can not only easily improve the aesthetics and functionality of your applications but also provide a safe, intuitive and consistent user experience compatible with other systems.
Over a decade on the market has allowed Keycloak’s creators to significantly extend the capabilities of this access management solution. It now enables developers to implement complex functions in a simple and understandable way, as evidenced by the mailbox integration example. With each subsequent version, Keycloak offers a wider range of possibilities and allows users to easily add new functionalities through the intuitive administration panel. You can also create custom code to extend and adapt Keycloak to specific needs.
At Pretius, we’re experienced in developing custom software with top-notch identity and access management using Keycloak and more. So, if you’re looking for a software vendor to help your company with such a project, let us know using the contact form below (or just send as an email at hello@pretius.com). We’ll find out what we can do for you.
And, if you’re interested in more Keycloak tutorials and other Keycloak-related content, you should check out the following articles on our blog:


