
My name is Szymon Kmieć and I’m an Oracle APEX Developer working at Pretius. A while ago I wrote an article about integrating APEX with the Stripe payment platform. Today, I want to deal with a completely different subject. In this article, I’ll show you the basics of automation mechanisms in APEX. I’ll explain the following things:
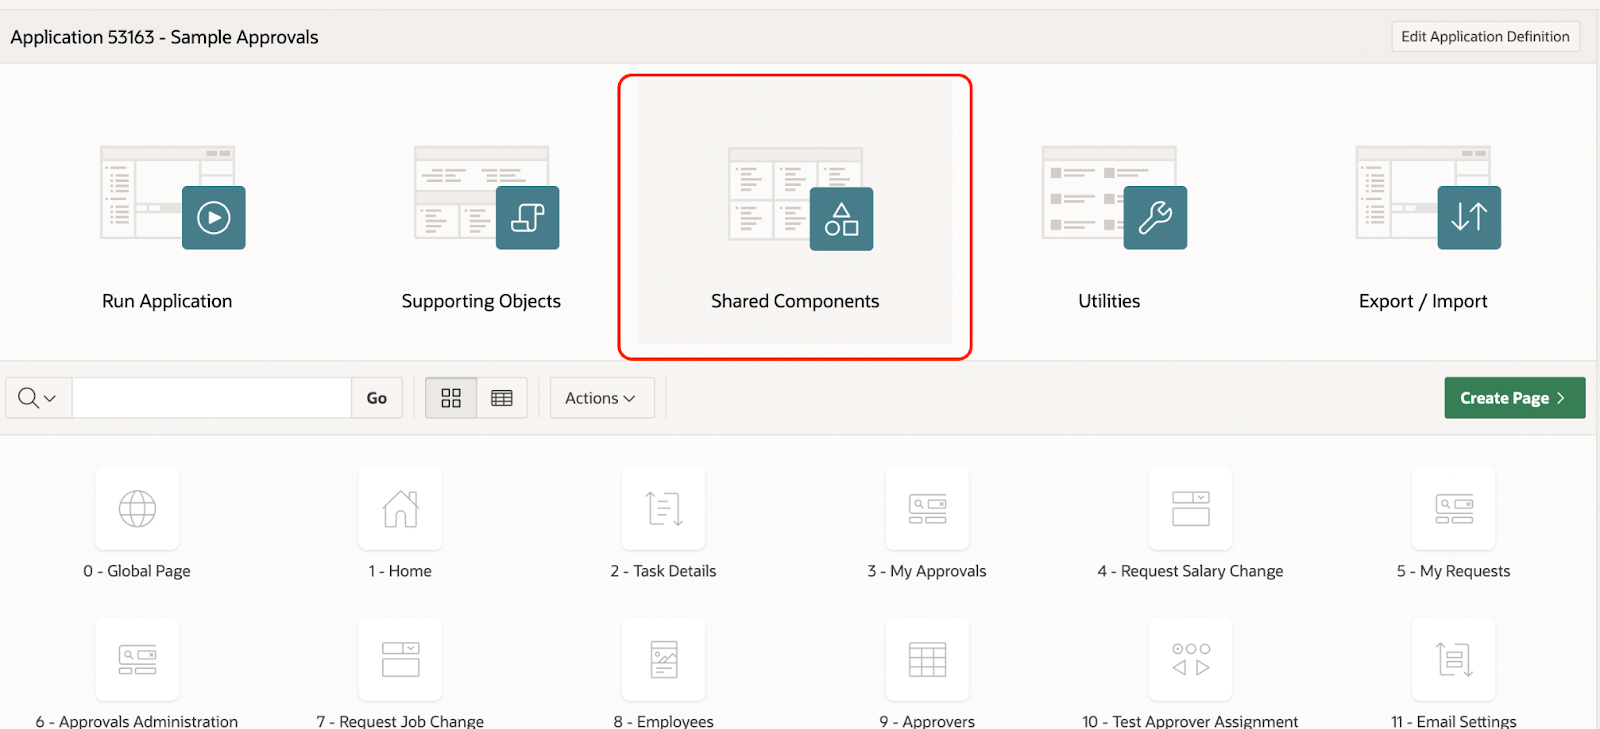
Our goal will be to prepare an automation process that will be responsible for informing a user about “pending approvals” via email. Because of this, we need to start by preparing an email template. To do this, go to Shared components in the Oracle APEX App Builder.
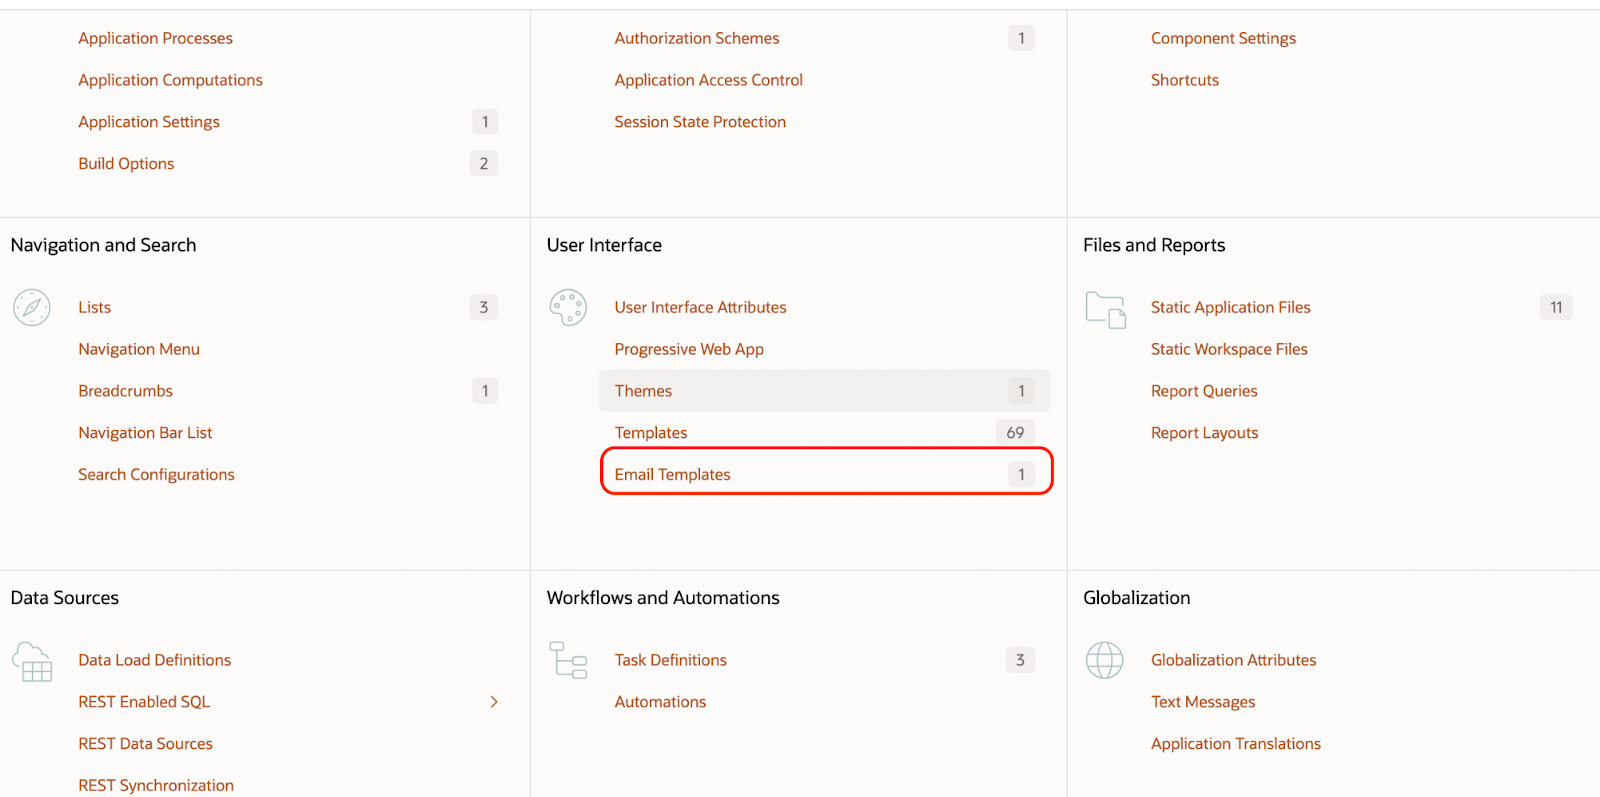
Select Email Templates in the User Interface section and then click the Create Email Template button.
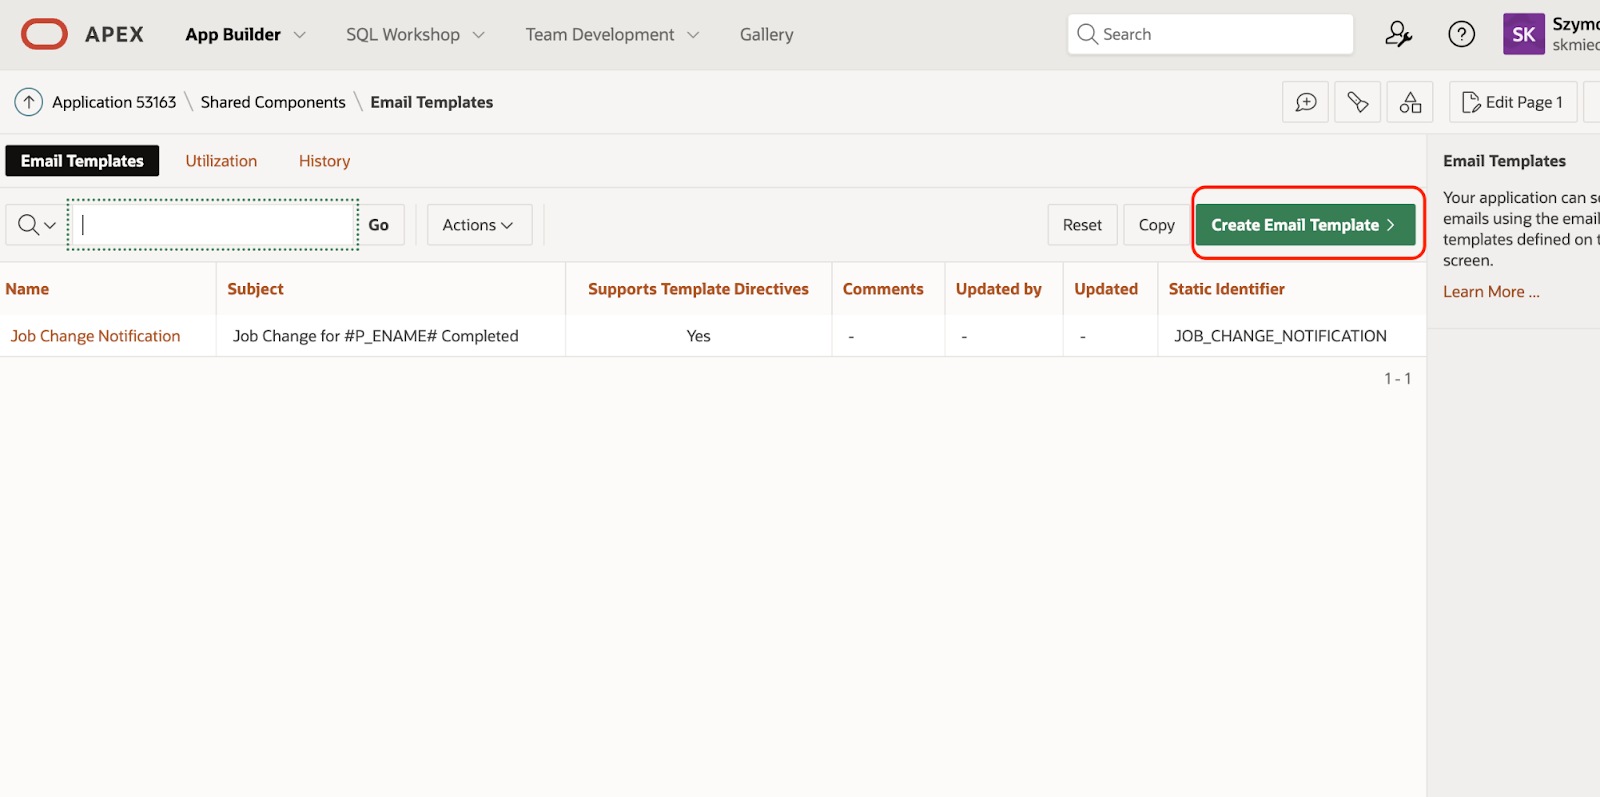
You’ll need to fill in some mandatory fields – Template Name, Static Identifier, and Email Subject – use the information provided below.

After that, you’ll also need to fill in information about the header, body, and footer of your new email template. For the header, paste the following line:
<b style="font-size: 24px;">Pending approval reminder ! </b>
For the body, use the code below:
<b>Hi #APPROVER#, </b> <br>
 <br>
 <b>You have new request to approve ! </b> <br>
 <br>
 <table width="100%">
   <tr>
     <th align="left">Request date </th>
     <td>#REQUESTDATE# </td>
   </tr>
   <tr>
     <th align="left"> Requester </th>
     <td>#REQUESTER# </td>
   </tr>
   <tr>
     <th align="left" valign="top">Object </th>
     <td>#OBJECT# </td>
   </tr>
 </table>
 <br>

 <br>
And finally, use this line for the footer:
<a href="#MY_APPLICATION_LINK#">Check approvals now !</a>
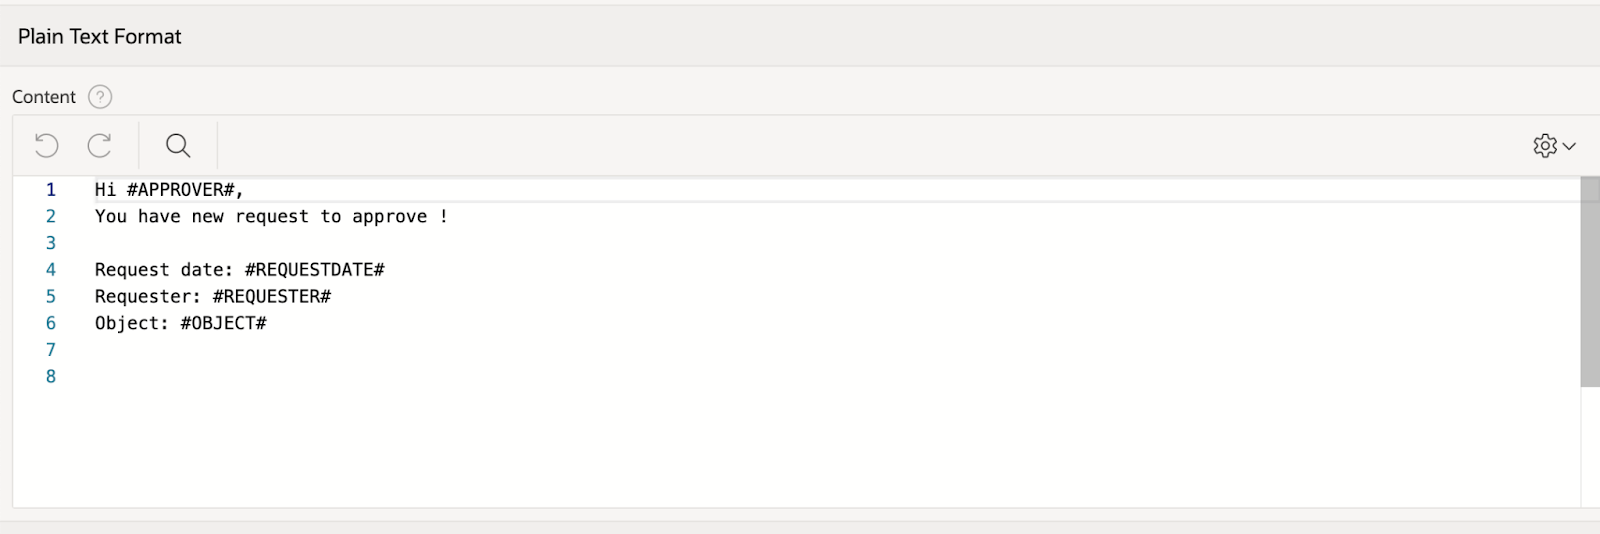
You can check the results of these actions in the Plain Text Format section, where the final message sent to the e-mail will be visible. The values between the “#” chars will be filled with the parameter values from the apex_mail.send procedure, whose parameter determining the use of these parameters will be the template name ( REMINDER_ABOUT_PENDING_APPROVALS).
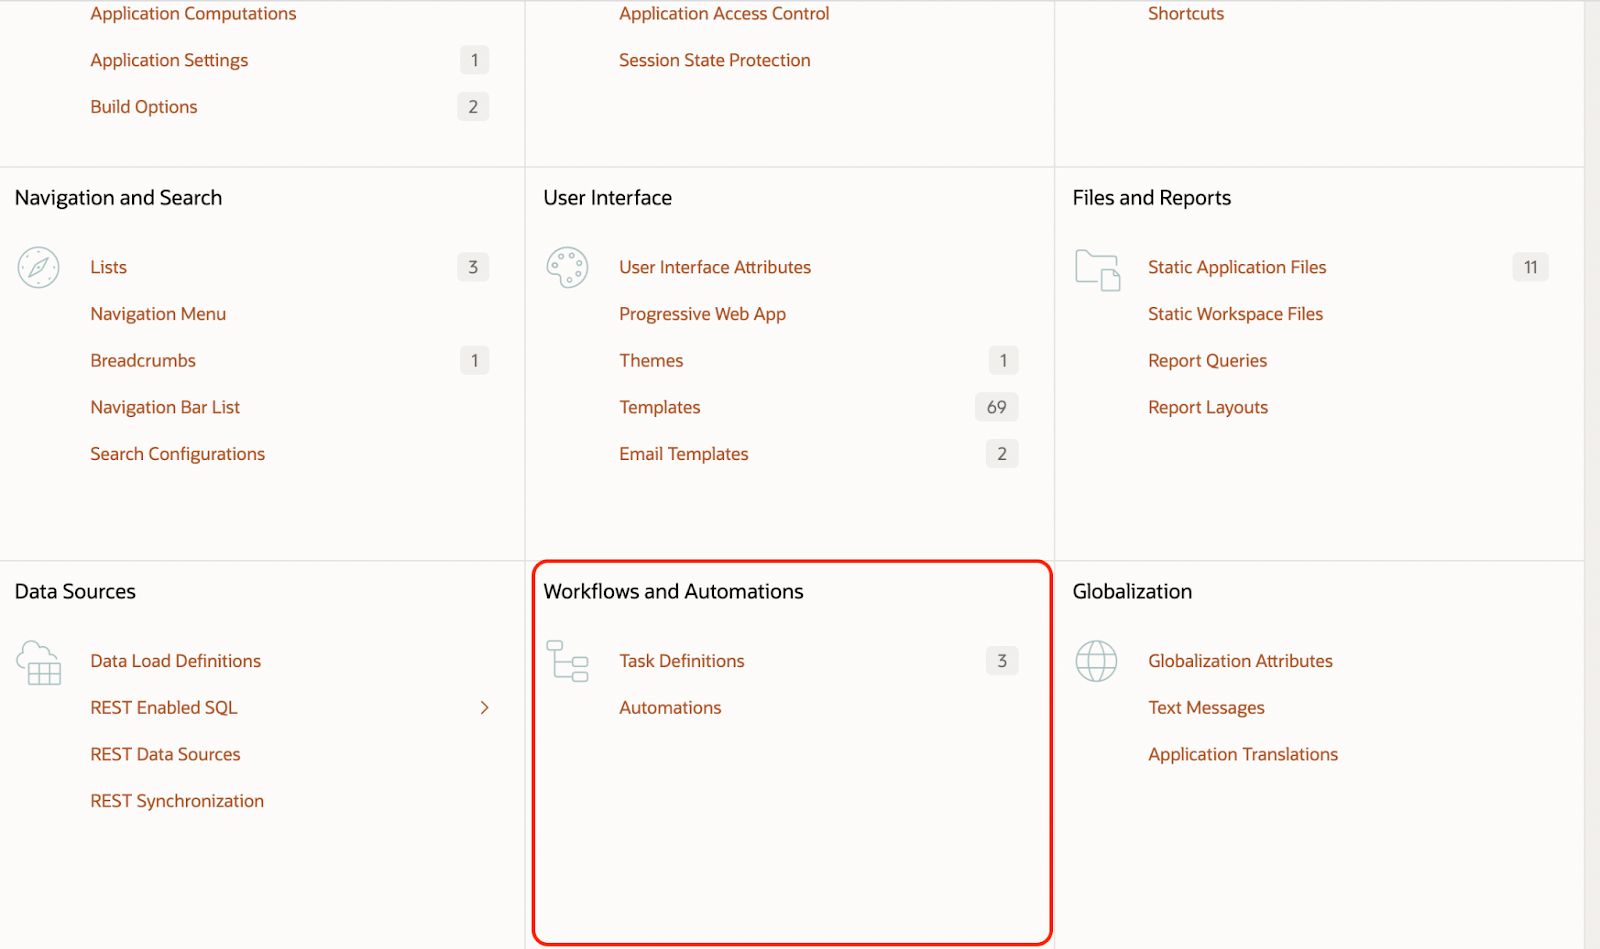
We’re now ready to prepare the automation process. To do this, go once again to Shared Components in the App Builder. However, this time select Automations in the Workflows and Automations section.
With the previous steps, we have prepared elements such as a trigger (a new request, for example, for a new laptop), and the expected trigger result (like sending an email using the previously configured message template). So let’s set the process up!
We start by clicking the Create button in the Automations section and filling in the information visible on the screen below.
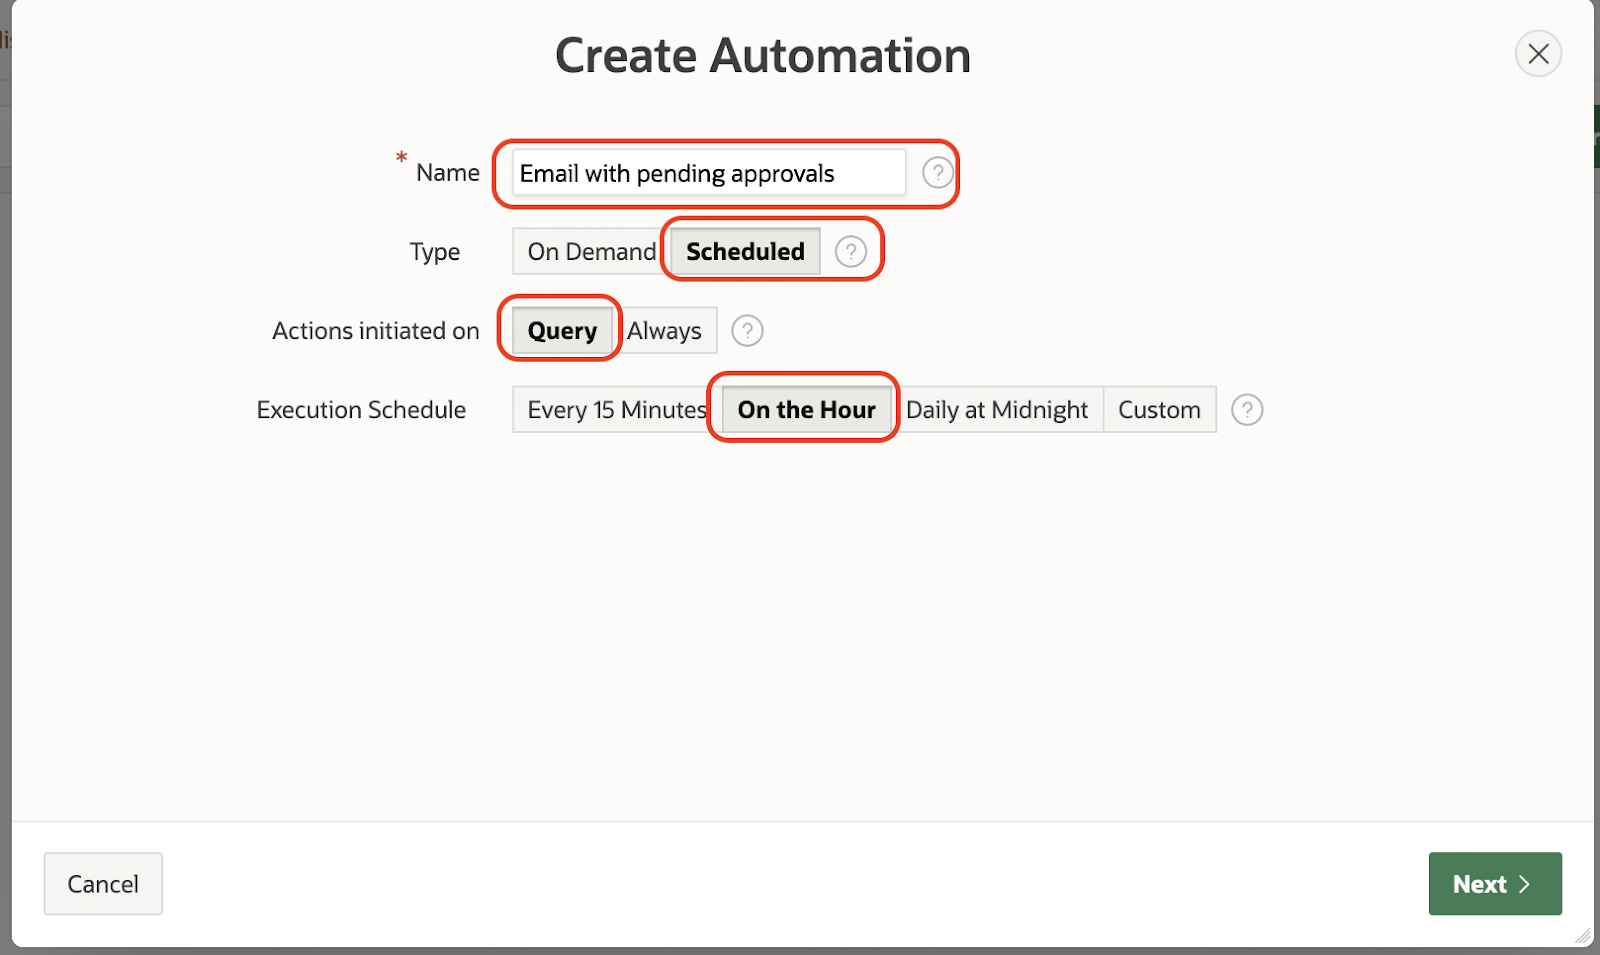
Next, we have to indicate when the automation is about to be launched. Our trigger is “pending approvals”, which means the automation should check if there are records in the database that have the status “PENDING”. To prepare this status, use the query below in the Source section.
Select 1 from EBA_DEMO_APPR_LAPTOP_REQUESTS where status = ‘PENDING’.
Each time the above query returns at least one row, the action in the automation process will be executed (or actions if several of them are added).
The next step is task configuration. Our goal is to send each pending request as an email in a loop. To do this, we need to configure the action as seen on the screen below.

Then, in the code section, program the action as follows:
begin

for x in (Select id ORDER_NUMBER, 'SKMIEC@pretius.com' APPROVER , NEED_BY REQUESTDATE, EMPNO REQUESTER, LAPTOP_TYPE OBJECT from EBA_DEMO_APPR_LAPTOP_REQUESTS where status = 'PENDING')
loop

    apex_mail.send (
        p_to                 => 'SKMIEC@pretius.com',
        p_template_static_id => 'REMINDER_ABOUT_PENDING_APPROVALS',
        p_placeholders       => '{' ||
        '    "ORDER_NUMBER":'        || apex_json.stringify( x.ORDER_NUMBER ) ||
        '   ,"APPROVER":'            || apex_json.stringify( 'SKMIEC@pretius.com' ) ||
        '   ,"REQUESTDATE":'         || apex_json.stringify( x.REQUESTDATE ) ||
        '   ,"REQUESTER":'           || apex_json.stringify( x.REQUESTER ) ||
        '   ,"OBJECT":'              || apex_json.stringify( x.OBJECT ) ||
        '   ,"MY_APPLICATION_LINK":' || apex_json.stringify( apex_mail.get_instance_url || apex_page.get_url( 10 )) ||
        '}' );

end loop;
end;
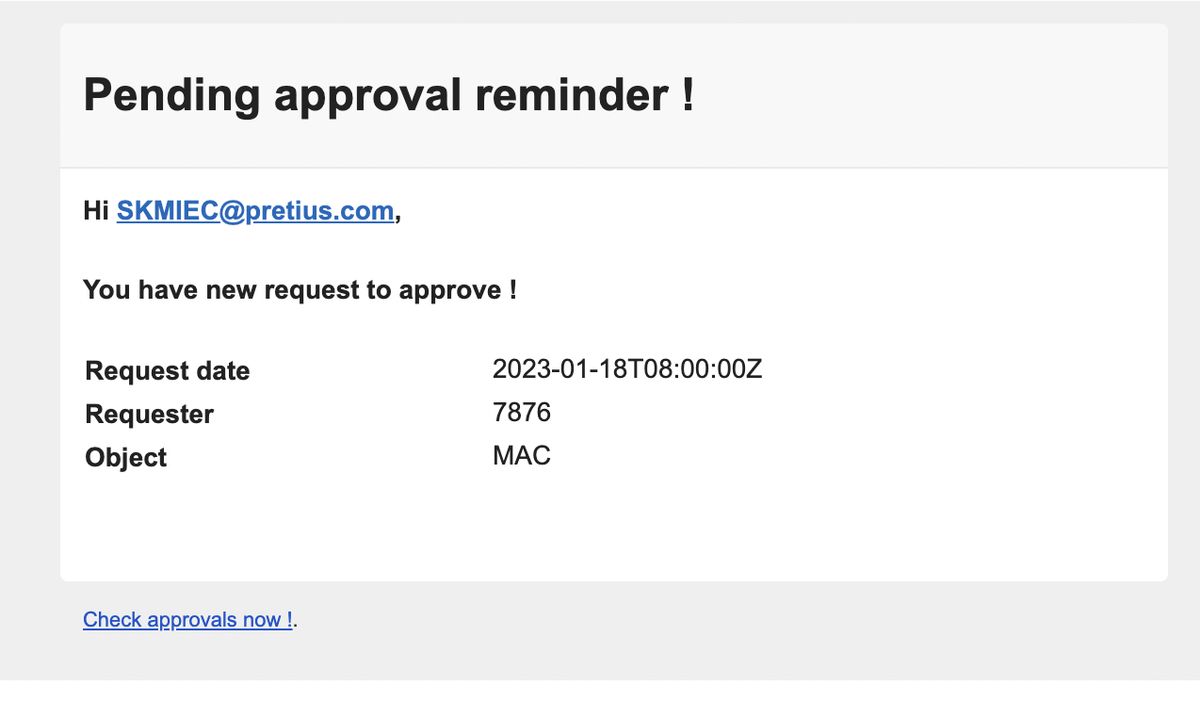
If you configure the action like this, it will cause notifications about all requests for new laptops to be sent every hour to the email address indicated in the code. The message will look like the one you see on the screen below.
Built-in APEX mechanisms will now allow us to check logs from the execution of a given automation process. They are available in the Execution Logs tab, on the main level of the Automation section in the App Builder.
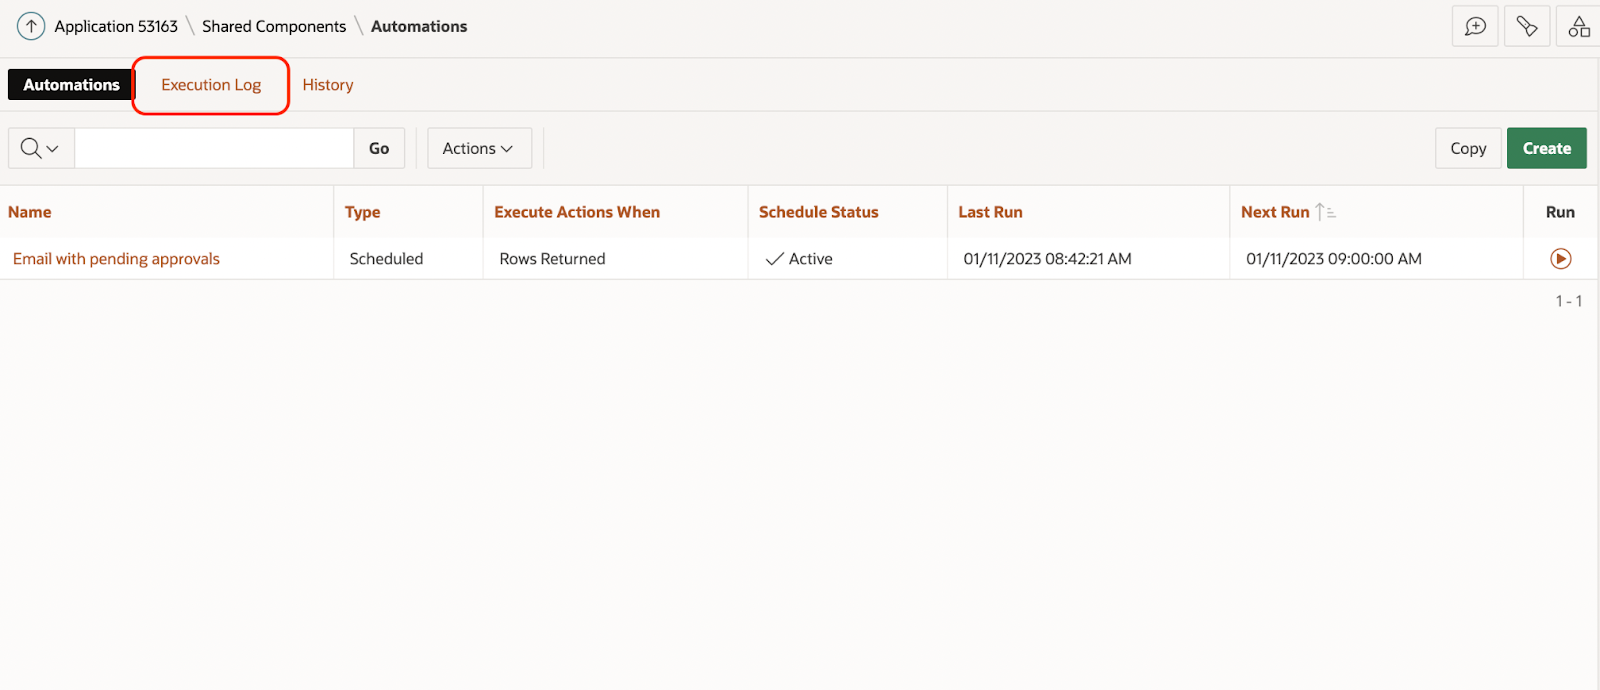
Logs are presented as visible on the screen below.
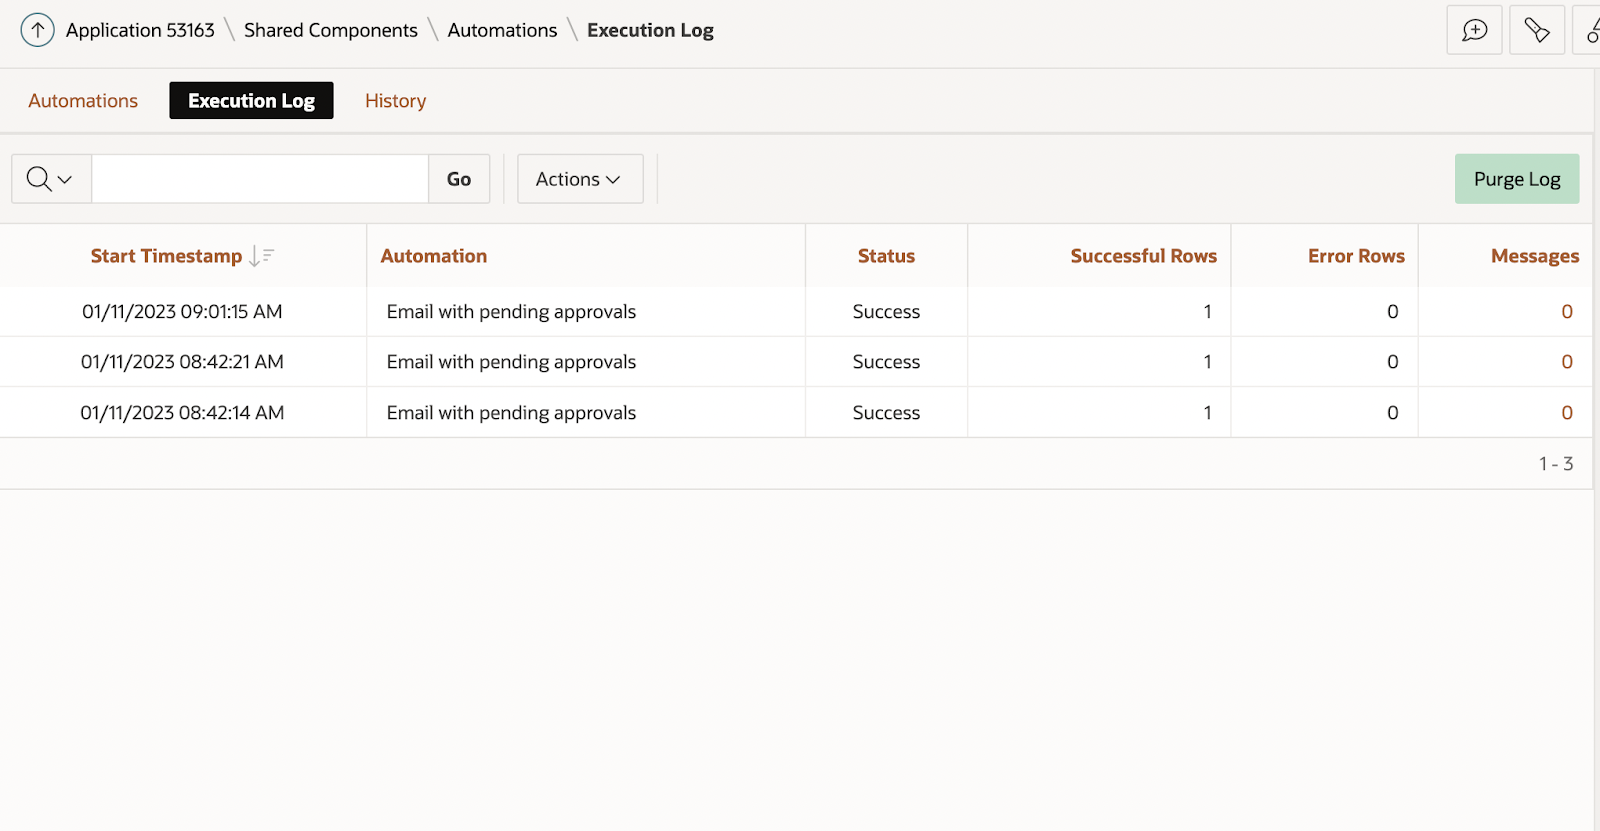
Here’s what specific columns mean:
As you can see, Oracle APEX offers plenty of powerful, built-in automation capabilities that can help you deal with user processes and various independent tasks. Making use of these features is quite straightforward as long as you know the basics, and I hope this article will serve as a solid introduction to working with the apex_automation package.
If you have any further questions, check out the Oracle APEX documentation. With its help, you can enable or disable the procedure, start it, change its schedule or check the execution logs, among other things. You can also reach out to me at skmiec@pretius.com. Finally, there are many other APEX-related articles on the Pretius blog, so check them out:


