
In short words, the project command, along with its sub-commands, will help you manage database changes with ease. In this step-by-step tutorial, I will describe how to use this helpful CI/CD tool in new or existing projects.
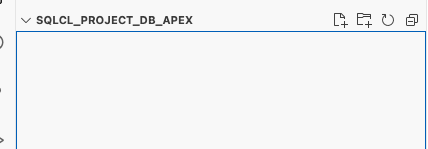
I have an empty folder SQLCL_PROJECT_DB_APEX in my VS Code.
Now, I connect to my HR schema on DEV.
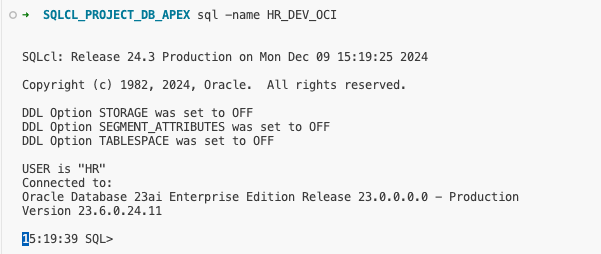
sql -name HR_DEV_OCI
I name my project “PRETIUS”, and I want to initialize it with the schema “HR”.
project init -name PRETIUS -schemas HR
The folders and files visible below are auto-created by SQLcl.

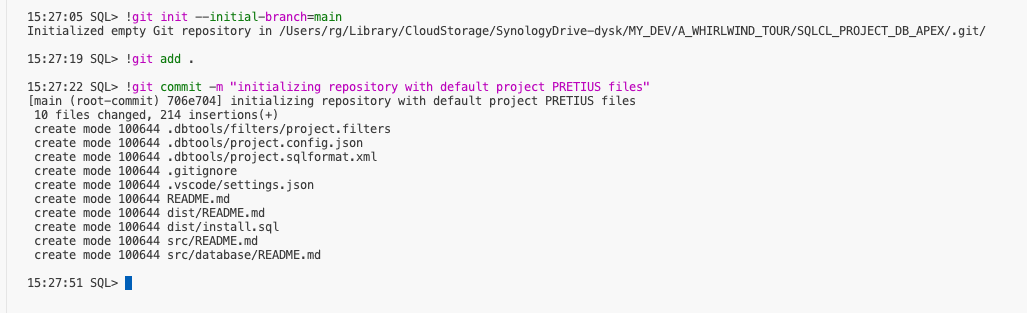
Now, I have to initialize a new GIT repository for created files and commit it.
!git init --initial-branch=main
!git add .
!git commit -m "initializing repository with default project PRETIUS files"
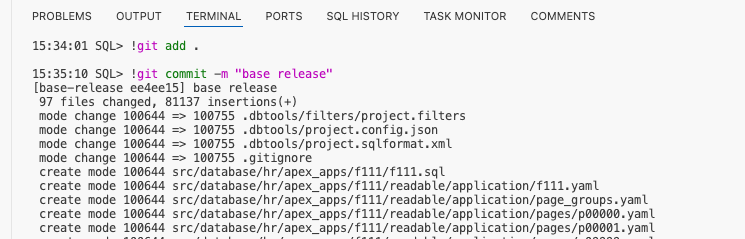
Now, I create a branch “base-release”, connect to HR_DEV, and export database objects and APEX apps into files. The steps are the same for new projects. You export your files once some objects are created in the database.
--this command creates new branch and switches to it
!git checkout -b base-release

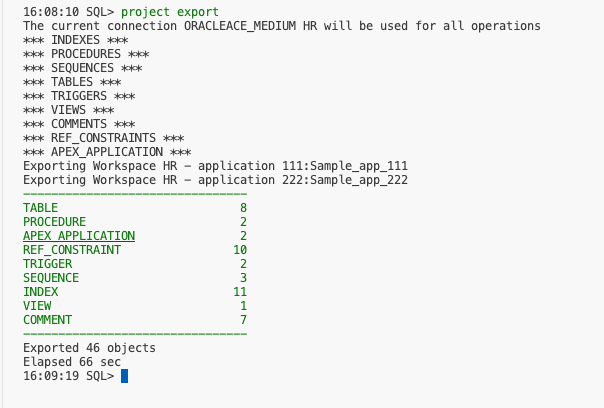
Now, I export all database objects and APEX apps from DEV.
--connected to HR_DEV_OCI, execute this
project export

My database objects and APEX applications are exported.

Now, I commit my base-release to GIT.
!git add .
!git commit -m "Base release"
In the next step, I use the command project stage to stage my changes – the command compares the main branch with base-release.
--DOCKER_HR_DEV
project stage
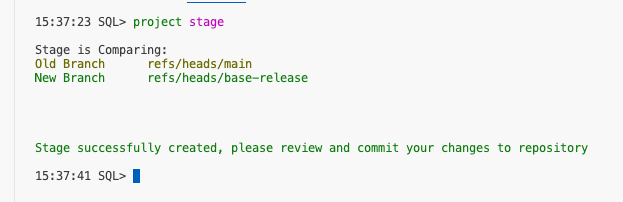
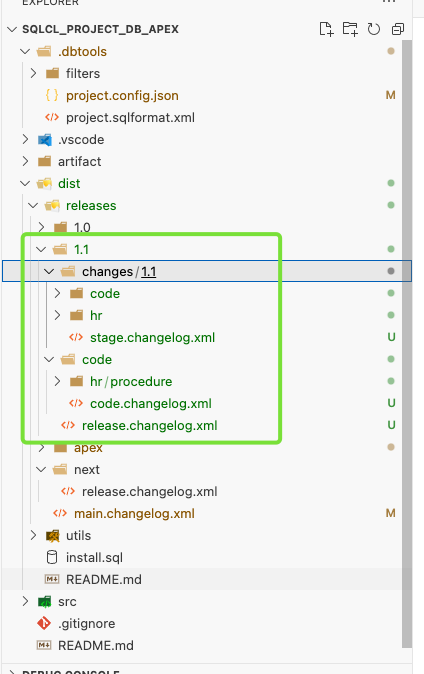
Files necessary for deployment were automatically created at location /dist/releases/next.
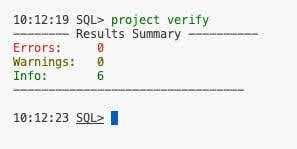
Now, I use the project verify command to check the project for any possible errors and warnings.
project verify -verbose
Everything is good to go.
I call my base release “version 1.0”.
--HR_DEV_OCI
project release -version 1.0 -verbose
SQLcl terminal says clearly what happened:

My release moves to /releases/1.0, and my next release is empty.

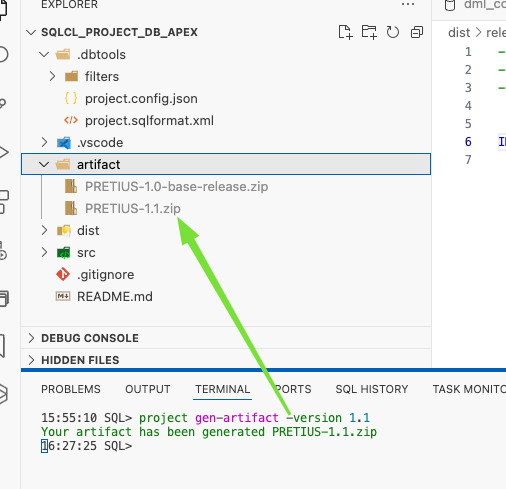
Using the command gen-artifact I generate an artifact representing my project’s current status.
--HR_DEV_OCI
project gen-artifact -version 1.0-base-release
A new ZIP file PRETIUS-1.0-base-release.zip is generated (notice that artifacts are not versioned in GIT).

The deployment script is ready so I can commit it.
!git add .
!git commit -m "Version 1.0"
--HR_PROD_OCI
project deploy -file artifact/PRETIUS-1.0-base-release.zip -verbose
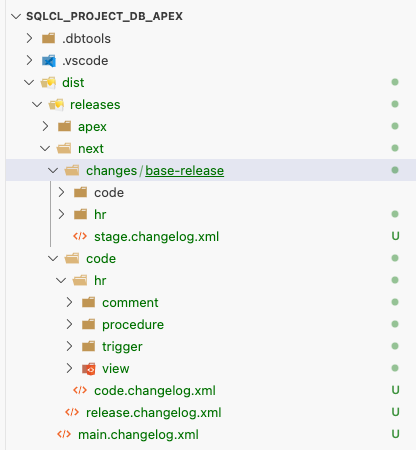
--HR_PROD_OCI
liquibase changelog-sync -chf dist/releases/main.changelog.xml


At this moment, my DEV (base-release) is equal to PROD (main). Therefore, I have to merge my base-release branch into the main branch.
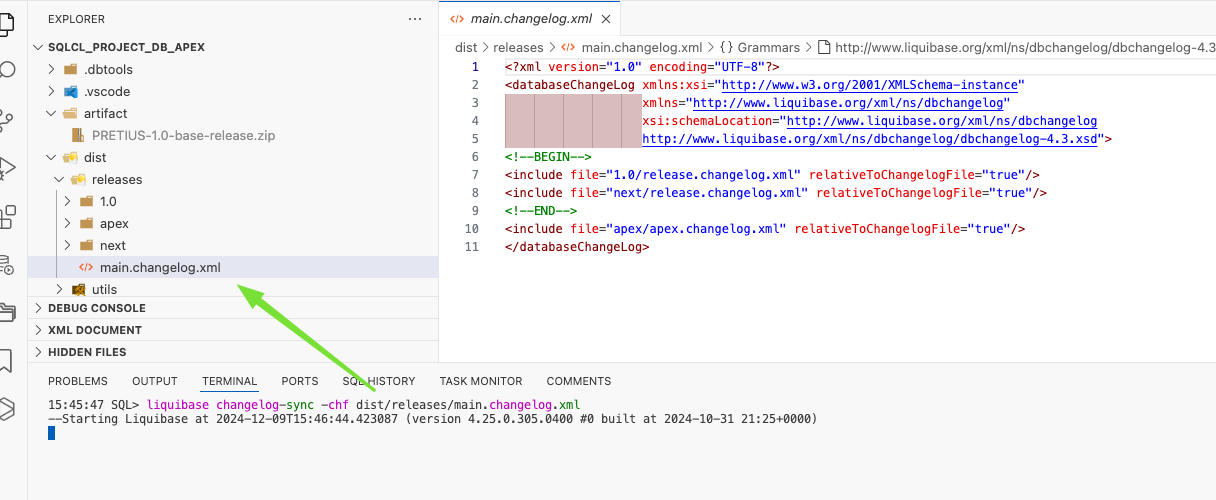
First, I need to change some stuff directly in the DEV environment (using VS Code, SQL Dev, etc.).I make some changes in APEX apps in DEV.
INSERT INTO HR.COUNTRIES (COUNTRY_ID, COUNTRY_NAME, REGION_ID) VALUES ('PL', 'Poland', '10');

CREATE TABLE HR.PARAMETERS (NAME VARCHAR2(50),
                           VALUE VARCHAR2(50));

ALTER TABLE HR.EMPLOYEES
ADD (ADDRESS VARCHAR2(100) );

 CREATE OR REPLACE PROCEDURE HR.SECURE_DML
 IS
 BEGIN
    IF TO_CHAR(SYSDATE, 'HH24:MI') not between '08:00' and '18:00'
       or TO_CHAR(SYSDATE, 'DY') in ('SAT', 'SUN')
    THEN
       RAISE_APPLICATION_ERROR(-20205,
                               'You may only make changes during normal office hours (this bracket is a change)');
    END IF;
END SECURE_DML;
/

INSERT INTO HR.PARAMETERS (name, value) VALUES ('MY_BLOG_URL','rafal.hashnode.dev');
COMMIT;
Now, I create a new GIT branch called “1.1“.
To export the changes, I use the project export command:
--on branch 1.1
--connected to HR_DEV_OCI
project export
This command exports my actual state of DEV database objects and APEX apps.
Once exported, it’s time to commit changes on branch 1.1.

!git add .
!git commit -m "Files for version 1.1"
First, I use the project stage command:
--HR_DEV_OCI
project stage

This command creates some new files for my release 1.1.
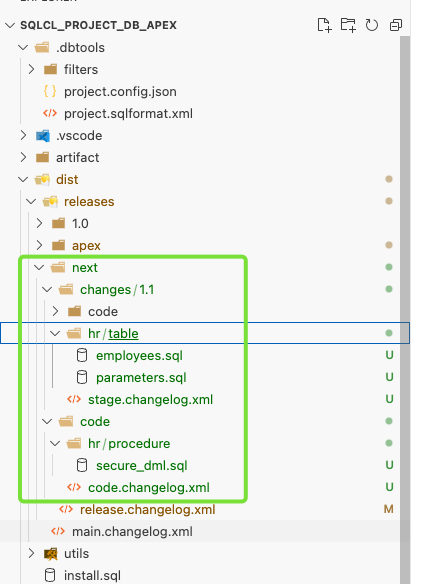
As you may remember, on my DEV, in addition to changes in the EMPLOYEES and PARAMETERS tables and the procedure SECURE_DML, I’ve also executed two inserts into the COUNTRIES and PARAMETERS tables. This is something that SQLcl won’t track automatically, and we need to use the add-custom command for that
That’s why I’ve created two files for DMLs in both tables:
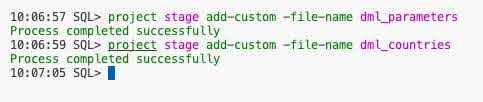
--HR_DEV_OCI
project stage add-custom -file-name dml_parameters
project stage add-custom -file-name dml_countries
And SQLcl automatically created those files:
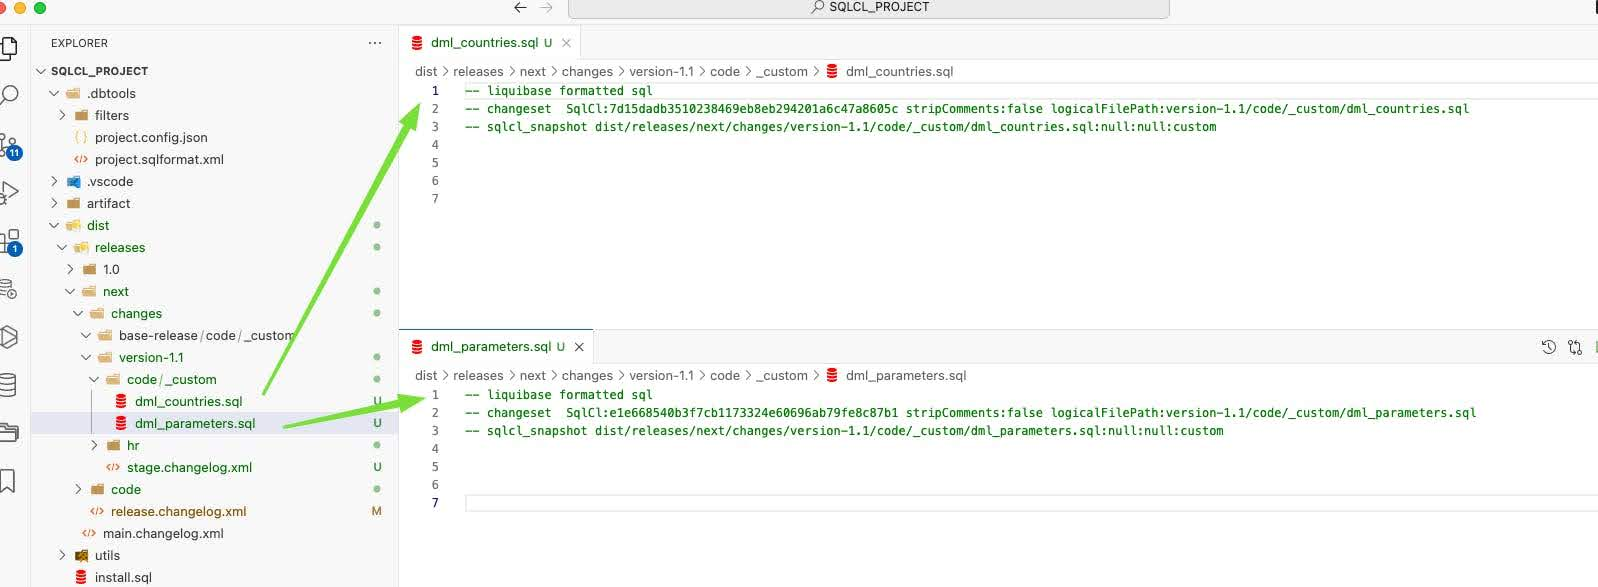
There’s no need to change anything in these files. I only put my insert scripts there:

Once again, I use the project verify command to check if everything’s alright.
--HR_DEV_OCI
project verify
We are good to go.
I use the following command:
--HR_DEV_OCI
project release -version 1.1 -verbose
SQLcl terminal says clearly what happened:
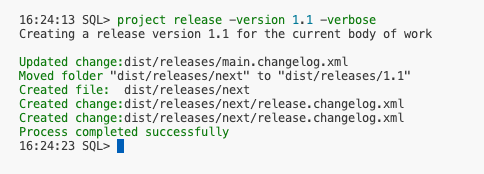
My release moves to /releases/1.1, and my next release is empty.
I like to do this so that everything’s transparent. Since my release is ready for PROD, I should deploy it from the main (PROD) branch. That’s why I do the following:
Now, I create an artifact for my version 1.1 using the gen-artifact command:
--HR_PROD_OCI
--on GIT branch MAIN(prod)
project gen-artifact -version 1.1
I’m ready to deploy my changes to PROD with the project deploy command:
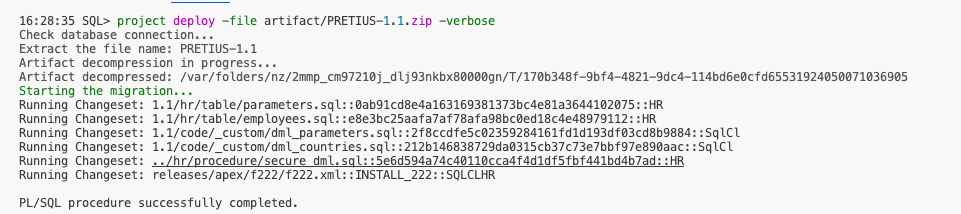
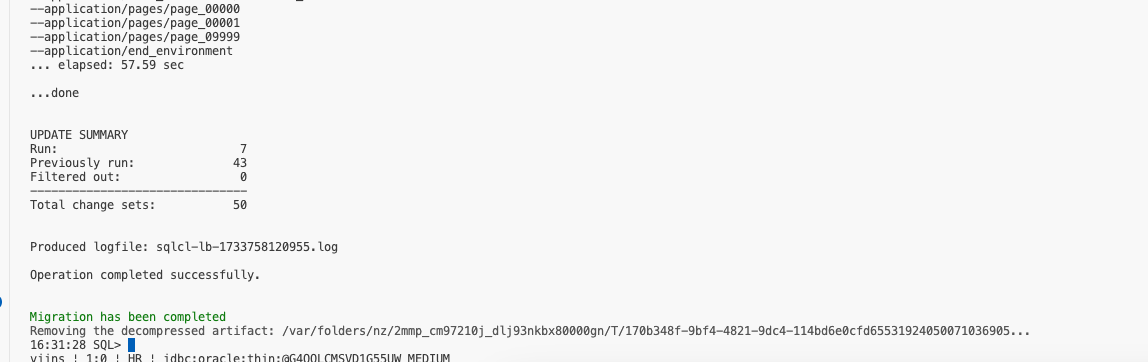
--HR_PROD_OCI
project deploy -file artifact/PRETIUS-1.1.zip -verbose
The SQLcl terminal clearly states what happened, but most importantly, all my changes, including APEX, were deployed to PROD:
And that’s about it. I hope you liked this article. I advise you to experiment with the project command and see whether it fits your particular CI/CD needs. Personally, I’m pretty impressed with its capabilities and it’s possible that it’ll really be the only CI/CD tool that I will use in many APEX projects.
If you have any questions, reach out to me at rgrzegorczyk@pretius.com. And, of course, check out some of my other articles on this blog:


