
AppSheet is a no-code framework offered by Google, which is to say it’s a technology that allows people who aren’t software developers – but rather specialists in other fields – to seamlessly build professional web applications. The important thing here is that the app creators don’t have to write code (hence the term “no-code”). This idea is called Citizen Development and it’s gaining popularity in recent years.
Google AppSheet replaced the old Google App Maker. It’s worth noting that it’s a part of Google Workspace – which means that the applications you create can leverage other areas of the Google ecosystem (such as the popular Google Cloud Platform). The assumption here is very simple: if the organization has implemented the Google Workspace package, then its employees should be able to build a fully functional application for an internal or external user – based on AppSheet – which directly draws from the data processed in the company. Is this assumption true? Let’s find out how functional and complex AppSheet web apps can really be.
Helpful information sources:
We will create a new app based on existing data – a dataset of employees of a fictional company. This is the kind of information that an average HR department, responsible for maintaining and managing employee data, might work on every day. In my sample scenario, all the data is stored in Google Sheets – therefore, the data source for my sample HR application will be a single Google Sheet file with multiple tabs that will be used to store different data sets. I named the tabs in an unambiguous way, such as: “Employees”, “Jobs”. The data in each of these tabs will be managed through the AppSheet application.
You can find the sample Google Sheet file here. If you want, you can customize it or build your own – just put your data into the form. Here’s how my sample looks:
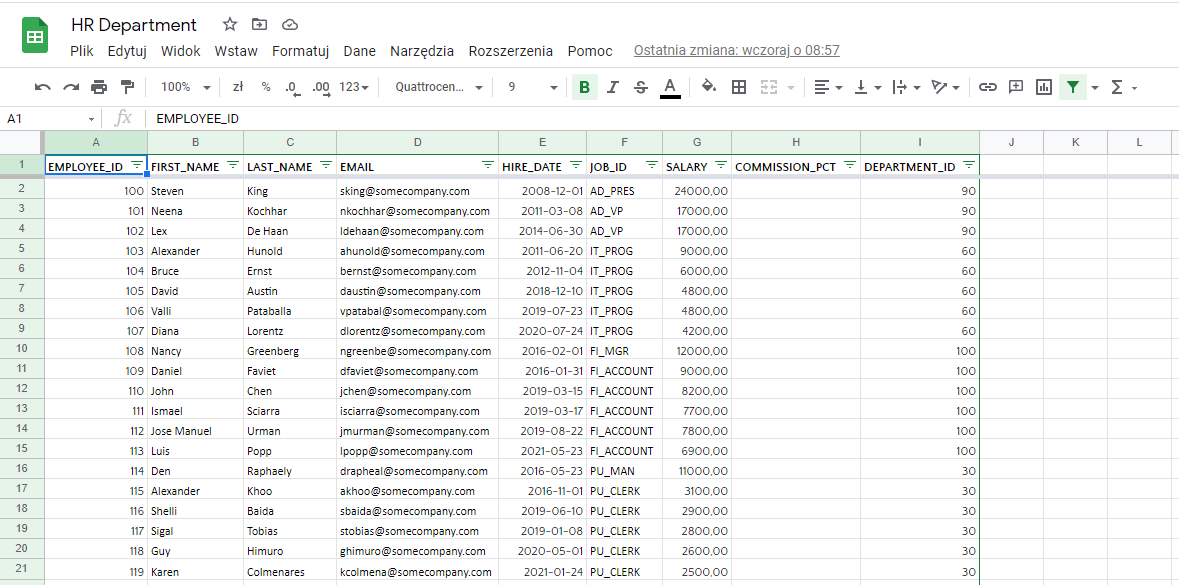
Let’s briefly summarize what can be seen on the screenshot. In my HR application, I have a table containing the information about employees, as well as other kinds of data that are worth storing – such as the location of the offices of this company, or details concerning the types of positions of employees. Each data tab represents a different part of the data that I want to process in my app. Within each of these tabs, the data is stored in columns. Important note: AppSheet will only recognize one table within a tab, so make sure that each table has its own place in the sheet before creating your application.
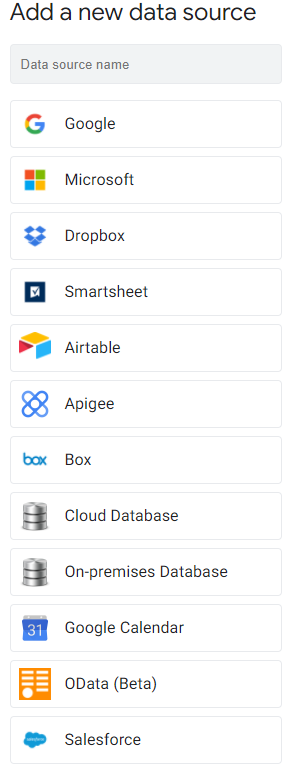
My sample app only uses the Google Sheet file, but this isn’t the only source of data you can feed to AppSheet. When you add a new table to your application, you have a list of possible sources available. Keep in mind that, depending on the option you choose, you may need a more expensive AppSheet subscription.
Let’s take some time to talk about formatting. It’s generally a good idea to format the columns appropriately for the type of data they collect, so that AppSheet can interpret this information and make the right settings in the application itself. How to format your Google Sheet properly? Here’s a couple of pointers:
Helpful information sources:
Another important step is data normalization. Generally speaking, it’s a good idea to make sure that information isn’t duplicated in your tables, and it’s possible that a new table may need to be extracted to avoid this. Keep in mind that AppSheet is aware of such dependencies and provides referencing between individual tables (I’ll tell you more about that in the next part of this tutorial).
Also, each row of data should be uniquely identified – this is extremely important, because AppSheet applications allow multiple people to work on the same table row, and also support offline use. Both of these functions work thanks to unique identifiers. For example, if the user manages app data without a connection to the server, AppSheet will automatically update the data when the connection is restored, and that update of the data that has been changed offline will happen based on the unique identifier assigned to each row. If your data has an attribute that can serve as such an identifier (for example, a number that will be different for each row in the data table), you can make use of that. Otherwise, consider adding an ID column to your tables to perform this function.
However, keep in mind that how you generate a unique identifier in the dataset can also be important. For example, a formula with increments based on the maximum value of some expression that’s perfectly fine on the worksheet side, won’t work in the AppSheet, especially if your application is supposed to support offline operation. Any attempt to get another ID value will fail due to lack of network access. So, it should be AppSheet’s responsibility to manage the unique key values that, once the connection is recovered, will be able to be transferred to the worksheet.
As I’ve mentioned previously, my data table contains the basic employee data with more specific attributes in addition to textual data – these include email address, date of employment, salary and commission rate. We will orient our entire application around this information.
Our first worksheet should be named in an unambiguous way because it will be the default name of the application. However, nothing prevents you from customizing this name at the AppSheet level. In Google Sheets, we go to the Extensions menu. After selecting AppSheet -> Create Application, we may be asked to agree to use our Google account to work with AppSheet.
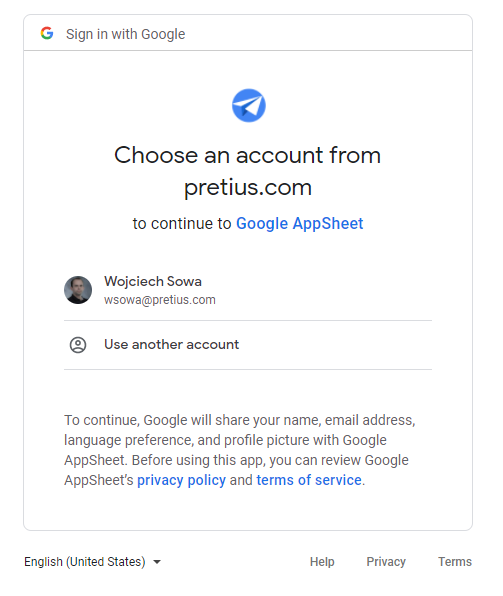
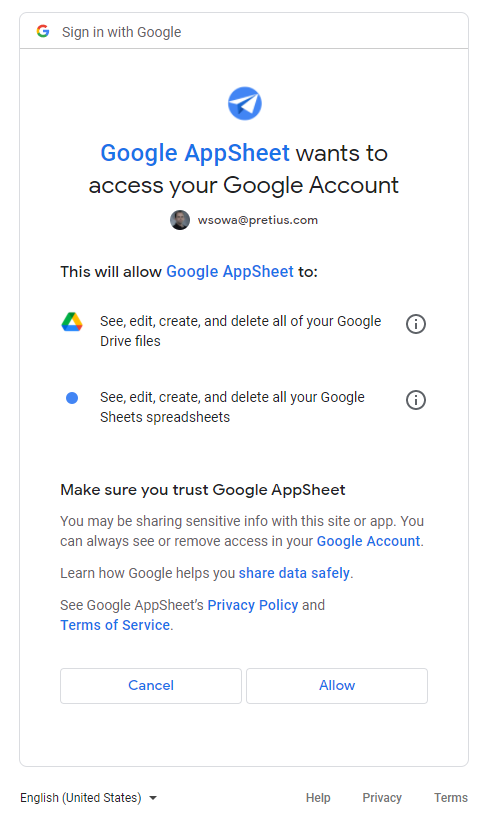
We continue by selecting the correct account. After this step, AppSheet will start configuring the environment and prepare the first version of the application.
At the data source definition stage, AppSheet analyzes columns and, where possible, assigns them an appropriate data type, e.g.: text, data, integer, or price expressed in a specific currency. The column names are analyzed as well as the content in all rows. That’s why it’s a good idea to put some effort into the data preparation stage. It’ll save you a lot of time later when you’ll be creating data sources in AppSheet.
When AppSheet is done, you’ll see the environment divided into two parts. The left part will be used to create applications, while the right serves as the preview of your application.
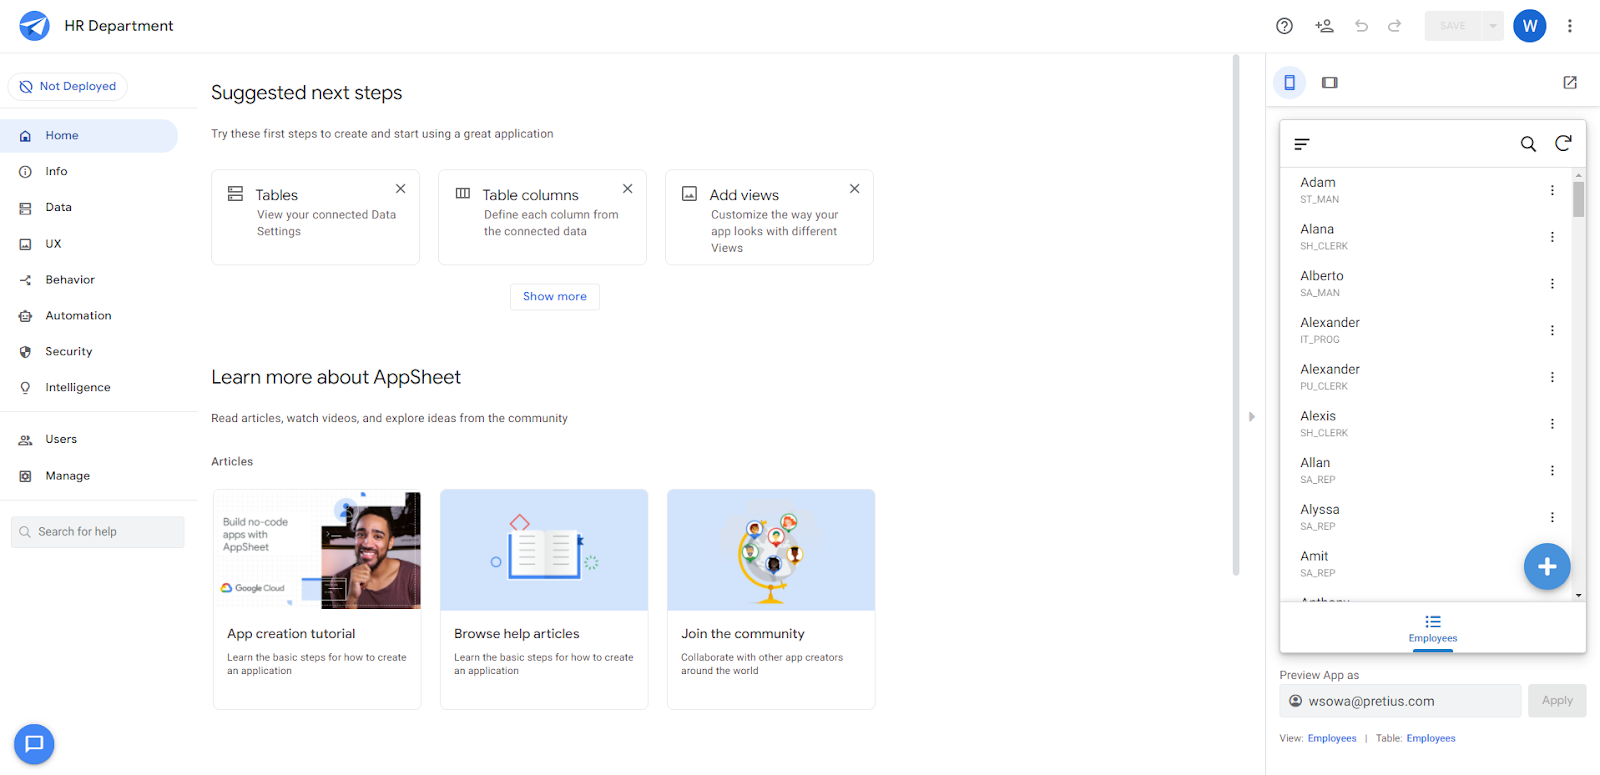
The app preview is continuously updated, allowing you to keep track of the changes. AppSheet interface is very clear. It contains fixed areas in the form of a menu on the left and an application preview on the right. Everything that will be created by you will be presented in the middle section. It is worth noting that the menu on the left is a kind of a checklist. Now, it’s time to discuss its individual items:
The Info tab has a dual role: it allows you to keep track of errors that occurred during the development stage of the application but also gives you the opportunity to document your application and describe it in terms of its purpose and use (you can also include links to the privacy policy or readme file).
Let’s take a look at the base application that was automatically generated by AppSheet. It contains a number of default settings and is fully functional, even though you may not see that at first glance. This is in part due to the effort put into processing the data in the Google Sheet. And, also, AppSheet is able to infer some of the more important dependencies.
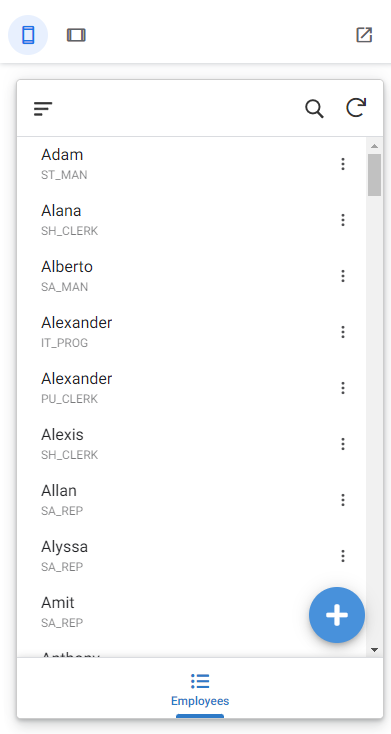
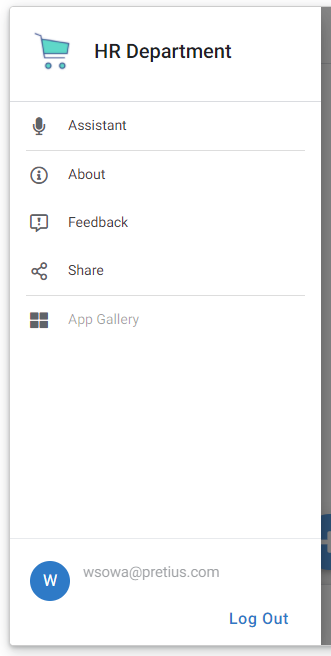
The screen above shows the startup view. This view can be presented in different forms depending on the purpose. Available modes are Mobile, Tablet and Full Screen. The top bar of the application has three buttons. The icon of three horizontal dashes hides a standard menu with the following options:
Under the magnifying glass icon is a search engine that can search globally or according to criteria corresponding to one of the columns of your table.
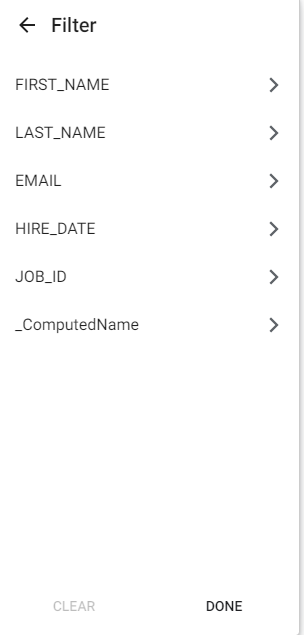
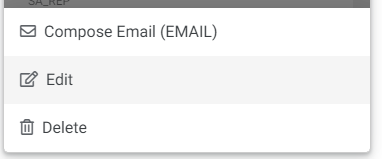
The outermost button on the right allows you to invoke on-demand data synchronization. While we’re on the subject of data, it’s time to see how you can work with your data. In the basic view, each row is clickable, and the icon of three vertical dots hides an additional menu:
Previewing a single row of data takes you to the next view, where all the information is summarized in the reading mode. There is a button in the upper right corner to enter edit mode.
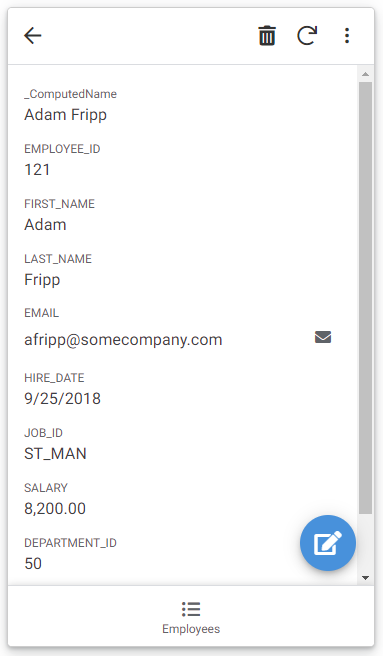
It’s worth noting that the menu in the top bar of the application is customized to the currently presented view and, as you can see on the screen, from this level we have the ability to delete this record. Also, by default AppSheet places a shortcut next to the employee’s email address, in the form of a mail icon. It allows you to quickly write an email to this person.
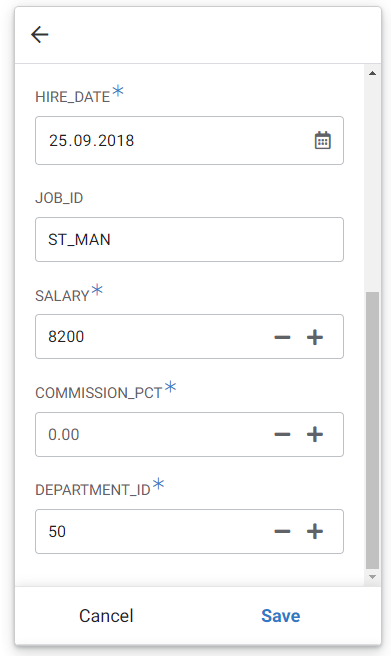
The view in the Edit mode gives us the ability to modify the data. It’s worth noting that AppSheet independently infers the types of data we collect in the sample Google Sheet. In addition to the standard text fields, numeric fields seem to be interesting – they have the ability to increase the values incrementally. Some things don’t work perfectly here – at least not yet – but the basic configuration should satisfy most developers.
To perform a short test, you can modify one of the rows using the application. For example, try giving an employee named Adam a raise in the amount of 10,000. Enter the data and save it. If you now go to your Google Sheet, and find this employee, you’ll see that the data in the sheet has been updated very quickly. The same situation occurs when you delete and add new rows.

Data can also be modified in your Google Sheet. After that, you just need to force sync the data, and its current state will be visible in the app. Congratulations, you’ve just created your very first Google AppSheet application. It seems that thanks to you your HR department will have more time to drink coffee and eat donuts. 🙂
I have briefly discussed how format the data and use AppSheet to create an app. Now, you should know how to prepare the data and what each section of the wizard is responsible for (take some time to familiarize yourself with it, create some sample apps). However, this is just the beginning of your adventure with AppSheet and no-code app development. In the future, I’ll write more articles on this subject. I’ve already created a guide that’ll show you how to use Appsheet’s data tab. You can also expect some blog posts with solutions to various problems you might encounter. Finally, I’ll try to find analogies to Oracle APEX, a low-code technology with which I have several years of experience. There is a question of whether AppSheet, as a no-code framework, can handle the implementation of a complex application project. I’ll try to provide you with an answer.
And if you need professional help with low-code technology in projects that can’t be achieved without specialized software developers, we’re here just an e-mail away! Write us at hello@pretius.com or use the contact form below – we’ll see what we can do and get back to you in 48 hours.


