
Sometimes we reach the limits of native Oracle Apex components, and we have to improvise and implement workarounds to achieve the needed functionality, such as multiple input types in one interactive grid column. In this article, I would like to present my way of doing it without unnecessary hacking, preserving all native functionalities.
It may sound complicated, but as we go through the solution, we will see that it’s simple. Let’s explain the solution using two use cases. First, we start with something very easy, and then we add some complications.
In the Label-Value pair use case, the functionality is straightforward. We want to have two columns, where on the left we have a label and on the right the value.
We can have multiple rows, and each value input can be of a different type. Let’s see how we can achieve this in an interactive grid.
We create a DYNAMIC_IG_INPUTS table that contains 5 columns. Label, column type, and then the actual value columns for varchar, date, and number. We could also use just one varchar column for value and do a case where we split the values from the database to multiple columns in an interactive grid and then back, but we will keep it simple for now.
| Column Name | Data Type |
| ID | NUMBER |
| LABEL | VARCHAR2(100 CHAR) |
| COLUMN_TYPE | VARCHAR2(100 CHAR) |
| VALUE_VARCHAR | VARCHAR2(100 CHAR) |
| VALUE_NUMBER | NUMBER |
| VALUE_DATE | DATE |
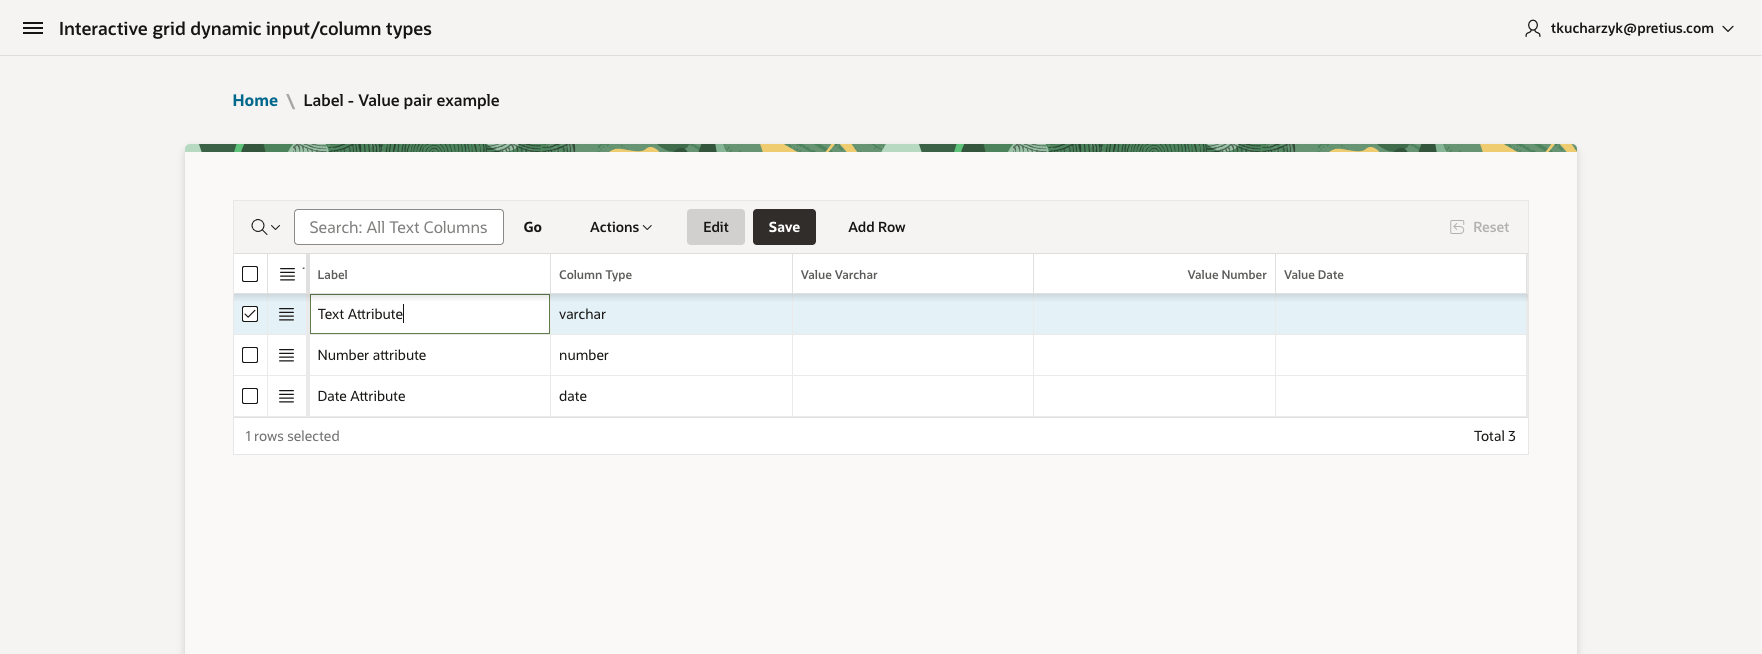
We will add three rows into the table: Text attribute with type varchar, Number attribute with type number and Date attribute with type date.
In the Apex application, we create an enabled interactive grid. The DML process will be automatic: we use the ID as a primary key, and we add a static ID mygrid to the grid attributes. The result will look as below.
To show/hide the proper column per type, we will create a simple JavaScript function.
/**
 * Sets column visibility in an Oracle APEX Interactive Grid based on the COLUMN_TYPE value for each row.
 *
 * @param {string} pi_grid - Static ID of the Interactive Grid region
 *
 * This function dynamically shows or hides cells in each row based on the value stored in the "COLUMN_TYPE" column.
 * For each row, it shows only cells with a CSS class matching the COLUMN_TYPE value ('dropdown', 'date', 'varchar', 'number'),
 * plus any cells with the 'donothide' or 'has-button' class. All other cells are hidden.
 *
 * The function optimizes performance by:
 * - Using a reusable filter function to avoid repetitive code
 * - Processing all records in a single model traversal
 * - Skipping invalid column types
 */
function setcolumns(pi_grid) {
  const region = apex.region(pi_grid);
  const grid = region.widget().interactiveGrid("getViews", "grid");
  const model = grid.model;
  const gridElement = region.element;

  // Create a reusable filterAndShow function outside the loop
  const filterAndShow = (row$, columnType) => {
    // If there is a - in the columnType, take only the part after it
    if (columnType.includes('-')) {
      columnType = columnType.split('-')[1];
    }
    const td = row$.find("td");
    // Hide all cells that don't match the column type and don't have the donothide class
    td.each(function() {
      const cell = $(this);
      const shouldShow = cell.hasClass(columnType) || cell.hasClass('donothide') || cell.hasClass('has-button');
      cell.toggle(shouldShow);
    });
  };

  // Define valid column types to avoid repetitive if/else statements
  const validTypes = ['dropdown', 'date', 'varchar', 'number'];

  // Process all records in one go
  model.forEach(function(record) {
    const rowId = model.getRecordId(record);
    var columnType = model.getValue(record, "COLUMN_TYPE");
    console.log(columnType);
    console.log(`Row ID: ${rowId}, Column Type: ${columnType}`);
    // If the column type is object take a v value
    if (typeof columnType === 'object' && columnType !== null) {
      columnType = columnType.v;
    }
    // If columnType is not valid, default to varchar
    if (!columnType || !validTypes.some(type => columnType.includes(type))) {

      columnType = 'varchar';

      console.log(`Row ID: ${rowId} has invalid column type, defaulting to varchar`);
    }
    const row$ = gridElement.find(`tr[data-id='${rowId}']`);
    filterAndShow(row$, columnType);
  });
}
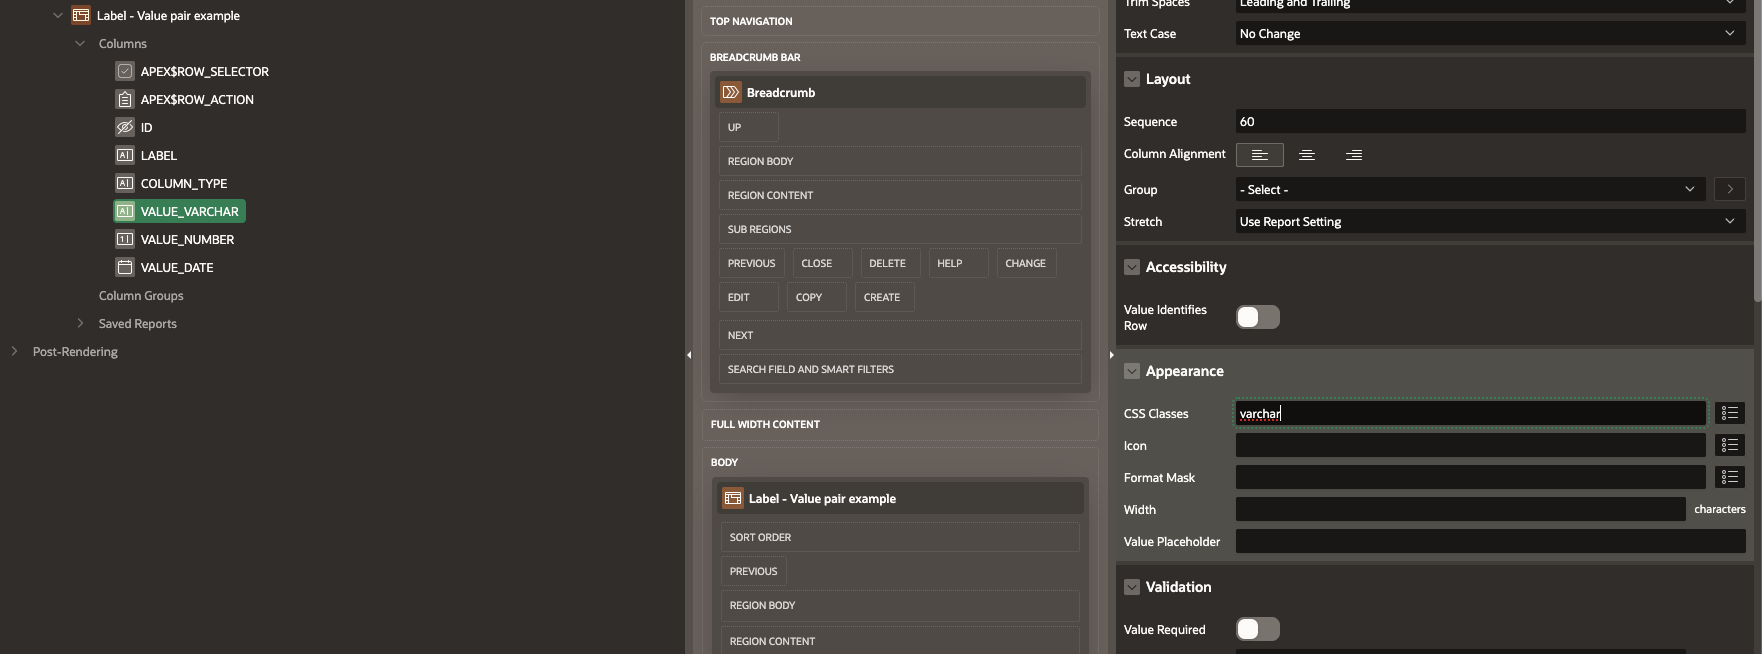
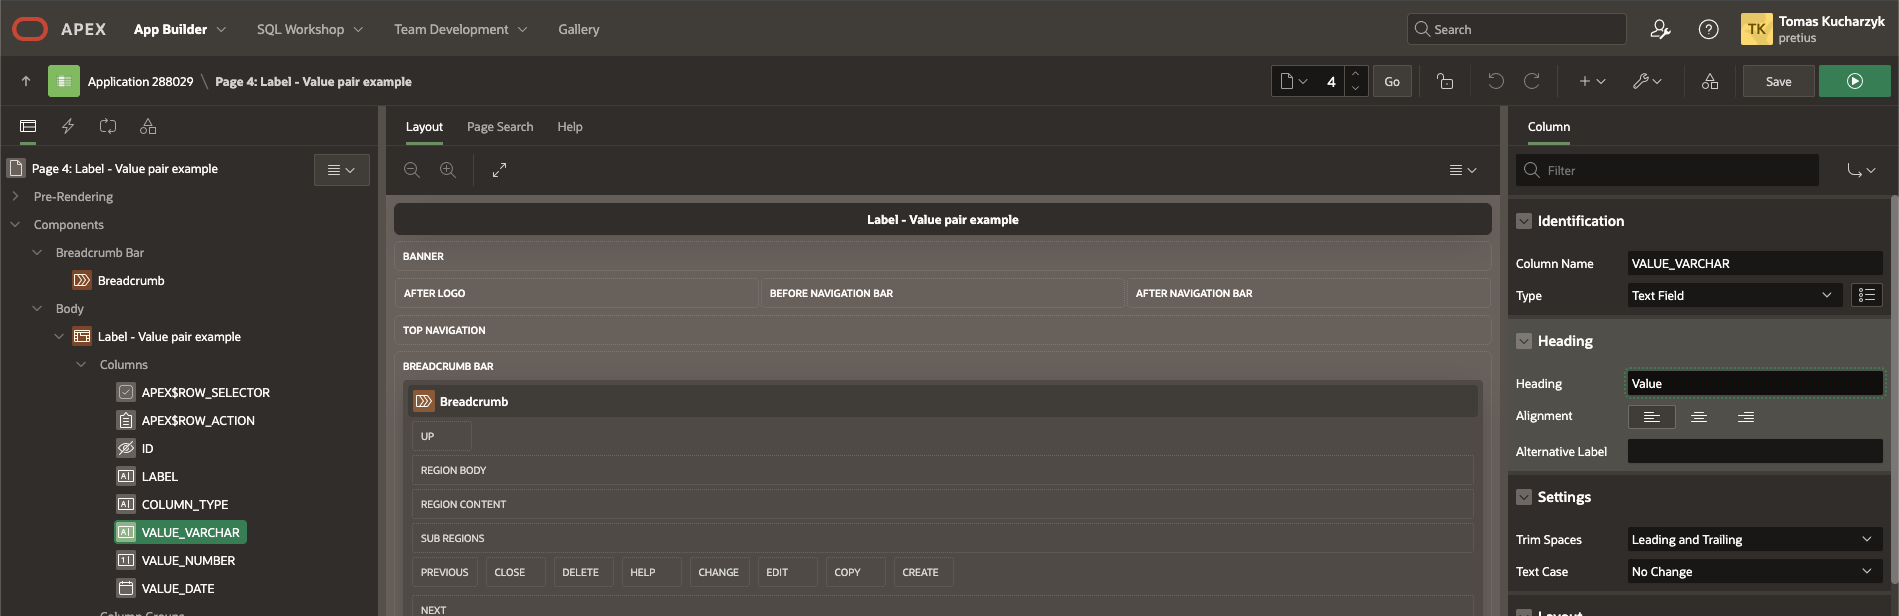
To target the columns and cells precisely, we will add some classes to the columns’ attributes. To the VALUE_VARCHAR column, we add varchar. And the same for the other columns, date for the VALUE_DATE and number for the VALUE_NUMBER column.
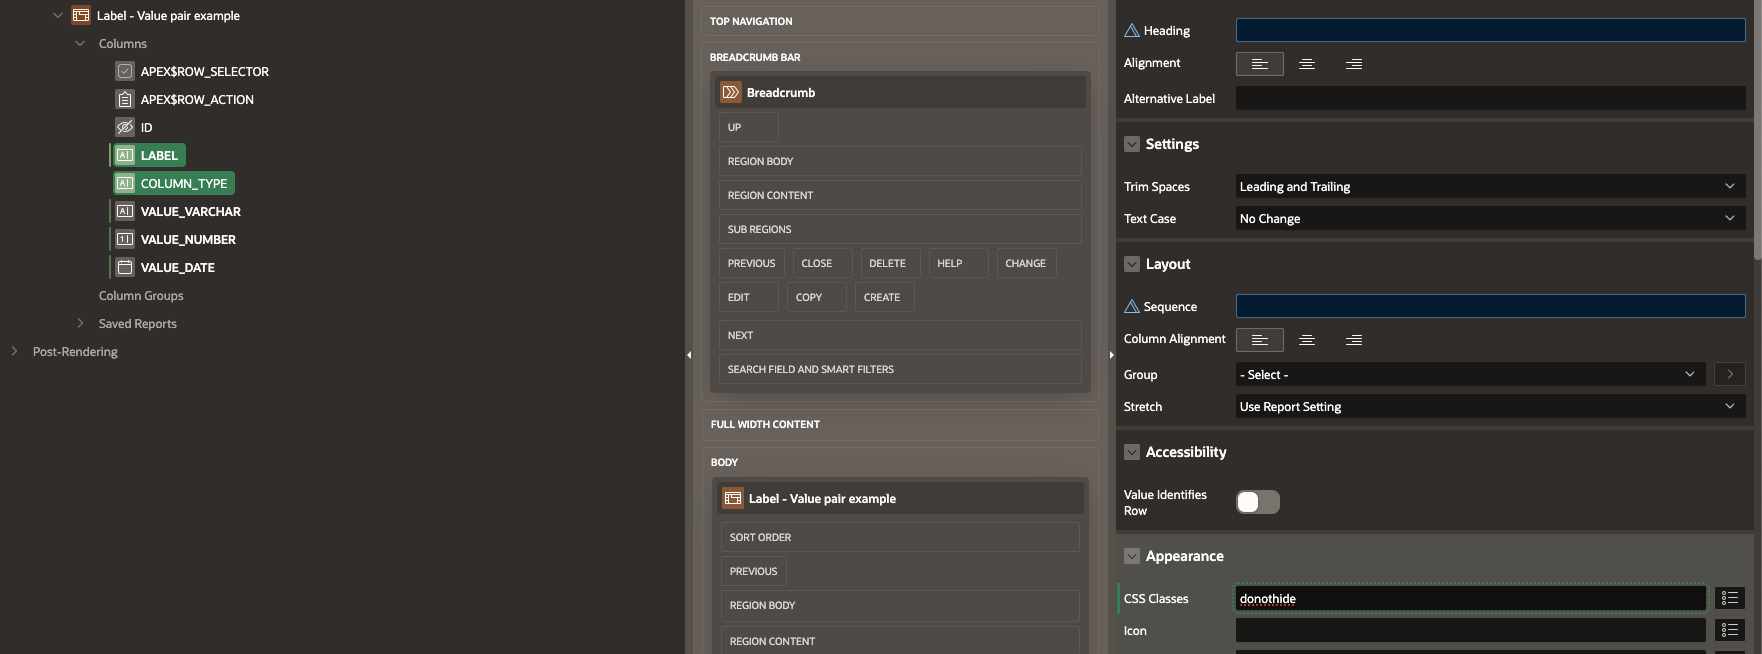
For the Label and Column type columns, we add the class donothide. This will prevent hiding of the columns.
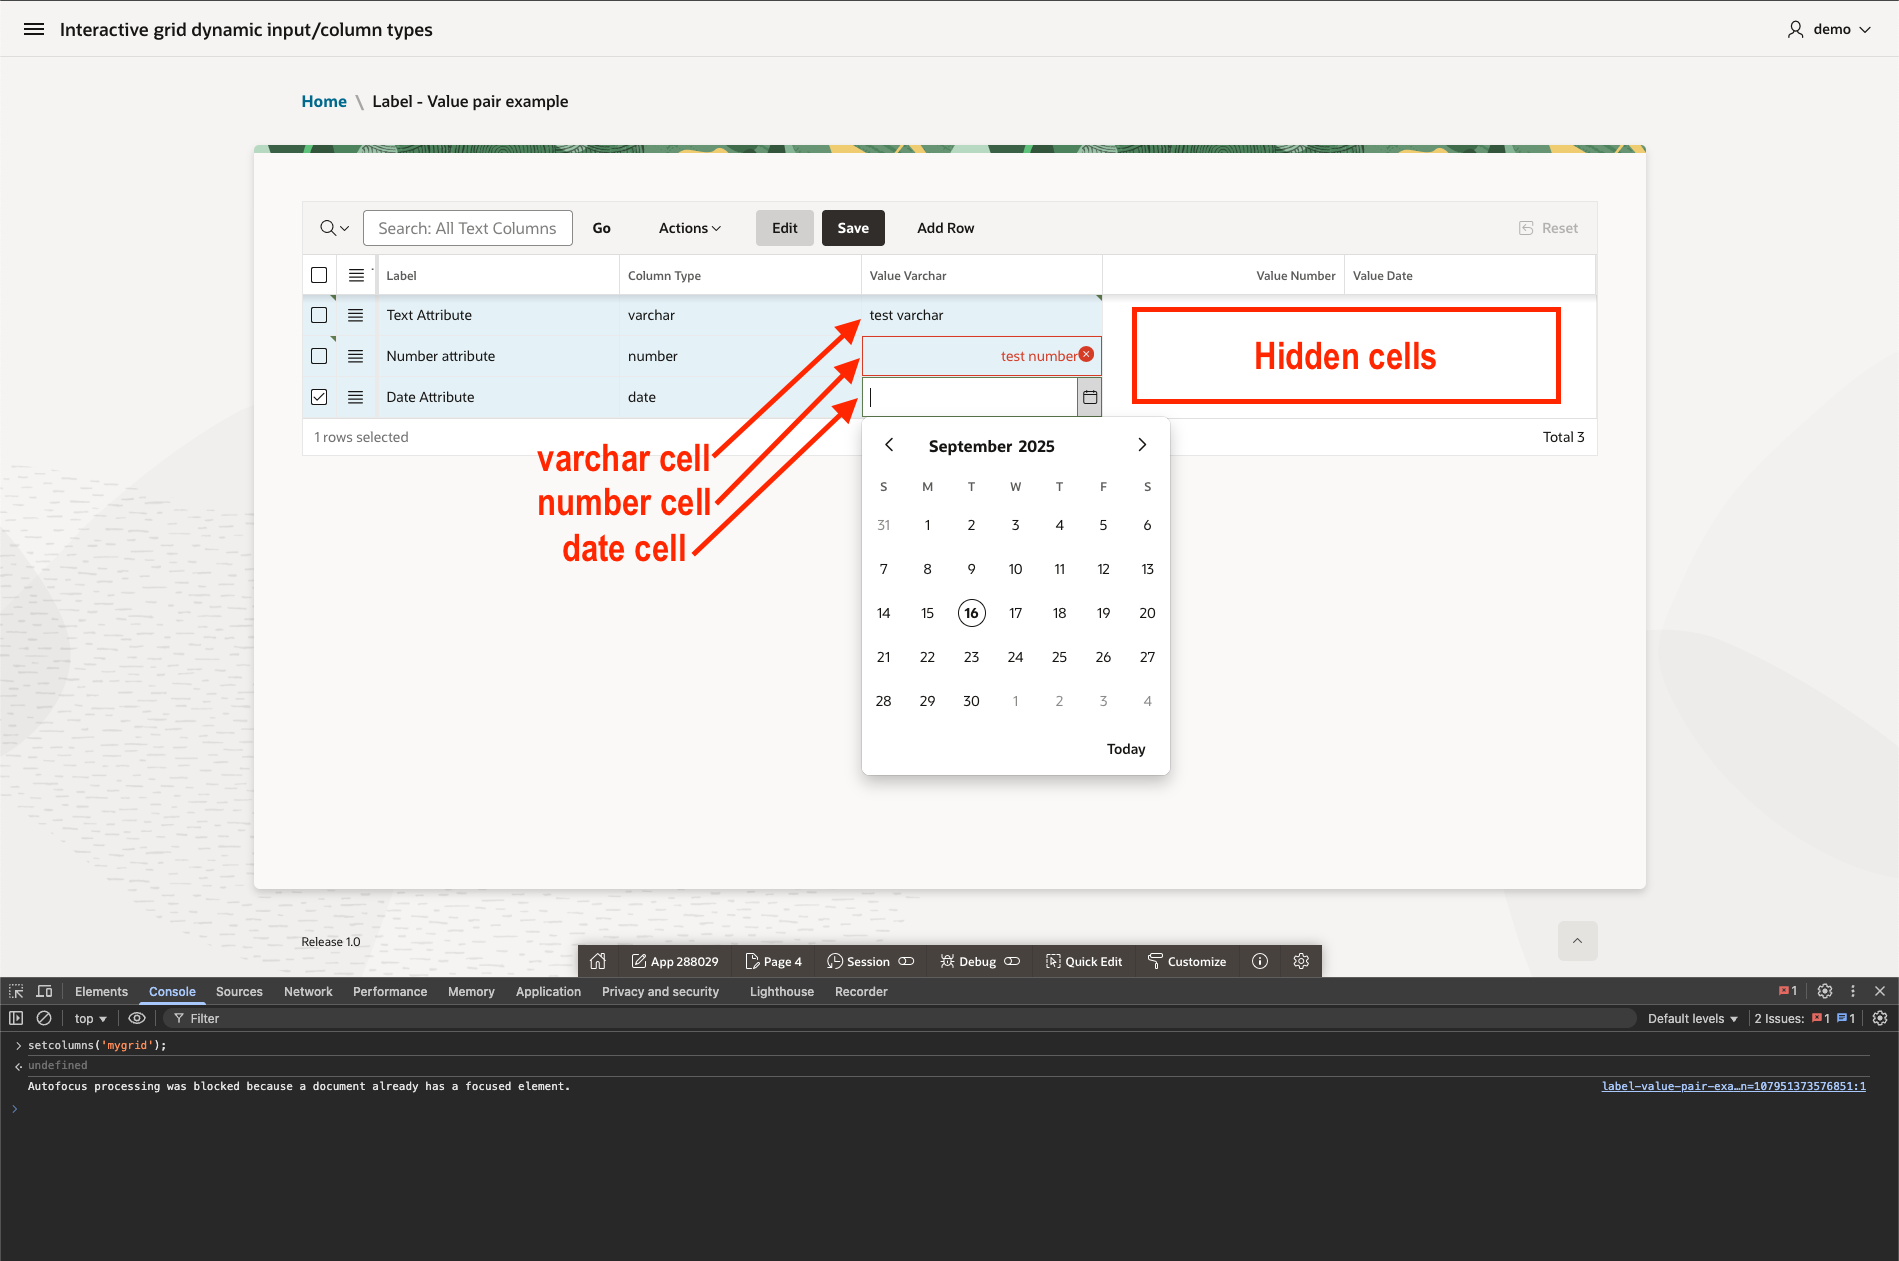
Now, we are all ready to see the result. If we run the function in the console (setcolumns(‘mygrid’);), we will see that some columns disappeared. If we try to edit the cells visible in the Value Varchar column, we can see that the cells are of a different type.
It looks like it works, but it doesn’t look good. First, we will rename the column name of the Value Varchar to Value.
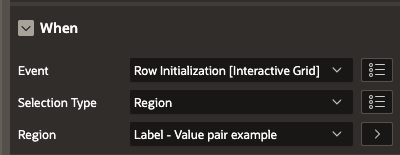
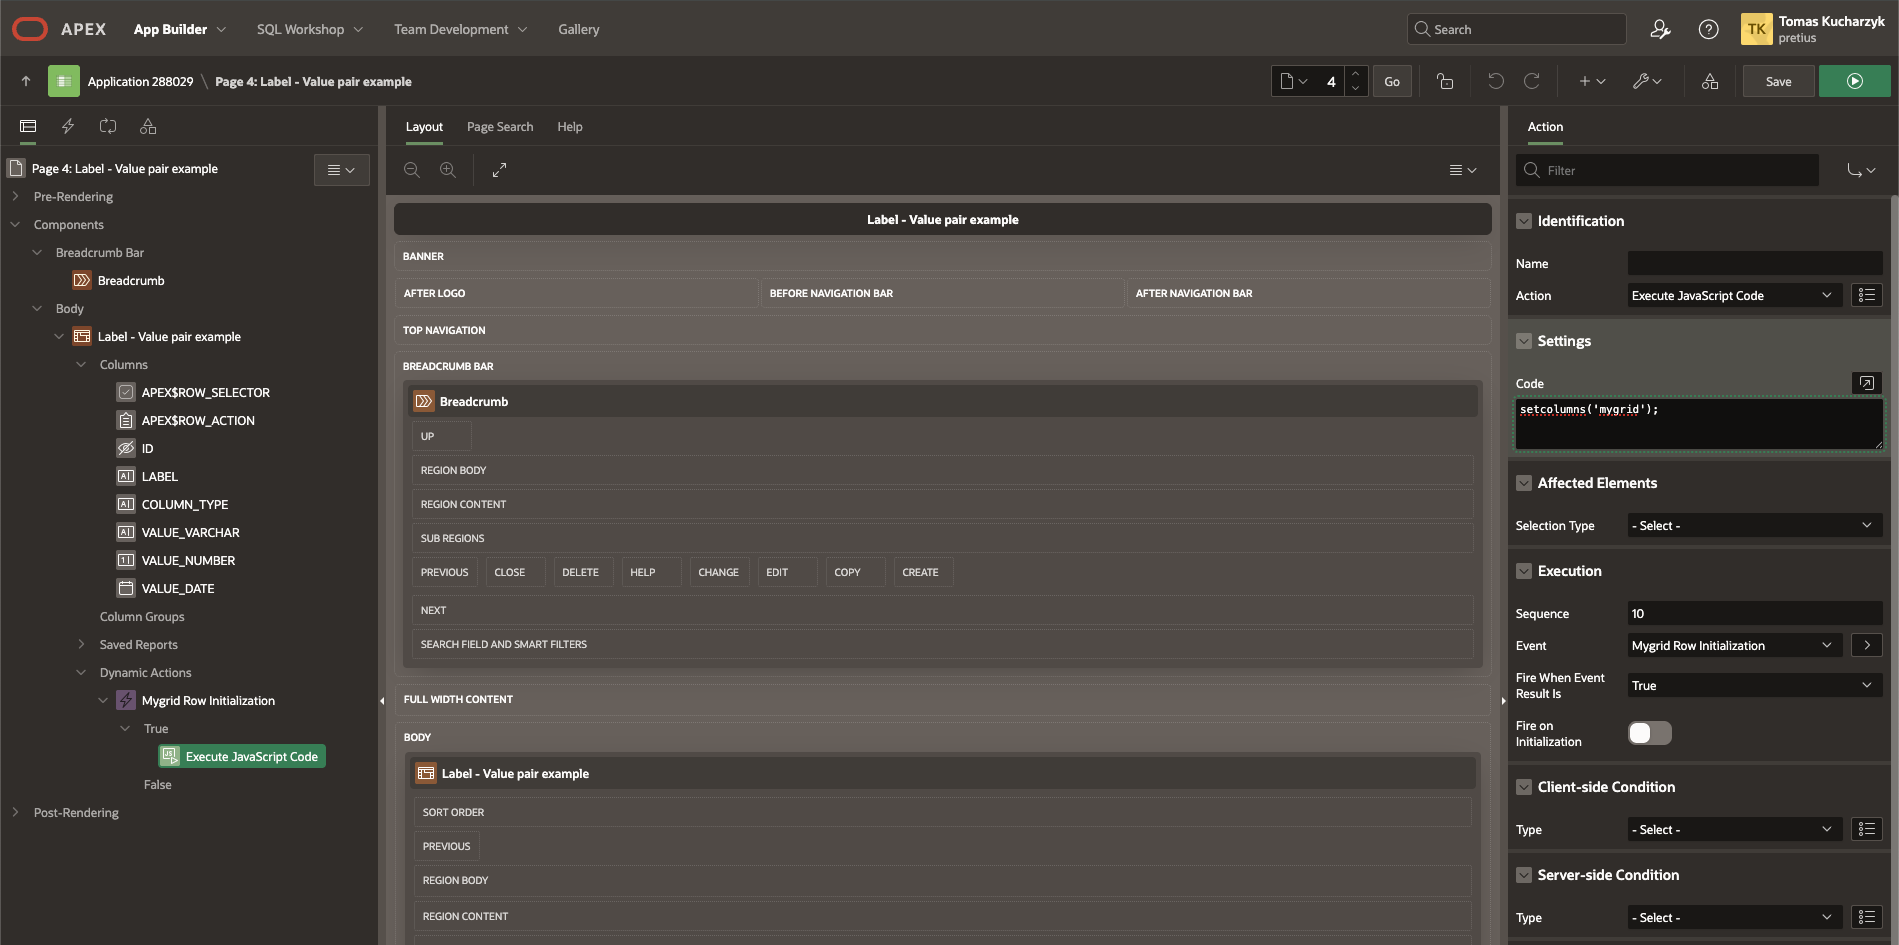
We will add a dynamic action that will run the JavaScript function for us automatically. I added an action for the event Row Initialization [Interactive Grid], but you may add multiple events to trigger the function in more cases.
In the True actions, we add setcolumns(‘mygrid’);.
Then we will add some basic CSS to hide the remaining columns. We need to hide the last two columns with the header and cells. You can do it in a more sophisticated way, but the code below will work just fine.
/*Hiding COL*/
#mygrid .a-GV-table col:nth-last-child(1),
#mygrid .a-GV-table col:nth-last-child(2),
/*Hiding TH*/
#mygrid .a-GV-table th:nth-last-child(1),
#mygrid .a-GV-table th:nth-last-child(2),
/*Hiding TD*/
#mygrid .a-GV-table td:nth-last-child(1),
#mygrid .a-GV-table td:nth-last-child(2){
    display: none;
}
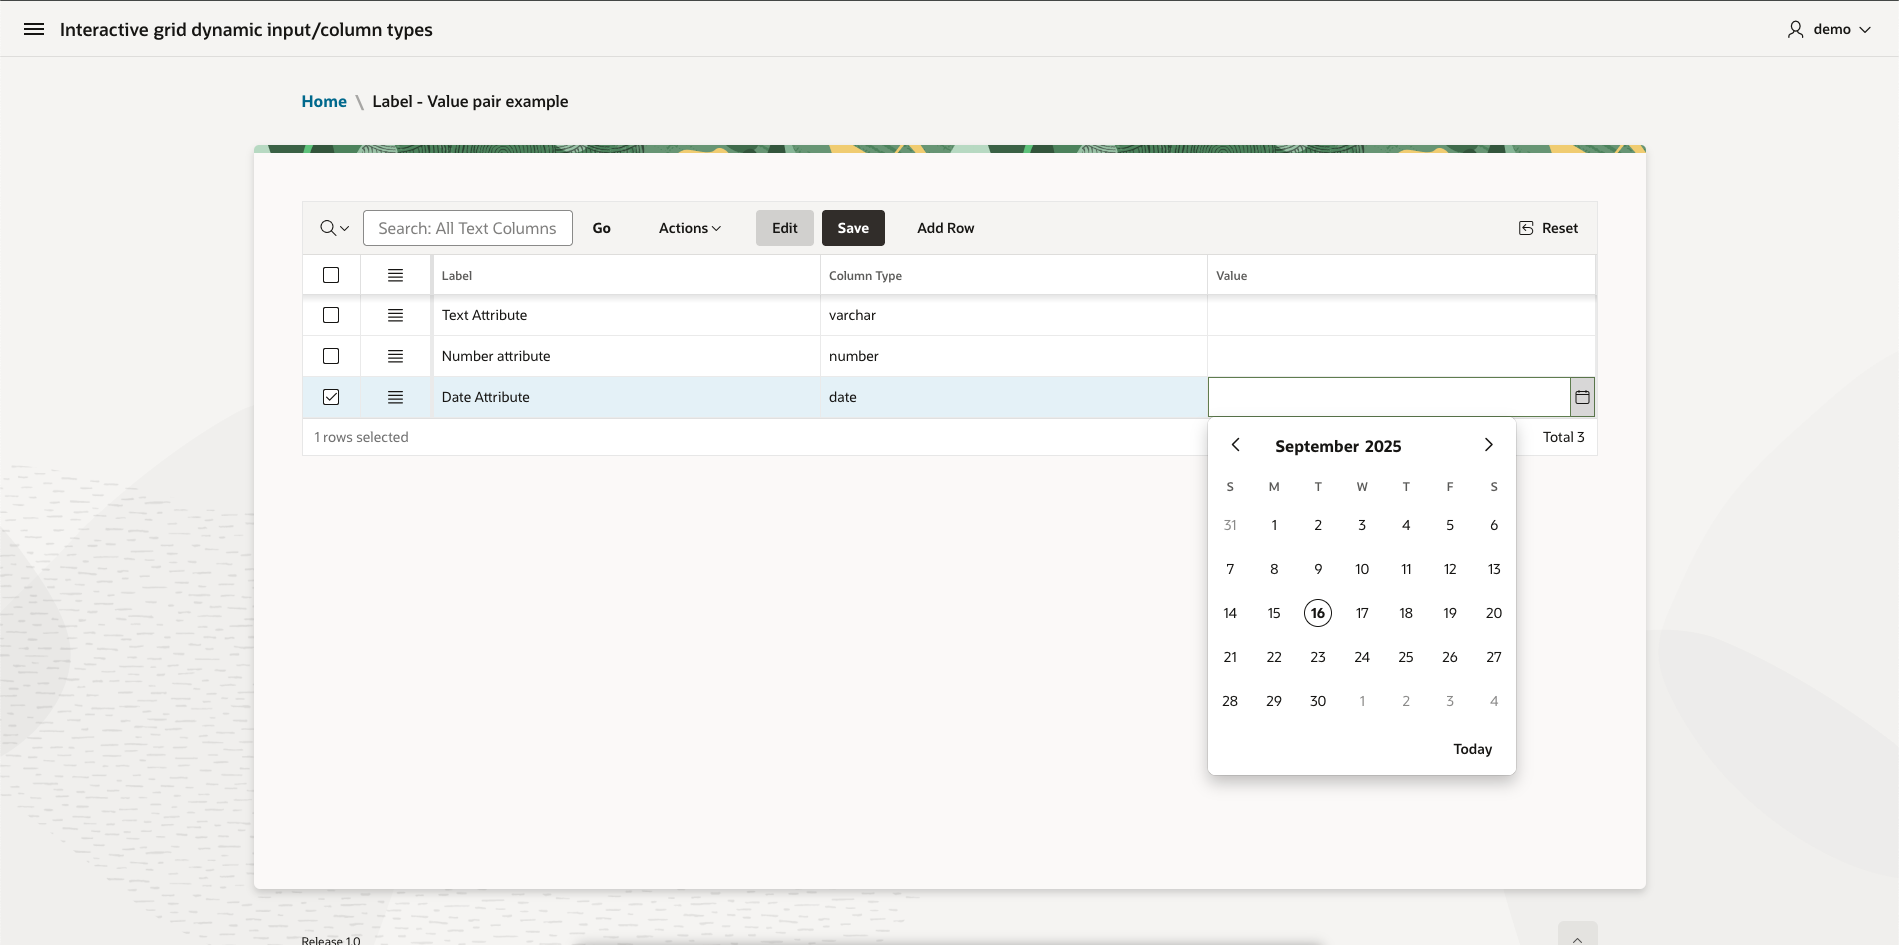
Now the finished interactive grid looks like this. All the validations, etc., will work as there are multiple columns. We can also set the required validation based on the column type value.
In the second case, we will add a few complications
First, we create another DYNAMIC_IG_INPUTS2 table that contains five columns. Label, column type, and a then value column for varchar, dropdown (number), and date.
| Column Name | Data Type |
| ID | NUMBER |
| LABEL | VARCHAR2(100 CHAR) |
| COLUMN_TYPE | VARCHAR2(100 CHAR) |
| VALUE_VARCHAR | VARCHAR2(100 CHAR) |
| VALUE_DROPDOWN | VARCHAR2(100 CHAR) |
| VALUE_DATE | DATE |
The next step is the same as before: creating a new enabled interactive grid with static ID mygrid with automatic process.
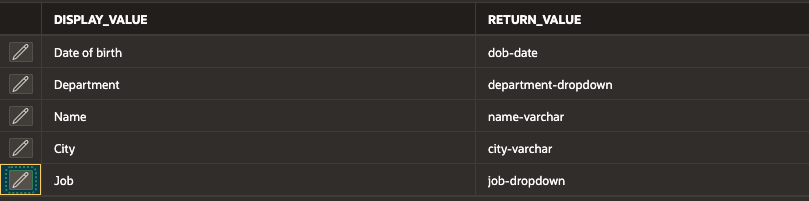
We will create one more table: DYNAMIC_LOV. It will serve as a column type for the grid. It will have two columns, display_value and return_value.
| Column Name | Data Type |
| DISPLAY_VALUE | VARCHAR2(100 CHAR) |
| RETURN_VALUE | VARCHAR2(100 CHAR) |
We will add a few values to the table.
And set the Column Type column in the grid to a Select list with the dynamic_lov values.
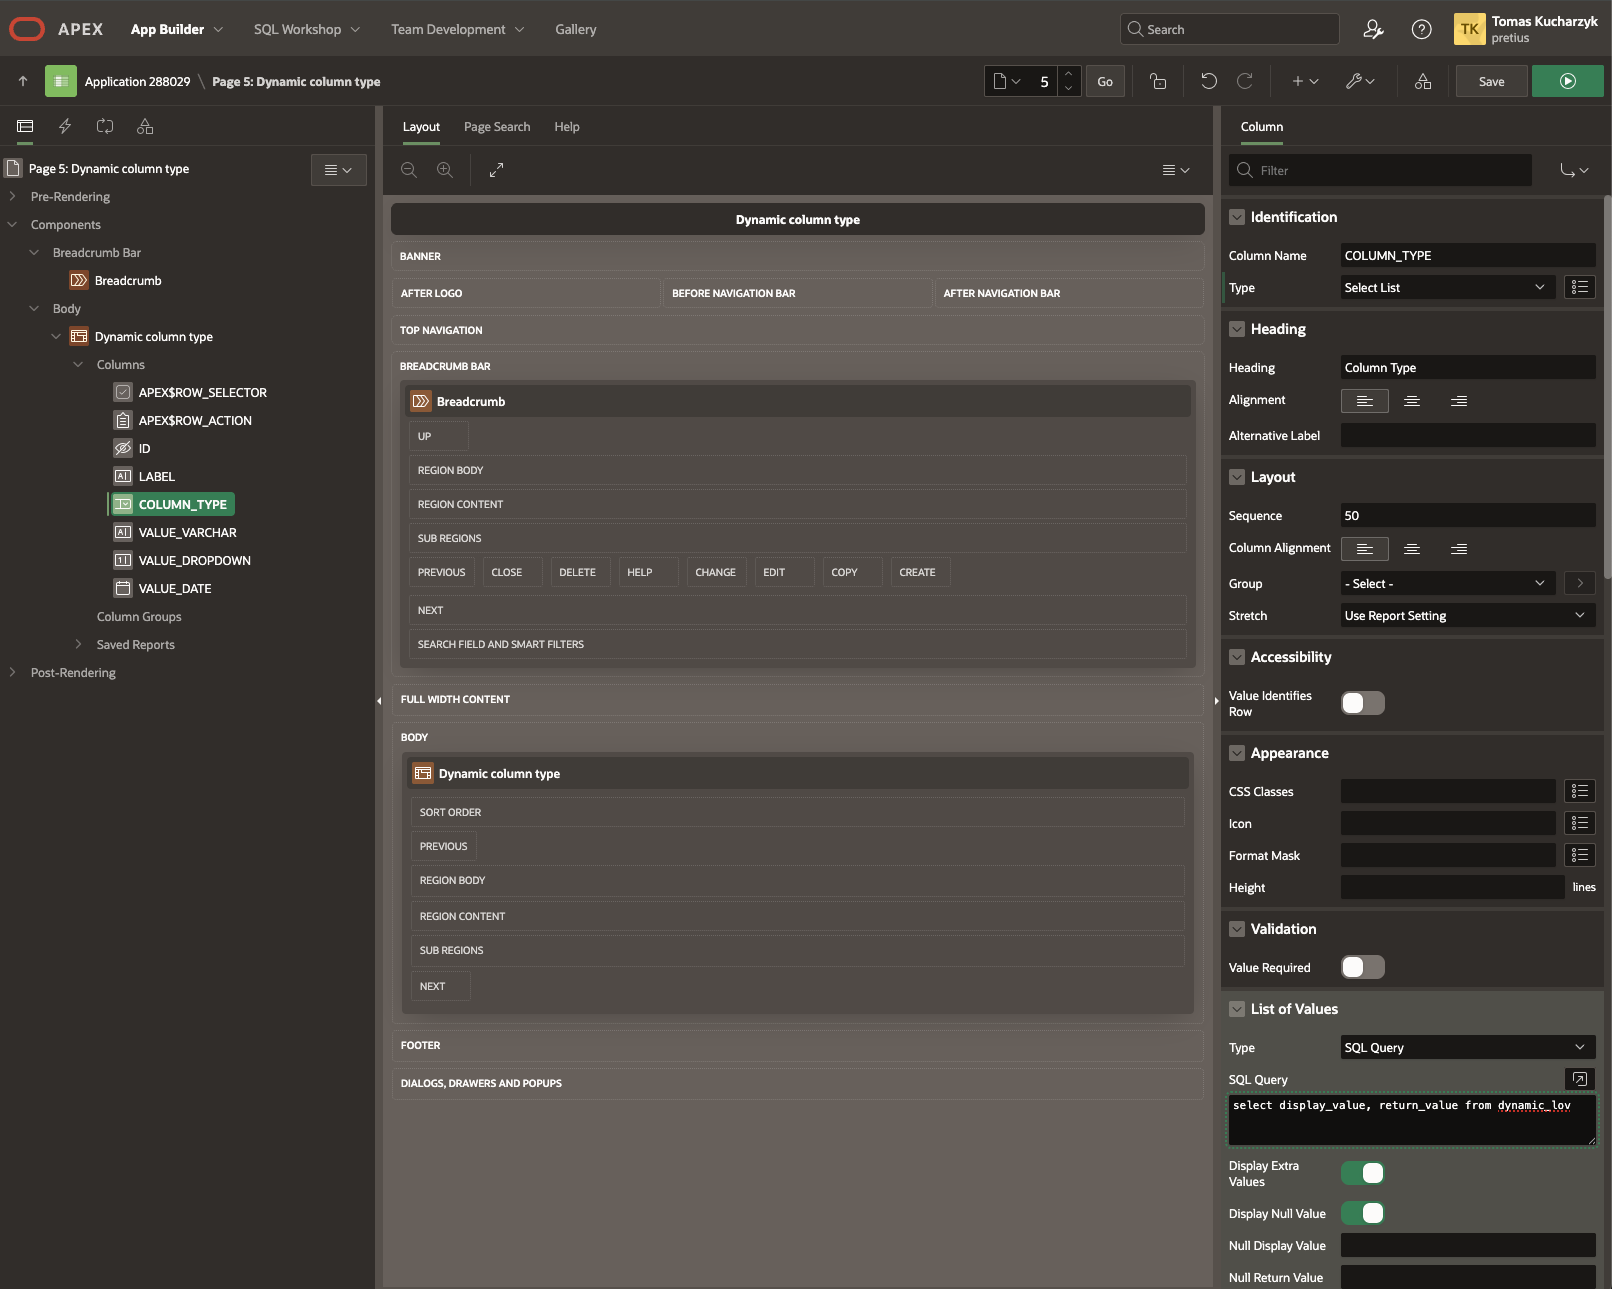
We will set the VALUE_DROPOWN column to select list and the Type to SQL Query with something like the code below. In the section Cascading List of Values we will set the Parent Column to COLUMN_TYPE. It is not the perfect example, but it will work.
select display_value, return_value
from (
    select distinct
        job as display_value,
        job as return_value,
        'job-dropdown' as dropdown_type
    from emp
    union
    select distinct
        dname as display_value,
        dname as return_value,
        'department-dropdown' as dropdown_type
    from dept
)
where dropdown_type = :COLUMN_TYPE
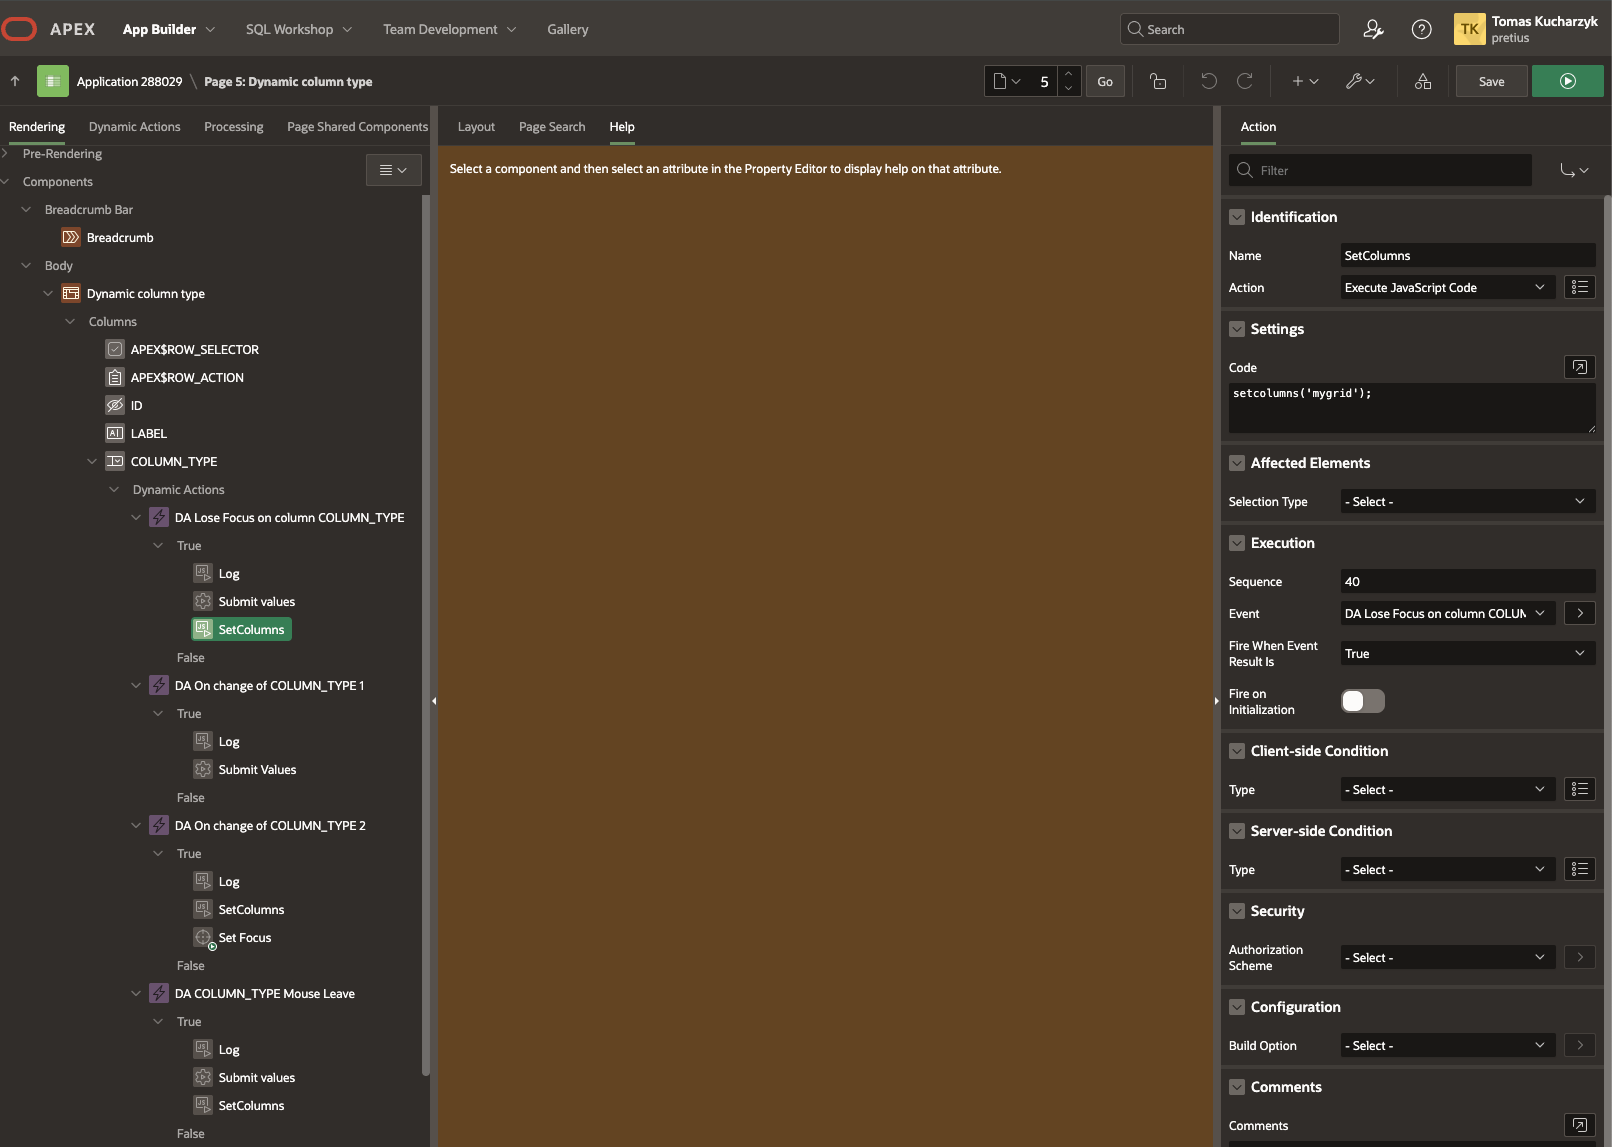
Now, the tricky part of this solution is the dynamic actions. First, we need a DA at the point of Rows initialization (same as in the previous example), but we also need to set multiple actions to submit the value of the COLUMN_TYPE and then refresh the grid columns using the setcolumns javascript function.
I ended up with four dynamic actions. They aren’t all necessary, and it depends on where in the row your dynamic dropdown is. But it’s difficult to have the cells and drop-downs prepared correctly after you select the COLUMN_TYPE.
The dynamic actions are a combination of submit values for the COLUMN_TYPE and calling the JavaScript function setcolumns. With one additional function that does Set Focus on VALUE_VARCHAR – to leave the column type field and submit the value after change.
After adding the dynamic actions, the grid will look like this.
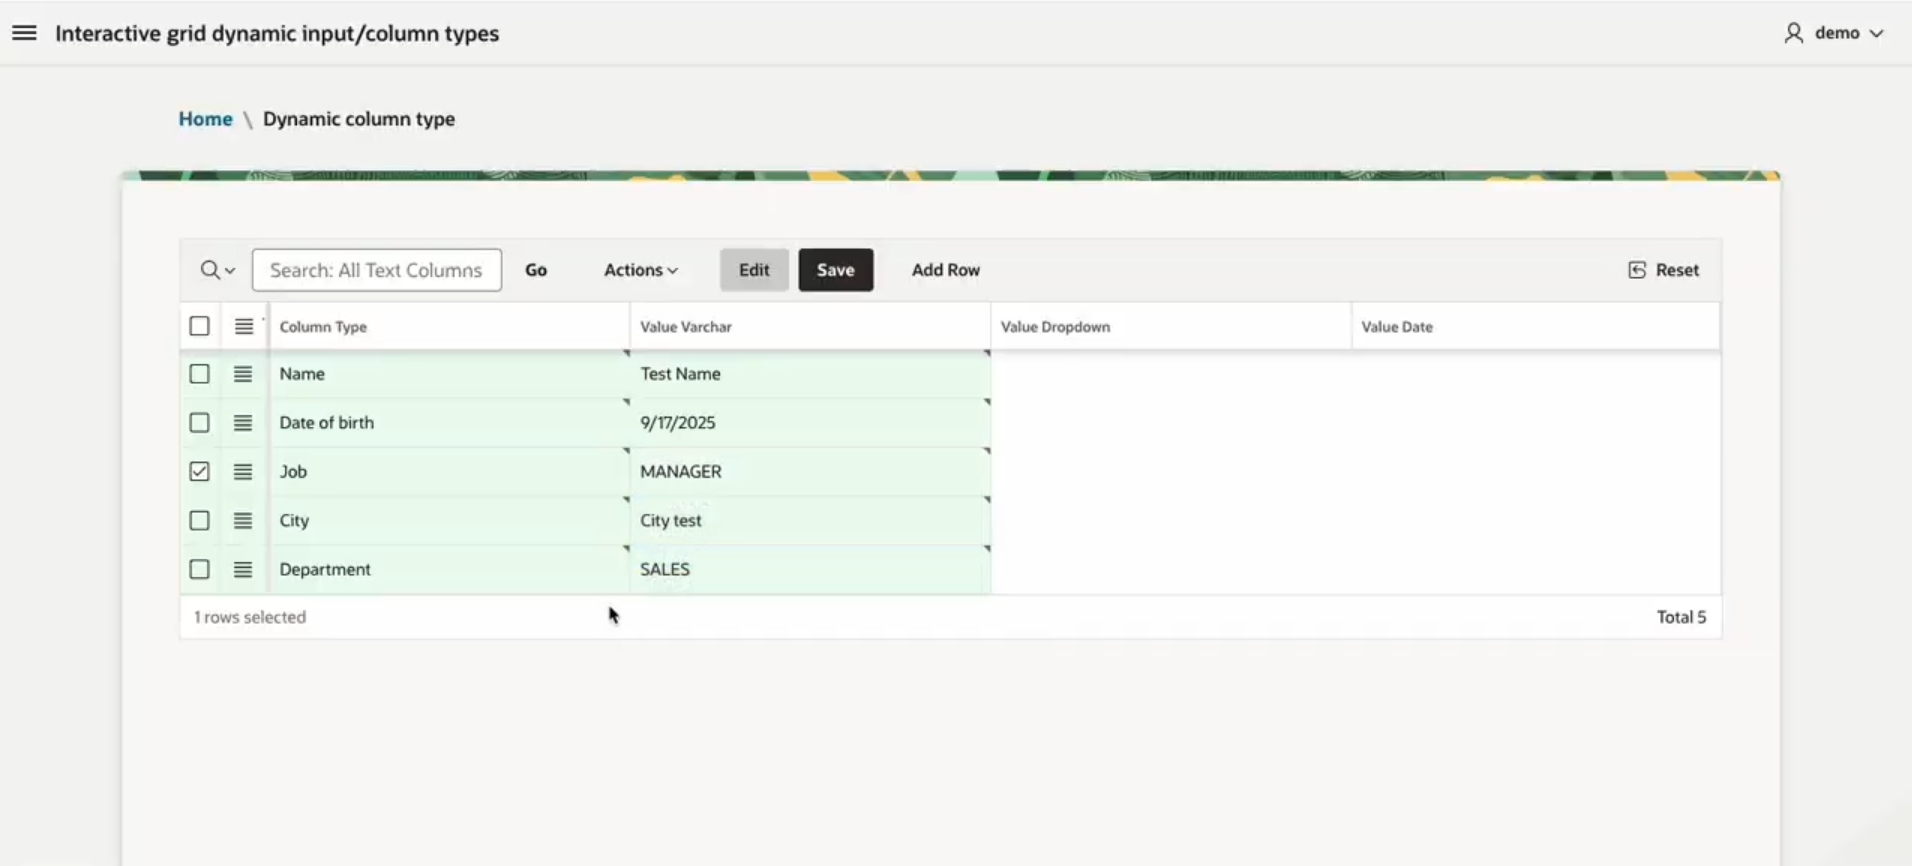
Here we go again. The cleanup steps are the same as before. We rename the value column that is first from left to Value and hide the unnecessary columns with the same CSS.
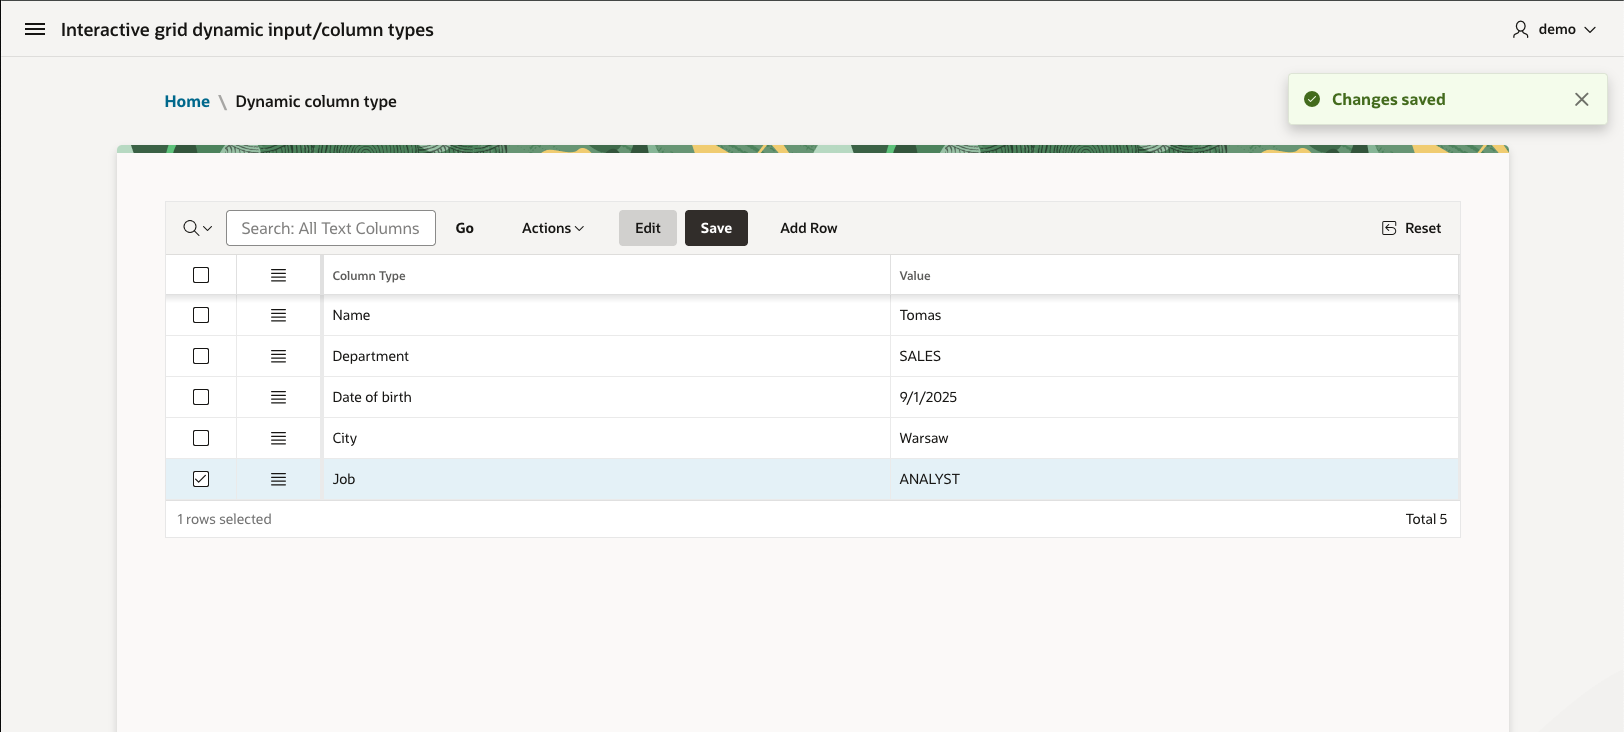
The Final result looks like this:
When it comes to dynamic column types, you often won’t really be able to use native authorizations and validations. But not in this case. All the columns can use the authorization, all the client/server side conditions, and also validations. The native one, for the column type, but also additional custom validations that you can attach to an interactive grid column.
In the worst case, when the JavaScript and CSS fail, the data input will still be secure and process all the validations. There are no workarounds or compromises.
The demo application with both cases is available HERE. All the code I used for this article is available HERE! Please let me know what you think about this solution! And of course, thank you for reading. If you’re interested in similar APEX-related content, check out some of my other articles on this blog:


