


Disclaimer: This article was originally published in January 2022, but in March 2024 it was reworked and extended with brand new content.
Many platforms support the development of Internet and intranet applications, but Liferay Portal maintains its position as a significant player, even in 2024. Despite the passage of time, this proven platform maintains its usefulness, continuing to evolve and adapt to users’ changing needs. If you have found this article, you are probably starting your adventure with this solution, so read on to find out how to configure the environment and use Liferay’s functionalities to speed up application development and shorten the time to market.
The article will be based on the experience we have collected during projects implemented for our clients. It’s worth noting that although we could have used well-known tools, such as the Java Spring framework, the use of Liferay DXP technology seemed to be the optimal solution for the designated requirements.
👶 Are you completely new to Liferay? Before diving into this practical tutorial, you should probably first read our article “Liferay DXP guide: Features, cost, use cases, and possible alternatives”
I’ve also created a video introduction that shows how to use Liferay Portal to how to create a web application in your browser, really fast, and without any coding. You’ll learn how to add the Knowledge Base, Blogs & Webinars, Images, and Documents widgets. The video also shows how to make a dashboard that aggregates details from the other modules, and set up users and permissions.
To start with Liferay, we first need to download its instance locally. A popular solution due to its simplicity and speed of installation is to use a Docker image. To install Liferay this way, we must first download the Docker application. The Docker installation process is described in detail on the official documentation page, so we won’t cover it in this article. After installing the application, you can also complete a short tutorial to familiarize yourself with the most important elements of Docker.
After properly installing the Docker application, we can create an instance of the Liferay portal. On the official Liferay portal website, you will find detailed step-by-step instructions on how to locally install a Docker image containing a Liferay Portal instance. We are interested in Liferay version 7.4. To select a version of the portal other than the latest one, go to the Tabs tab and copy the appropriate command.
Let’s start by downloading the version of the portal we are interested in by copying the command below into your favourite CLI:
docker pull liferay/portal:7.4.3.109-ga109
This process can take a while (depending on your Internet connection). Once it’s completed, open the Images tab in the Docker application, where you should find the following entry:
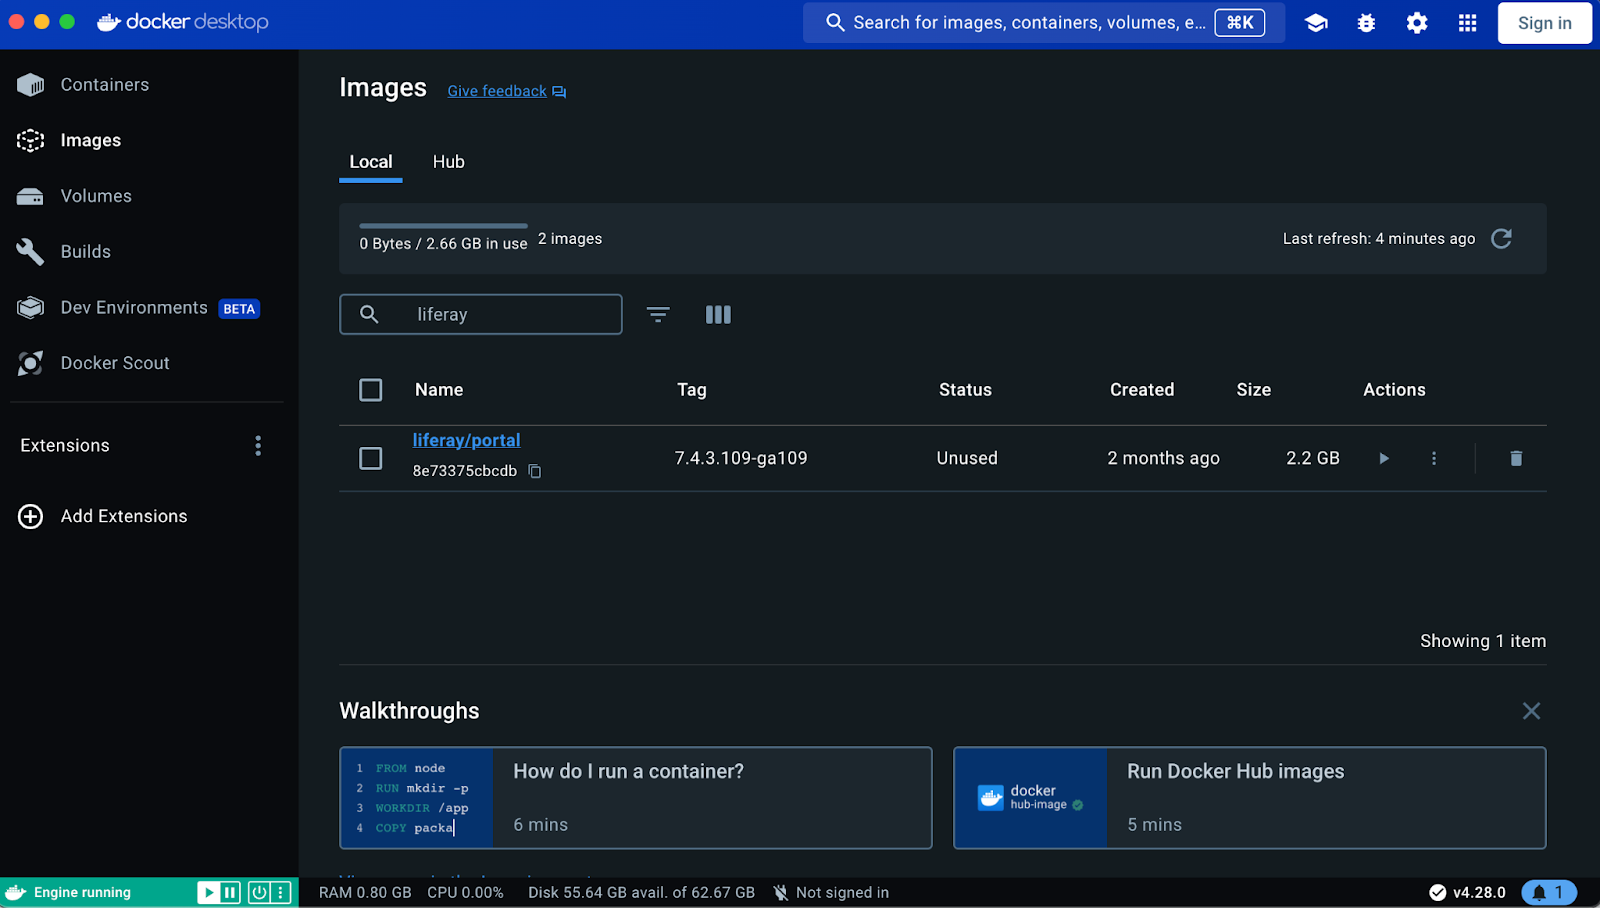
You can freely manage the instance you have downloaded here. Press the Run icon in the Action column to launch your container to display the downloaded content. Alternatively, if you prefer to launch the instance using the CLI, you can do so using the following command:
docker run -it -m 8g -p 8080:8080 liferay/portal:7.4.3.109-ga109
Please note that the above command will start your Liferay instance on port 8080. If you decide to start it with the Run button, you need to set the correct port in Image configuration. Regardless of the path chosen, you should see a log window where the subsequent stages of starting the server will be listed. When you see the Liferay logo and the information “Server startup in [X] milliseconds” here, it means that the Liferay server has been successfully started.
If all the above steps were successful, the instance should be running and you should be able to display its interface on the local network. To do this, go to http://localhost:{SELECTED_PORT_NUMBER} (in our case, the number is 8080) and you should see the following view:
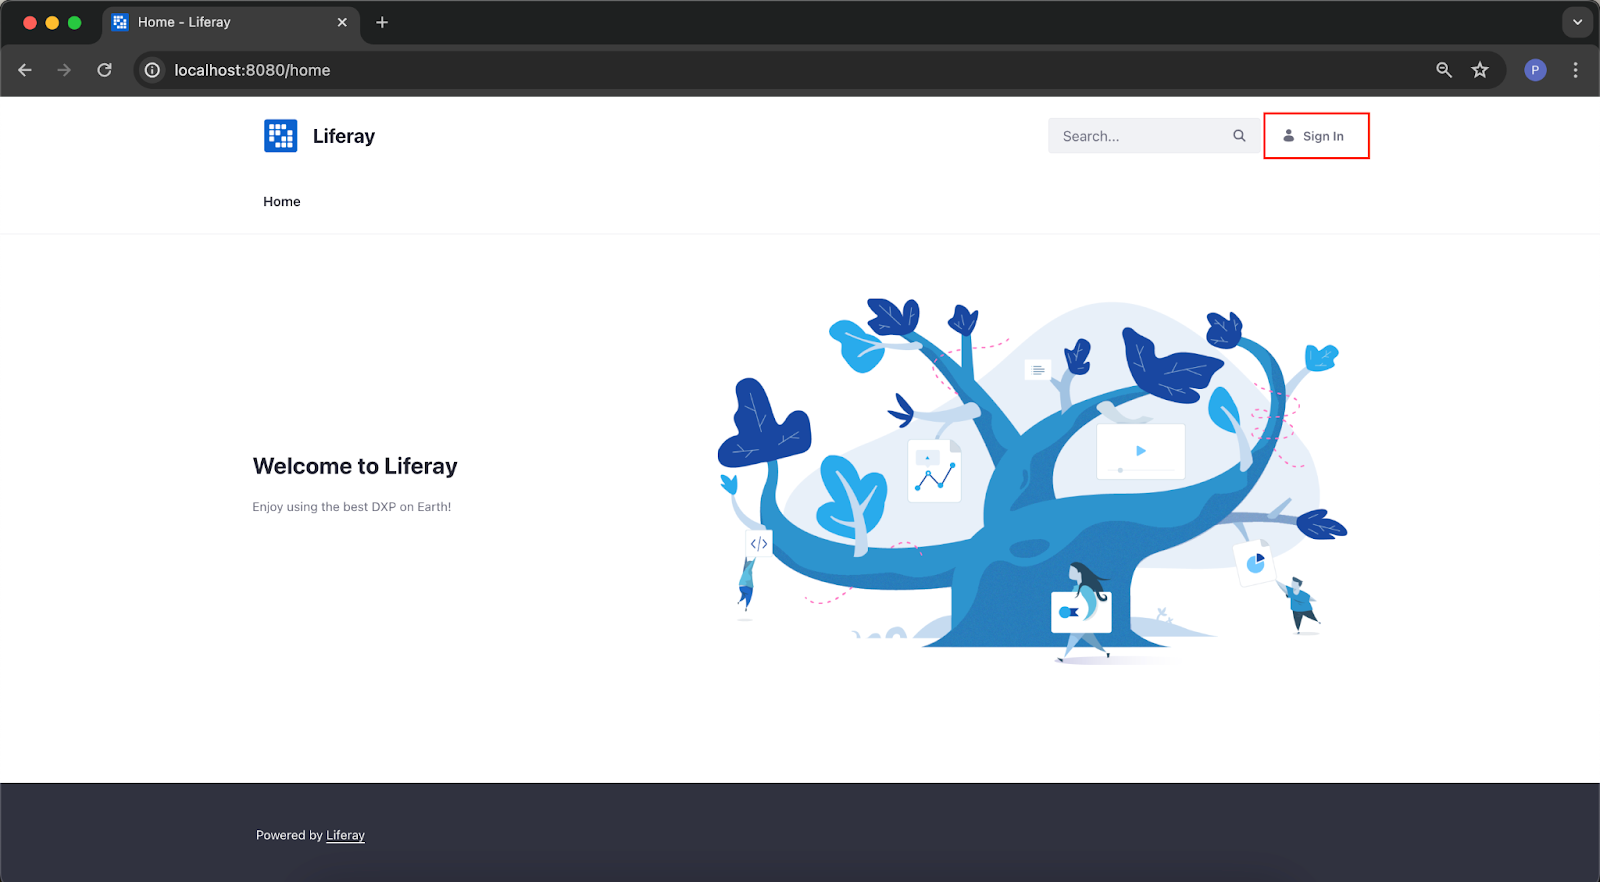
Next, try logging in to your newly created application. Click the Sign In button in the upper right corner of the screen and complete the form fields. The initial email address the Liferay team assigns you is always “test@liferay.com”, and the password is “test”.
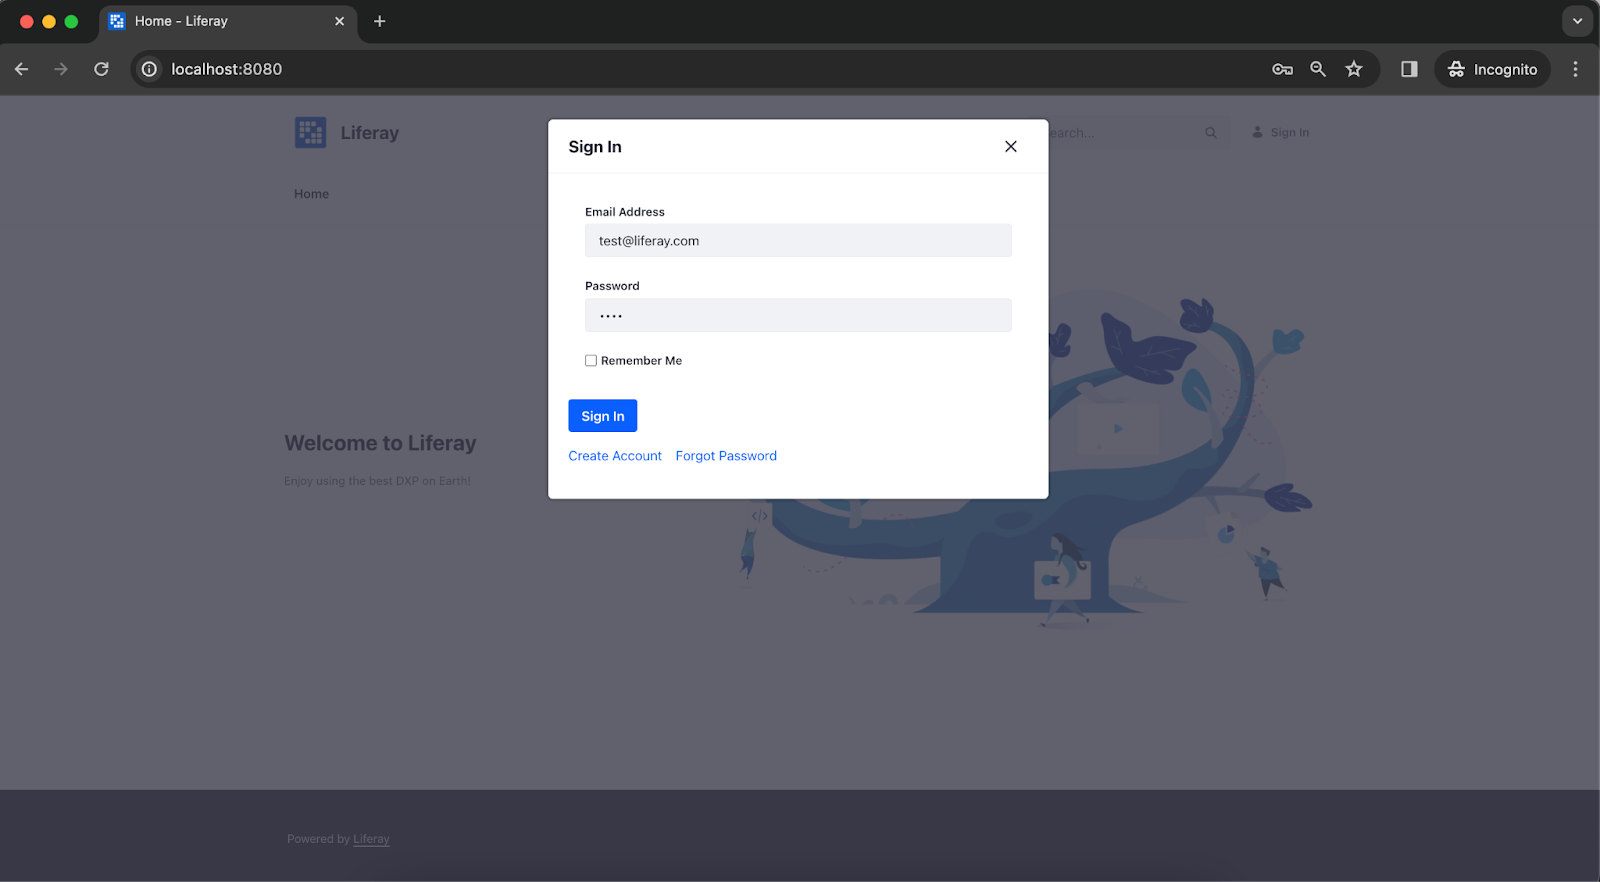
After clicking the Sign In button, you will be asked to set a new password. So, complete both fields with the selected new password and press the Save button.

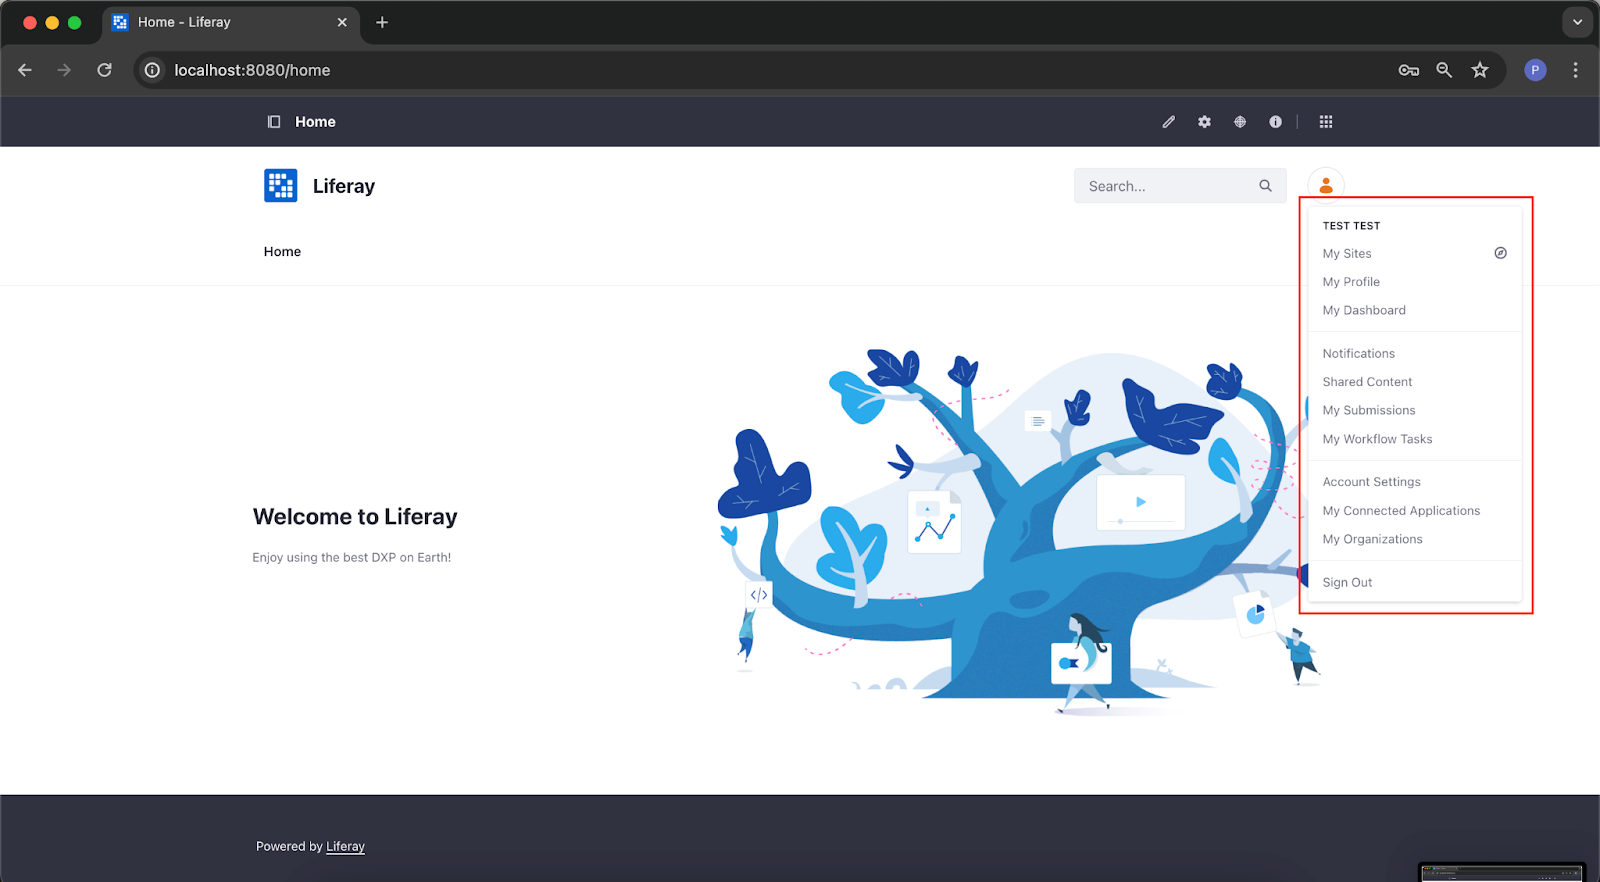
After successfully setting your password, you should be redirected back to the home page. However, instead of the Sign In button, you should now see a user icon in the top right corner. When you click it, a popover containing all the actions available after logging in will appear. In addition, at the top of the screen, you can also notice an additional menu bar. This is a menu available to administrators through which you can modify the application.
Now, we will focus on discussing the basic functionalities. The most important of them are the following:
To use the full potential that Liferay Portal offers, it is necessary to know these. So, let’s expand on each – and present the main benefits of using them.
Liferay’s dashboard is a personalized place that allows users to quickly access the most important information, applications, and functions. Users can customize the dashboard’s content according to their needs by adding widgets, links, reports, and shortcuts to frequently used functions. The dashboard allows you to effectively manage time and tasks by centralizing key information and tools in one place.
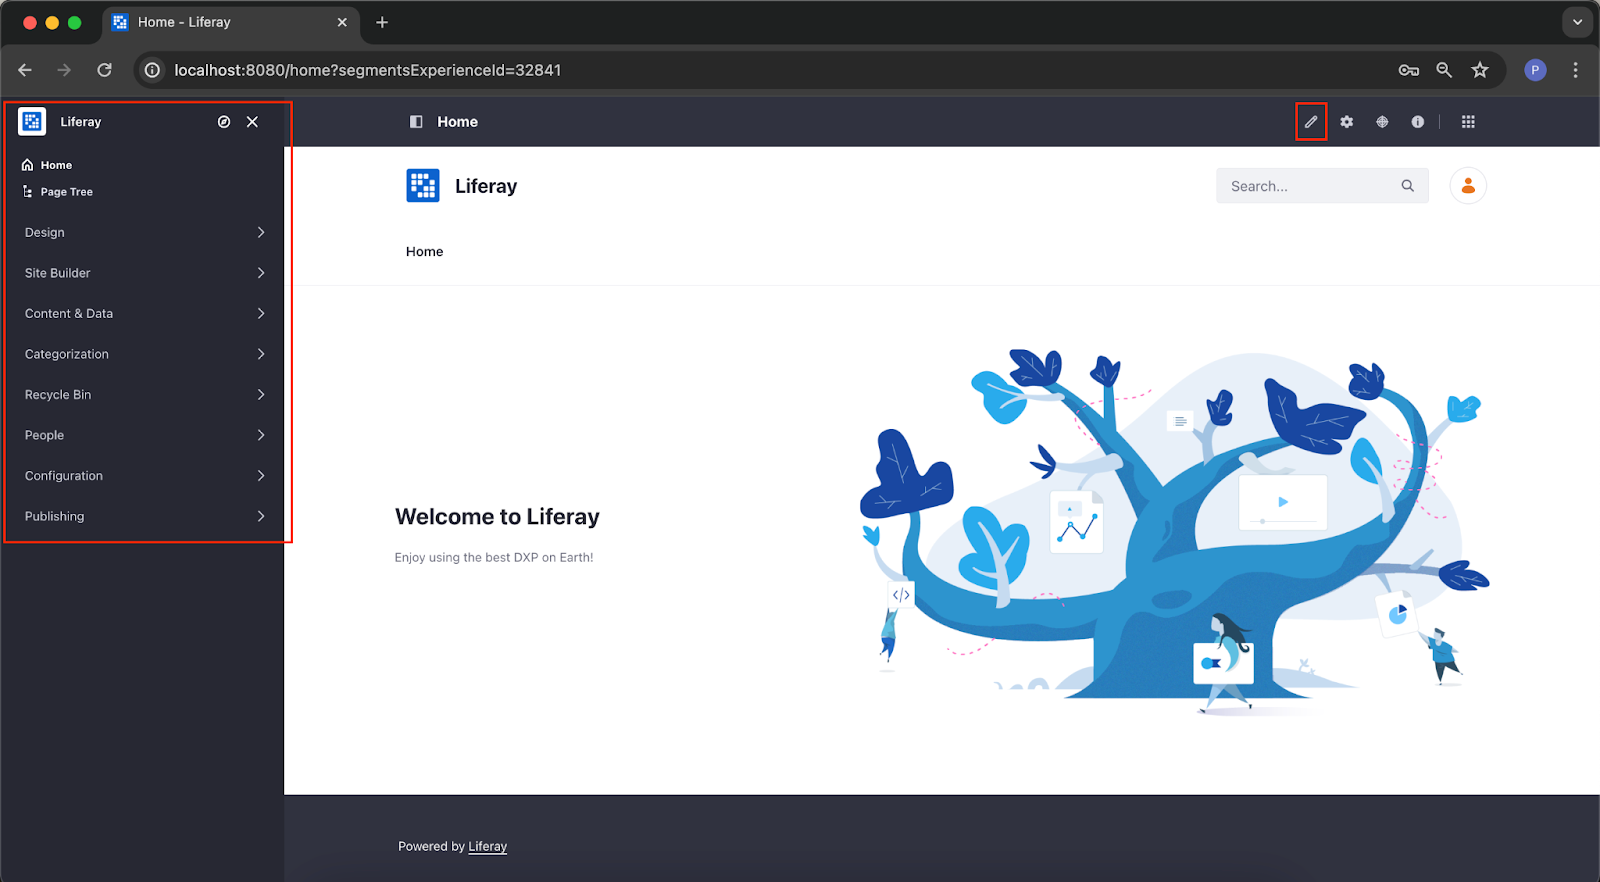
Let’s start by discussing the options in the administration menu at the top of the screen. First, select the icon located in the upper left corner next to the word Home. You should see a new side menu containing links to numerous options designed to simplify creating new pages, managing them, adding new elements, displaying the tree of dependencies between individual pages, and many other activities necessary when working on a new app. The side panel is presented in the photo below:
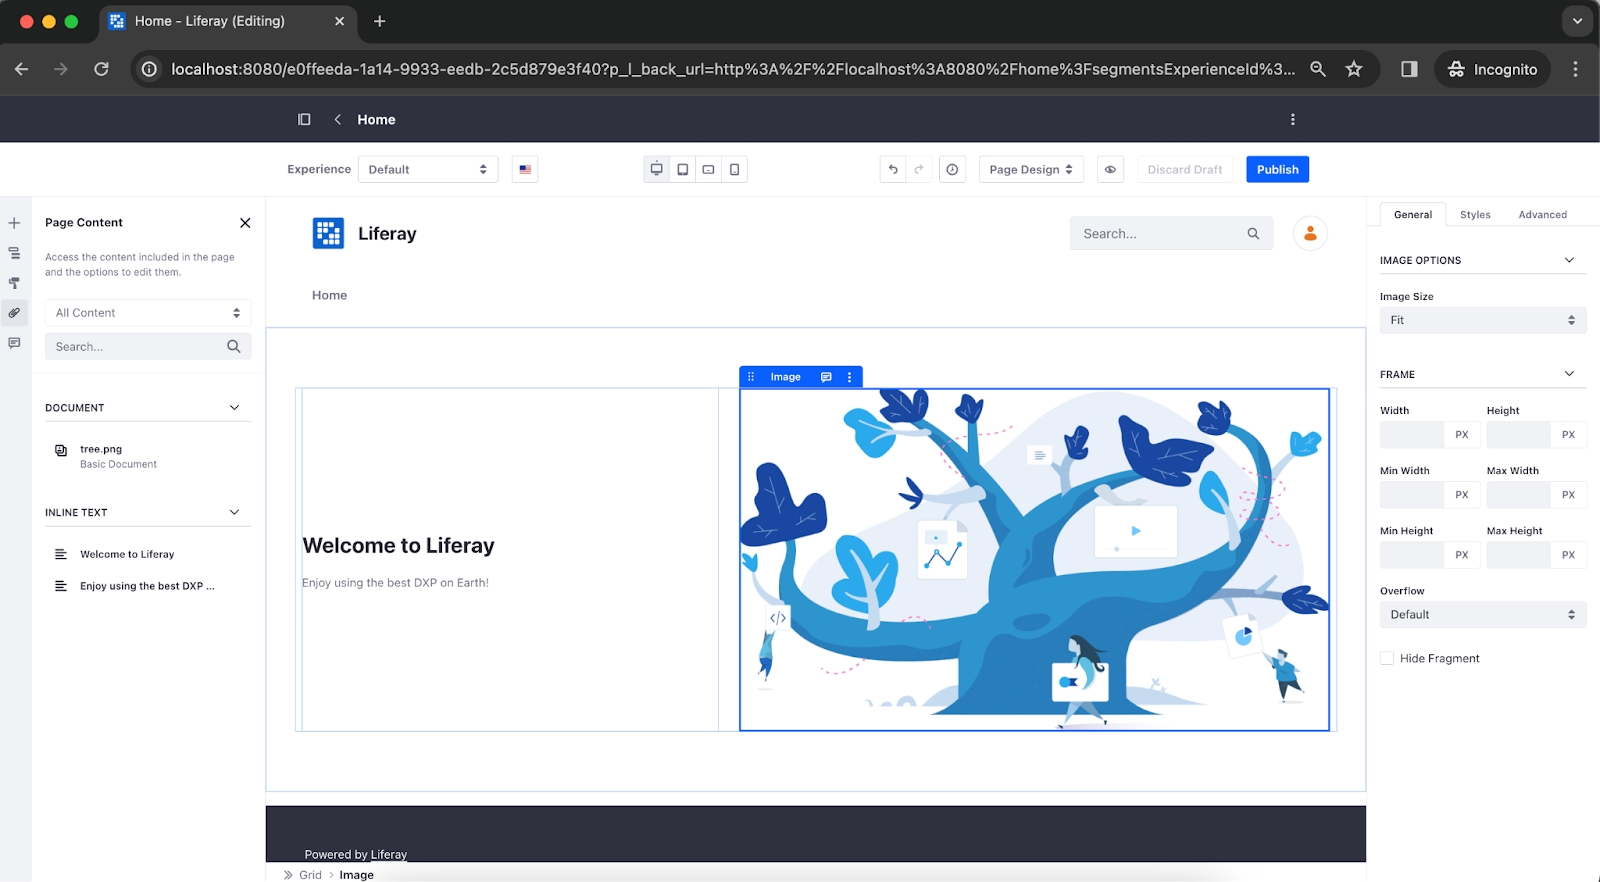
Another frequently used menu item is the page editor. To access it, select the pencil icon on the right side of the menu (highlighted in red on the screen above). The editor (shown below) is divided into three sections (going from left to right):
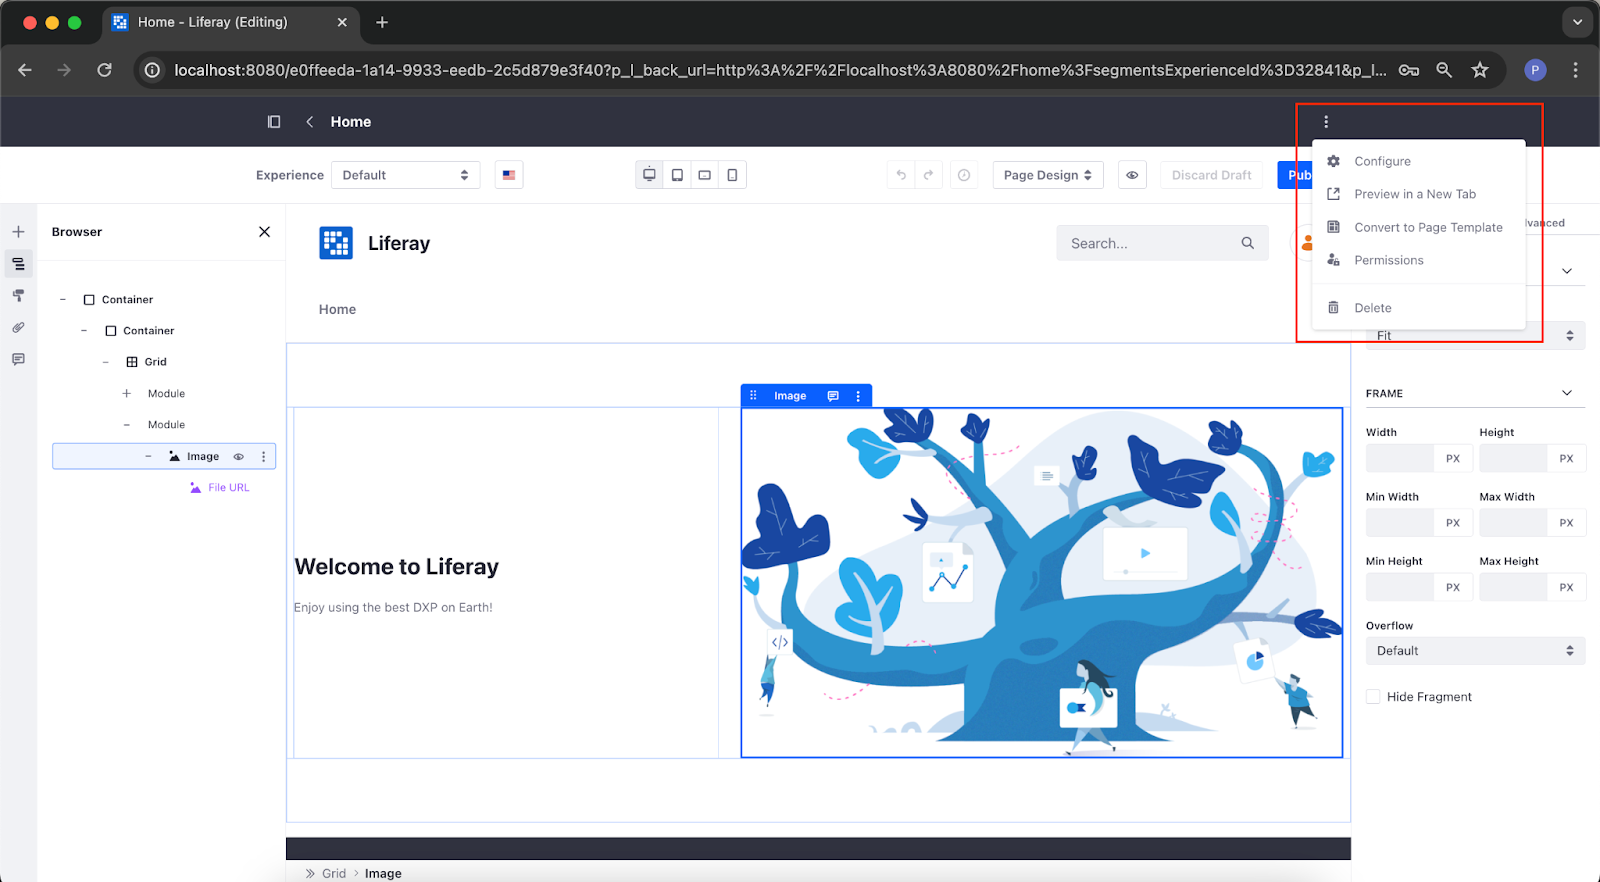
In addition, Liferay allows easy access to the configuration of the edited page and modification of details such as the page’s name and URL, custom CSS, metadata, and SEO settings. You can also display a preview of the page in a separate tab, save the page layout as a template, and limit access to the page depending on the user role. To access these options, press the icon with three dots on the right side of the top menu.
Let’s return to the home page and focus on the next menu option – the page configuration menu. Click on the gear icon, and the following page should appear:
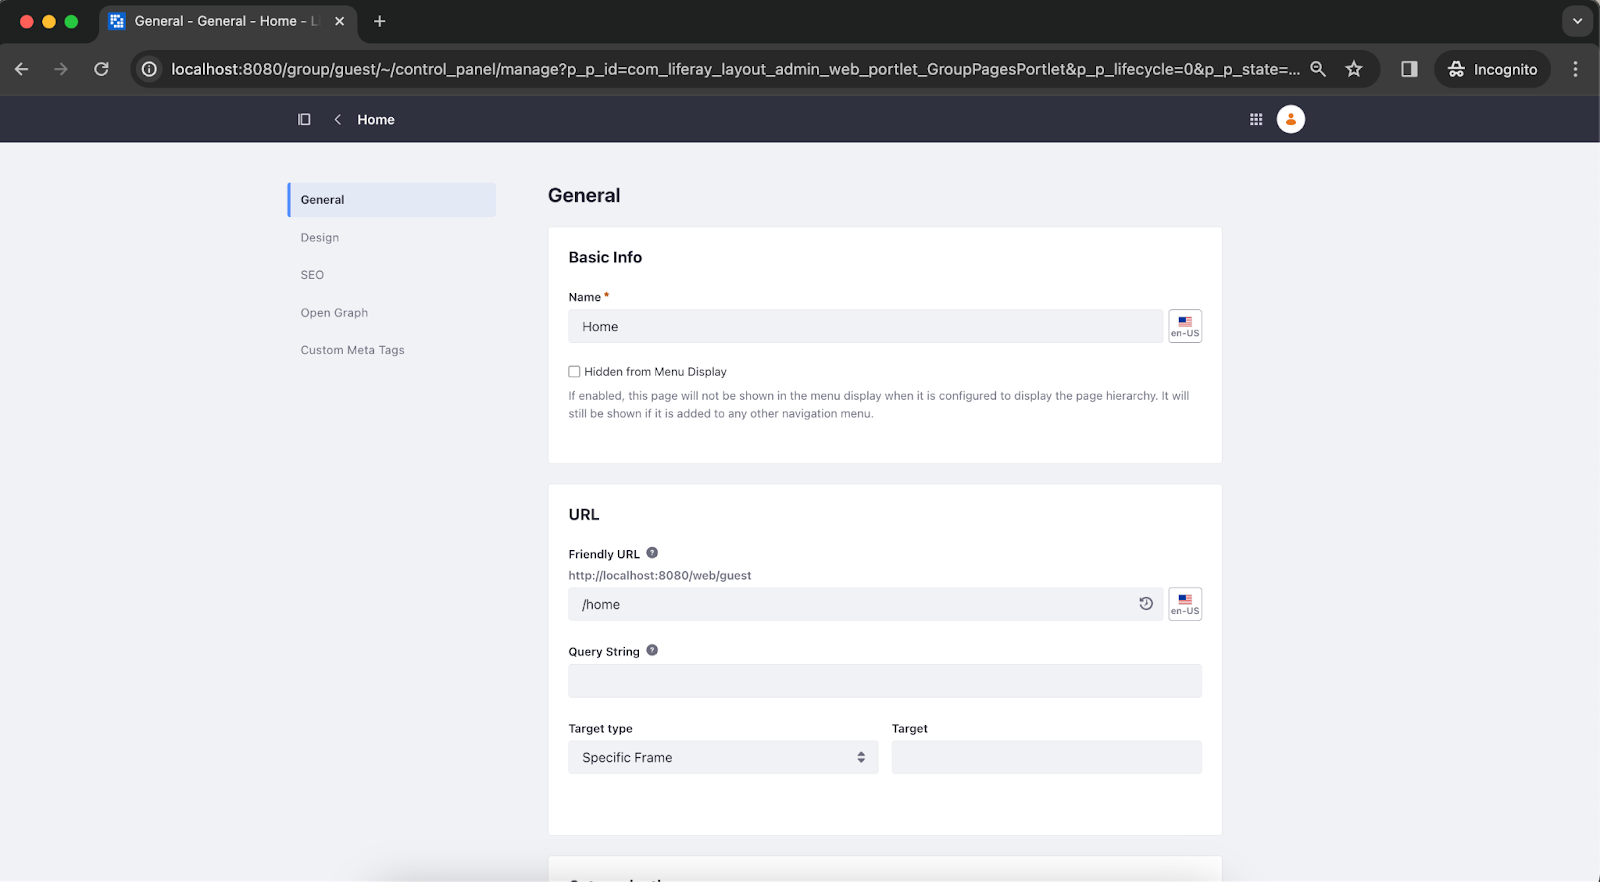
Simplified access to many page elements has been prepared to facilitate the configuration of individual pages within Liferay-based applications. You can access settings for SEO optimization, metadata configuration, custom JavaScript and CSS code, and integration with OpenGraph-based platforms for content publishing (e.g., Twitter, Facebook, or LinkedIn).
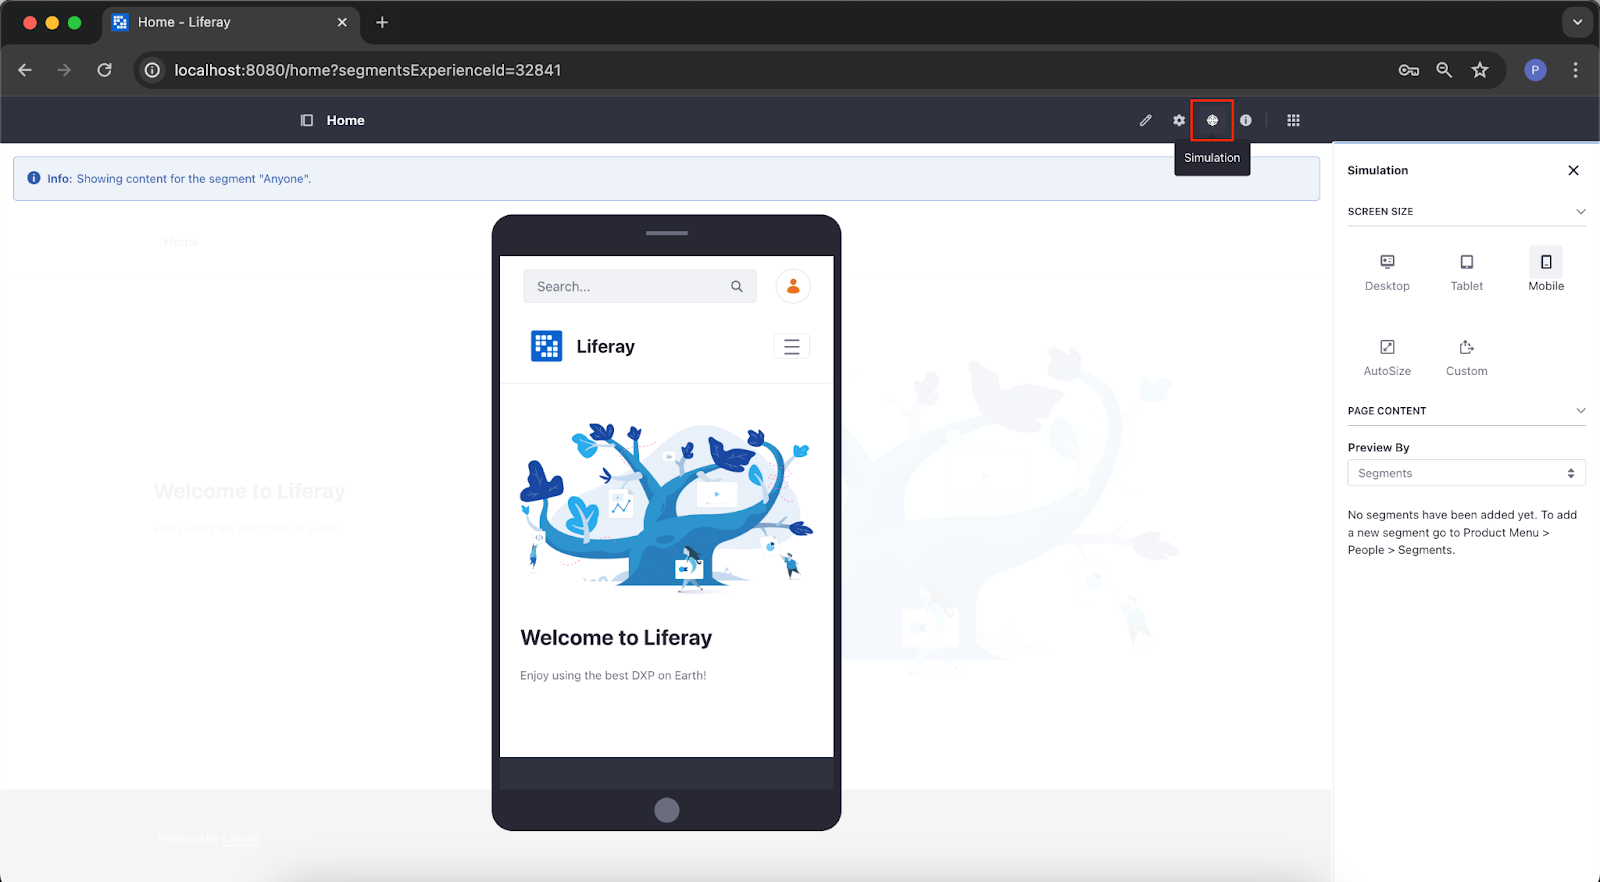
Liferay natively supports various platforms (i.e., desktop, tablet, mobile, etc.) for displaying the content and pages you create. To make it easier to check whether this content is displayed correctly on various devices, it offers an easy-to-use simulator – another option in the admin menu. This way, it’s possible to prepare the website for various platforms users may use.
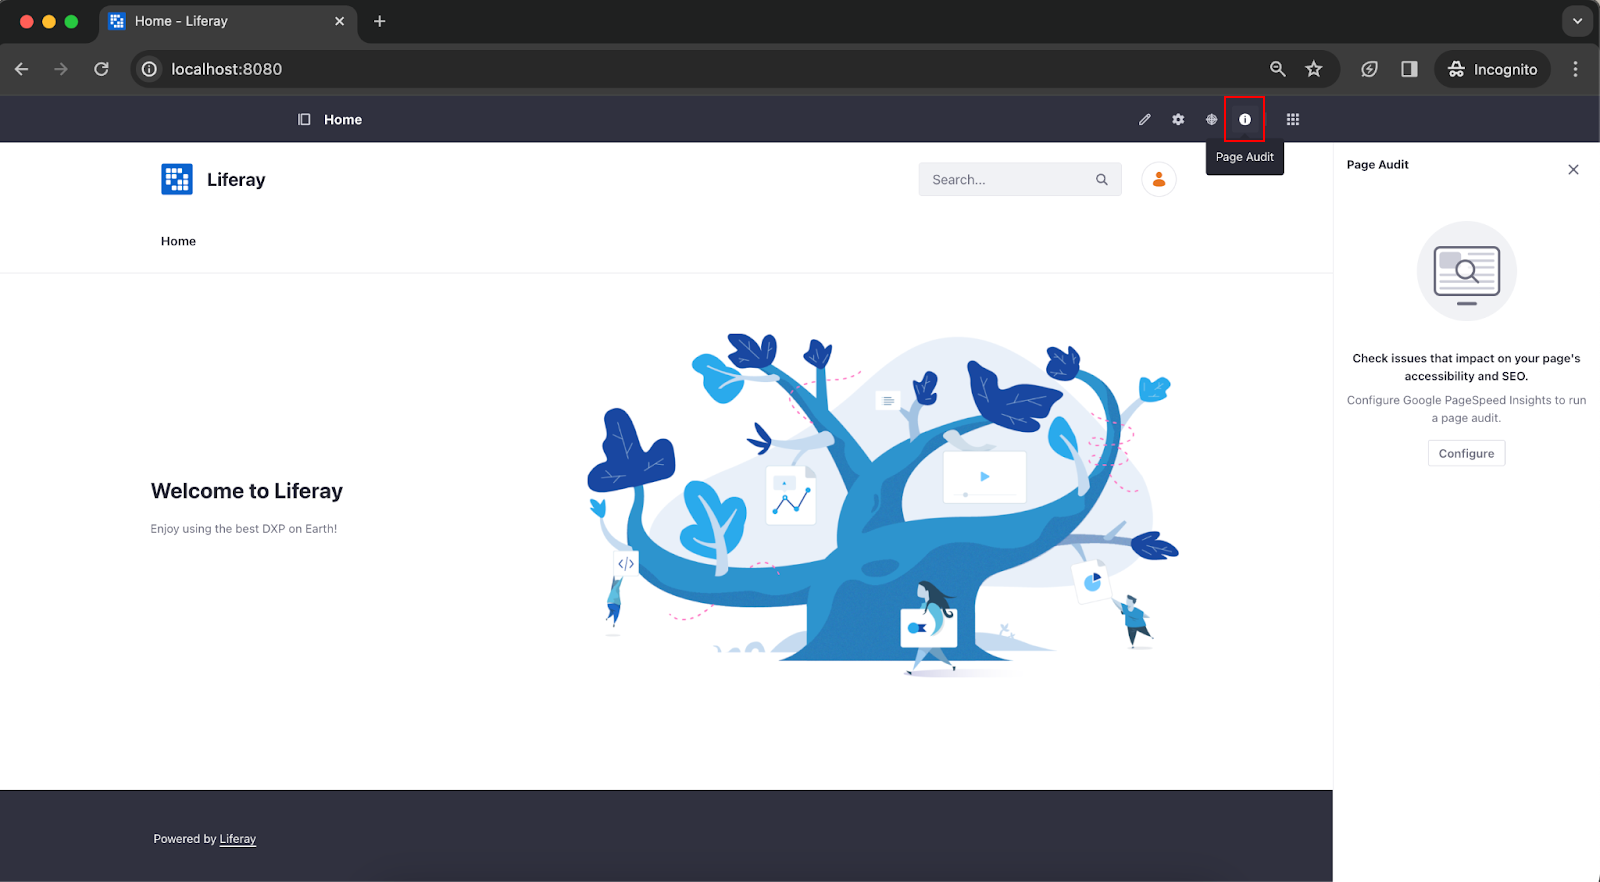
One of the basic elements that help define problems related to accessibility and SEO are audits carried out on the website. Liferay offers the ability to configure Google PageSpeed Insights to conduct a website audit directly from the administration panel. To open this menu, select the icon shown below (it looks like a circle with “i” inside) and press the Configure button in the panel that opened on the right.
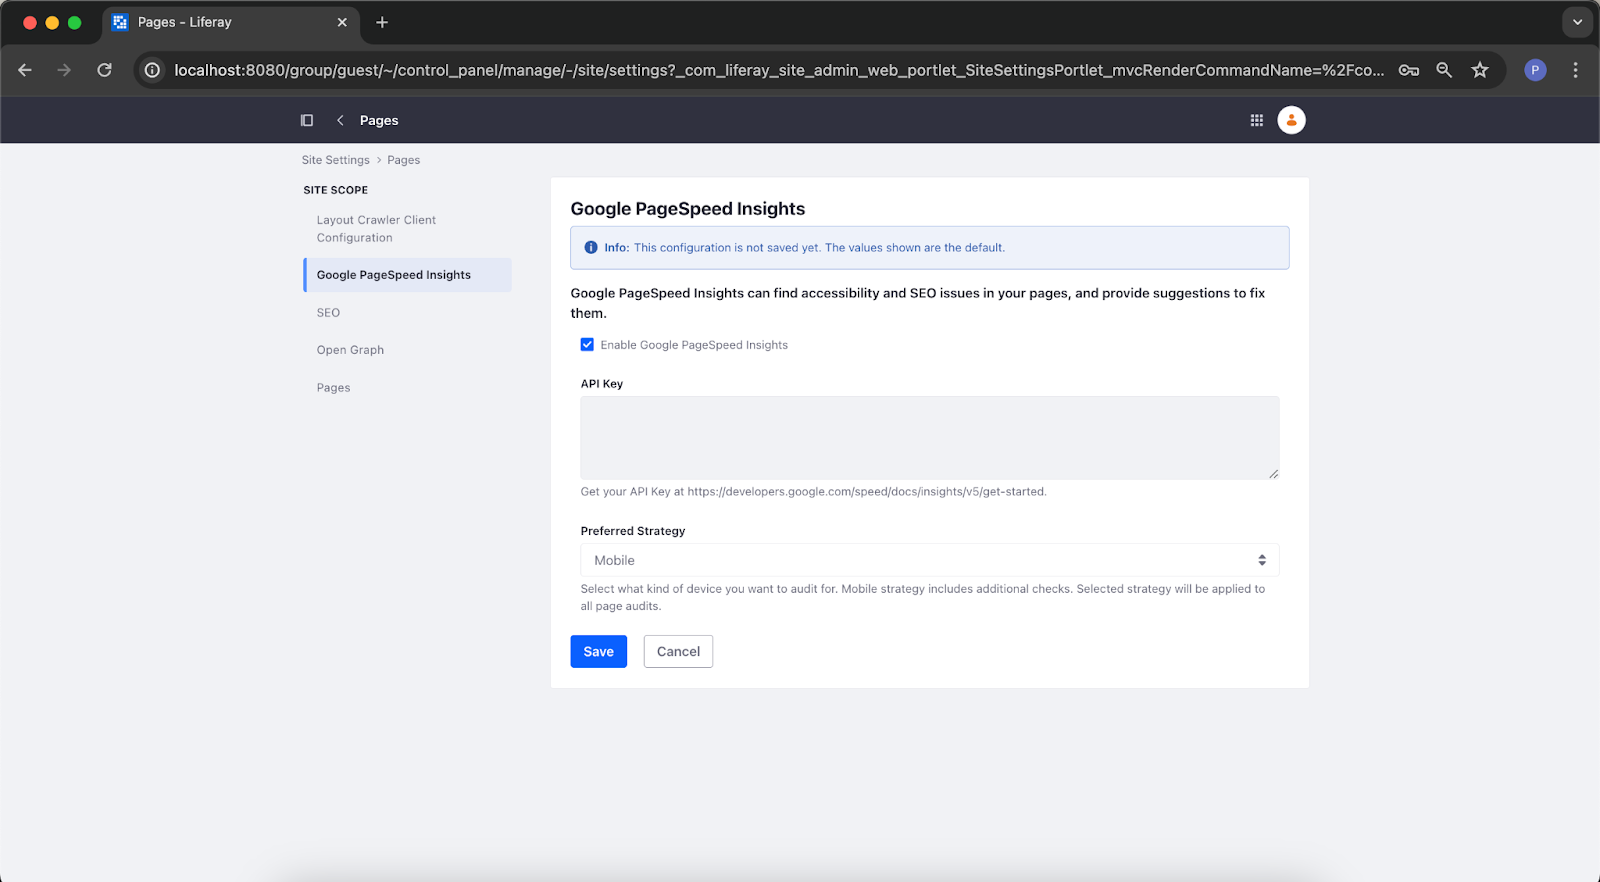
The configuration process itself only requires providing the API key for Google PageSpeed Insights and indicating the audit strategy – for mobile or desktop devices.
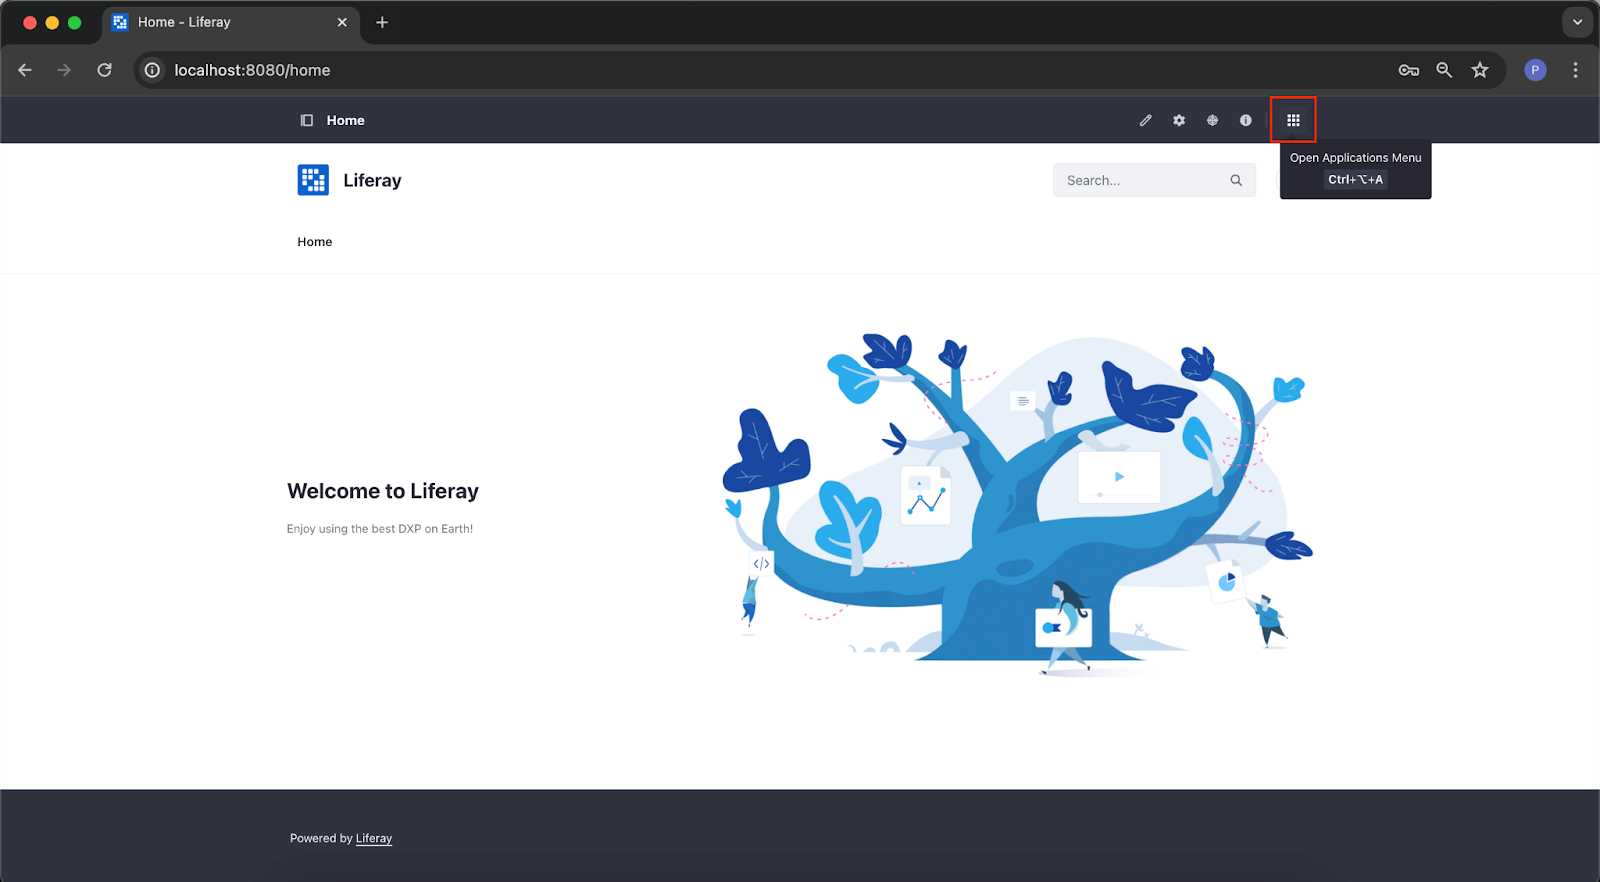
However, the options described above are only some of the possibilities offered by Liferay. The last menu icon (which looks like nine squares in three lines) allows you to open advanced configuration options to manage every aspect of the application.
For easier navigation, the available options are divided into three sections:
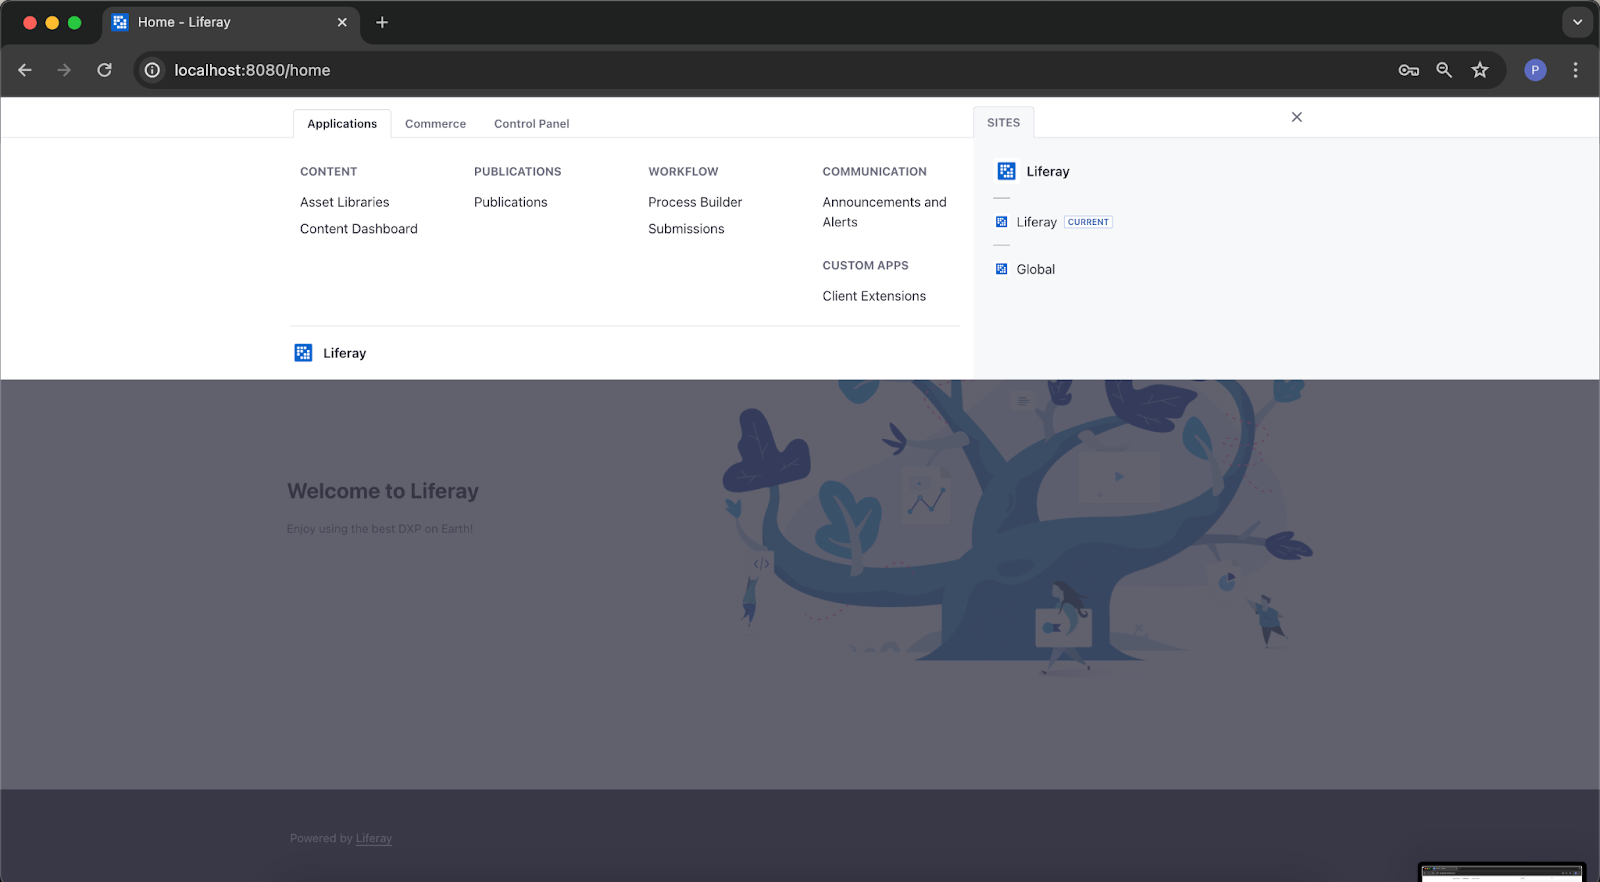
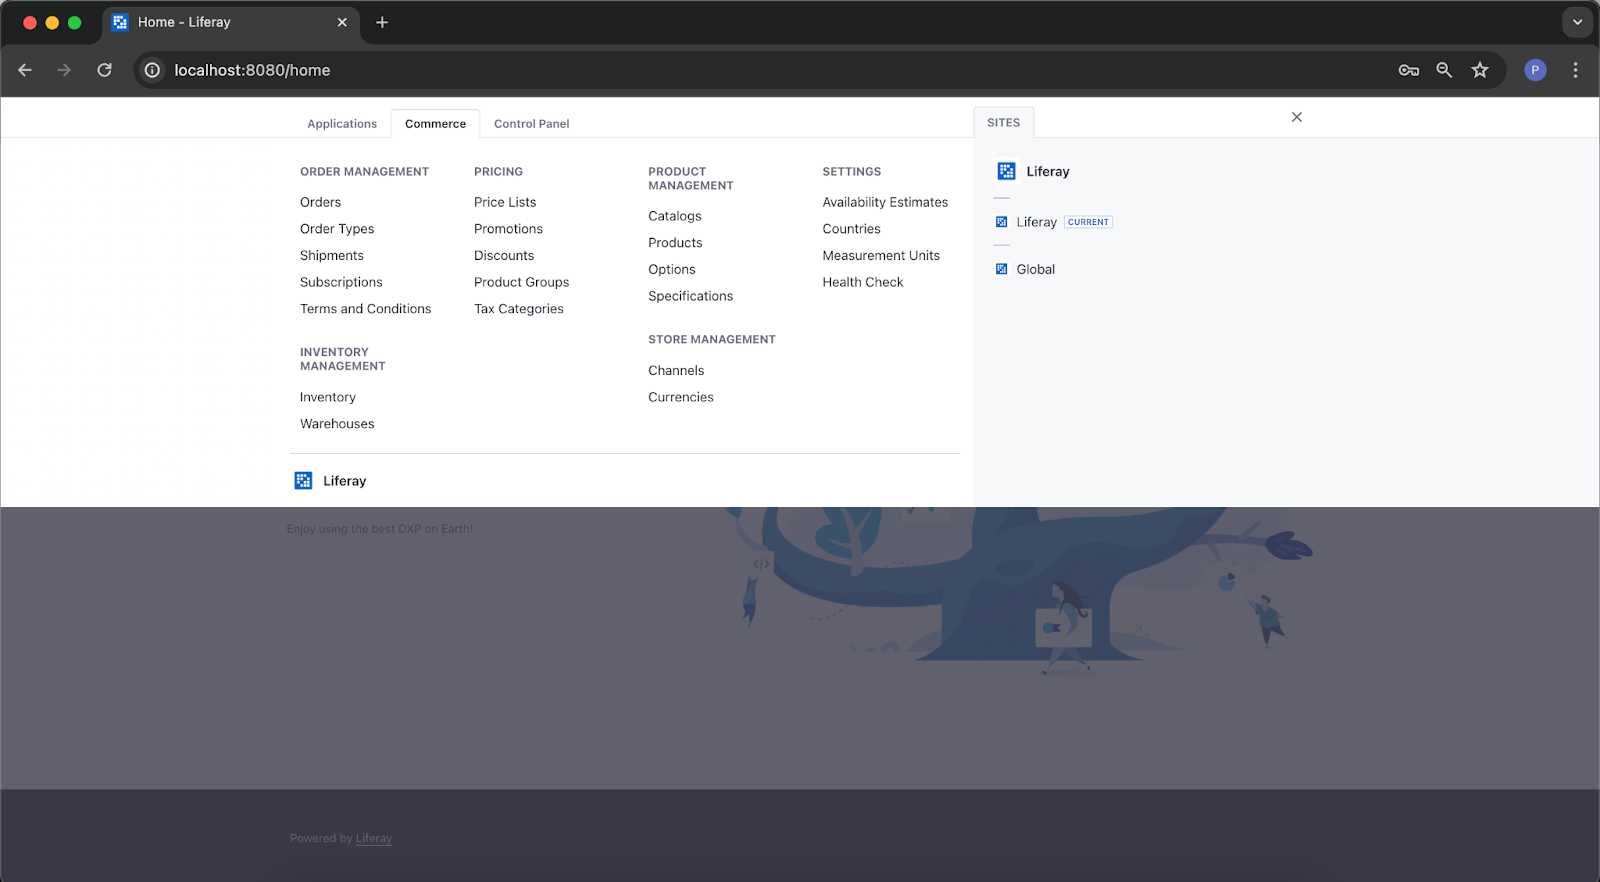
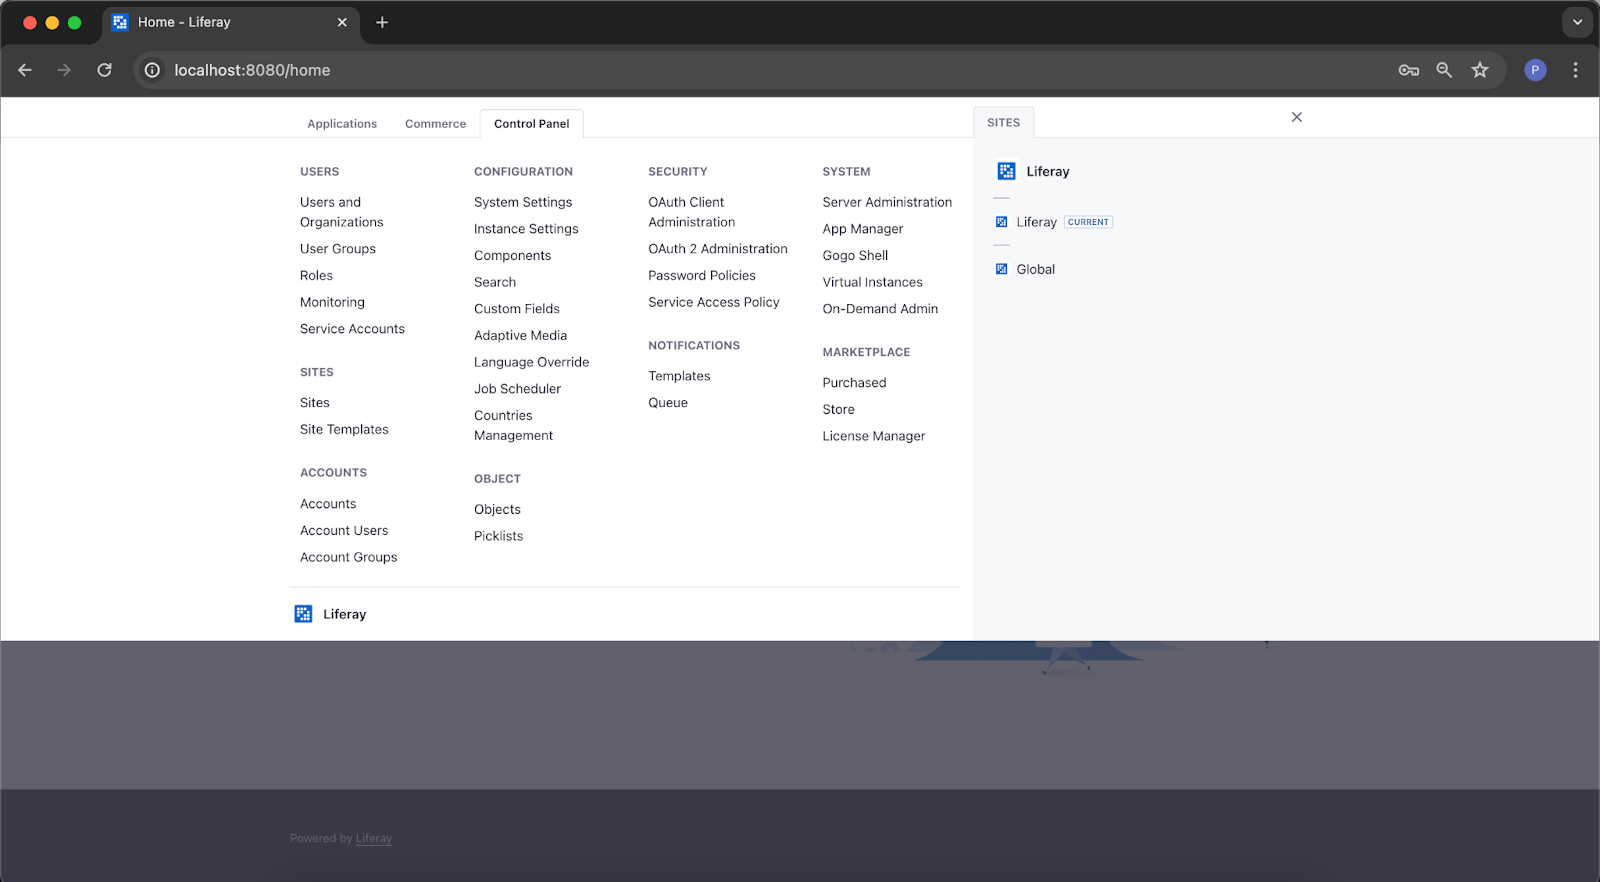
This extensive set of options makes it easier to create and manage applications using the Liferay platform. Moreover, the user doesn’t need programming skills to manage the application configuration, thanks to the simple interface and explanations available for each setting.
Liferay’s team has collected the most common business requirements for various types of web platforms and prepared extensive and comprehensive tools – widgets and applications – that allow quick implementation of numerous scenarios without the help of developers.
Widgets can be managed and placed on a page with the admin panel. We’ll show you precisely how to do this using the calendar as an example, but you can mirror this process for any other widget of your choice. The cool thing is that you don’t need to worry about arranging other elements on the page – the Liferay application handles it.
Please note that you must have administrator rights to add, modify and manage these items. After logging in to an account with appropriate permissions, it is possible to use widgets from the administrator panel as described above. The administrator can also manage the portlet permissions.
In our project, we used the widgets and applications mentioned below, with some custom coding to adapt them to the client’s specific business needs.
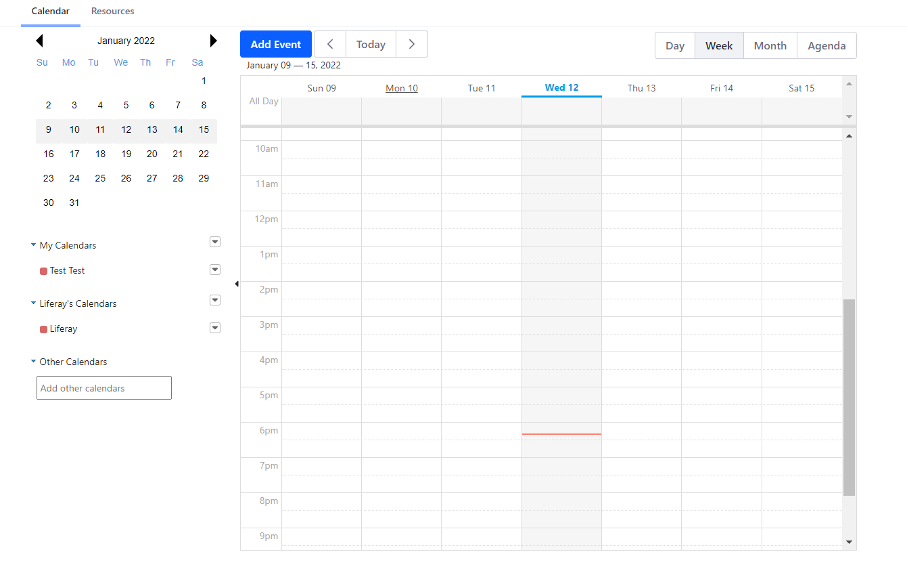
The calendar is the basic tool that serves as the backbone of our applications’ event management. It shows events for individual users and sites and allows you to manage them. It’s divided into sections dedicated to the user and the site itself. You can also customize new calendars, add events, and change email notification settings.
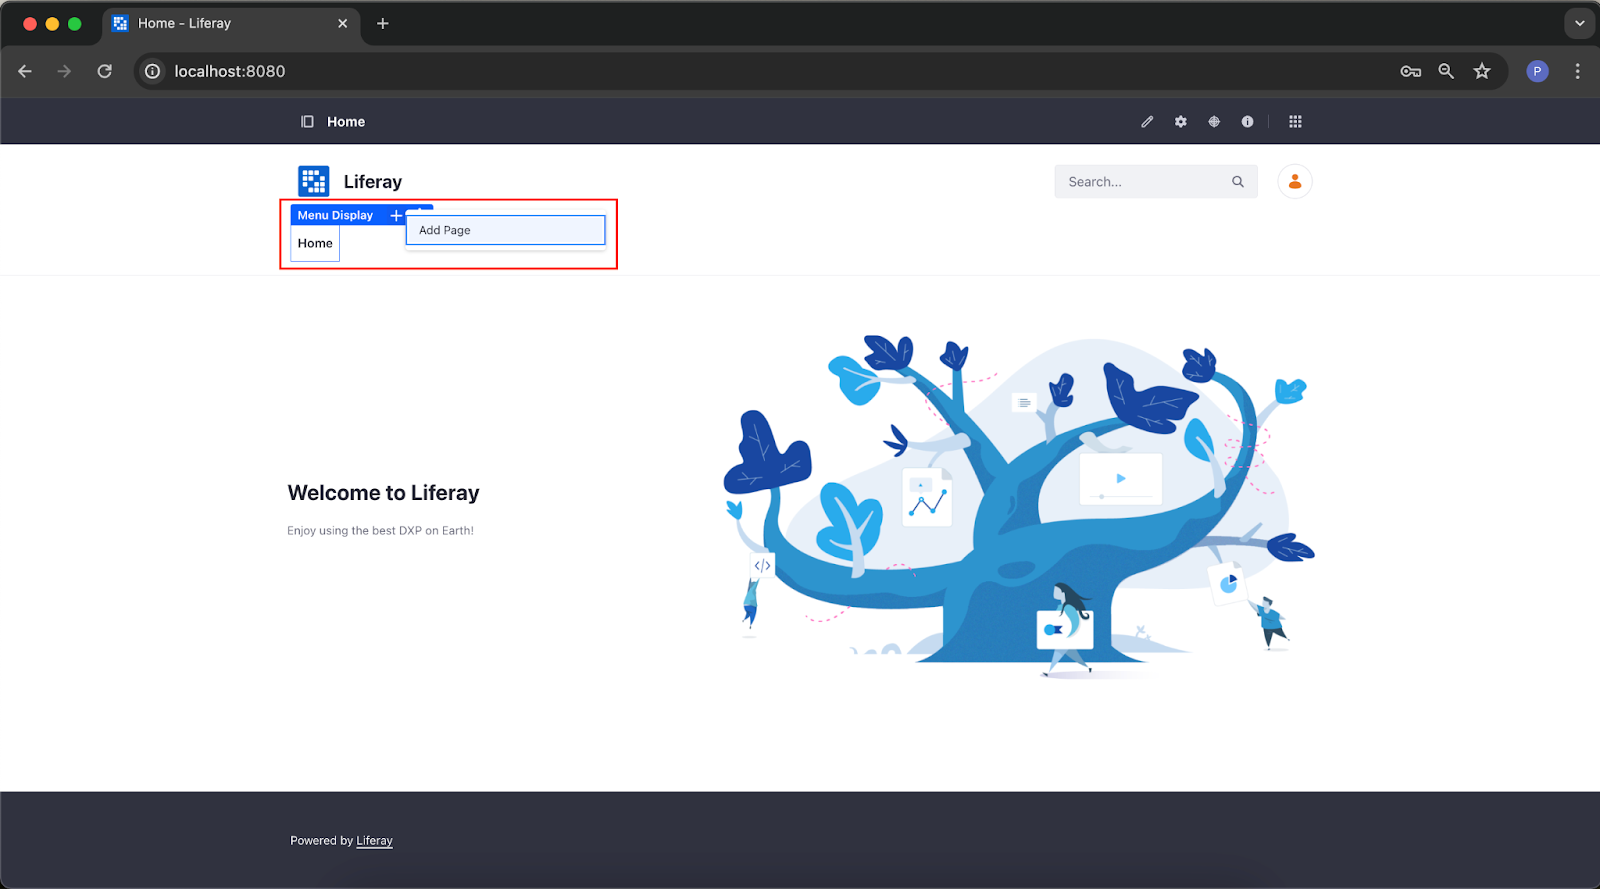
To add a new widget, simply hover your mouse over the navigation menu, where the home page inscription Home is by default, and press the appearing plus sign. A popover will then open with the available options, including the Add page button, as shown in the image below:
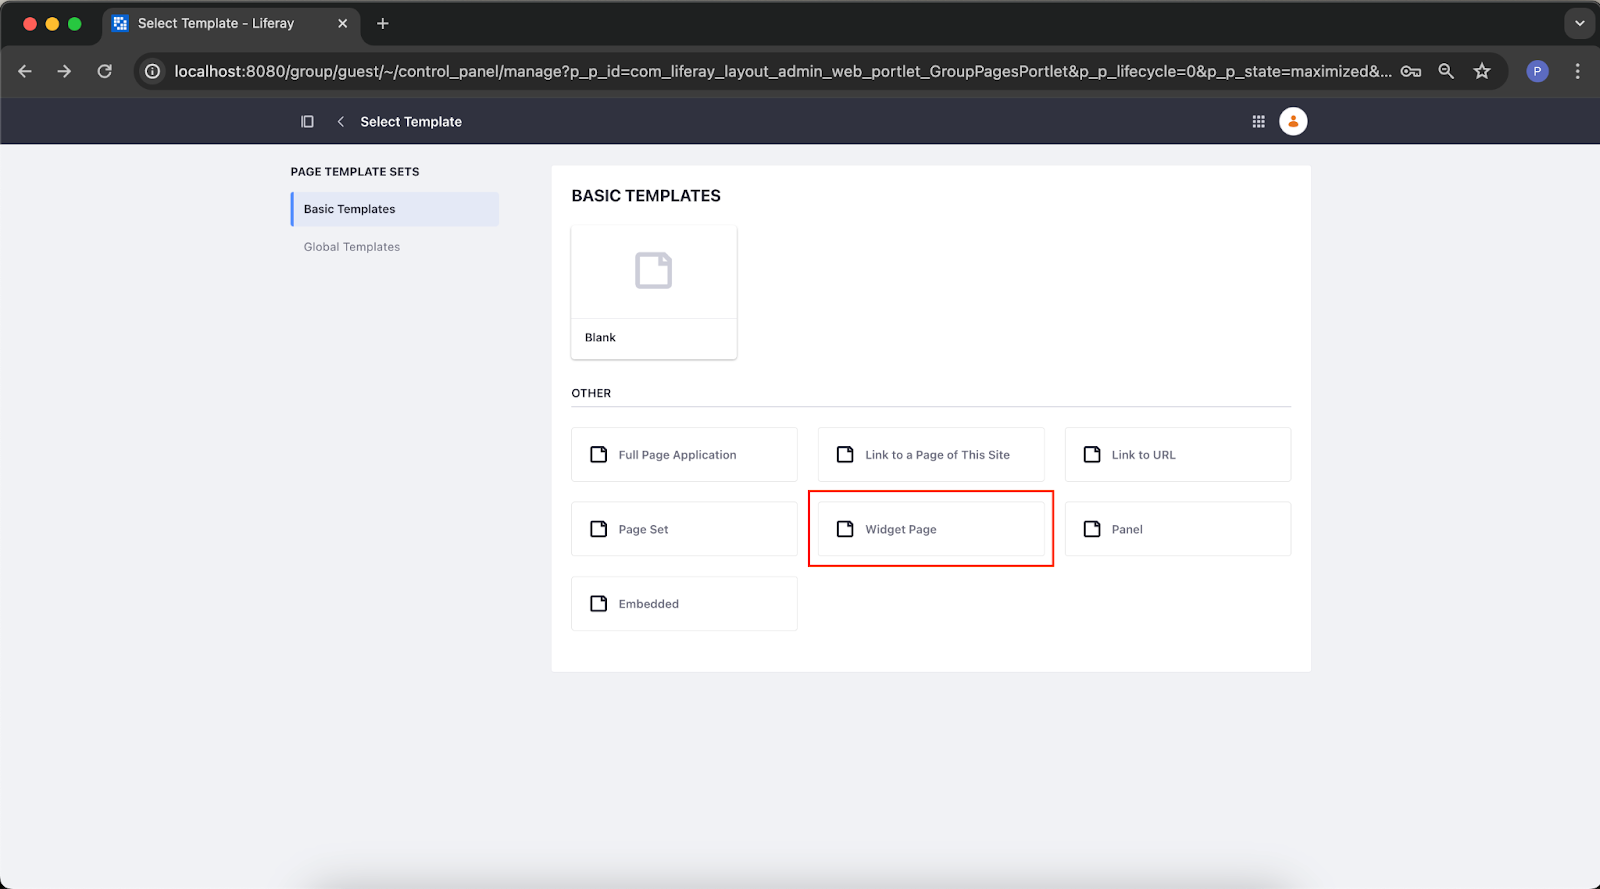
After clicking this button, you will see the creation of a new website. From this level, you can select the type of page you are interested in. For example, you can choose Full Page Application – in which case a page dedicated to a specific application, such as Blog, will be created. Alternatively, you may select Widget Page, which allows you to add any number of elements to the page in your chosen layout. For now, choose the second option by pressing the button marked below.
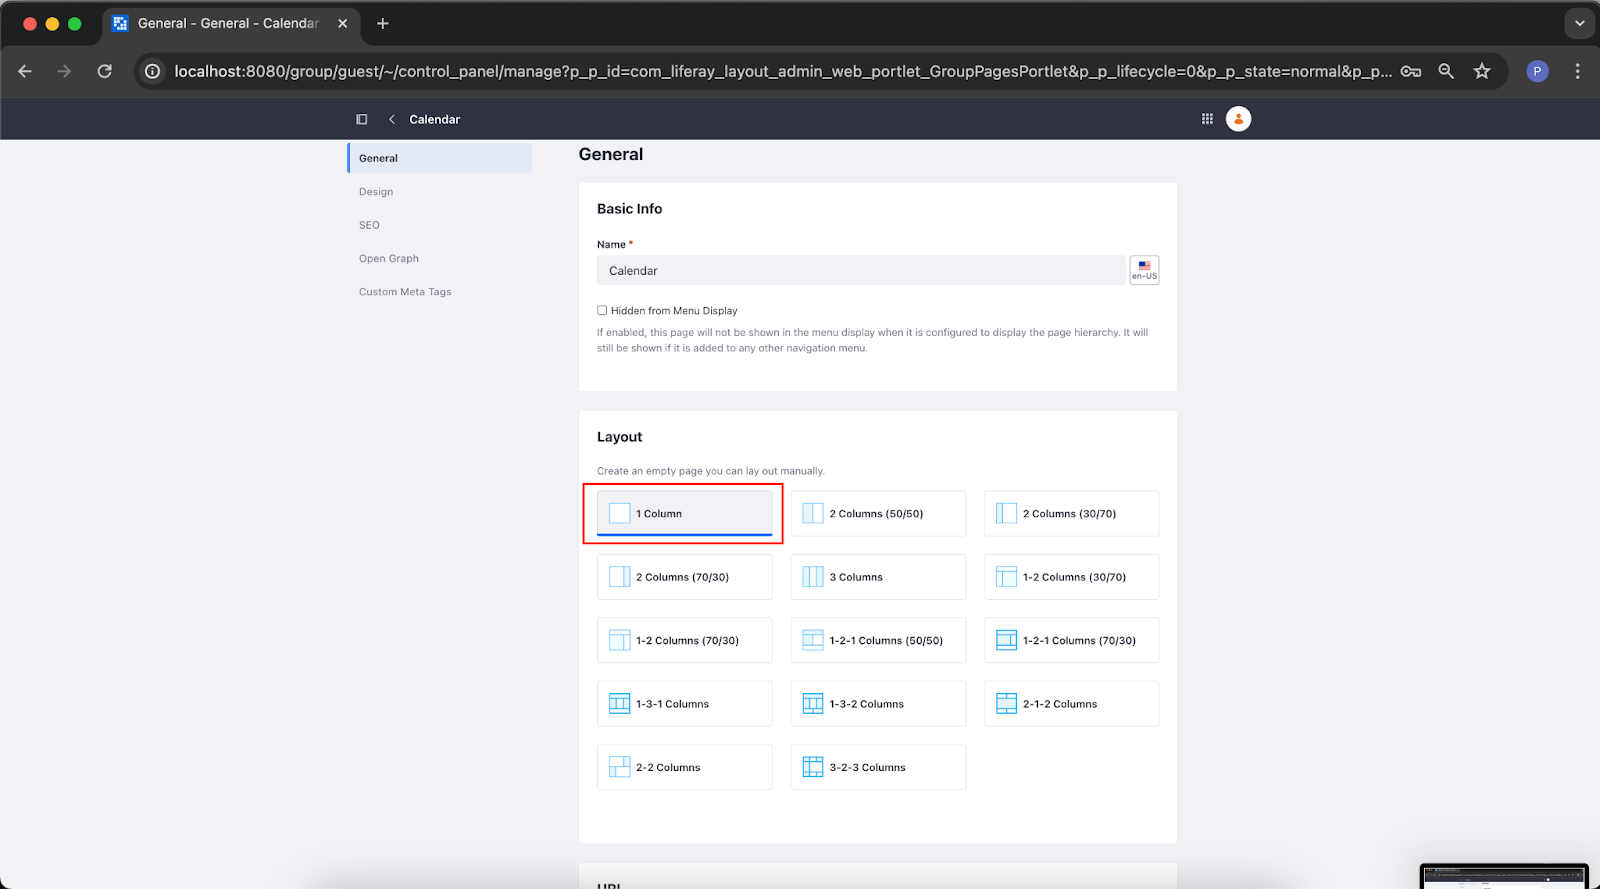
Liferay will now take you to the layout specifications and page features view. Here, you can adapt the newly created website to your needs. Importantly, these settings aren’t final – you can modify them as business needs change. For the purposes of our presentation, we suggest selecting a single-column page and saving the settings using the Save button at the bottom of the page.
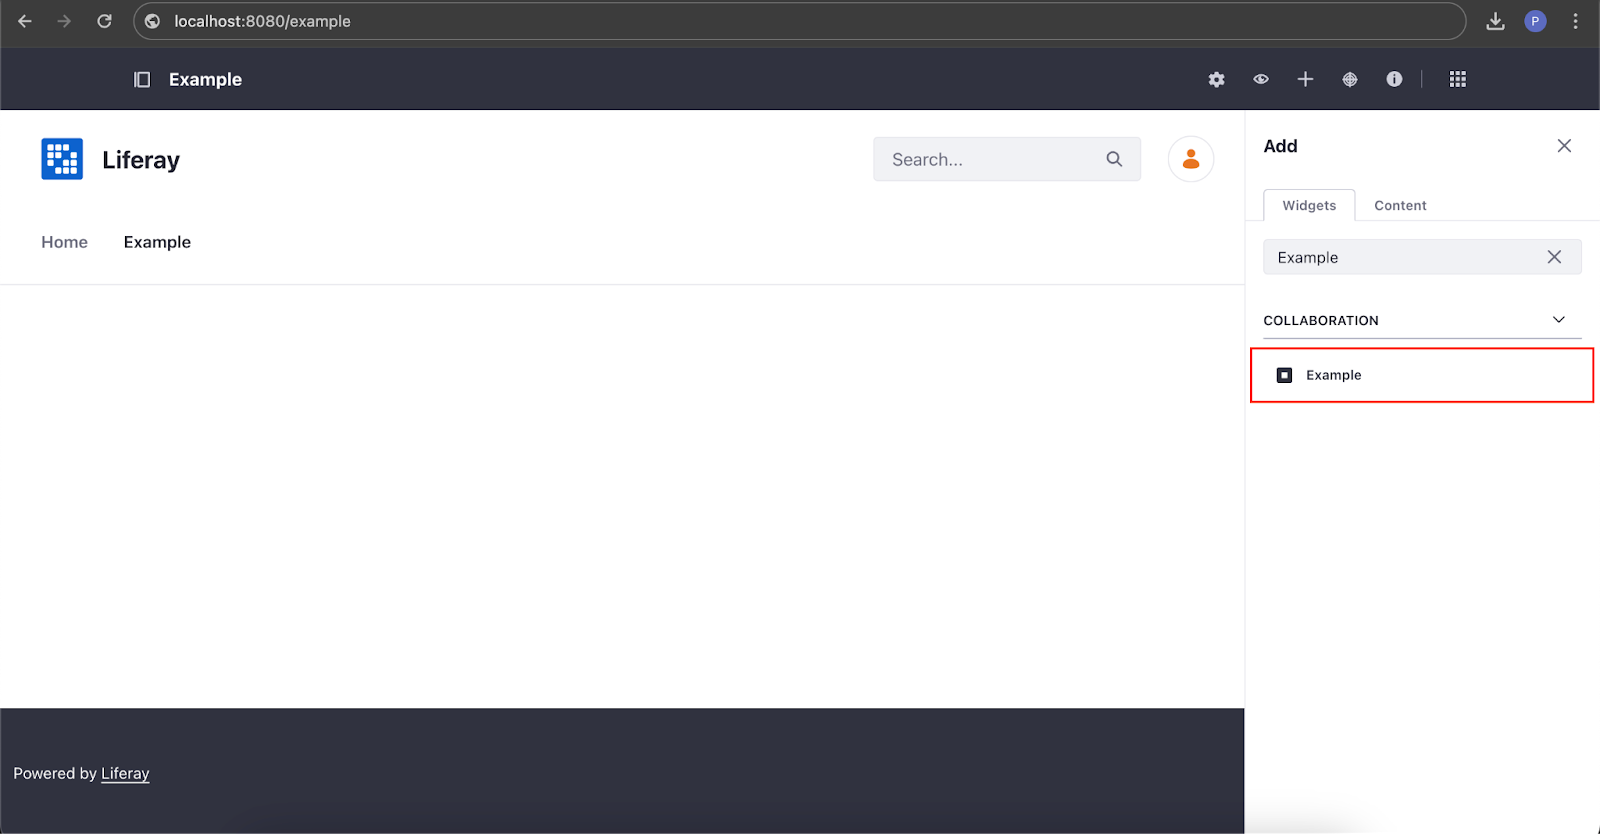
The result of your actions is the creation of a completely new page of your application: localhost:8080/calendar. Of course, the content displayed on the website can be modified. In order to make changes to the content, select the Add icon in the administrator panel at the top of the page, similar to what we discussed while modifying the Dashboard page.
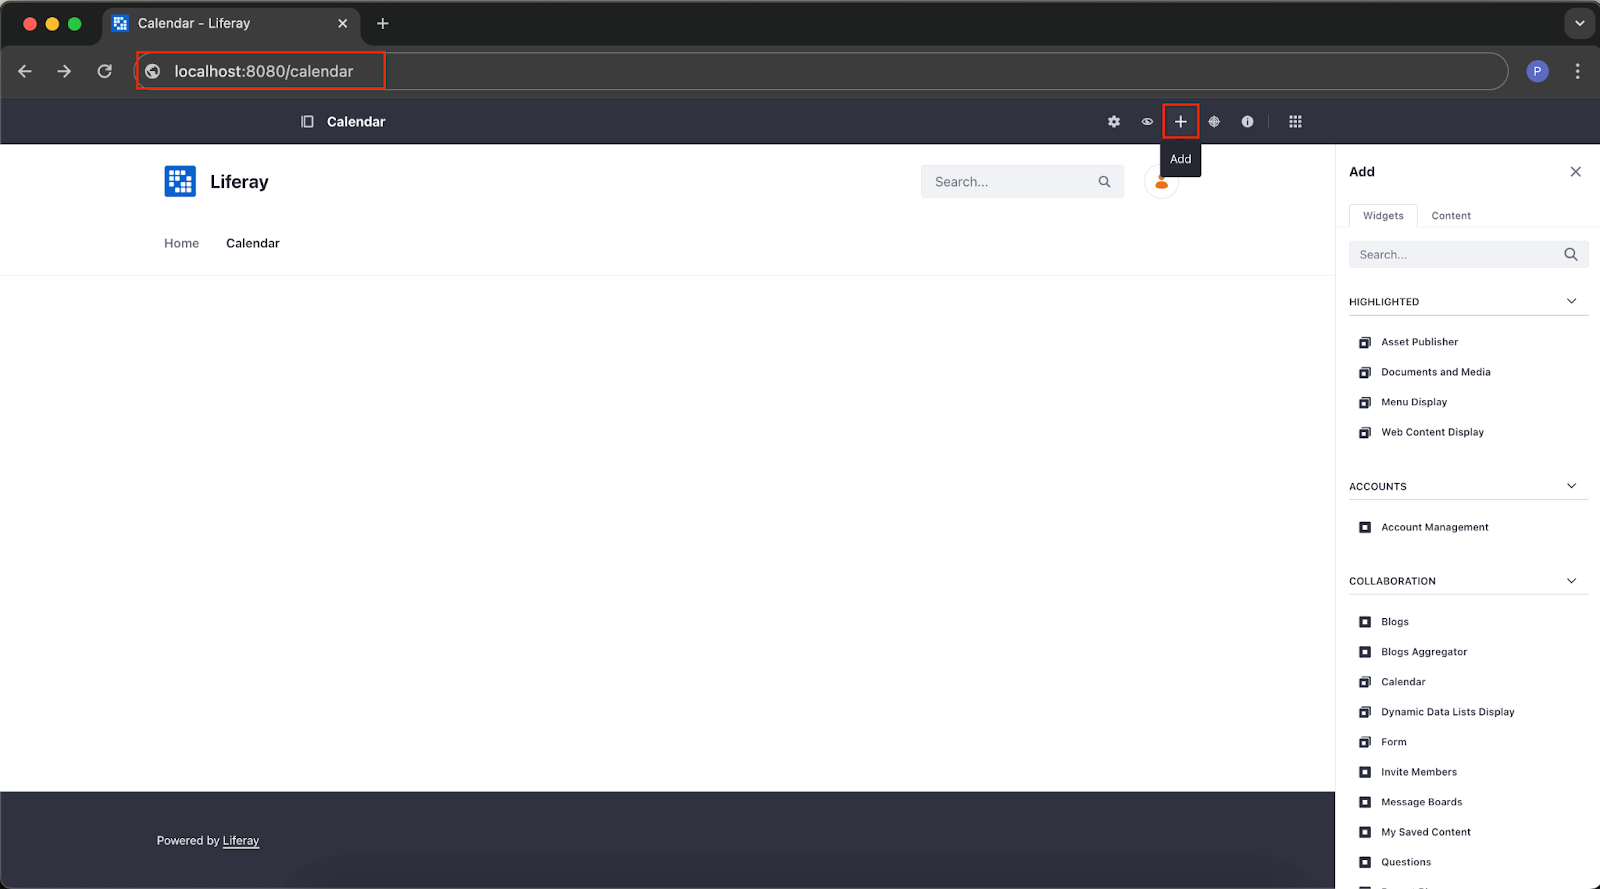
Now, let’s use the search engine located on the right side panel and find the widget we are interested in: Calendar. To place the widget on the website, we can either click the + icon located on the right side of the widget tile or use the mouse (drag & drop). The advantage of the second option is the ability to freely adjust the order of elements on the page by simply dragging them to the place where we want them to appear. By default, Liferay tells the user where the widget will be placed on the page when dragging it. This is indicated by a blue box representing the location where the item will be added.

Liferay provides the ability to add many types of resources, such as articles and documents. In most circumstances, you’ll want to present these resources to the end-user. This is where the Asset Publisher tool comes in handy. It is a highly customizable application that allows you to search for different types of content on the fly, giving you the ability to control what and how is displayed in a given place. This helps you create a more dynamic website.
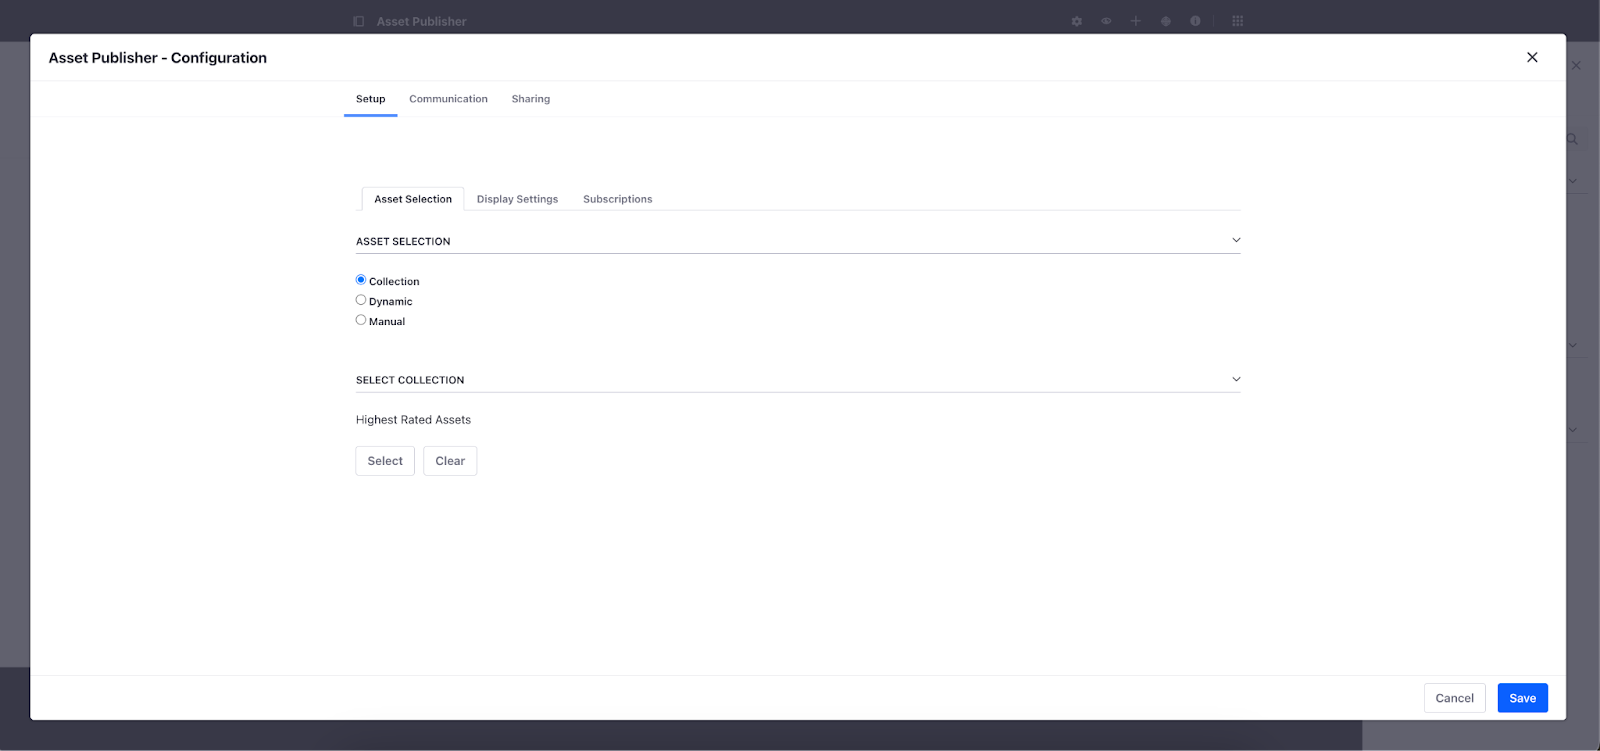
You can search for resources in a variety of ways. You can set the resource selection to either dynamic or manual. With the dynamic setting, the content is displayed automatically, based on the specified rules or filters. For example, you can set the Asset Publisher to display only resources of a certain type, or resources that have specific tags or categories applied to them.
When you select resources manually, the Asset Publisher only displays resources that have been explicitly chosen by the administrator. You can also configure how the content is displayed by creating new Application Display Templates which allow portal administrators to override the default settings, removing restrictions on how content is displayed in your application.
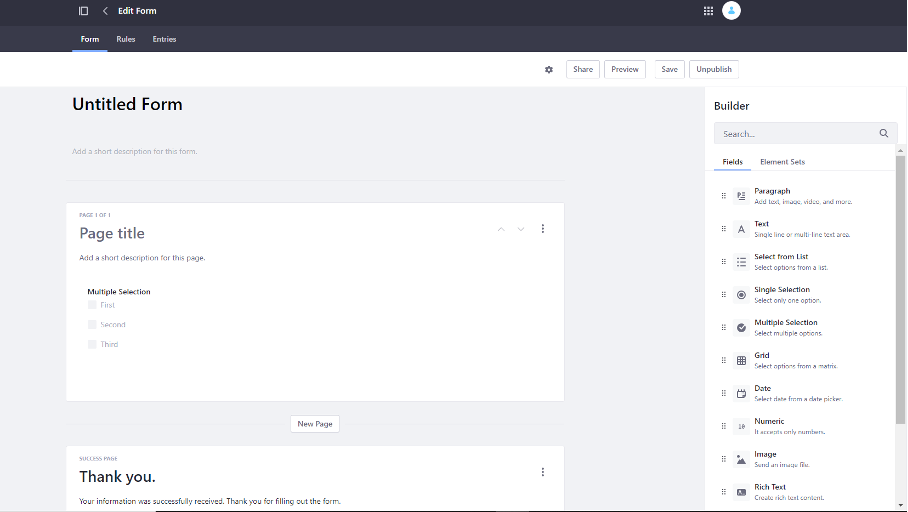
Liferay also provides you with a module you can use to build your own forms that can be widely configured. For example, you can add field types: Text Field, Single Selection, Multiple Selection, Date, Grid, etc. Such forms are one of the most often used elements in applications. Users can use them to input data (e.g., names or dates of birth) and make various choices in the system.
Another functionality offered by Liferay is the ability to create a knowledge base in the form of an article repository. Knowledge Base is an application that provides tools for creating and managing such a repository. Thanks to this, you can create articles using the built-in WYSIWYG (what you see is what you get) editor or import them as markdown files wrapped using ZIP. Once you have created an article, you can view, edit, assign permissions to it, and set expiration dates for the content. This solution enables quick and effective documentation management, e.g., regarding the products offered by your company.
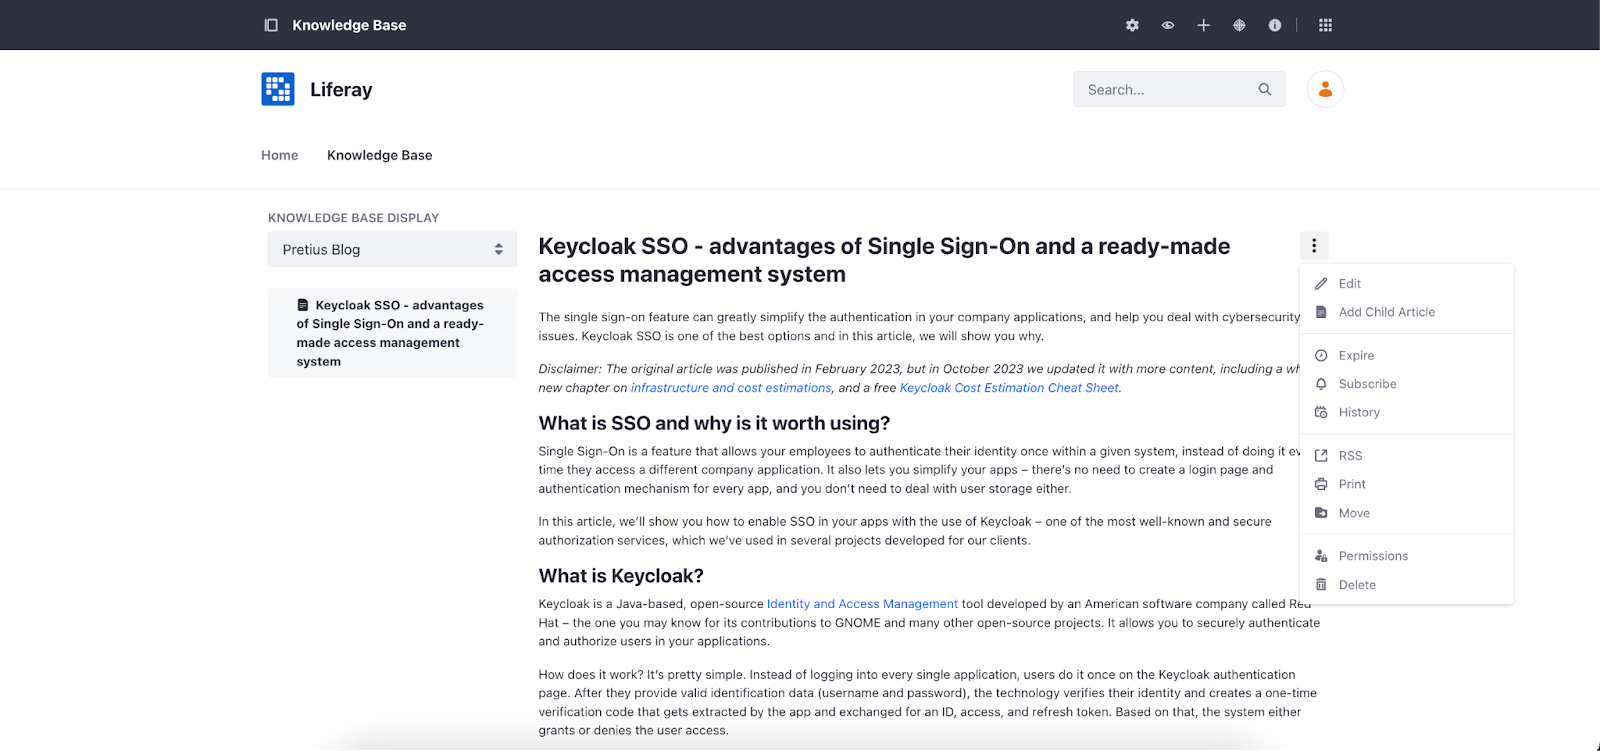
Additionally, the application allows you to create content templates and use workflow processes in them. Thanks to these options, not only do articles have a clearly declared form, but you can also be sure that they go through the approval process before being published.
Knowledge Base also offers the ability to import articles from external sources, such as markdown files hosted on the popular GitHub platform. Once imported, articles are automatically converted to the HTML format, making them easier to integrate with various tools, and an Edit on GitHub button is added to allow users to easily navigate to the content source file. Thanks to numerous built-in features, such as comments, ratings, related resources and subscriptions, users can actively participate in the process of creating and improving the content they produce. In addition, the provided options for planning the publication of articles on specific dates and managing proposed changes further facilitate the supervision of content within the application.
When new content is published, Knowledge Base allows it to be displayed in a variety of ways depending on the user’s needs. From presenting the full content of the documentation and its hierarchy to displaying only its individual sections and articles. The content prepared in this way can then be posted on a specially prepared website or added as an element of an existing website thanks to the use of Widgets offered by the Knowledge Base.
Liferay offers extensive configuration tools that allow you to customize the behavior of blogs and webinars according to your organization’s needs and preferences. Users can create new entries, add multimedia, tags, categories, moderate content, as well as rate and share it according to their needs. Thanks to integration with the Liferay calendar, it is also possible to plan and organize webinars, which can be automatically added to the participants’ calendars.
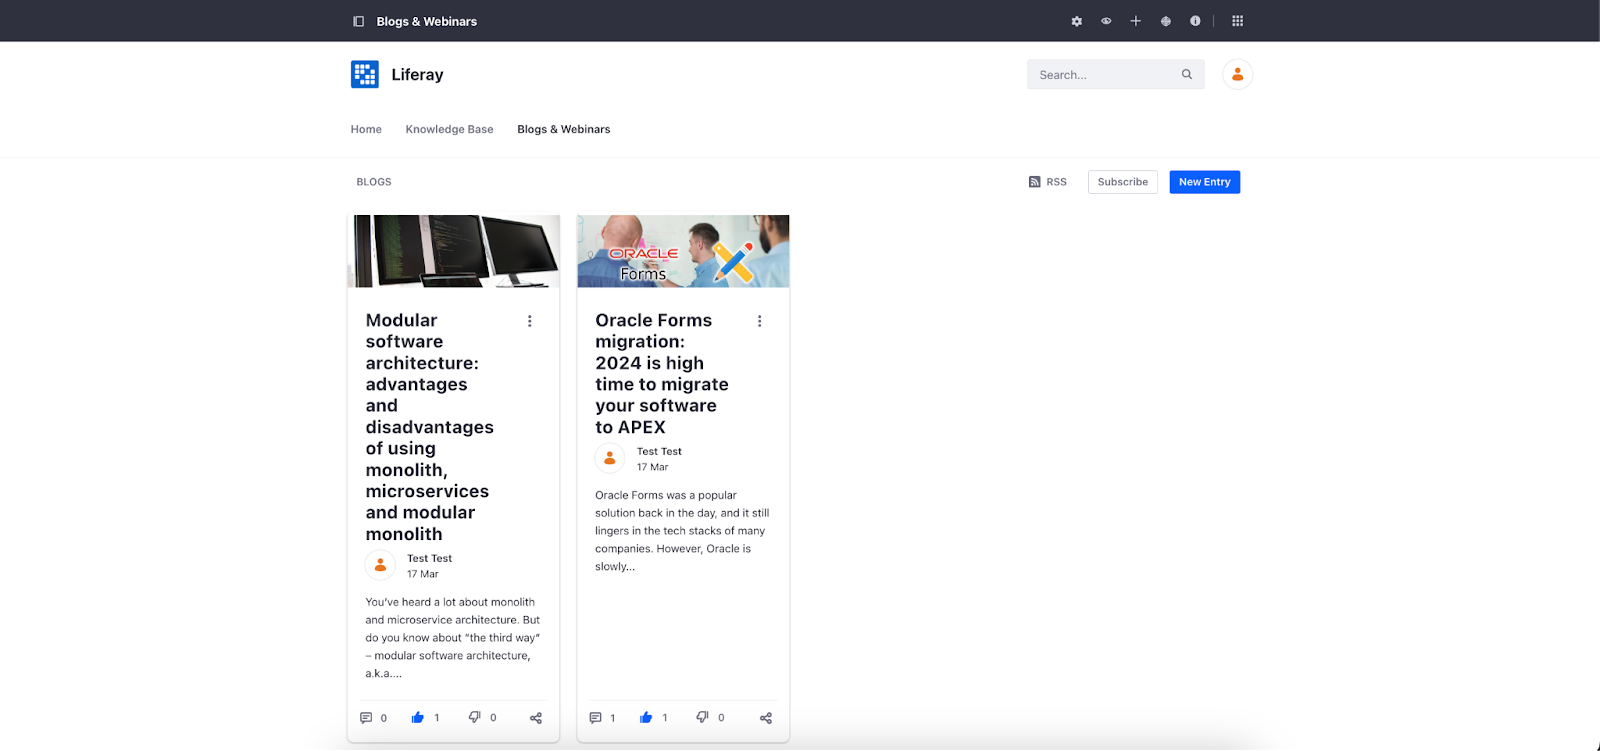
There are two main methods to present blog entries to users:
Each blog entry also has a number of features available for configuration, from adding your own cover image to assigning a friendly URL that can be set automatically or manually. When such a URL changes after the entry is created, Liferay automatically stores the previous value in the history. Thanks to this, users are still redirected to the latest version of the entry. It is also possible to manage the history of friendly URLs, which allows you to remove old URLs and reuse them for other entries.
Liferay Blogs application also offers the ability to export/import data using LAR files (Liferay Archive – a compressed ZIP archive file that Liferay DXP uses to export/import data), control permissions to manage entries and configure e-mails informing about changes in an entry. Additionally, it is also possible to choose the format for publishing entries in the RSS feed and specify how individual blog entries are to be displayed.
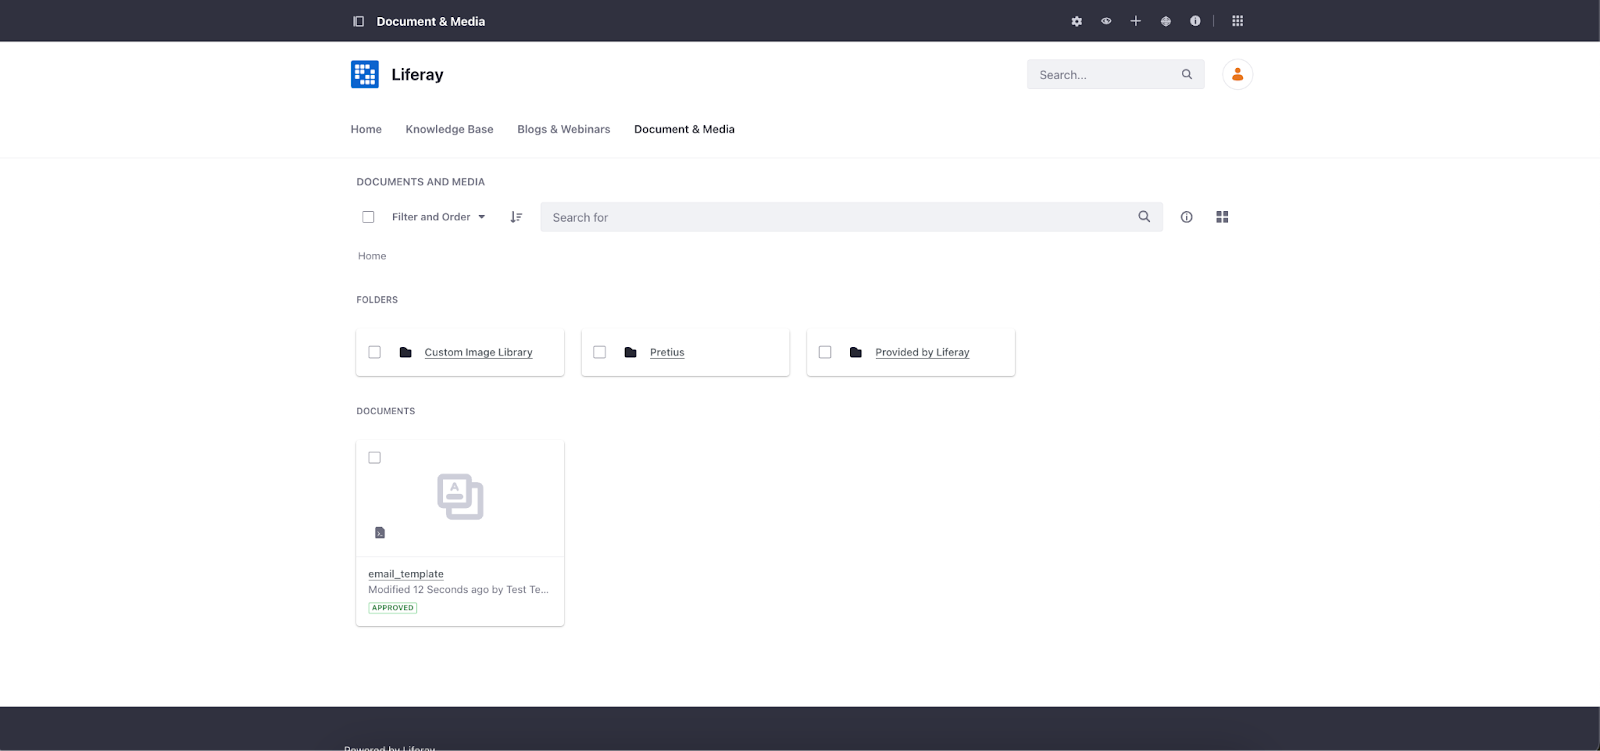
Documents and Media is a repository and management tool for files uploaded within your Liferay instance. It offers extensive capabilities for storing, managing and organizing digital assets for various file types. Users can upload files directly to the application, modify and categorize them using tags and categories, and define access permissions. The application also supports the WebDAV protocol, which allows access and management of files transferred to Documents and Media from the user’s system file manager.
However, this is not just an ordinary repository. Documents & Media goes beyond basic file storage, offering seamless integration with external platforms and applications commonly used in organizational structures. Integration with Microsoft Office 365, OpenOffice and Google Drive enhances collaboration capabilities by enabling users to work together on documents and media files directly within the Liferay environment. This integration significantly affects the efficiency and productivity of their activities, simplifying and accelerating the tasks performed.
The key advantages of Documents & Media also include high configurability. Administrators can adapt the application to even the most non-standard organizational requirements. From selecting alternative file stores such as DBStore or Amazon S3 Store to modifying file transfer settings and permissions, the application offers a comprehensive set of configuration tools. This flexibility ensures that Documents & Media can continually adapt to dynamically changing use cases and the organization’s growing needs.
To display files added to Documents & Media within the main application, you can use applications that support attachments (e.g., Web Content, Message Boards) and Page Fragments or widgets (e.g., Media Gallery). Additionally, resources stored within Documents & Media can be easily exported as Liferay Archive (LAR) files between applications. It allows you to store them as backup copies of your content or to import your assets into Liferay’s Liferay Asset Library or directly into another Liferay-based application.
Sometimes your requirements are more complicated. For example, if you need to display data from a database (or any API), add or modify it – the MVC Portlet is the perfect solution. It’s based on the well-known Model-View-Controller architecture, designed to separate each layer of the module’s operation. With it, you can create modules that you can place anywhere in your system using the drag & drop functionality. The generated template is configured by default and ready to be used.
Adding such a portlet requires a few simple steps:
1. Create new module by right clicking your project folder
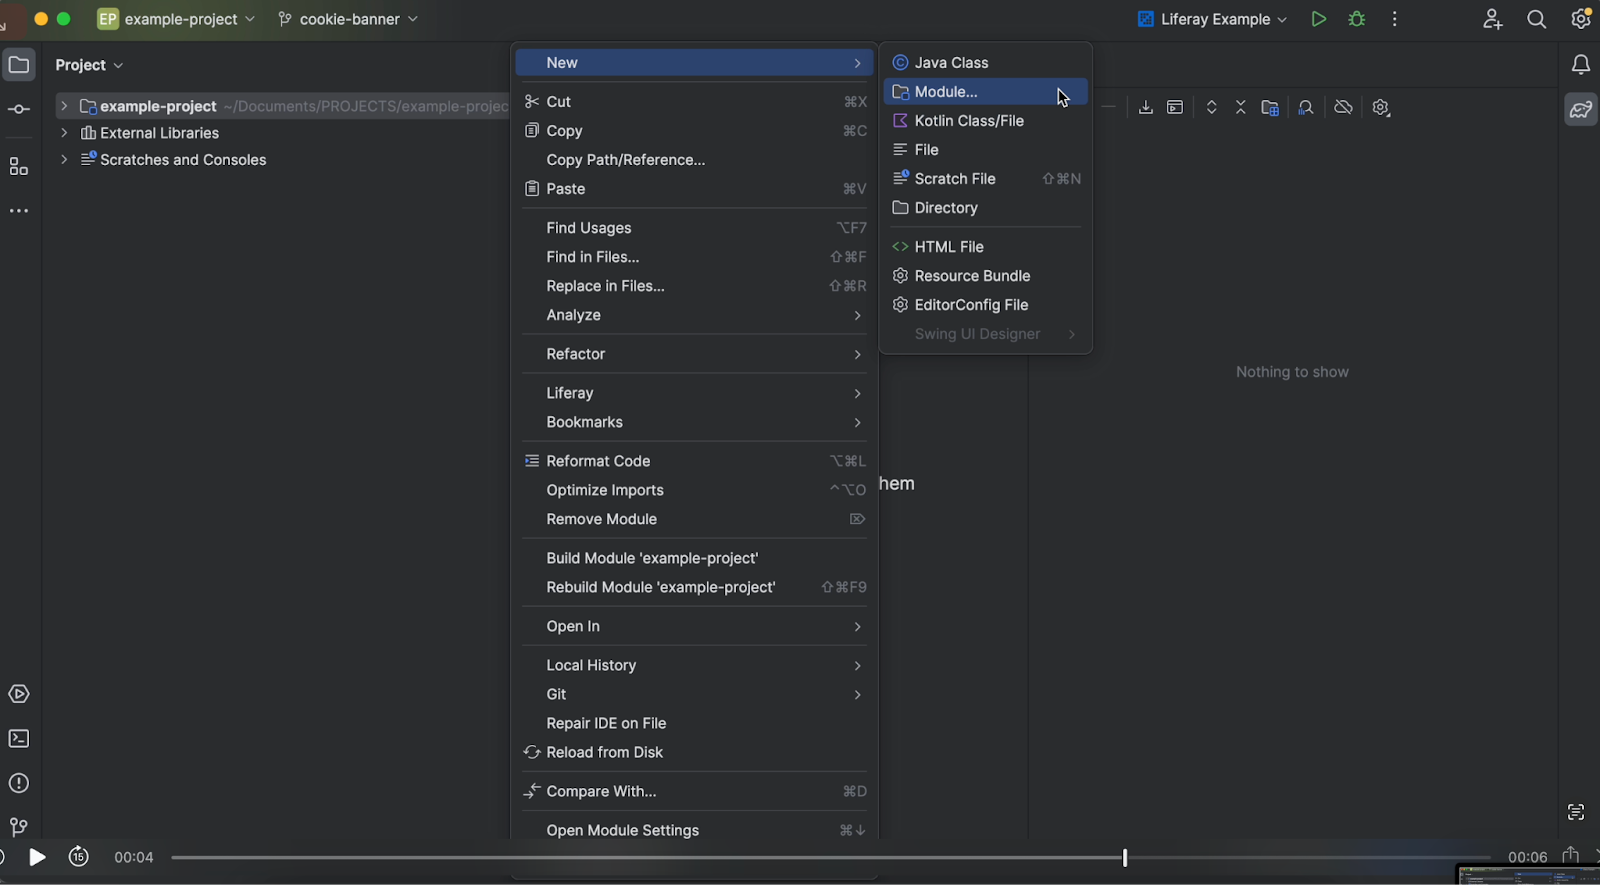
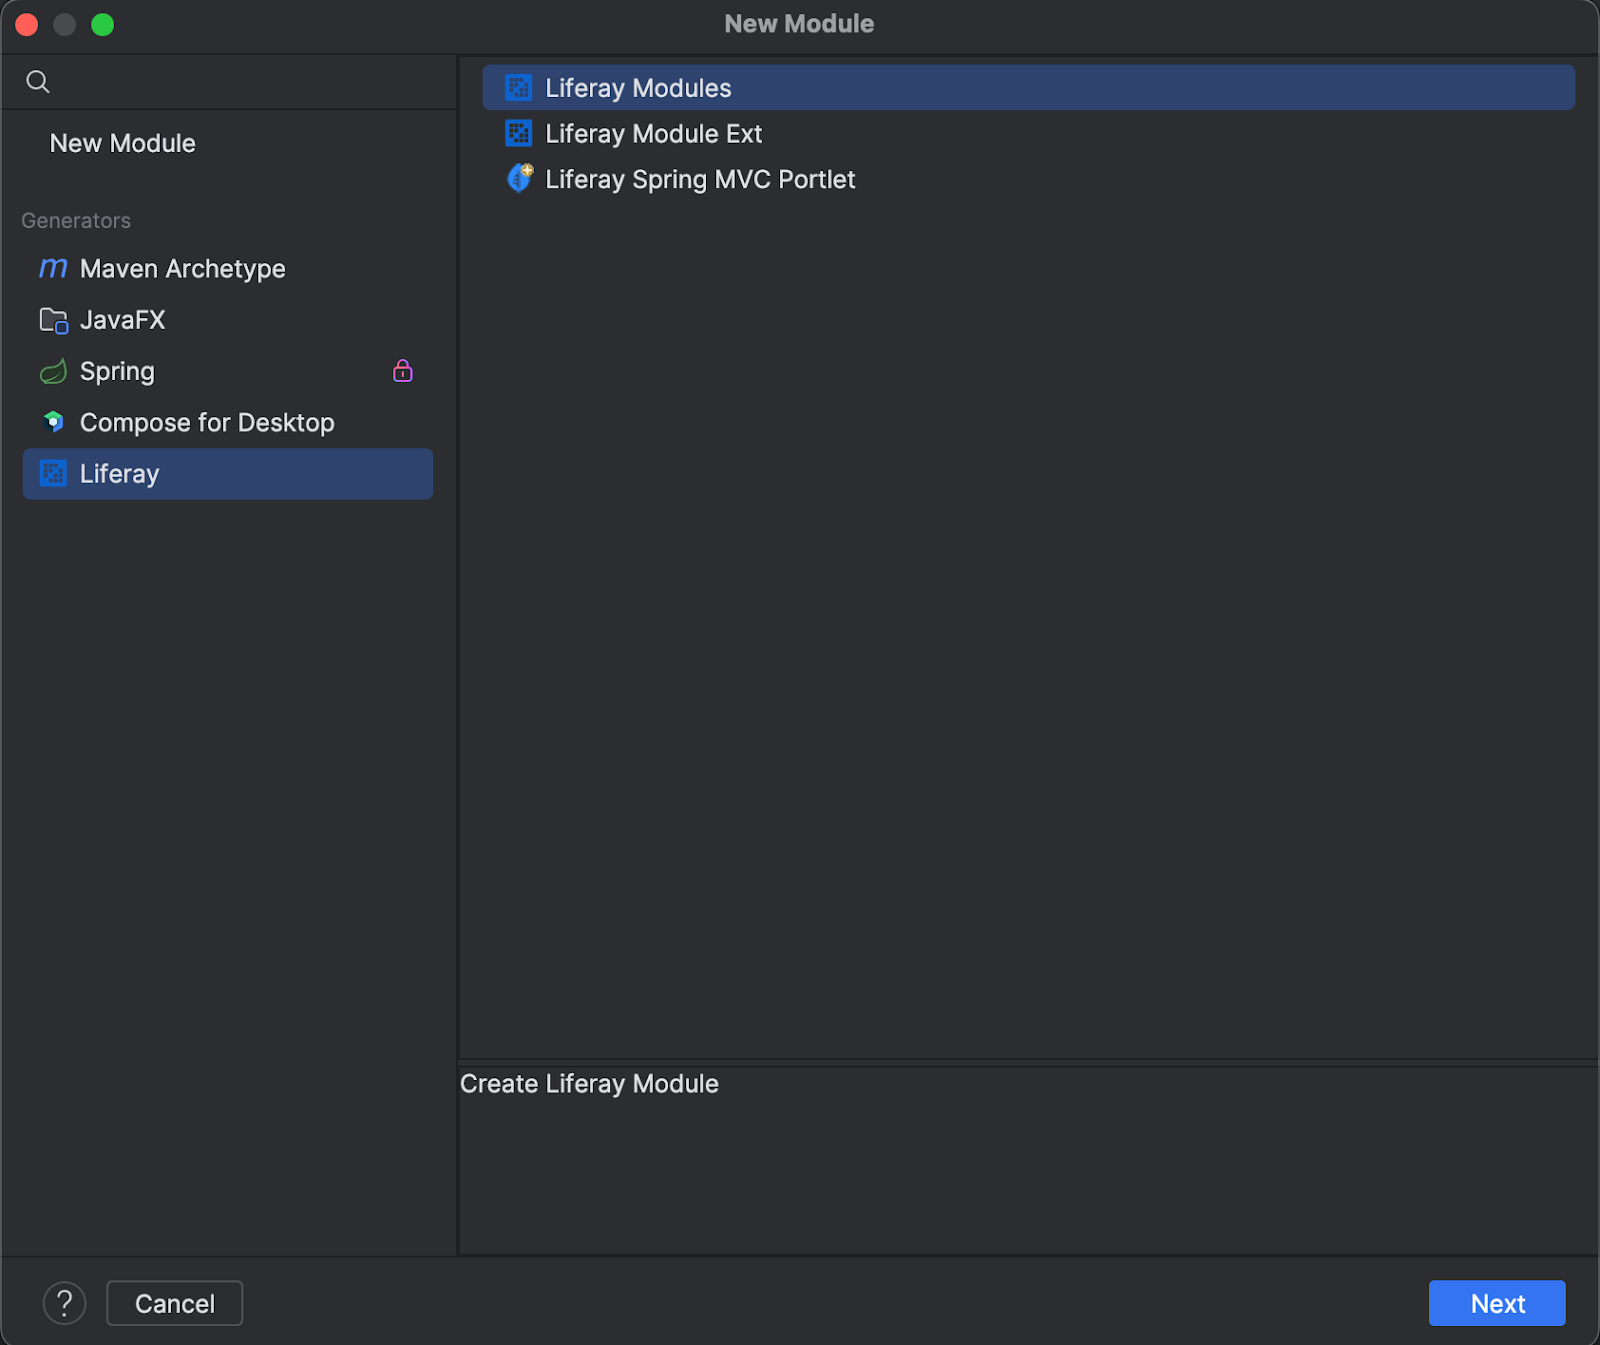
2. Choose Liferay Module as type of the new module
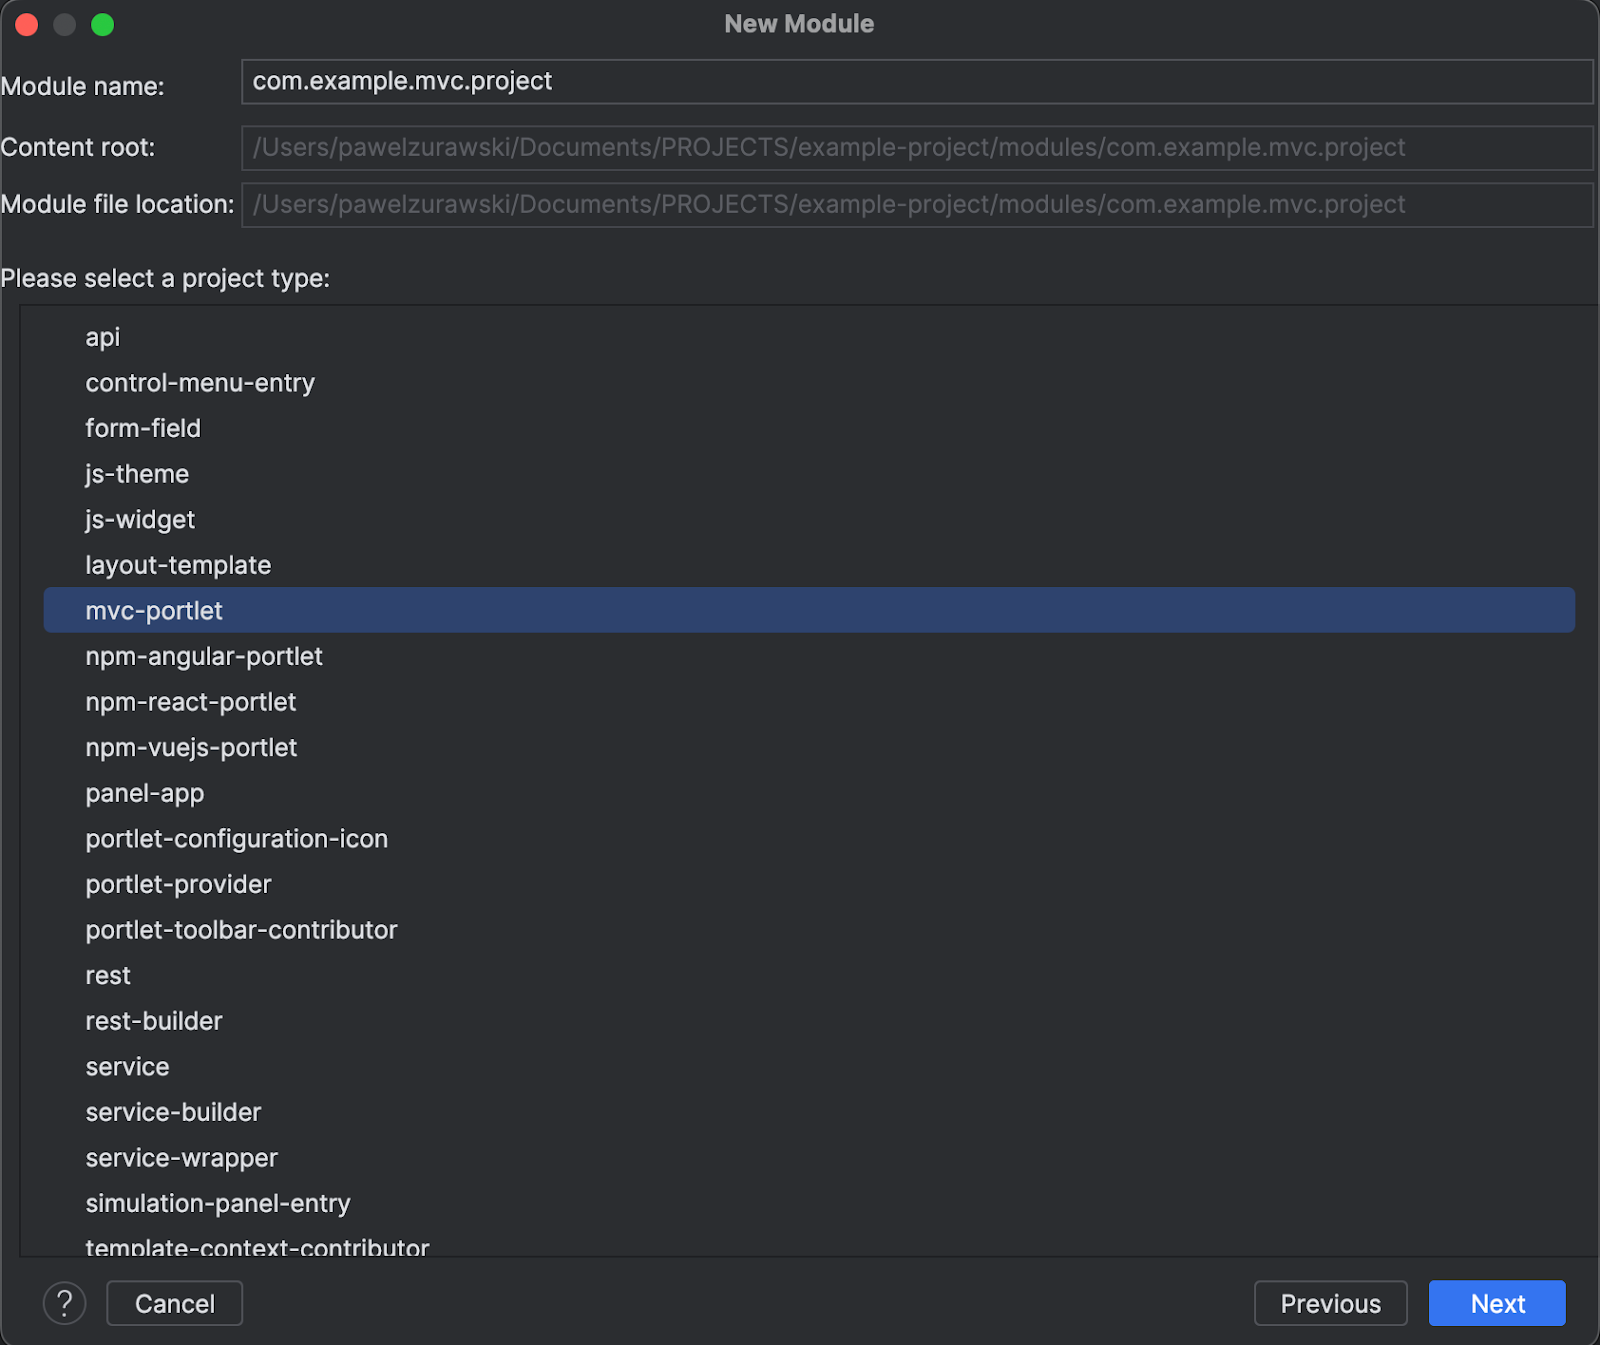
3. Generate the MVC Portlet module template
4. Depending on your preferences, you can deploy your new module using Blade, Maven, or Gradle plugins. Remember to apply the appropriate plugin and configure your Liferay Home property. If you are using the Blade CLI, navigate to the folder containing your module using the CLI and execute the deploy command shown below (check out the documentation for more information).
blade deploy
5. Place the portlet on the selected page using the drag & drop functionality (just use the mouse and move it wherever you want it)
As you can see, the template for a working portlet is very easy to obtain. From that moment on, it’s available on the website, and you can start implementing your own business logic.
Service Builder is one of the largest and most frequently used tools for creating new database entities. It uses relational-object mapping, which generates subsequent layers based on a single XML file:
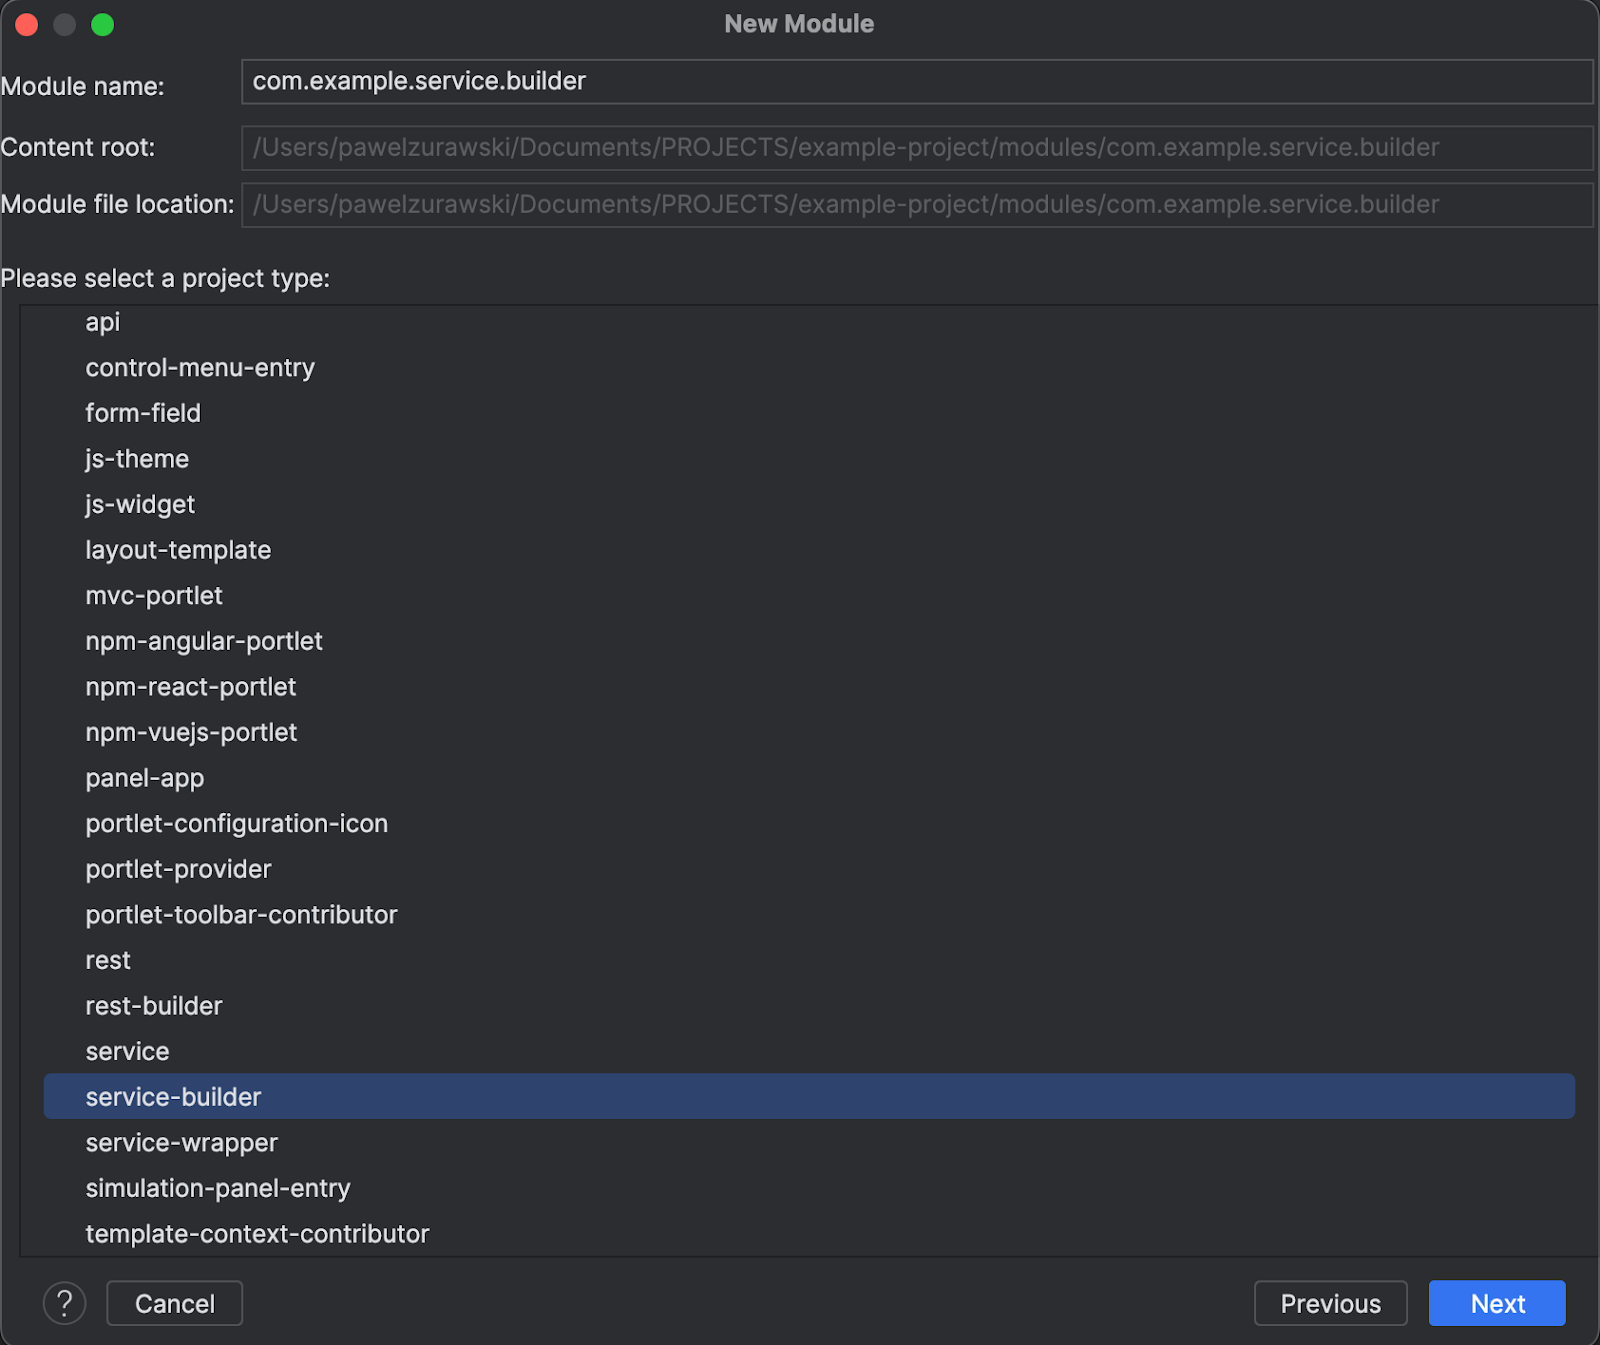
After generating the basic service builder, we get two modules – API and service. This configuration file is in the service module under the name service.xml, and in its default version it looks like this:
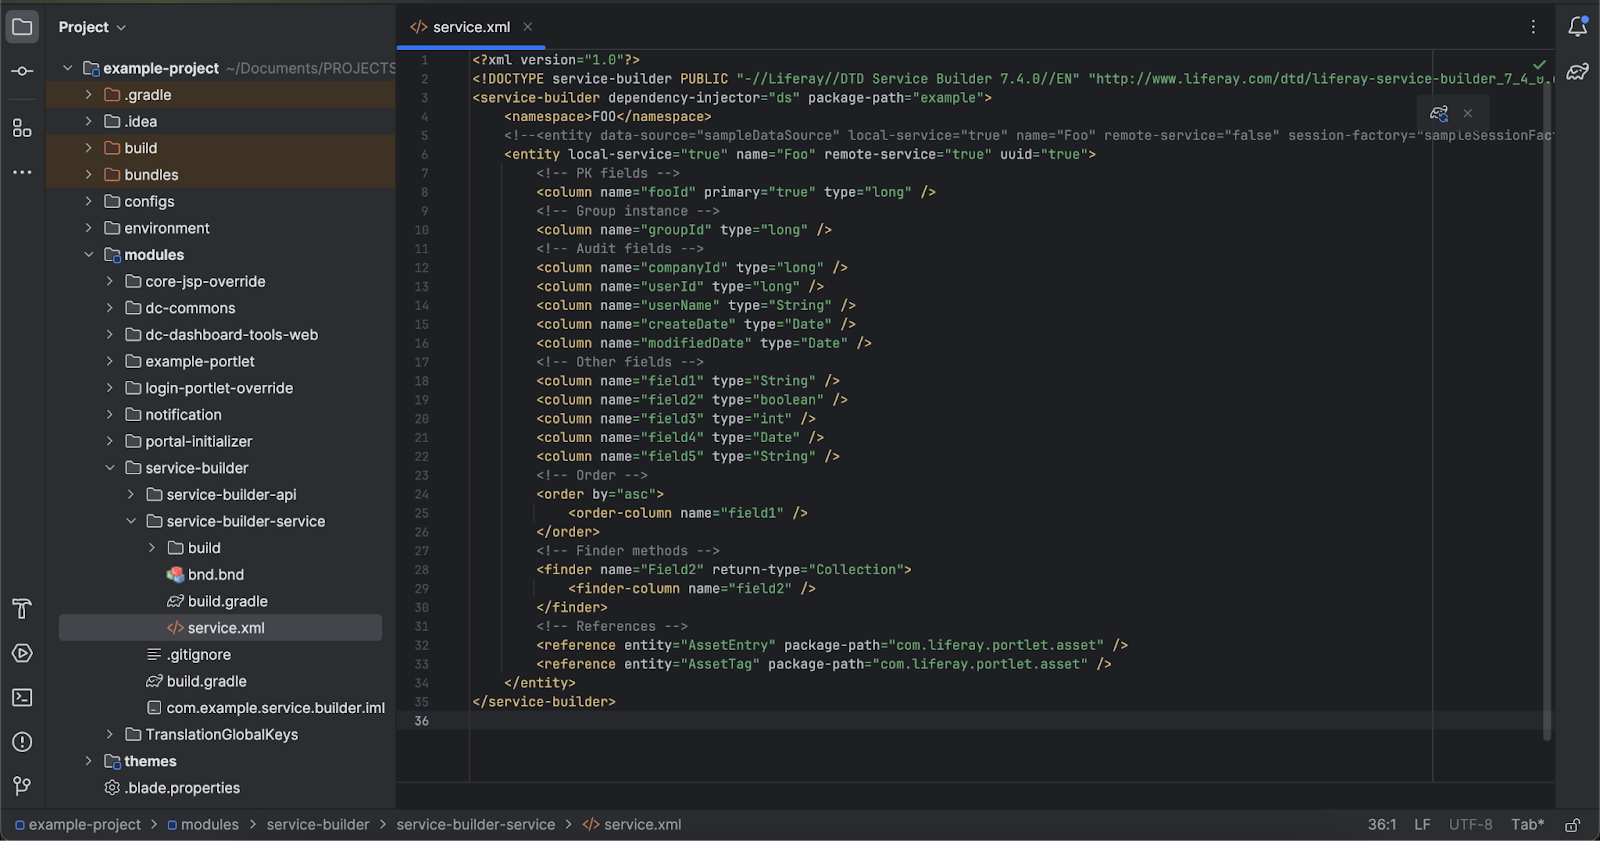
Now let’s describe what it consists of and what functionalities it has:
To build entities and generate classes needed to implement the logic, execute this command:
blade gw buildService
After this, you should have the following module structure:
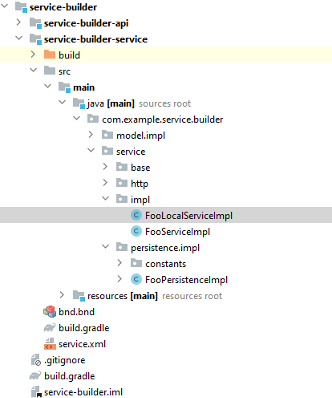
From now on, you can define the behavior of servers related to this entity in the FooLocalServiceImp class.
⚙️ Want to find out more about the advanced customization of Liferay? Read our tutorial on using Service Builder, Dynamic Queries and Custom SQLs in Liferay
REST Builder is a powerful tool that consistently generates the code needed to implement and configure the appropriate endpoints (based on the OpenAPI profile) so that they are ready for consumption.
The main advantage of this module is the speed of the REST service development. The programmer does not have to worry about the appropriate endpoint configuration, annotations, and permissions. The code is automatically generated, and everything’s ready to implement the business logic.
This service enables an easy-to-configure ability to use pagination, filtering, or search by declaring the appropriate values in OpenAPI.
Responses are returned in both JSON and XML formats. The end-user can decide in which format he wants to read the answer.
First, you need to build a new module. The process is similar to the previous modules, but in this case, you’ll need to select rest-builder from the context menu. This way, two modules – API and IMPL – should be generated. In the latter, you’ll find the rest-openapi.yaml file, which will be the source of your API. We fill it in based on the OpenAPI specification. For example, the file might look like this:
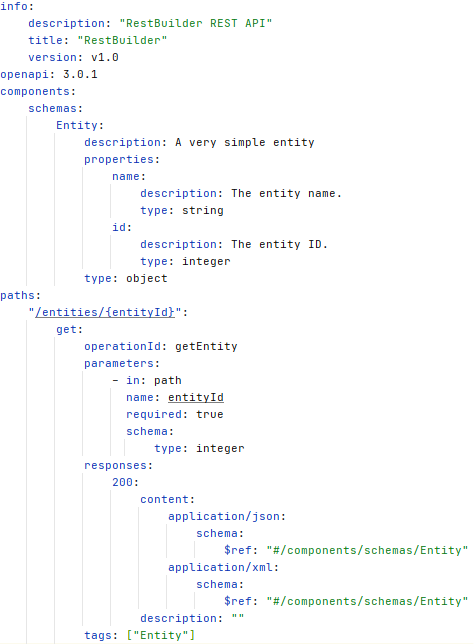
All OpenAPI profiles contain three sections: info, components, and paths. The first one (info) contains information about the OpenAPI version, our API version, and the title. The components section contains schemas/entities that the API can return or consume. In this case, an entity named simply Entity is created, containing the field’s name as a string and id as a number. The last section, paths, defines the name and structure of the endpoint. In this case, the entityId parameter is passed to the GET “/entities” endpoint, and the Entity object created in the previous section is returned as a response.
After executing the blade gw buildRest command, resources and POJOs of your schemas and JAX-RS application will be generated. After verifying correctness, run the blade deploy command. That’s it – the endpoint is ready to be consumed. 😊
Liferay is a pretty old tool – it was created at the turn of the century, in the year 2000. Because of this, you might be tempted to forgo it in favour of newer solutions. However, this is not a choice you should make lightly because Liferay is still being developed by its authors and has much to offer – both in terms of practical business uses and surprisingly powerful customization options.
Looking at the basic functionalities and tools available in the Liferay Portal platform, we notice their significant impact on creating web applications. Liferay’s dynamism and flexibility make it a great tool for both beginners and experienced users. The functionalities discussed in the article emphasize the comprehensive and wide possibilities of content management, work organization and integration options. Thanks to the tool’s intuitive interface, you can use the available functions without deep technical knowledge.
It’s a bit hard to start learning this technology, but it has many functionalities that can be used in modern systems. This article only shows you a small part of the possible options. Still, it should be enough to see how this solution can help you accelerate the development of your application and whether Liferay training is worth considering.
If this tutorial sounds too difficult and/or you have very specific business needs, don’t worry! We have a great deal experience in creating and customizing enterprise-grade Liferay systems, and we will be happy to help! Write to us at hello@pretius.com (or use the contact form below) and tell us what you need! We’ll respond in 48 hours.
Here are answers to some common questions regarding Liferay.
You can find the Liferay Community Edition here.
You can add MVC liferay plugin portlets by going to File, New, and Liferay Plugin Project.
Yes, you can find the information about it here.
Go to Servers, New and Server. For a more detailed answer, go back to the beginning of this tutorial or read the documentation.
The commercial variant of the technology is currently marketed as a comprehensive Liferay DXP platform, and the newest version is Liferay 7.4.
Liferay has a Content Dashboard that offers access to various options, including content lists and an audit tool.
A Liferay workspace is an environment that contains your Liferay projects.


