Pretius is a software house with extensive experience in enterprise-grade software. While our company is generally very busy, we sometimes find the time for fun side projects (which is something our developers appreciate quite a bit). One such task was creating games in Roblox. When my team was finished with the project, I decided to share my knowledge, and so I wrote this Roblox tutorial.
What is Roblox?
It’s a platform for developing crossplay games which you can play on:
- PC
- Android
- IOS
- Windows
The platform is based on a free-to-play model, although it is possible to buy the virtual currency Robux, which we can use to buy additional skins or accelerate our development. The platform is most popular among younger players (probably due to its “pixelated” graphics reminiscent of Minecraft), but older people can also find Roblox interesting and fun.
It’s also worth mentioning that to play Roblox games you need to have a dedicated application downloaded. In the PC version, it’s the Roblox Player. After opening it and logging in, the website opens up and you can find the game you are interested in. After entering the game and clicking on the big green button, Roblox Player starts again, but with the right Roblox game.
When it comes to creating a game in Roblox, it’s only possible on Windows and Mac devices. In order to do that, you need to download a different, dedicated application called Roblox Studio. That’s what’s used to make Roblox games and publish them.
Roblox is very popular among gamers. Just look at these numbers:
- Over 150 million users
- Including the 33 million people who log in every day
- More than 40 million Roblox games
- The most popular of these are:
- Adopt me! (20,5 bln total entries)
- Tower of Hell (10,3 bln)
- MeepCity (9,3 bln)
- Piggy (7,8 bln)
What language is Roblox written in?
The language is called LUA. According to Wikipedia, it’s a scripting programming language originally designed to extend the functionality of various applications, but often used as a stand-alone language. Lua combines a simple procedure syntax (similar to Pascal) with data description constructs based on associative arrays and extensible semantics.
For example, a Hello World line LUA looks like this:
|
1
|
print(“Hello World!”)
|
The most important thing from the perspective of a software developer is that it’s a dynamically-typed language, so the syntax resembles JavaScript or Python more than Java. There is no concept of a class, which we know from C#, for example. At most, we can consider metatables as classes, which is better described in this forum thread on Roblox and Object-oriented programming.
Roblox in numbers:
- Over 150 million users
- Including the 33 million people who are available every day
- More than 40 million Roblox games
- The most popular of these are:
- Adopt me! (20,5 bln total entries)
- Tower of Hell (10,3 bln)
- MeepCity (9,3 bln)
- Piggy (7,8 bln)
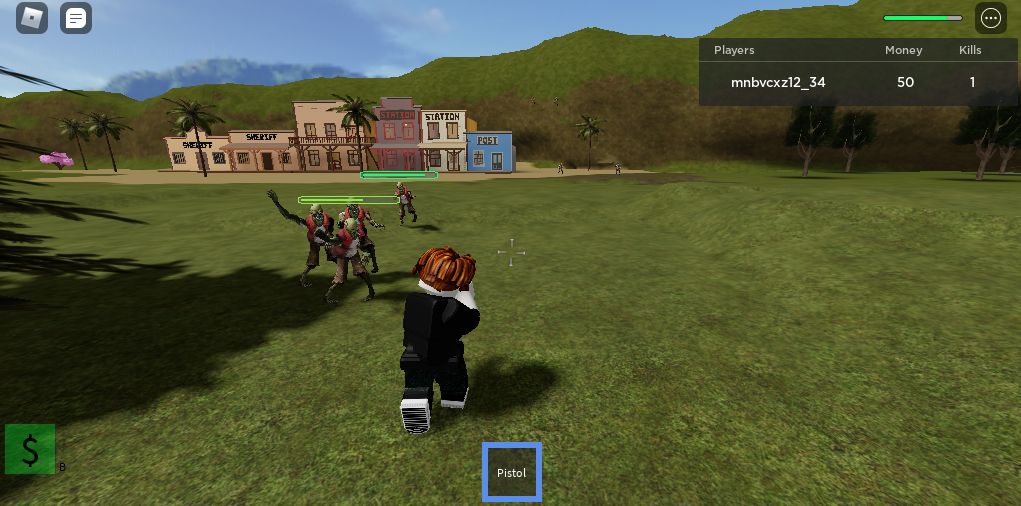
How to create a Roblox game: Let’s make a zombie shooter
With the help of the article, you will be able to create your first Roblox game. I assume that you know the basics of programming: variables, conditions, and loops. Our first Roblox game is going to be a zombie shooter. Main objectives:
- Creating, through the lobby, separate servers where players who want to play with each other can enter the Roblox game
- Zombies appear around the players, on all sides, but not so close that they can attack anyone right away
- Every X amount of time, the number of zombies created increases and they also get stronger
- The player can:
- Shoot the zombies (or which he improves his statistics and gets money)
- Buy new weapons in the store
- Get killed by zombies 😀
- After death, the player sees a screen with his stats, and after some time the game teleports him back to the beginning (he’s respawned)
Your first Roblox game – creating the project
After opening Roblox Studio click New, and in All Templates select Baseplate.
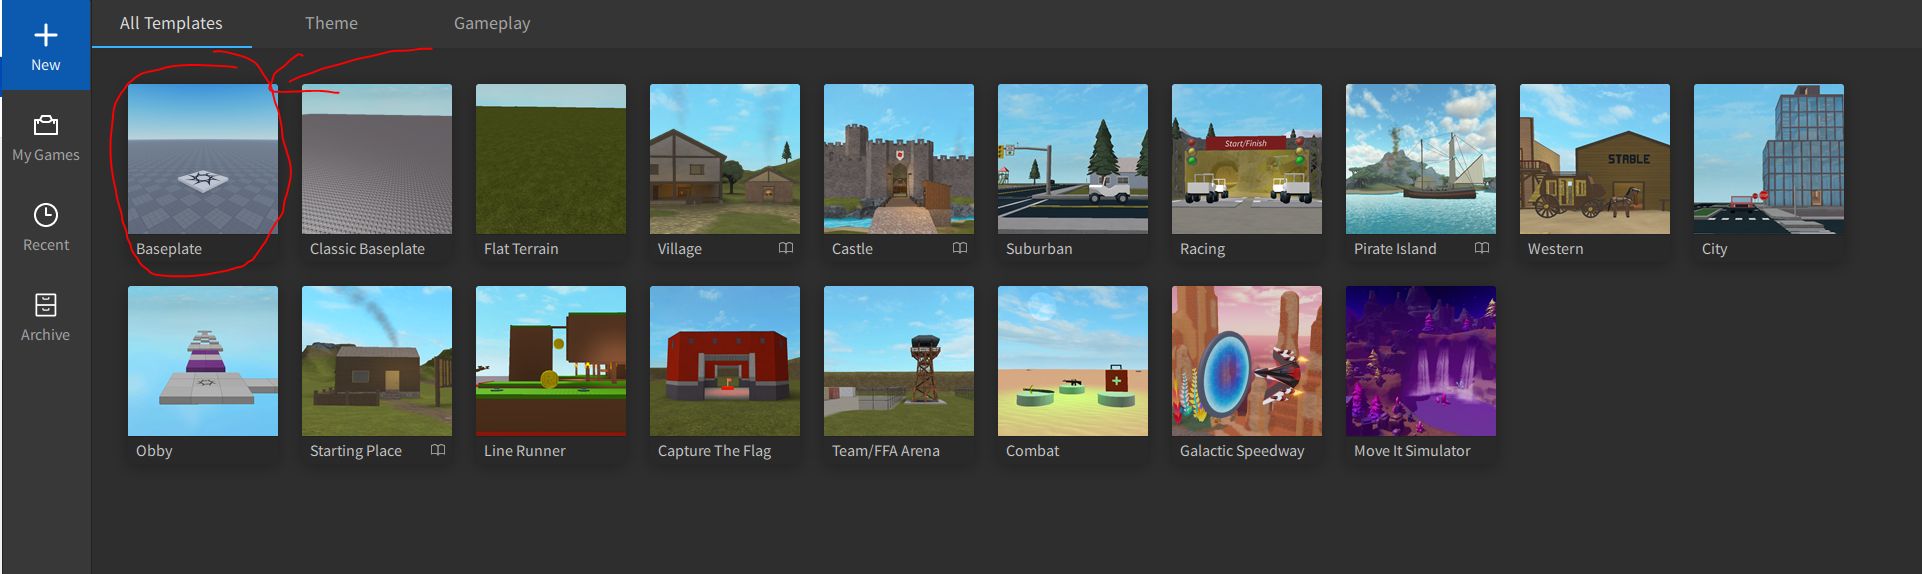
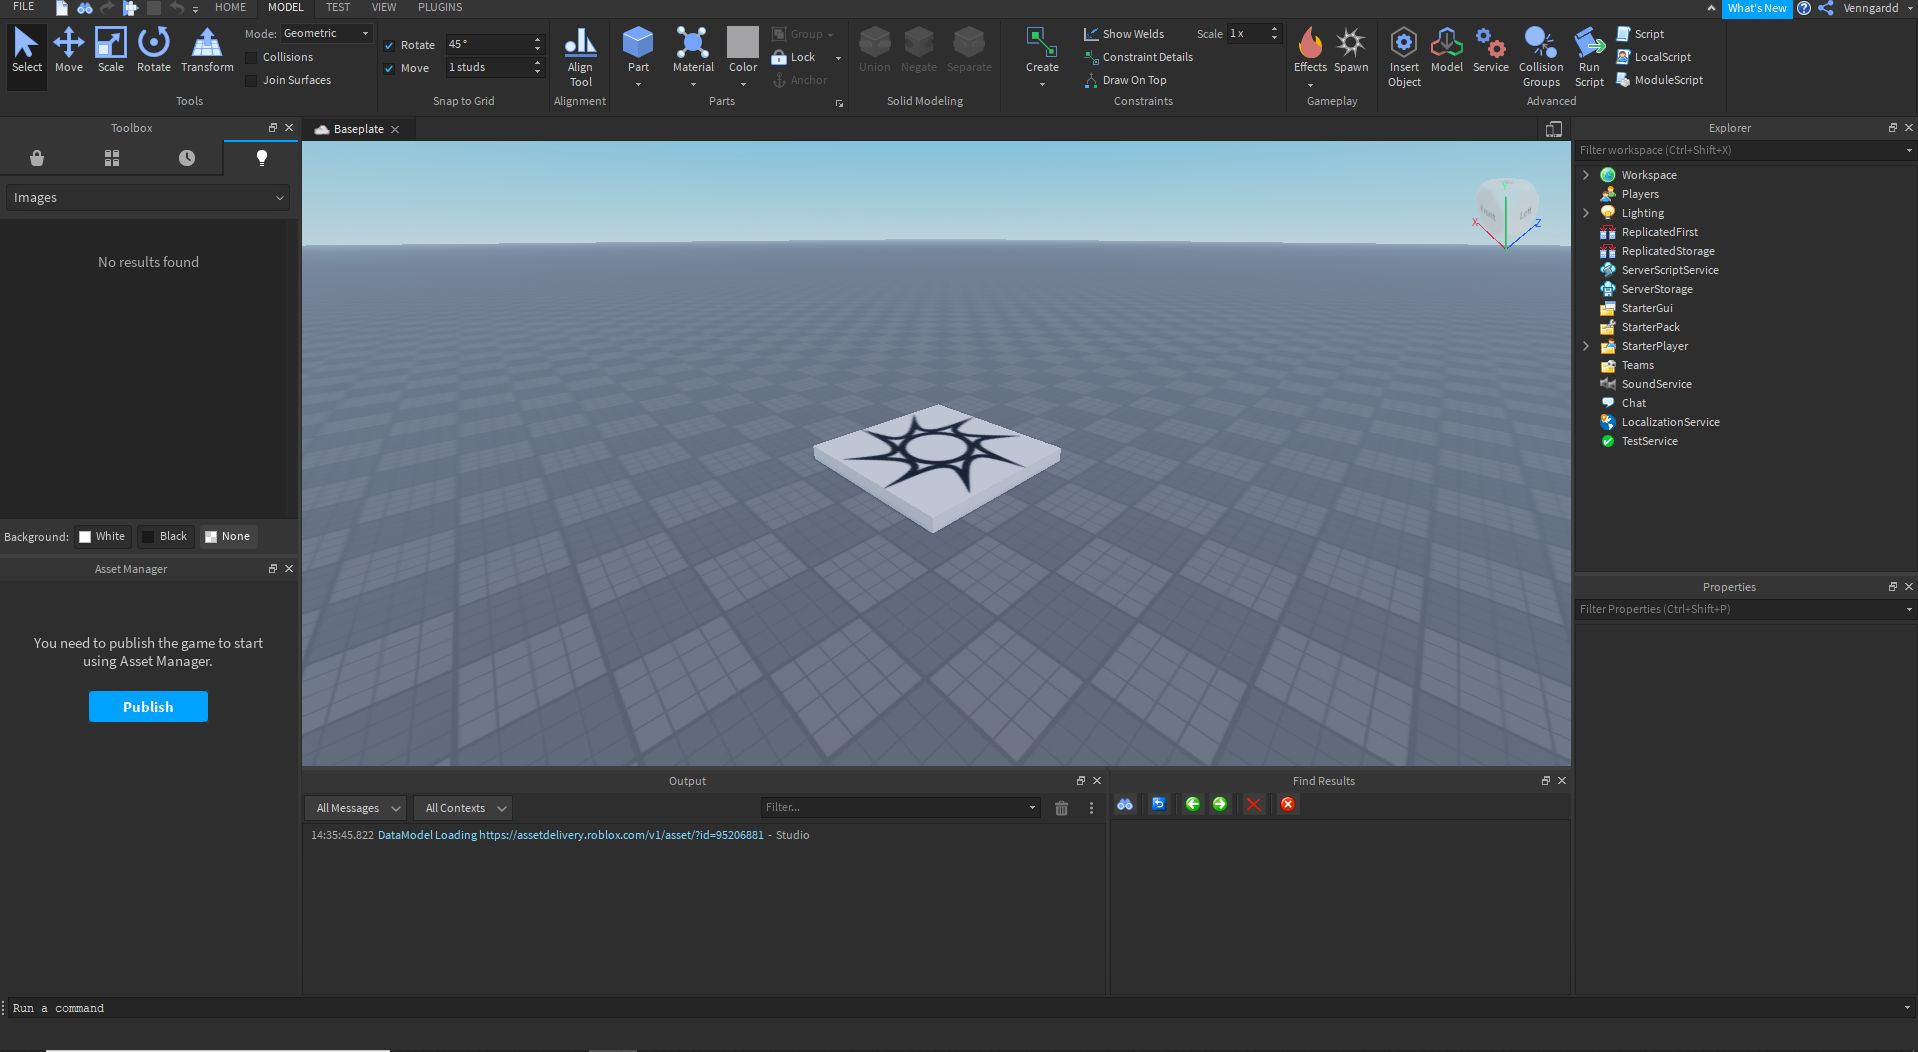
After creating this project, you should see a screen like this one:
Publishing the game on Roblox
The new game is not really entertaining yet, but this is a good time to learn how to publish your game on Roblox. It’s quite simple.
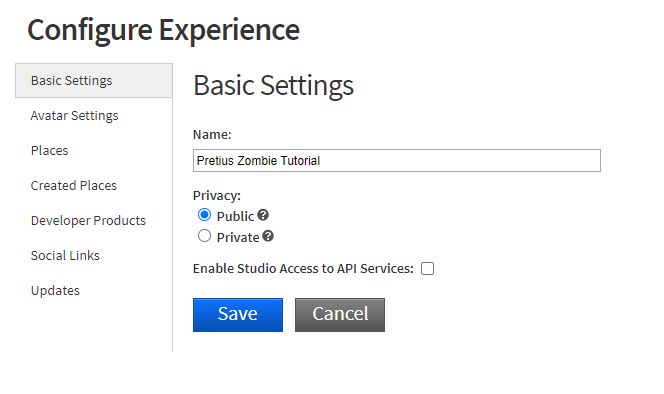
In the upper left corner click File → Publish to Roblox or click ALT + P.
On this screen, type the name of the game – in my case, it’s be Pretius Zombie Tutorial, but you can choose whatever you want. 🙂
Then just change Devices to Computer only, click Create, and you’re done.
To view your game, go to: https://www.roblox.com/develop and find it.
If you want other people to be able to find it and play it, you have to enter the game’s ‘place’ (you can find more info on how Roblox is structured in this helpful article), and under Basic Settings set Privacy to Public.
Creating a new world in the Roblox game
We intend to make it so that when you enter your game, you will first be in the waiting room. From there you’ll be able to move to the actual game. Let’s start with creating the “main” Roblox game.
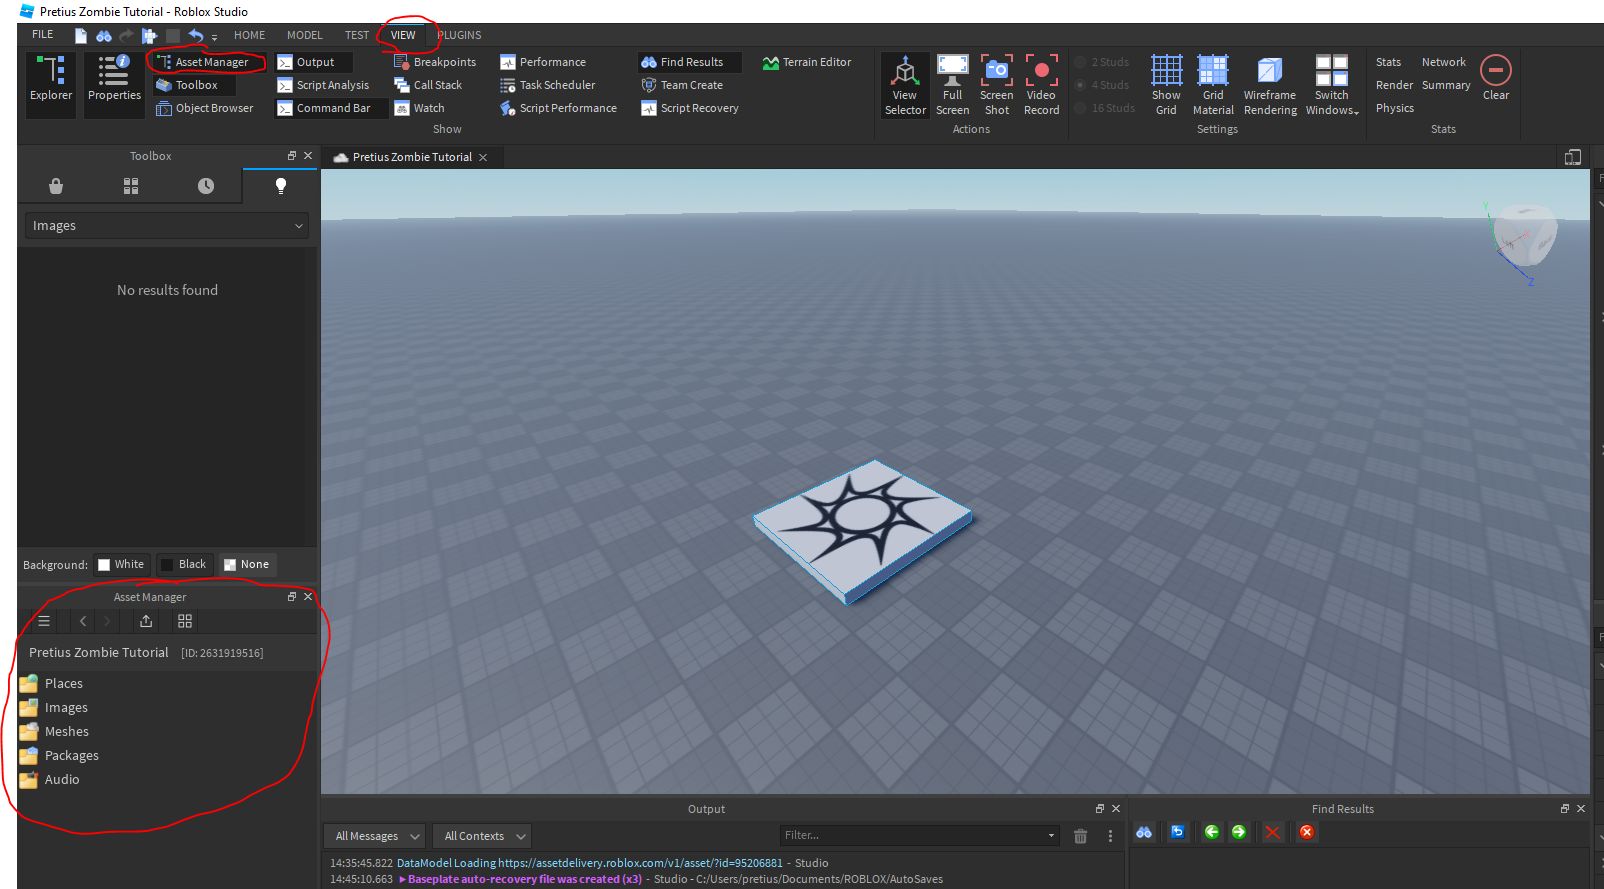
To do this, you need to open the Asset Manager. If you don’t see it in your view, you need to open it in the View → Asset Manager tab. It should then open in the bottom left corner.
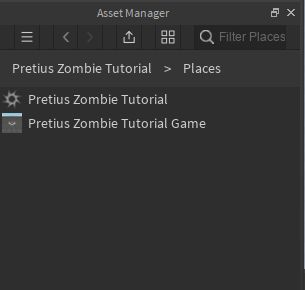
Then, click on Places, and below the name of your current game, right-click and select Add New Place. Then, rename the newly created game to whatever we want. In my case, it’s Pretius Zombie Tutorial Game. It should look more or less like this:
Now, double-click the left mouse button on the newly created game, and a new window should open.
Creating zombie spawns
Creating objects in the Roblox game
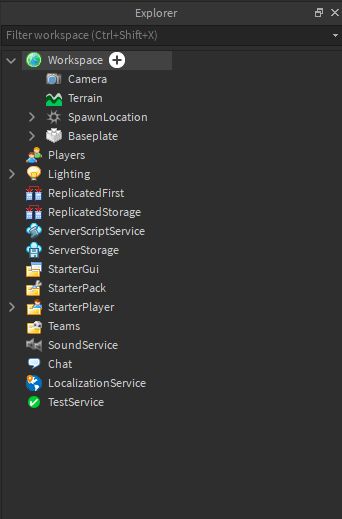
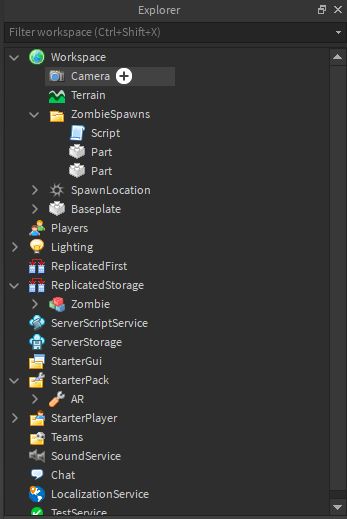
Now, let’s create some zombie spawns for your game. In the Roblox Studio application, on the right side, you should have the Explorer window – this is where you have all the files from your game. The main area of the Roblox Studio you’ll be working in is the one with Workspace. This is where all the items in the game are located.
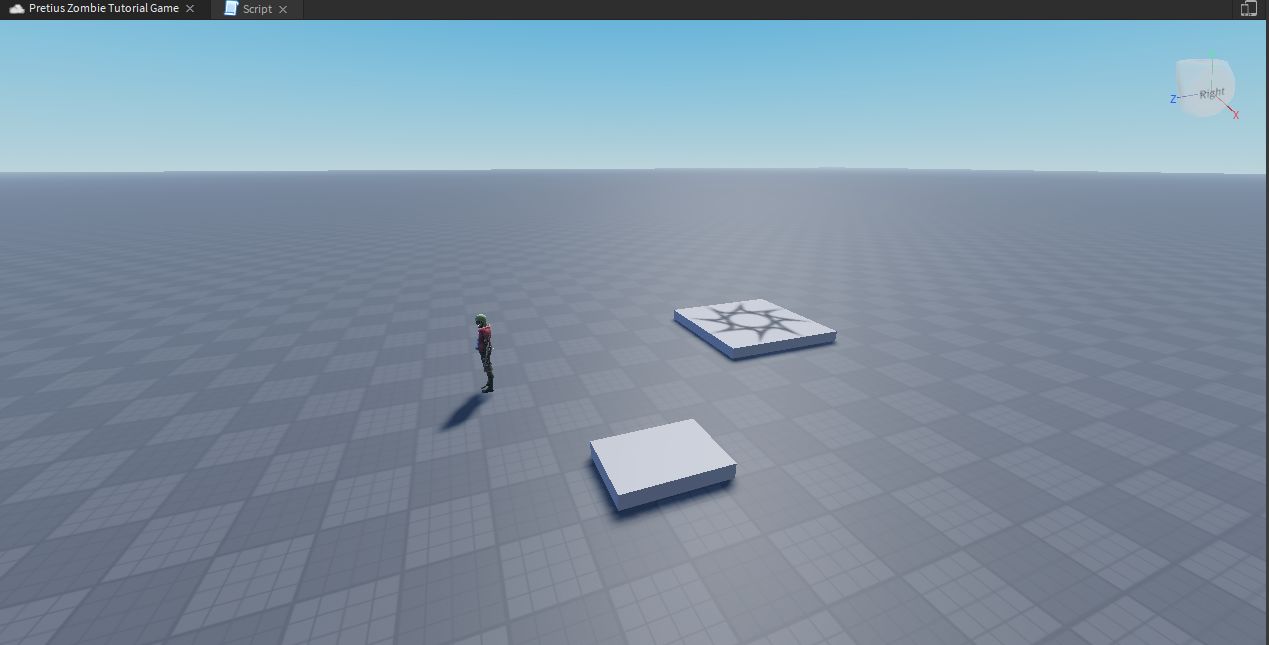
First, you need to create a Folder named Spawns. You can do this by first hovering over Workspace and then clicking on the plus sign. Search for the Folder object and add it to the workspace. Then right-click on it, and rename it (Rename option) to ZombieSpawns. Next, click on the plus sign next to the newly created folder and select Part. In the middle of your game world, most likely on the Spawn point (it’s the tile marked with a symbol that looks kinda like the sun – it’s the first thing you saw when you created your world), a new block will appear. This is your Part. At this point, we click on it, and while holding it down, we move it out of the Spawn. With your new part selected, you can click on the tab on top of the Model (between Home and Test), and in the upper left corner, you can Move, Scale and Rotate your object on the board. I set the size of this batch to (x,y,z) – (5,1,5), but you can set it to whatever you want.
The next thing we need to do in order to make a Roblox game about shooting zombies, is adding a script that manages our spawns. So we add another Script object to our folder.
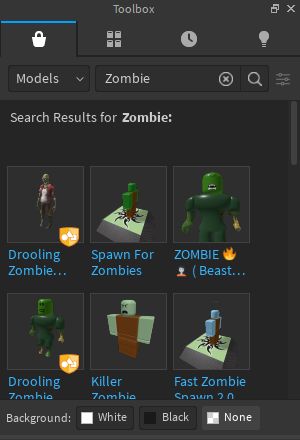
Of course, we can’t forget about the zombies themsleves. 🙂 For the purpose of this tutorial, you can use a ready-made model. On the left side of Roblox Studio, you should have a Toolbox window. If you don’t have it, you need to click on the View option in the upper tab, and on the left side click the Toolbox. Then in your window, in the left tab (MarketPlace), search for a Model named Zombie, and move the first result – Drooling Zombie – to your game world.
Then, your Zombie should appear in the Explorer → Workspace window. You need to move this model (from the workspace) to the ReplicatedStorage tab. Then it should disappear from your game world and exist only in the new tab.
Your screen should look like this:
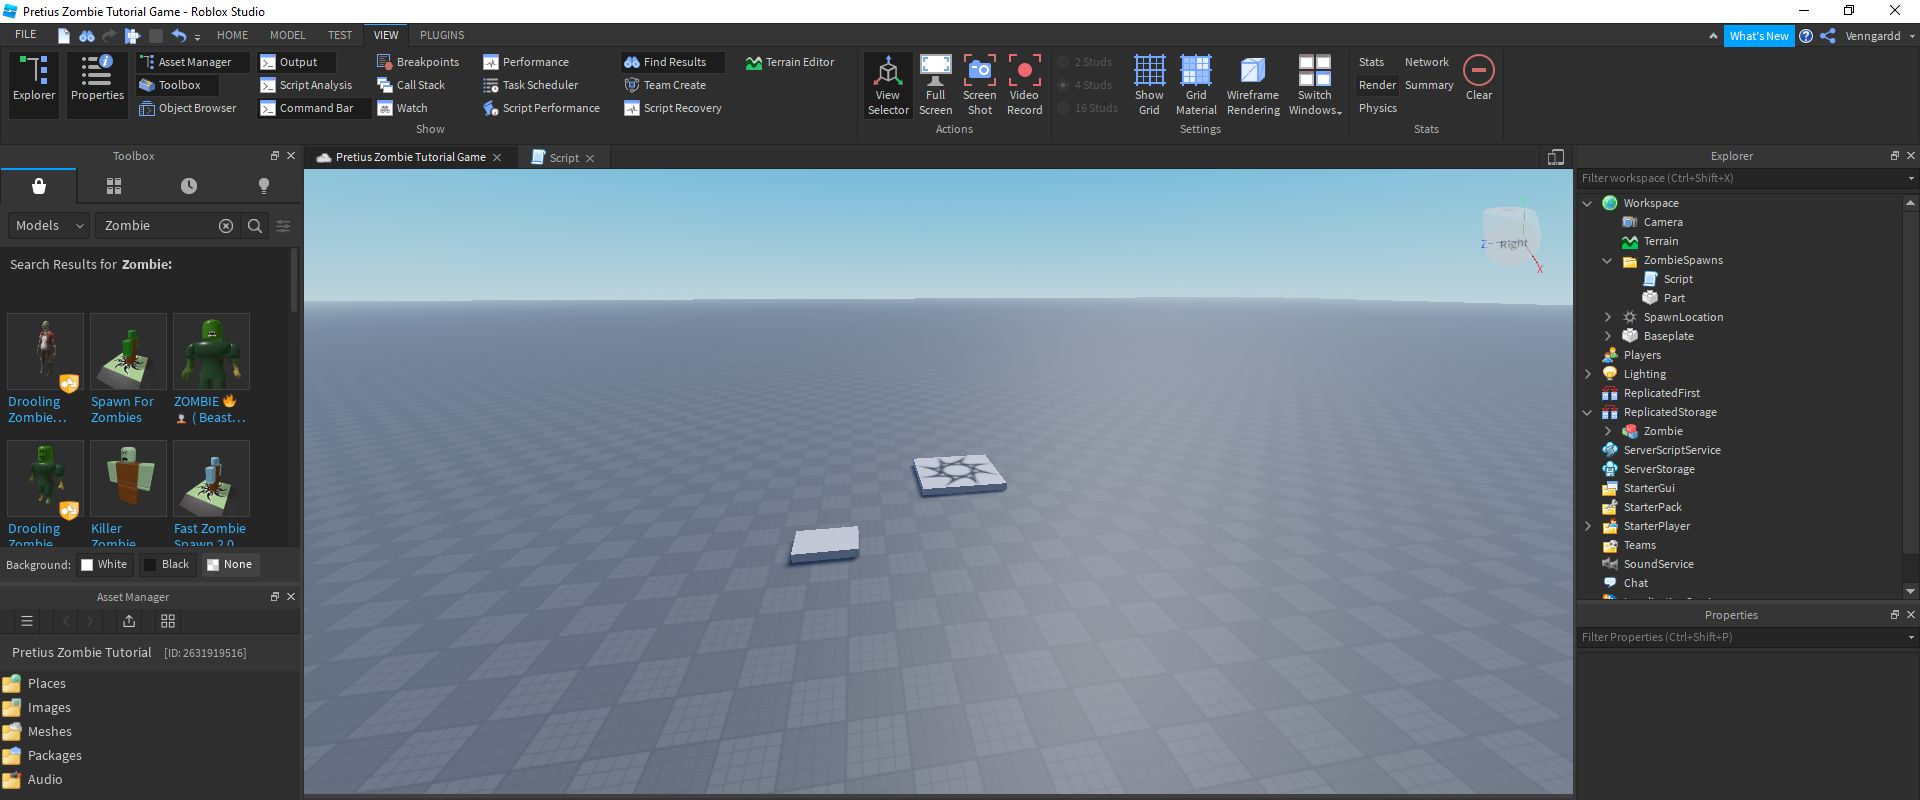
The model needs to be in the ReplicatedStorage tab.
The Replicated Storage tab is used to hold objects that can later be reused in different parts of your game. In this case, we want one universal zombie model, copies of which will be created each time you want to create new enemies.
Writing a zombie creation script
I will paste here a finished script that you can use to create zombies at each of your spawns.
|
1
|
local zombieSpawnsFolder = script.Parent
|
|
1
2
3
4
5
6
7
8
9
10
11
12
13
14
15
16
17
18
19
20
21
22
|
local zombieSpawnsFolder = script.Parent
local zombieNumber = 5
local currentZombieNumber = 0
local timeBetweenWaves = 5
while true do
wait(timeBetweenWaves)
while currentZombieNumber < zombieNumber do
for _, spwn in pairs(zombieSpawnsFolder:getChildren()) do
if spwn:IsA(‘Part’) then
local zombieCopy = game.ReplicatedStorage[‘Zombie’]:Clone()
zombieCopy.Parent = game.Workspace
zombieCopy.HumanoidRootPart.CFrame = CFrame.new(spwn.Position + Vector3.new(0,3,0))
currentZombieNumber += 1
end
end
end
currentZombieNumber = 0
zombieNumber += 5
timeBetweenWaves += 15
end
|
Here’s what each line of code means and what it actually does in your game:
- 1 – Create a variable to store our ZombieSpawns folder. Most objects in the workspace – whether they are scripts or parts – have a parent. In this script’s case, its parent is a folder.
- 3 – Variable to be stored, to create during a given wave.
- 4 – Number of zombies already created in the wave.
- 5 – Time between each wave in seconds.
- 7 – The while loop that runs all the time.
- 8 – The wait() function takes as an argument the number of seconds the script has to wait before it continues executing commands.
- 9-18 – Loop that creates on all spawns as many zombies, as you have specified in the zombieNumber variable.
- 10 – Here, you iterate over each object in your zombieSpawnsFolder (method :getChildren()).
- 11 – Here, you check if your current object during the iteration is a part. At this point we have our script here, in addition to the spawns themselves, so we don’t want to add our zombie to it.
- 12-15 – In these lines, we create a copy of our zombie, and add it to the Roblox game.
- 12 – Creating a copy of the zombie. We download it from ReplicatedStorage, and then clone it.
- 13 – Set your copy’s Parent as Workspace, which will make the zombie appear in the game.
- 14 – Set the position of the zombie to the position of the current spawn + add Vector3 so that the zombie appears slightly above our object.
- 15 – Increase the value of the variable holding the current number of zombies in the wave.
- 19-21 – Change the values of the variables.
- 19 – Reset the number of zombies in the current wave.
- 20 – Increase the number of zombies in the next wave to 5.
- 21 – Increase the time between waves by 15 seconds.
Now you need to fire up your Roblox game and test the script. If you did everything right in the Roblox Studio, after 5 seconds zombies should appear on your block and start chasing you. 🙂
Adding weapons to a Roblox game
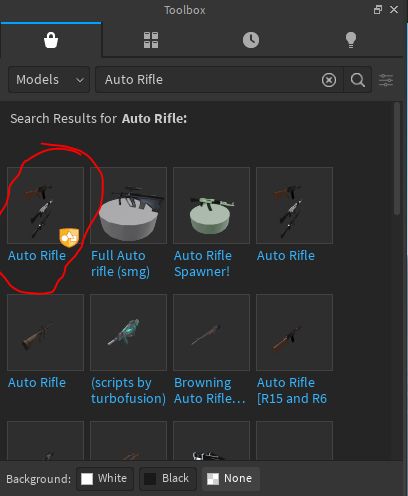
To add a weapon, search in your Toolbox for the name Auto Rifle. Take the first item with the yellow marking you find (as seen on the screenshot below) and move it to your game world.
At this point, three weapons should appear in your Workspace in Roblox Studio. Through Explorer, remove any two of them and move the one that is left to the StarterPack folder. After this operation, there shouldn’t be any weapons in our game space.
How to create a Roblox game – summary
And so, you now have a working Roblox game with some very basic features. In the future, I’ll help you make it more complex – look out for this tutorial’s continuation. If you don’t want to wait and want to know more on the subject right now, check out the guides and articles written by the platform’s developers (Roblox Corporation). It’s also worth noting that Roblox has a very active community. You can ask people for their help and opinion – both on the official website and on the platform’s subreddit.